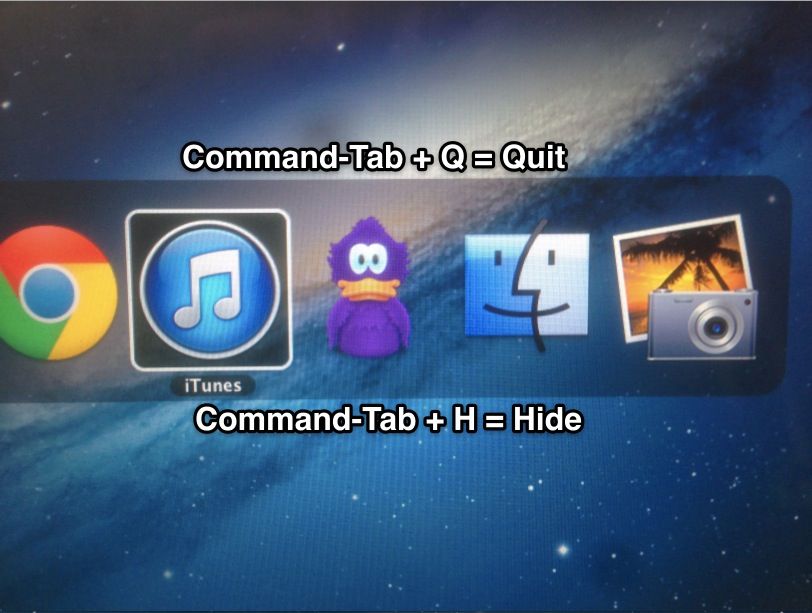
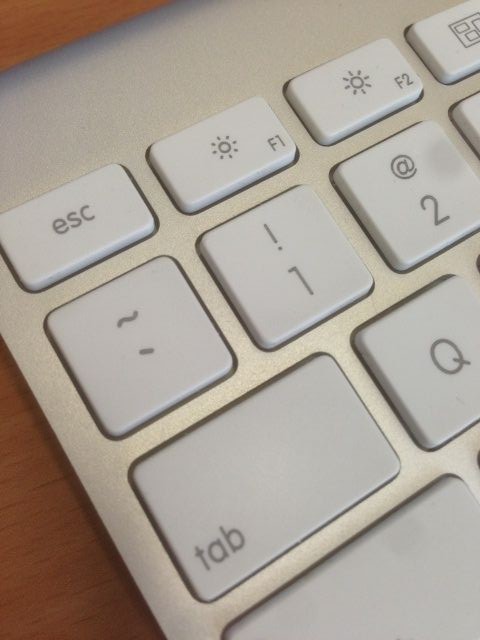
Command-Tab is probably seared into your muscle memory to switch between running applications while on your Mac. I know it is permanently stuck in mine.
You probably also know that Command-Tab can also be used to quit apps as well, right? And hide apps? To be honest, I knew the first tip, but not the second one, which (to me) makes it worth a share.
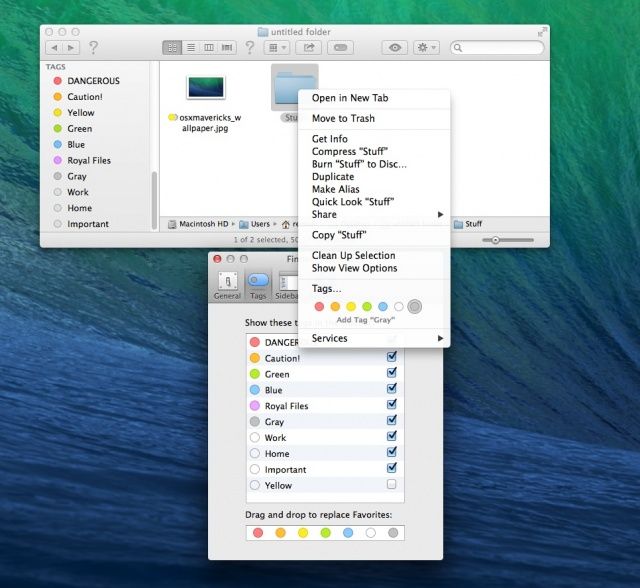
One of the cool new features of OS X Mavericks is the ability to tag files in the Finder, making Finder labels a bit more useful. Want to sort a bunch of files for your upcoming vacation into one place? Make a tag for “vacation,” and then add the tag per file with a right-click as we showed you a while back.
Want to track some of those vacation files with the destinations they pertain to? Go ahead and tag them with a second tag. Can’t do that with a label.
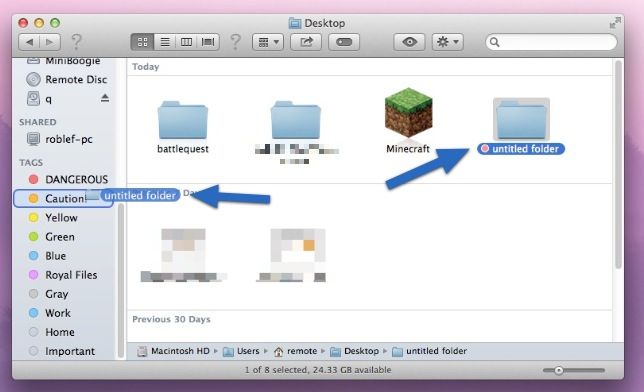
While it’s easy to right-click on a file and choose a tag, it’s even easier to add tags with a simple Mac OS standard move. Here’s how.
It looks like this has been possible since, oh, Mac OS X 10.5 or so, but I hadn’t come across it before. I’m guessing that might mean some of you haven’t, either.
If you’re one of those amazing folks who have seen this already, then feel free to check out all our other OS X tips; it’s possible there’s something in the list you didn’t know about already.
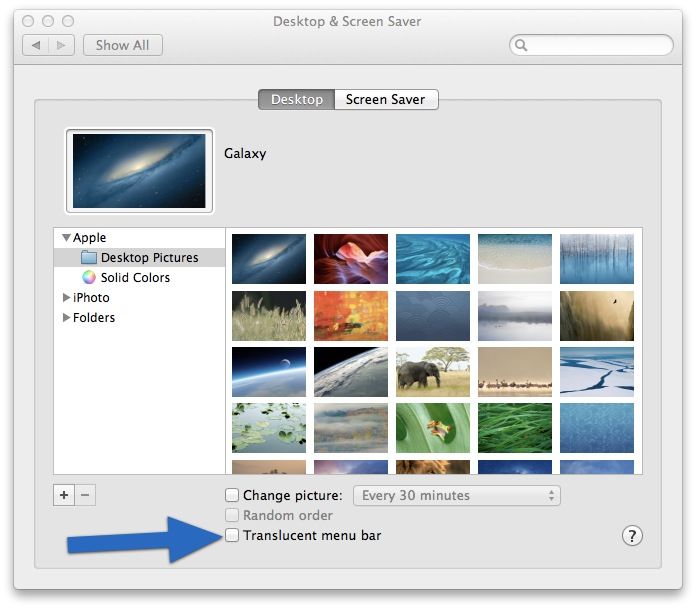
For the rest of you, if you want to disable the translucent menu bar on your Mac, it’s relatively simple. Check it out.
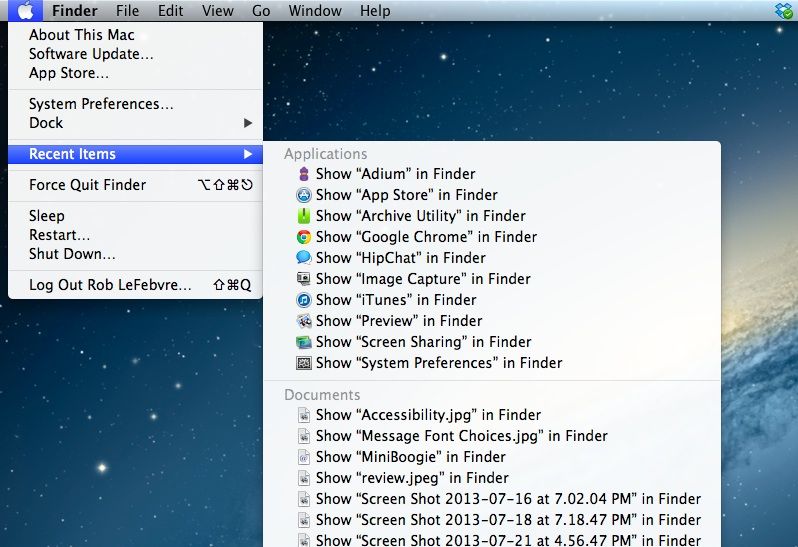
Sometimes, when using the Recent Items feature of the Apple menu, you might like to find a specific file or app without opening it. Maybe you just want to find it, and then copy it or move it to a different drive, or email it to a friend.
It’s super simple, and it works in both Mountain Lion and the new OS X Mavericks beta, as well.
In yet another addition to the OS X Finder in OS X Mavericks, you can now tag your files. This is a wonderful way to keep track of stuff, since unless you’re an obsessive folder and sub-folder maker, tags are much easier to define and apply on the fly, making the dynamic organization of your files easier and less permanent.
OS X Mavericks tags seem a lot like Labels did, with a couple of differences. You can apply more than one tag to a file or folder, and you can sort your files by tag, as well. Here’s how.
If you haven’t already watched Apple’s WWDC keynote, it’s probably because you just haven’t found the time. At just under two hours long, it’s not something you can just slip into your day. But you can now watch it at your leisure on any of your electronics devices because Apple just uploaded the entire thing to YouTube.
Yes, I’m totally making fun of those “lose belly fat” ads you might see all over the internet (or maybe it’s just me) with that headline, but the truth is, while many Mac users may know that hitting Command-Tab will bring up the Task Switcher in OS X, they may still be doomed to endlessly loop through their running apps with that keyboard shortcut.
If you’re running a lot of apps, that’s a lot of wasted time. Time that could be better spent actually in the apps you’re cycling through in and ever more frustrating rightward bound loop of task switching.
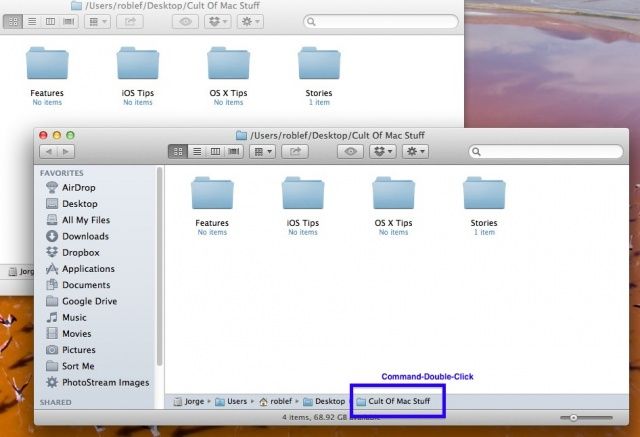
Typically, when you hit Command-N while you’re in the Finder, you’ll get a window for the folder you have set in the Finder’s Preferences dialogue. But what if you want to open two copies of the same folder on your Mac, to move stuff around in sub-folders when in icon view, for example? If you want to open two copies of the same folder on your Mac at the same time, simply do the following.
One of the big things I do here in OS X tips is take screenshots. A quick Command-Shift-3 will get me a picture of my entire screen, while a Command-Shift-4 will get me a crosshair which I can use to click and drag around any area of my screen to get a more specific area of my Mac’s screen to demonstrate a point.
Sometimes, though, I miss. When I don’t get the right area of the screen, I typically hit the Escape key and then Command-Shift-4 to try again. If however, I need to just move the selection area around to another part of the screen, I always assumed I was out of luck.
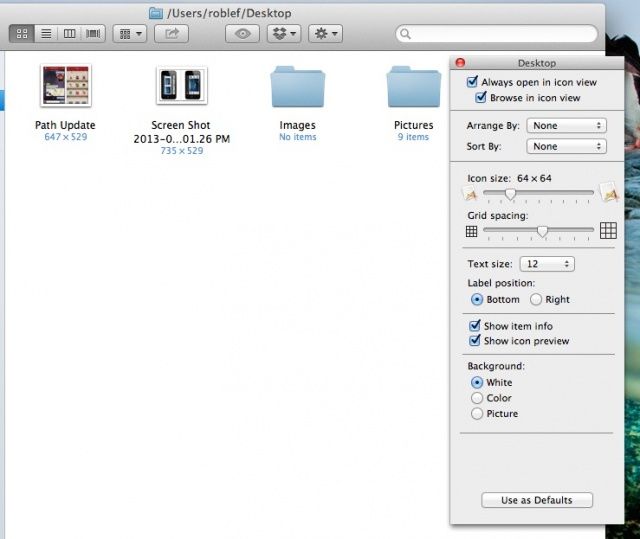
Do you use icon view in the Finder? Do you often find yourself double clicking folders and using Get Info commands to find out more about the files in your Finder windows? Well, it turns out there’s a View Option which will add a little bit of information to any item in a Finder window, provided you’re in icon view.
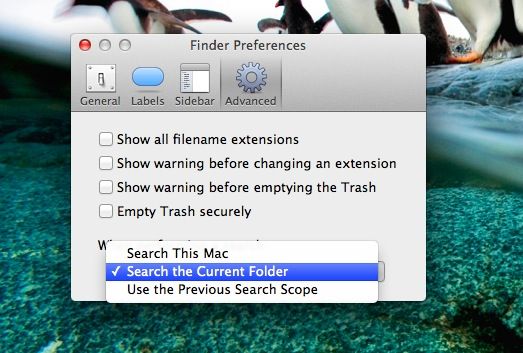
With the new-ish integrated search function in OS X, I spend a lot of time clicking over from “This Mac” to “Documents” or “Dropbox,” since I typically start out in the folder I’m searching for anyway. I usually want to just search the folder I’m in, rather than the entire Mac, since that can be a lot of files to search through, especially if the search term I’m using is fairly generic (“I think it was something about kittens…”).
Yesterday, we dove into the Finder preferences to help you tell your Mac what folder to open new Finder windows with. Today, then, we’re gonna rush headlong back to those very same preferences to tell your Mac what to do when you’re searching for a file.
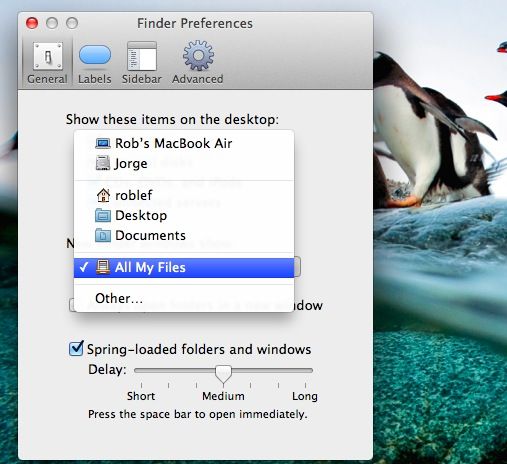
Ever since OS X 10.7 Lion, the Finder has a new sidebar section, called All My Files. It’s a list of, predictably, all the files on your Mac and it can be customized to show them in any style you like, sorting by Name, Date Created, Kind, Date Modified, and more. The trouble is, though, that all new Finder windows open to this All My Files section by default. Some folks might not like this, though, and wish for the long-ago days of, say, Snow Leopard, when Finder windows opened to the Desktop or some such.
Luckily, to make this happen takes just a quick trip into the Finder preferences to sort out. Thanks, Apple!
Terminal app can be daunting at first, but it’s really the best way to hack into your Mac’s configurations and preferences to customize things to work for you rather than against you. With the right Terminal commands, you can tweak the Finder, mess with the user interface, build a more private and secure Mac, and even enable features that aren’t officially supported on older Macs.
The Terminal app is like a window into the inner workings of your Mac. It accesses the Unix core of your Apple computer directly and without any muss or fuss. It can feel pretty daunting at times, but it’s really the way to dig in and make your Mac work the way you want it to. The Finder can be hacked a bit using the Terminal, of course, so we figured we could show you a few tricks, too.
Here’s how to hack up the Finder a bit to make it work better for you.
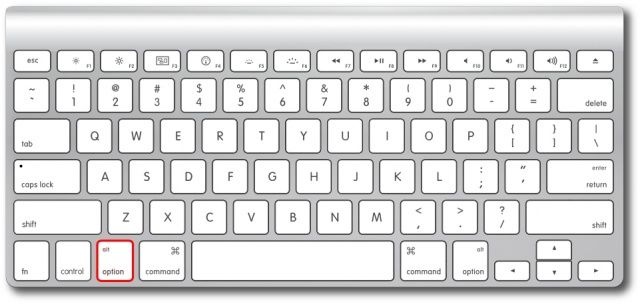
The Option key is a powerful ally in the transition from new, beginner user of OS X to the power user that you want to be. There are a ton of hidden features in the Finder alone that are hidden behind the underrated and unassuming Option key.
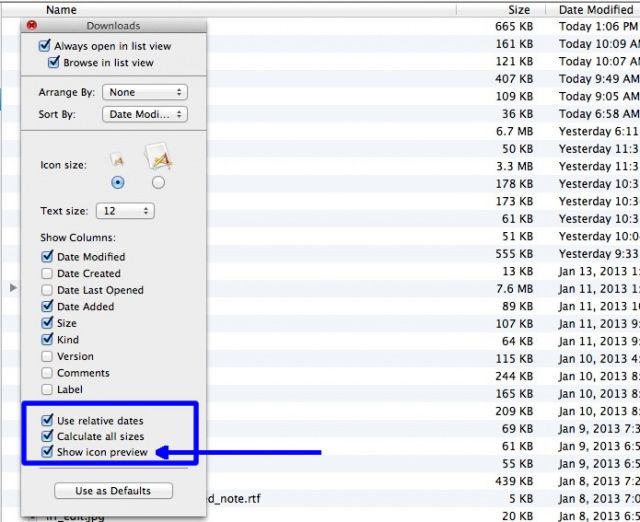
The OS X Finder keeps getting cooler and cooler, with animated window minimizing and live media previews. When you’re in icon view, the Finder updates all the image and video thumbnail previews in real time, making stuff easier to identify. This does take a toll on performance, however, which is important if you’re rocking an older Mac, like many of us.
One solution to help the Finder feel snappier is to turn off the image and video preview feature, and here’s how to do just that.
It’s not very often you can find a series of apps that has 16 utilities in one bundle, but this soon-to-end Cult of Mac Deals offer has 16 utilities all in one application! MacKeeper has got you covered in more ways than one – and you can get it for just $24 – and you’ll have the use of it for two of your Macs to boot!
The feature set that MacKeeper offers is almost limitless!
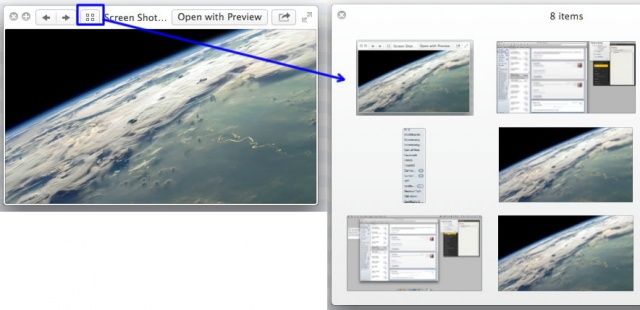
You’ve used Quick Look a lot, right? I know I have. I’ve use it a ton to browse through bunches of images on my Desktop when trying to decide which Screenshot I want to put at the top of these OS X tips.
But there’s much more you can do with multiple files and Quick Look, including a sweet index view that I just found out about myself. Follow along at home, and I’ll show you how.
Yet another way to open a file in a different app. Yay!
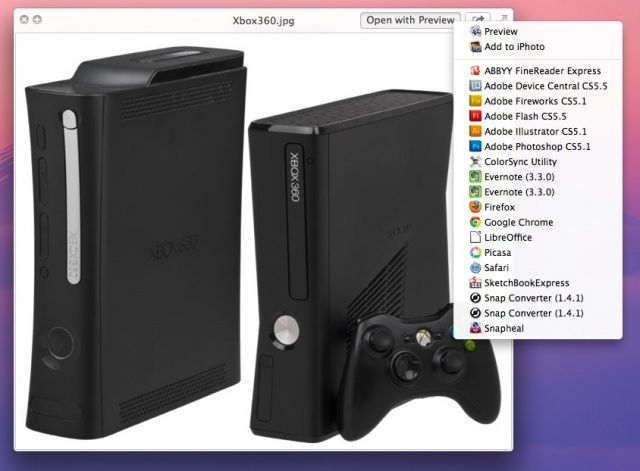
You may already know that you can right click on any file in the Finder and choose “Open With” from the contextual menu. This gives you a list of all the apps Mac OS X thinks can open that file. An image file, for example, will show Preview (default), Firefox, Google Chrome, and any image editing app that you may have on your system, like Adobe Photoshop or Fireworks.
You may also know that tapping the space bar after clicking on any file in the Finder, Open and Save dialogues, or in Mail app, will give you an instant preview of that file. This feature is called Quick Look, and it’s been in OS X for a while, now. iTunes will play their audio content, images will zoom to their actual size, and videos, if you have the right codex on your Mac, will play in a little pop up window.
What you may not know is that these two features can be combined now in OS X Mountain Lion.
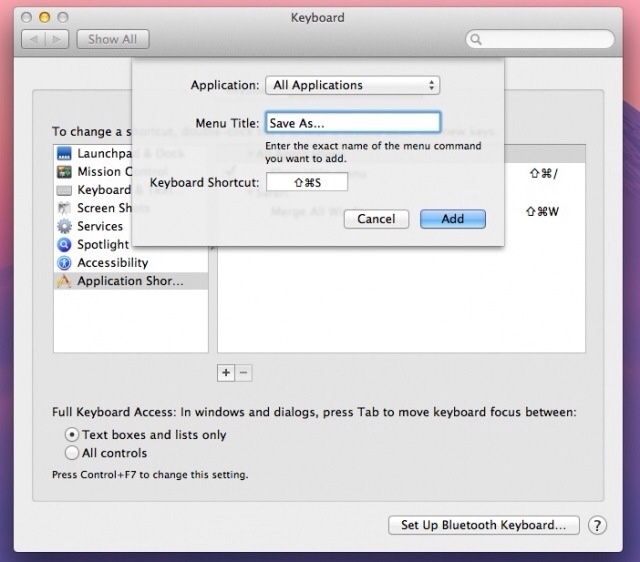
Remember that neat little hack to bring the Save As command back to Mountain Lion? It turns out that it’s not quite as handy as we first thought. Sure, you can now “Save As” instead of being forced to “Duplicate” the file and then save it, but Mountain Lion will not only save your changes in the new document, but write them to the original at the same time.
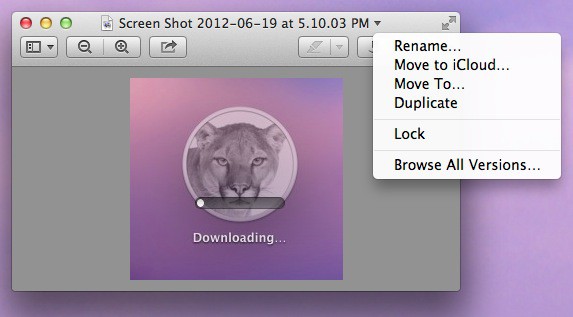
Renaming files in OS X is a fairly simple affair. Simply click a file name to select it, then click again (don’t double click!) to make the name editable. However, when you’re working with a file in your favorite app, a trip to the finder to rename it, or a trip to the Duplicate function may not fit within your workflow. It’s also just annoying. Why not just mess with the file directly from the file itself. Say,t he title bar? Well, in Mountain Lion, you can.
In Mountain Lion, the Finder might even replace iPhoto
Back in the time of the OS X Leopards, the Finder became a whole lot more useful for anyone with photos and videos on their Macs (ie. everybody)/ We got Quick Look, which let us watch slideshows and movies right there on the desktop, and the Finder itself was good enough to use as a lightweight photo viewer.
Then Lion came along and broke one essential tool: the little slider in the bottom right of Finder windows had its functionality removed. It used to let you zoom file thumbnails defaults write Finder trackpad zoom, but in Lion the tool remained, but did nothing.
Thankfully in Mountain Lion the slider now works again. And happily for the photographers out there, the Finder has some other new tricks you’re going to love.
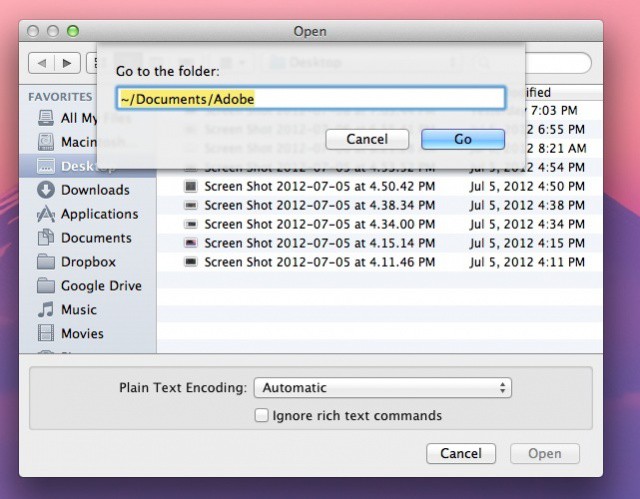
One of the joys of being a power user is when you use keyboard shortcuts to shave precious seconds off of your workflow routines. While you may know all the system shortcuts there are (⌘ + C for Copy, ⌘ + V for Paste, etc.), you may not be as familiar with those in the Open or Save dialog windows that you encounter every day.
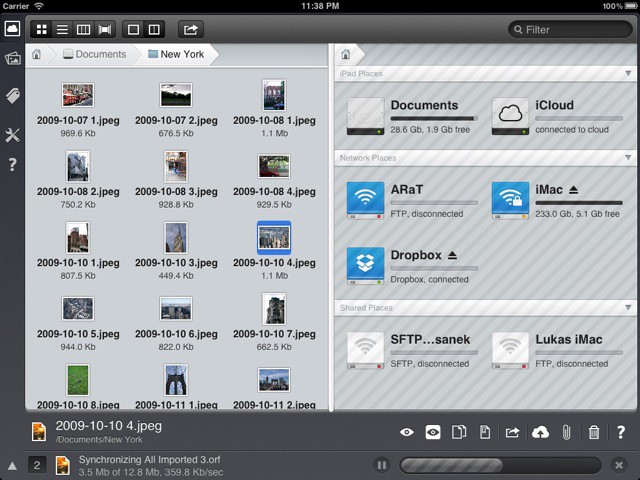
IStorage 2 is the coolest iPad file manager I have yet seen. It has a bunch of missing parts, and a few UI weirdnesses, but this DropBox-and-iCloud-connecting app uses the iPad’s touch interface and graphical horsepower to bring us the iPad file manager we always wanted.
Convergence. It’s all the rage, lately, and what better two items to converge than your Mac, running OS X, and your iPad (or iPhone, or iPod touch), running iOS? IT’s two great tastes that taste great together, to quote an old commercial that mostly no one has heard of any more.
With these five tips, you’ll amaze your friends with a Mac that looks more like your iPad than it does your Mac. So, read on, intrepid souls, and follow our steps to make that sweet Apple computer into something resembling the post-PC magical device we all love.