It might not be apparent at first, but Apple’s Photos app gives you plenty of ways to manage your photo library and tweak the images in it.
If you have tens of thousands of photos like I do, your photo library is probably a big mess. You could spend hundreds of hours meticulously sorting images into albums, and tweaking settings to get everything just right. Or you can use some of the features Apple offers to make things easy.
I’ve already covered my top tips for taking photos. Here are my top five tips for managing and manipulating the great photos you took, using tools in Apple’s Photos app.
Top 5 pro features in the Photos app
You can watch a video to see these all in action here:
No. 1: Tag faces of people you know
I love tagging faces in my pictures. Finding great pictures of people you know is so much easier if your phone knows all their names and can look up pictures for you.
This is far easier to do in the Photos app on a Mac, but I’ll also have instructions for iPhone.

Screenshot: D. Griffin Jones/Cult of Mac
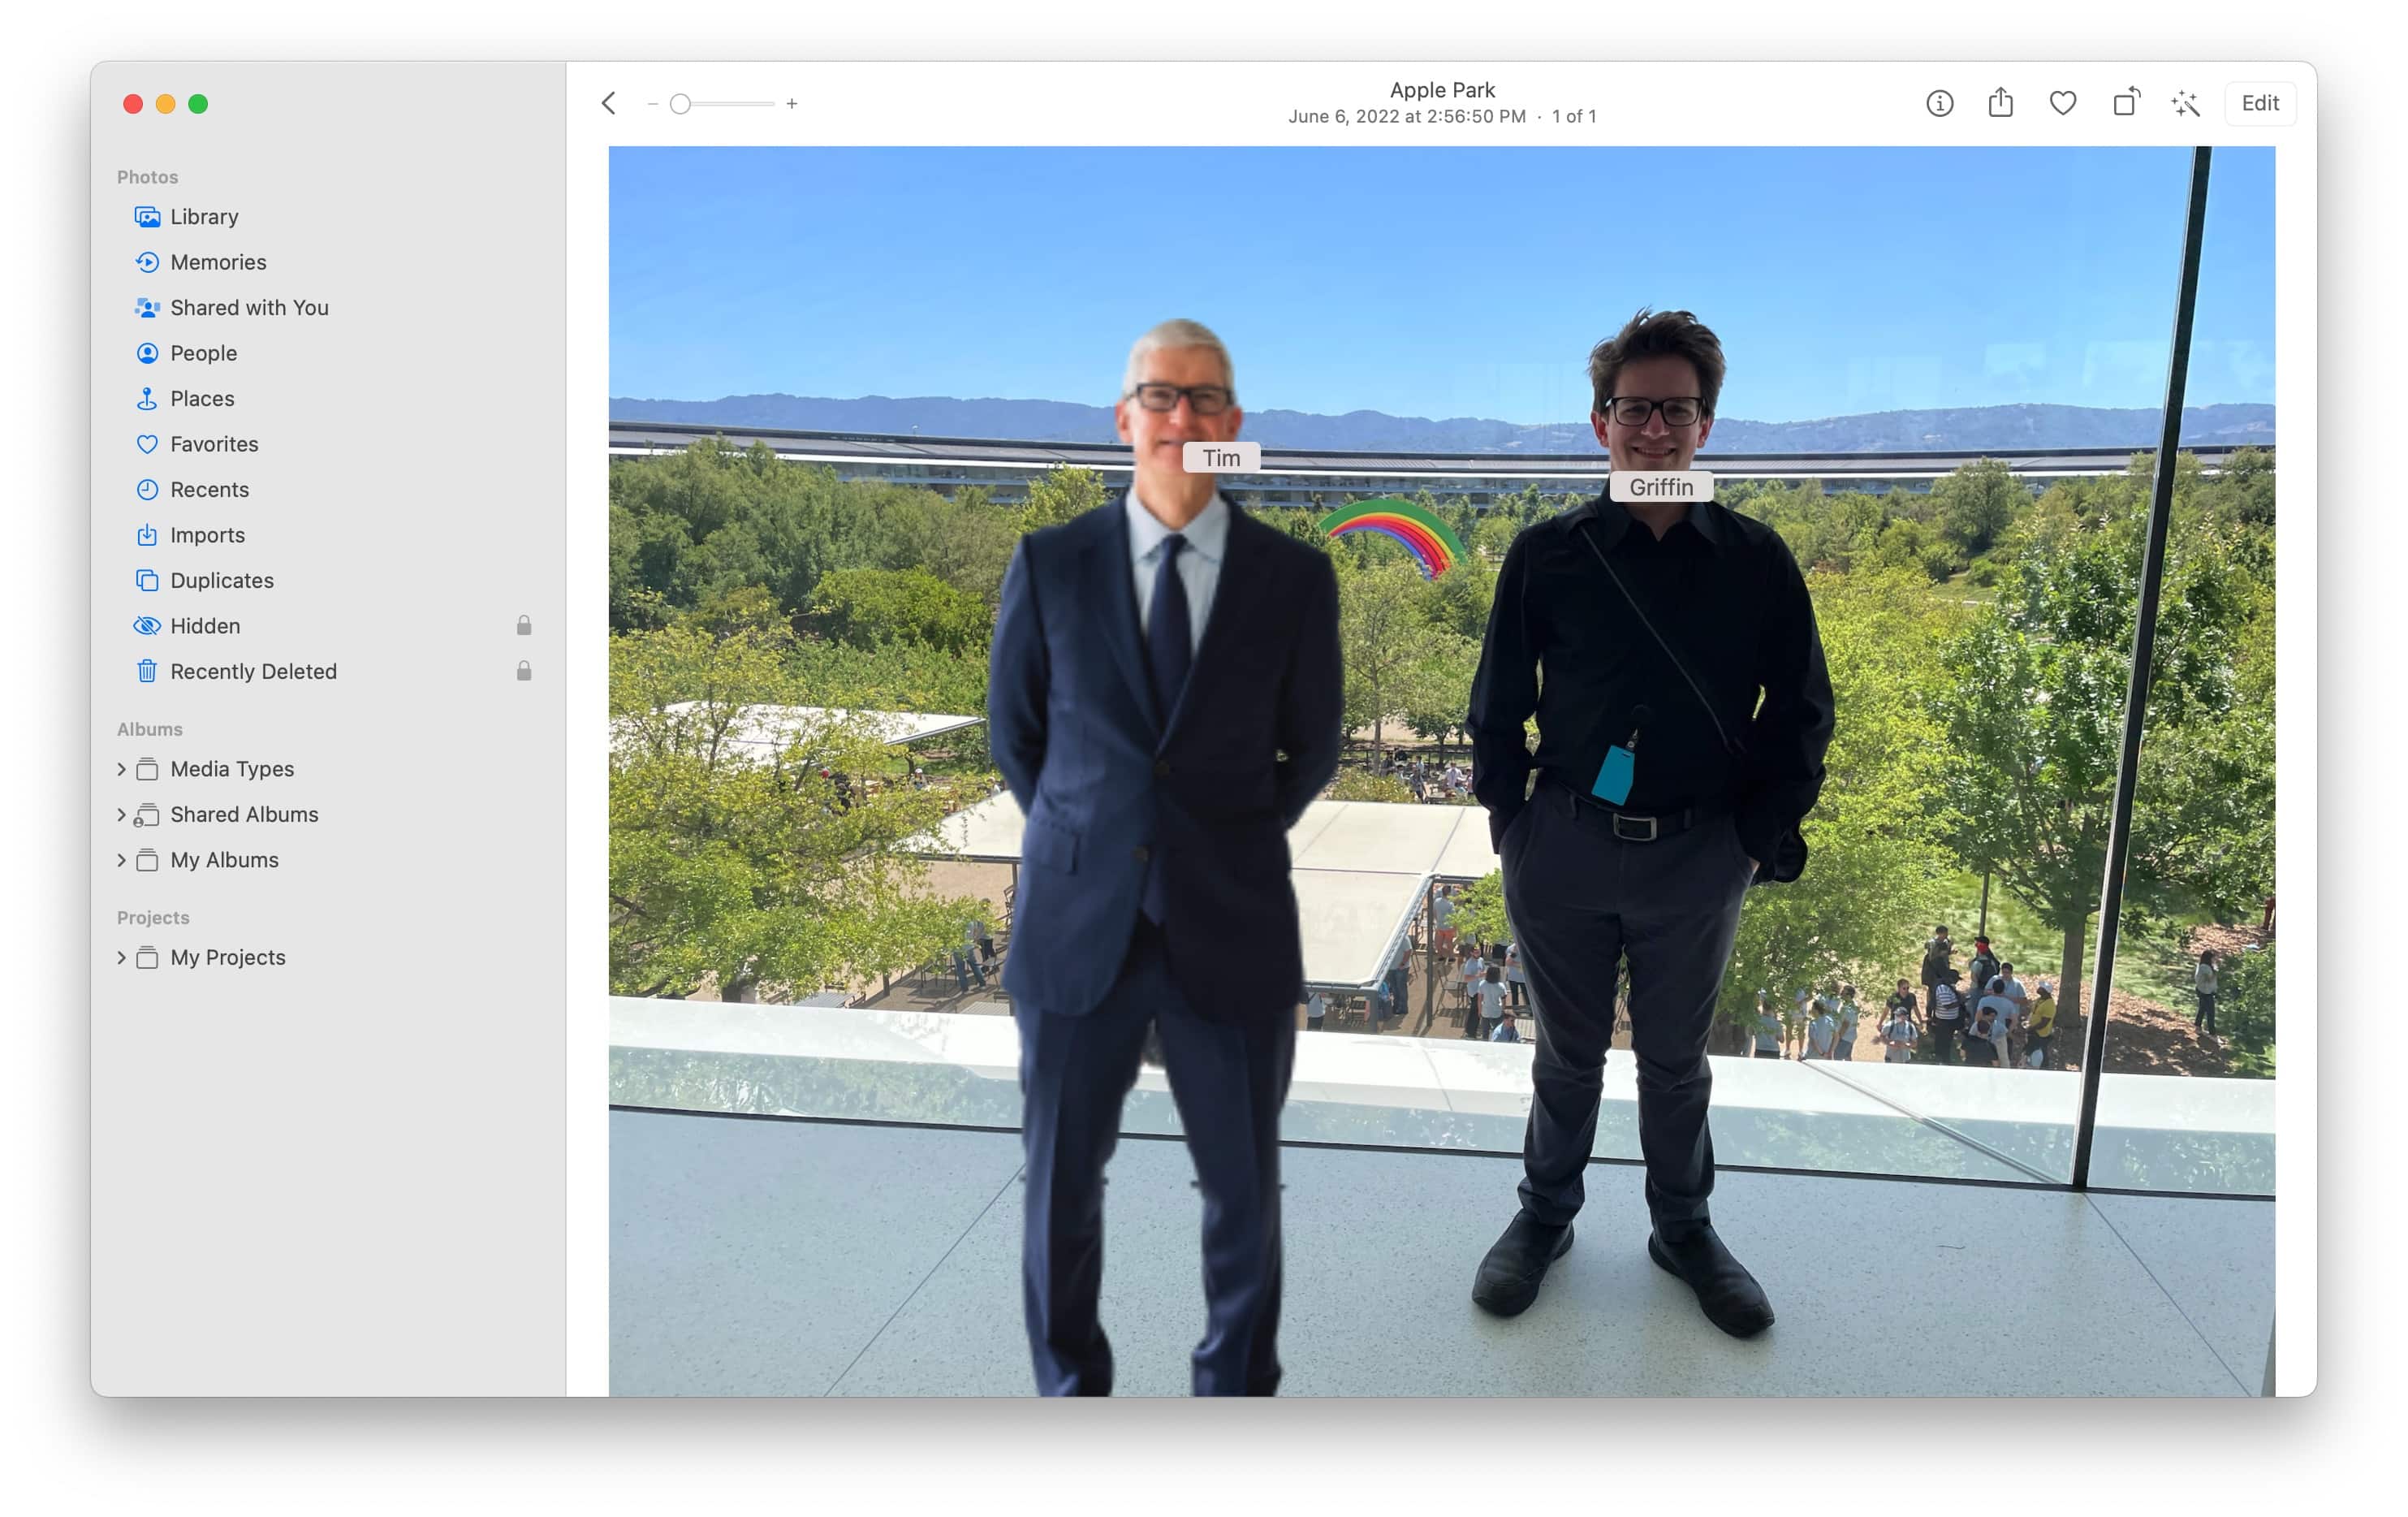
On a Mac, open Photos and then click on the People album in the sidebar. You’ll probably find it pre-populated with a few different faces. Hover the cursor over the icon and click + Name at the bottom; type in a name. Match it to a contact if you can.
On an iPhone, open Photos and go to Albums > People. Then tap on a face, and type in a name at the top.

Screenshot: D. Griffin Jones/Cult of Mac
Scroll down (or click the ⋯ menu) and click “Confirm Additional Photos”. It’ll scan your photo library for pictures it thinks might be of the same person.
If you’re looking at a specific picture, you can click View > Show Face Names to turn on labels for faces in the picture. This makes it easy to run through your library and tag faces as you go.
On an iPhone, swipe up on a picture and you’ll see tiny faces in the bottom left. Tap on these to assign them a name.
No. 2: Smarter search

Screenshot: D. Griffin Jones/Cult of Mac
As I alluded to, once you tag these faces, it becomes easier to search for photos of those people later. You can search by combining the date, location, business name, event, people, text inside the photo and more.
For example, I can search california,2022,griffin,tim to bring up the picture above that definitely has not been edited in any way.
You can even search keyboard,cat.
No. 3: Copy and paste photo edits
Say you take a bunch of pictures on a big photo shoot with your iPhone. The result is a few dozen pictures with roughly the same lighting conditions and subject. If you want to tweak or color-correct these photos, you might get caught up thinking you have to manually tweak every single one — but you don’t.
It’s much easier to make the edits you want in one, then copy and paste to make the same changes to other photos.
Here’s how to do it.

Screenshot: D. Griffin Jones/Cult of Mac
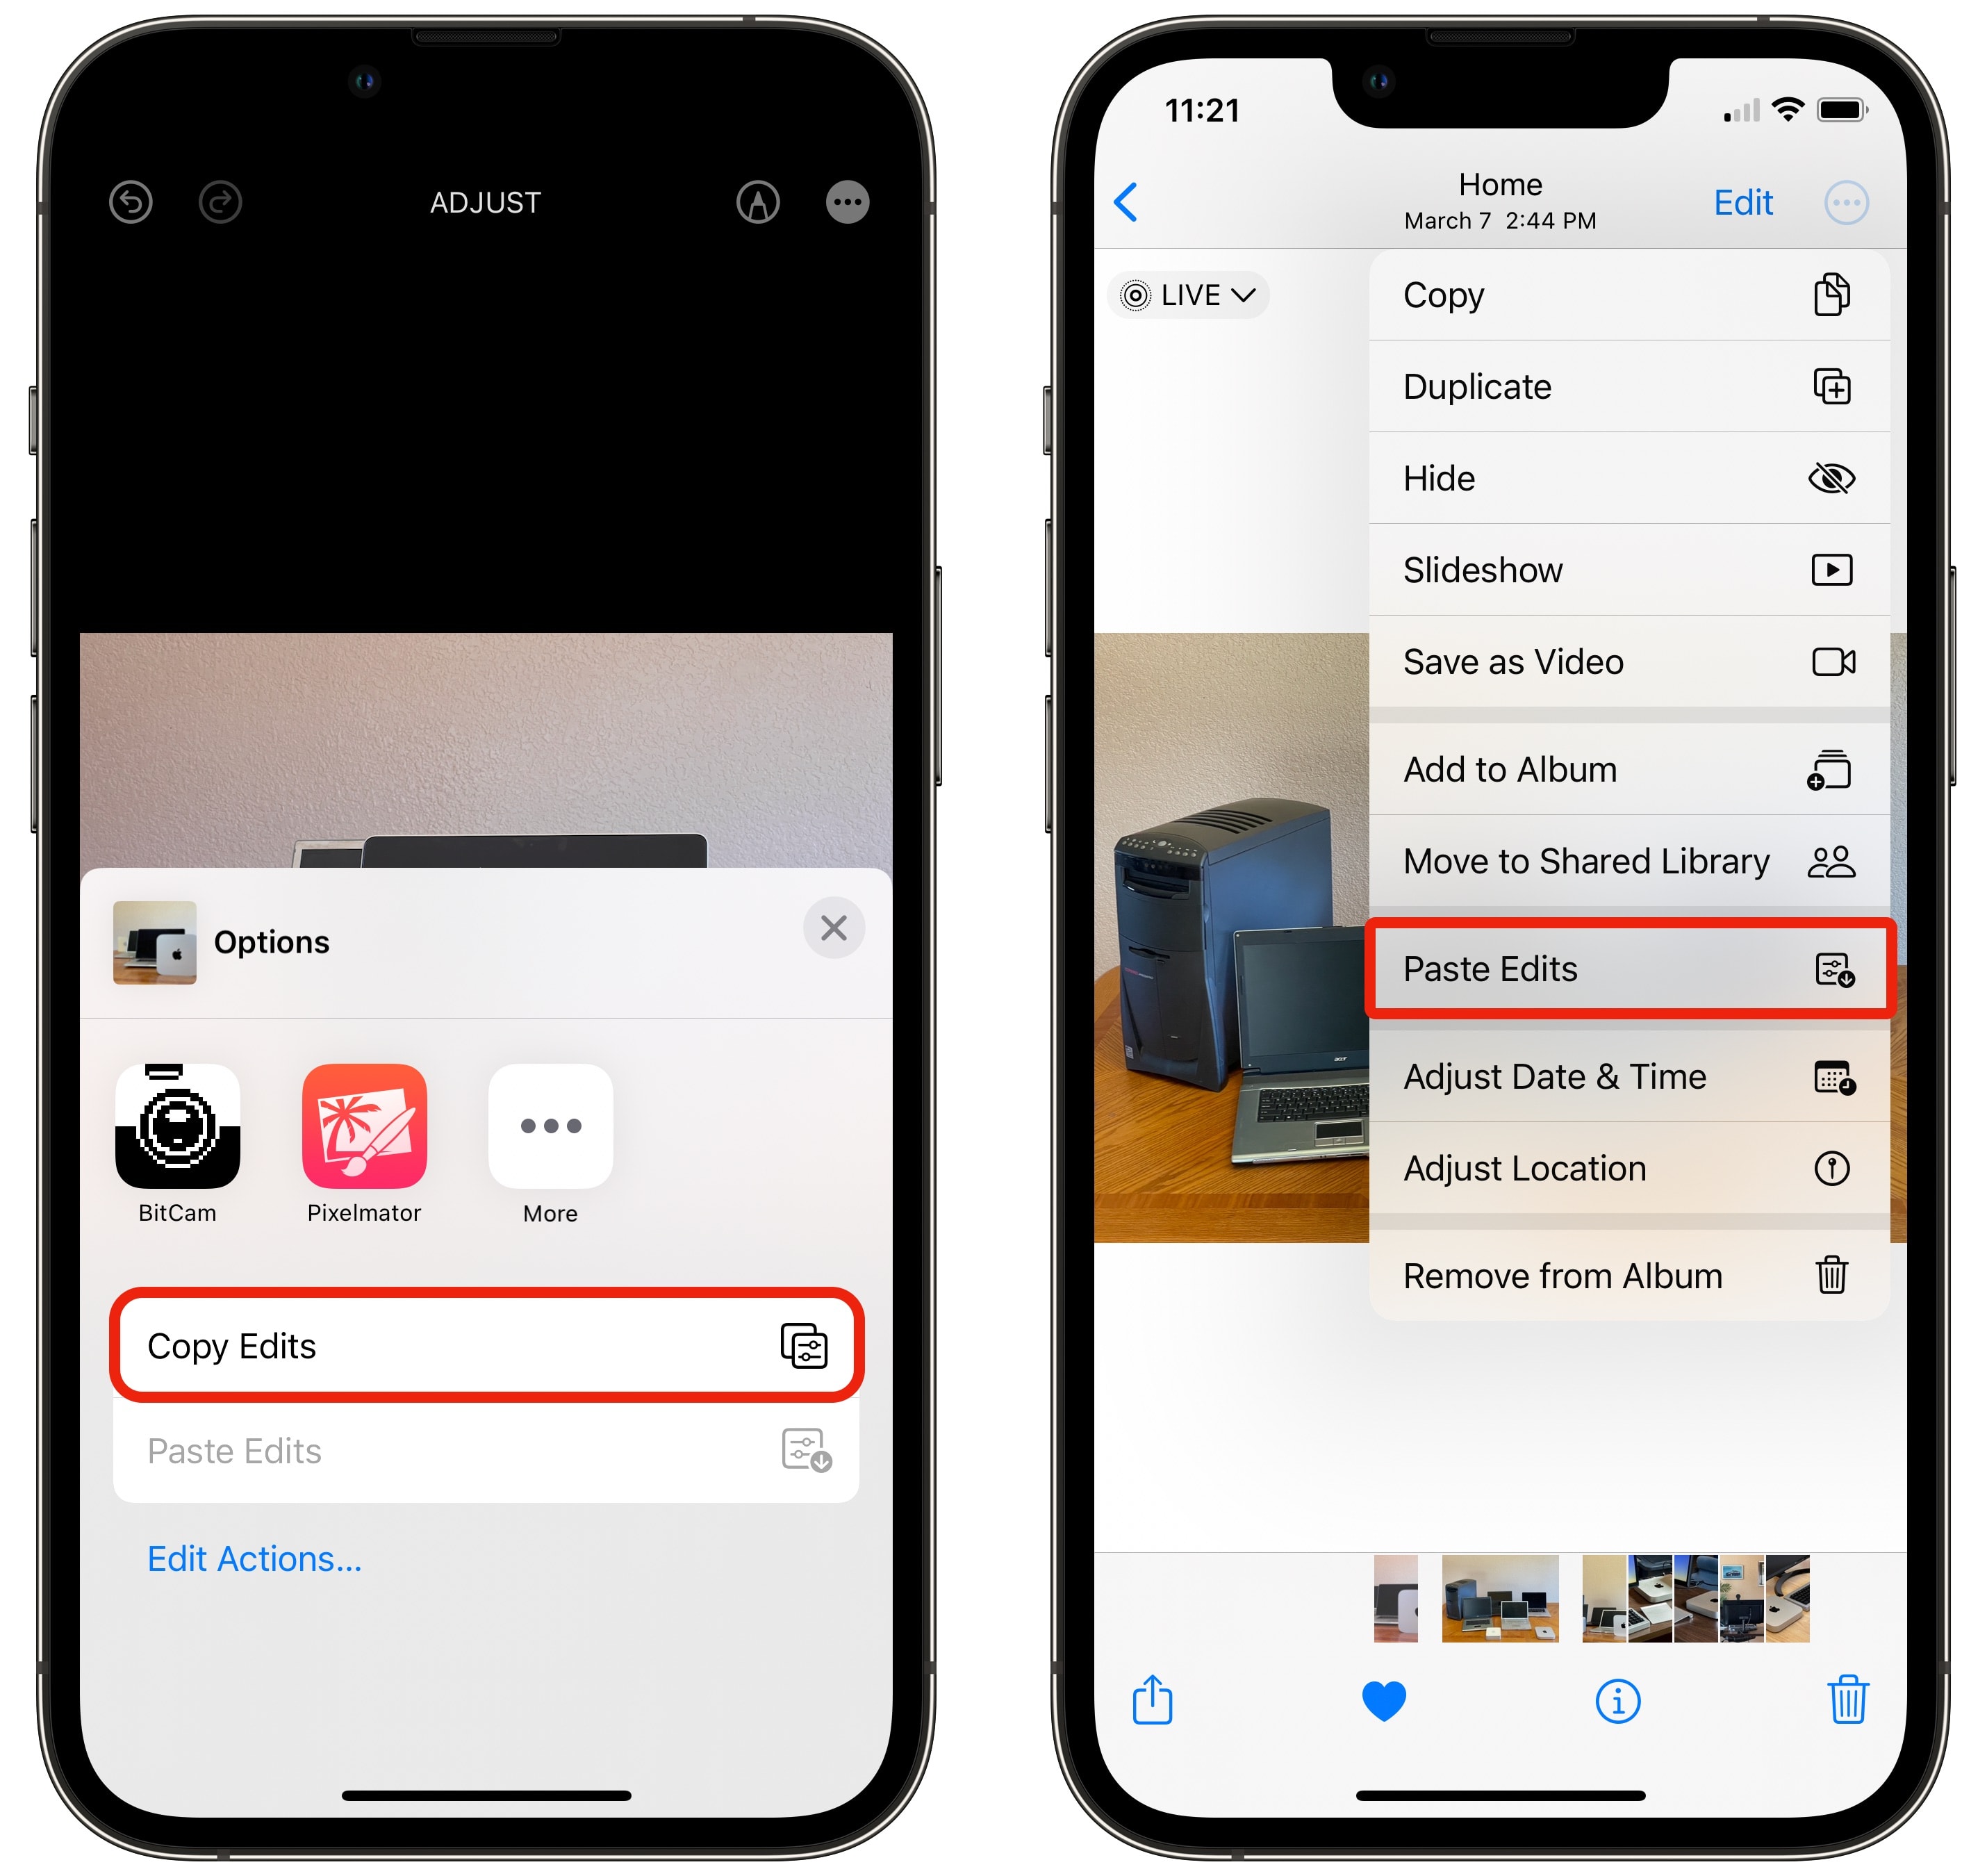
In the Photos app, open any photo. Then tap Edit and make any number of adjustments to brightness, saturation, cropping, noise reduction, etc. When you’re happy, before you tap Done, you want to tap the ⋯ button in the top-right and select Copy Edits.
Then, you can just swipe to the next photo in your library, tap the same button, and tap Paste Edits. You can even apply these edits on a whole range of selected pictures at once.
Even if you plan on individually touching these up in Photoshop later, this is a great way to shorten the editing process with just a few taps from your phone.
No. 4: Add Live Photo effects
I love Live Photos, a feature that takes a little piece of video around every photo. These short animations breathe more life into family pictures and candid shots. A blurry picture of my dog as a puppy doesn’t make for a good picture to hang on the wall, but when you can see the Live Photo of him running and wiggling, it makes the moment special in a way that can only happen digitally.
To make Live Photos even better, you can use a three built-in effects to transform them into something really cool: Loop, Bounce and Long Exposure. To turn on or change one of these effects, just tap the Live button in the upper-left corner of one of your Life Photos and select the effect you want.
Here’s what they do:

Photo: D. Griffin Jones/Cult of Mac
The Loop effect will stabilize and replay the Live Photo like an animated GIF. This works best on pictures of marquee signs, billowing flags or rain storms.

Photo: D. Griffin Jones/Cult of Mac
The Bounce animation replays and rewinds the Live Photo. Pictures of people clinking glasses in a restaurant or doing fun things look great with this effect.

Photo: D. Griffin Jones/Cult of Mac
The Long Exposure effect does just what it says: It mimics taking a long-exposure shot with a DSLR camera. If you ever take a Live Photo of a waterfall or fireworks, you’re practically required by law to use the Long Exposure effect.
No. 5: Make sure you share the full-quality photo
One of the most infuriating changes Apple ever made in iOS was deciding that people don’t need to send each other high-quality pictures and videos.
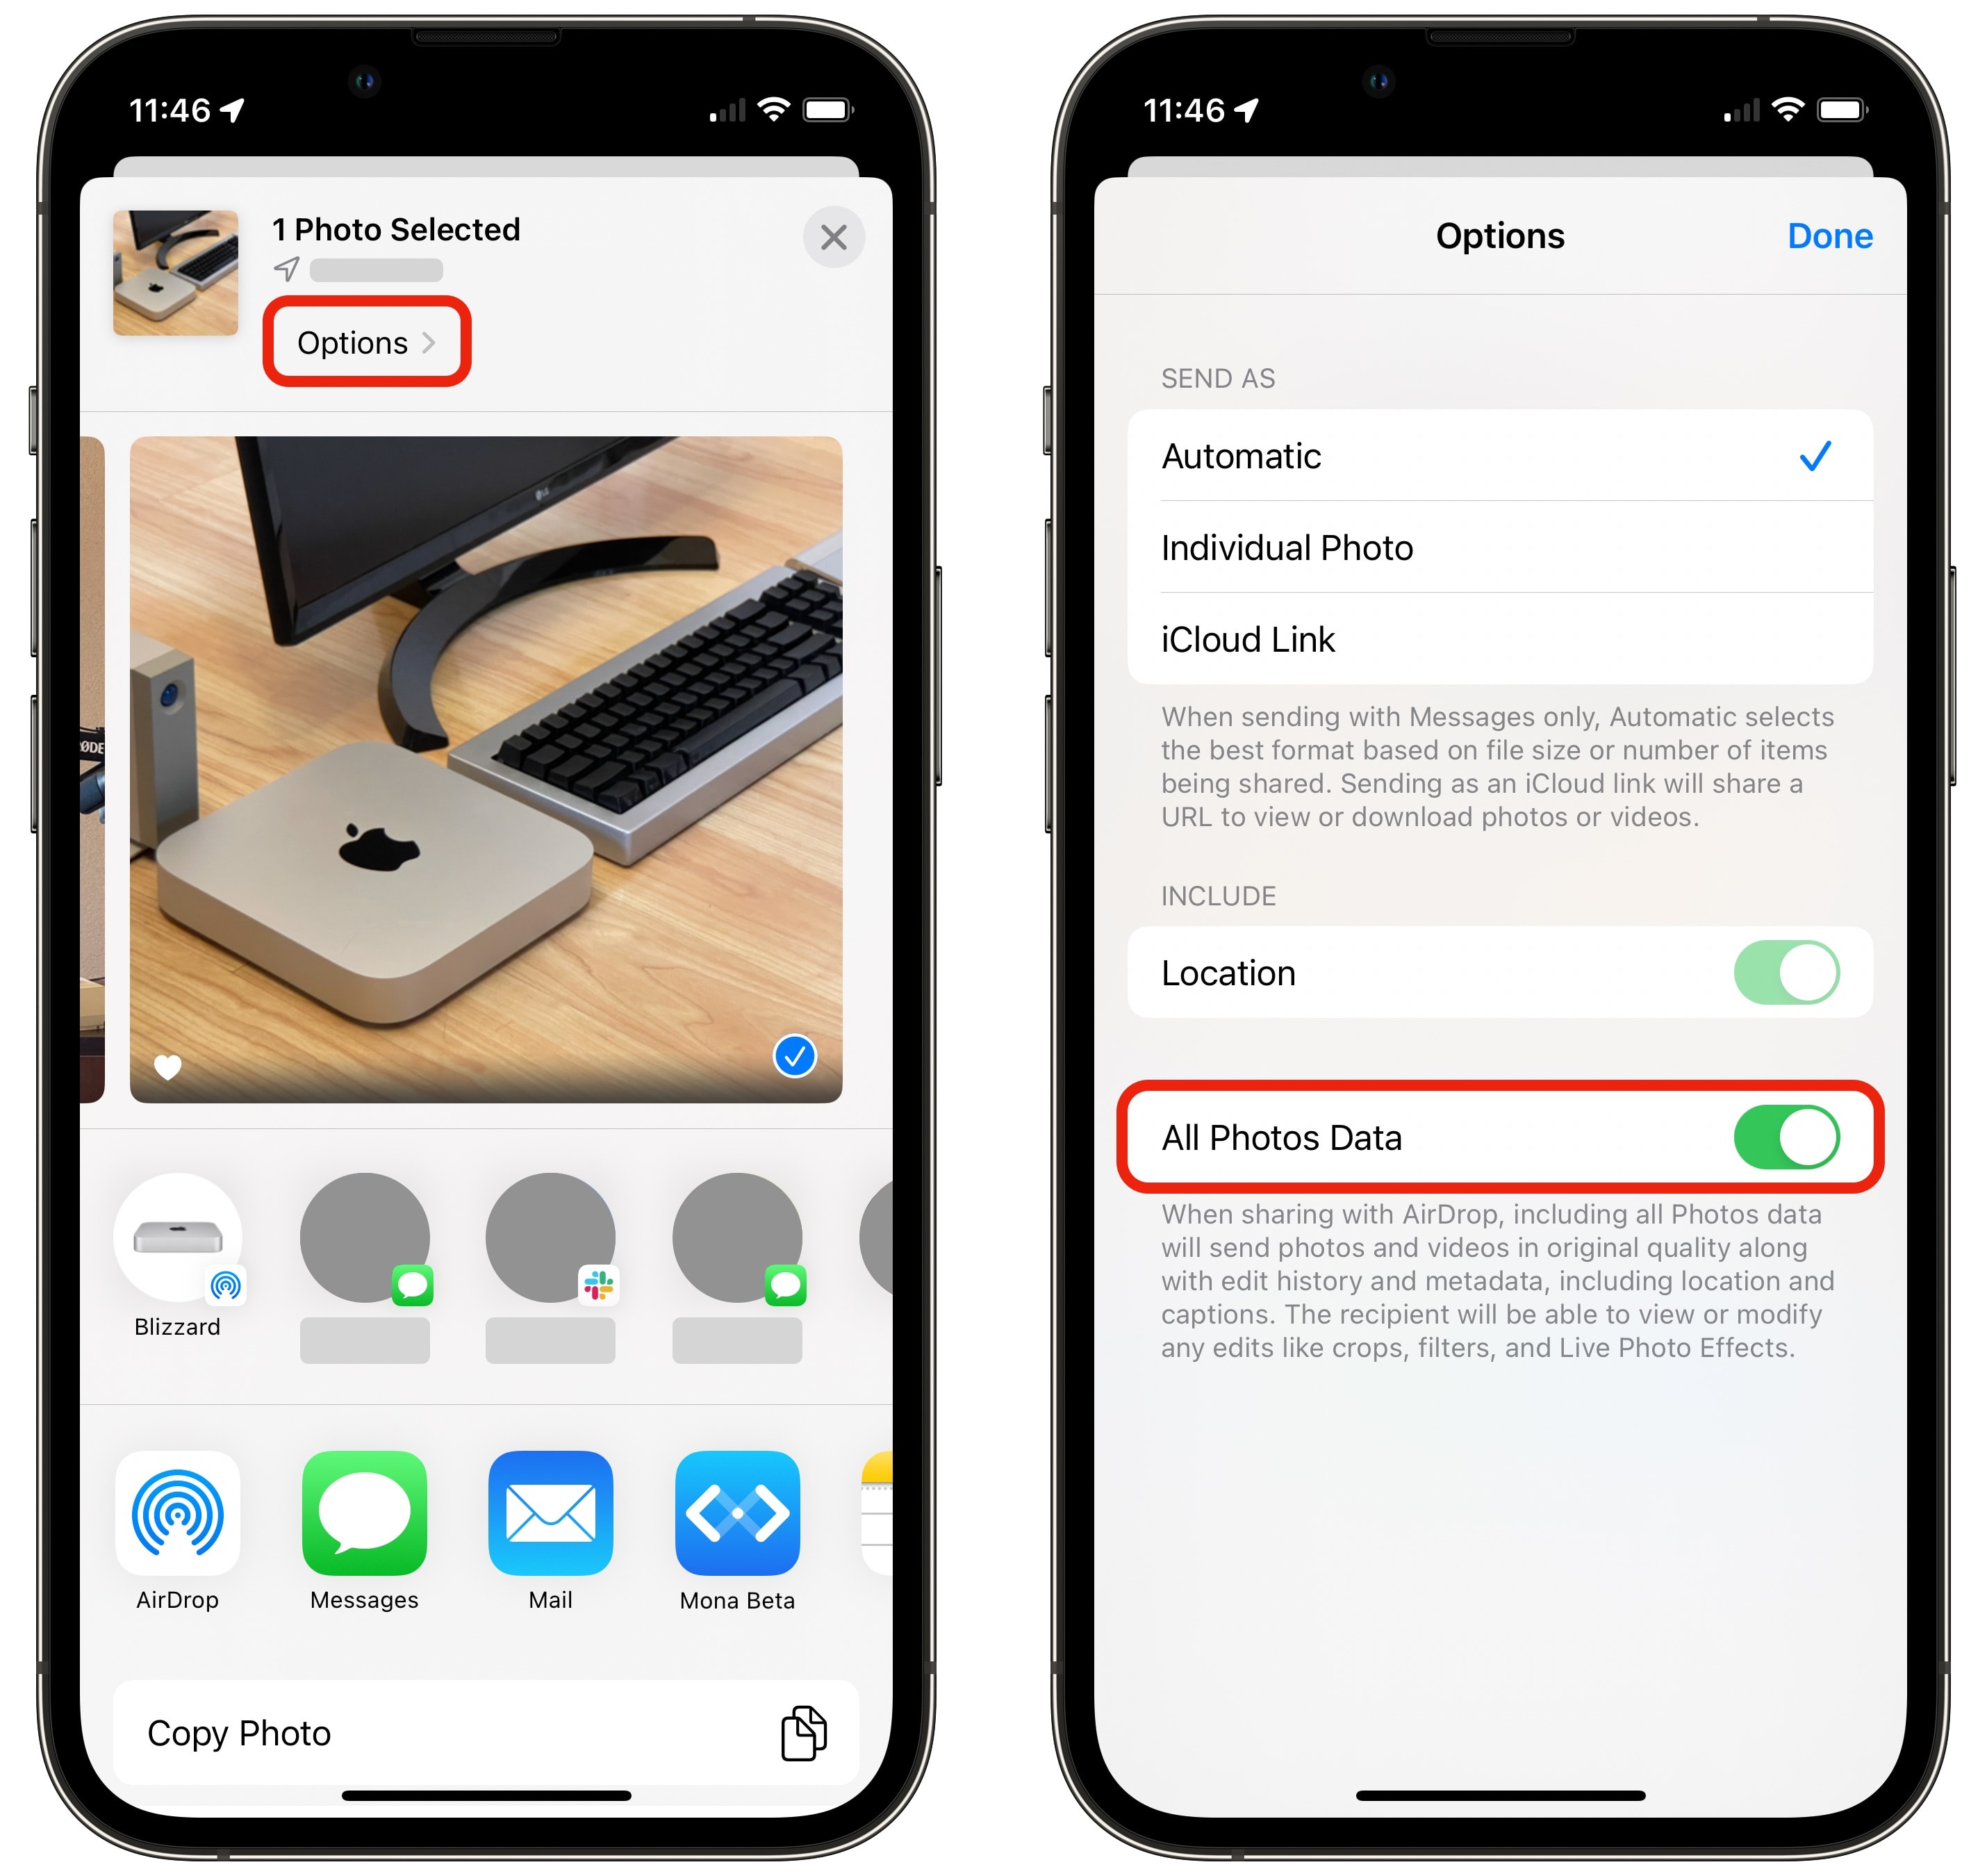
By default, when you AirDrop or iMessage someone a picture (and especially a video), Apple automatically lowers the quality and removes the metadata. I always prefer to have pictures in the highest quality and resolution.

Screenshot: D. Griffin Jones/Cult of Mac
If you want to send a photo or video in the highest possible resolution, here’s how. After you tap the Share button, tap Options before you pass along the image. Checking All Photos Data will send your file in full quality.


