Taking a moment to add an extra passcode to your iCloud account might save your skin if your iPhone is ever stolen by a shady character who’s eyeing you like a hawk. By default, your iPhone passcode is all someone needs to lock you out of your devices and wreak financial havoc on your life. And it’s not that difficult to capture your passcode if you tap into your phone in a public place.
In fact, a recent spate of coordinated scams have played out like this: A spy watches for anyone entering their iPhone passcode in a bar or other public place. Then, the device is yoinked out of the victim’s hands. And before they can do anything, they find themselves locked out of their own iCloud account. Soon, the criminals who stole the iPhone proceed to make unauthorized purchases, empty bank accounts and generally wreak havoc on the victim’s finances and personal life.
Luckily, setting up a second passcode just for iCloud can protect you from this type of criminal operation. I’ll show you how to keep these thieves at bay — and offer some additional advice for keeping your account secure.
Add a passcode to your iCloud account
Joanna Stern’s February video for The Wall Street Journal on how these operations work to systematically ruin lives is heartbreaking. With your passcode, thieves can access your password manager, bank accounts, photo library — all pieces of a puzzle they can put together to steal your money, drain your digital life, and sell your phone when they’re done.
In Stern’s recent follow-up piece, she discovered another wall of defense the attackers put up while they have your phone. They set up a recovery key, so that your account is cryptographically sealed. It can never be unlocked without receiving that code from the thieves — which they discard. This feature is intended for you to keep scammers out of your account, but when the scammers have your phone, you have no recourse.
In the video, Stern interviews an Apple aficionado who fell prey to such an attack. The victim even knew to immediately sign into Find My on a friend’s device to lock her phone remotely, but the thieves were faster.
What can you do to protect your account? It’s really simple.
Add a Screen Time passcode to iCloud settings

Screenshot: D. Griffin Jones/Cult of Mac
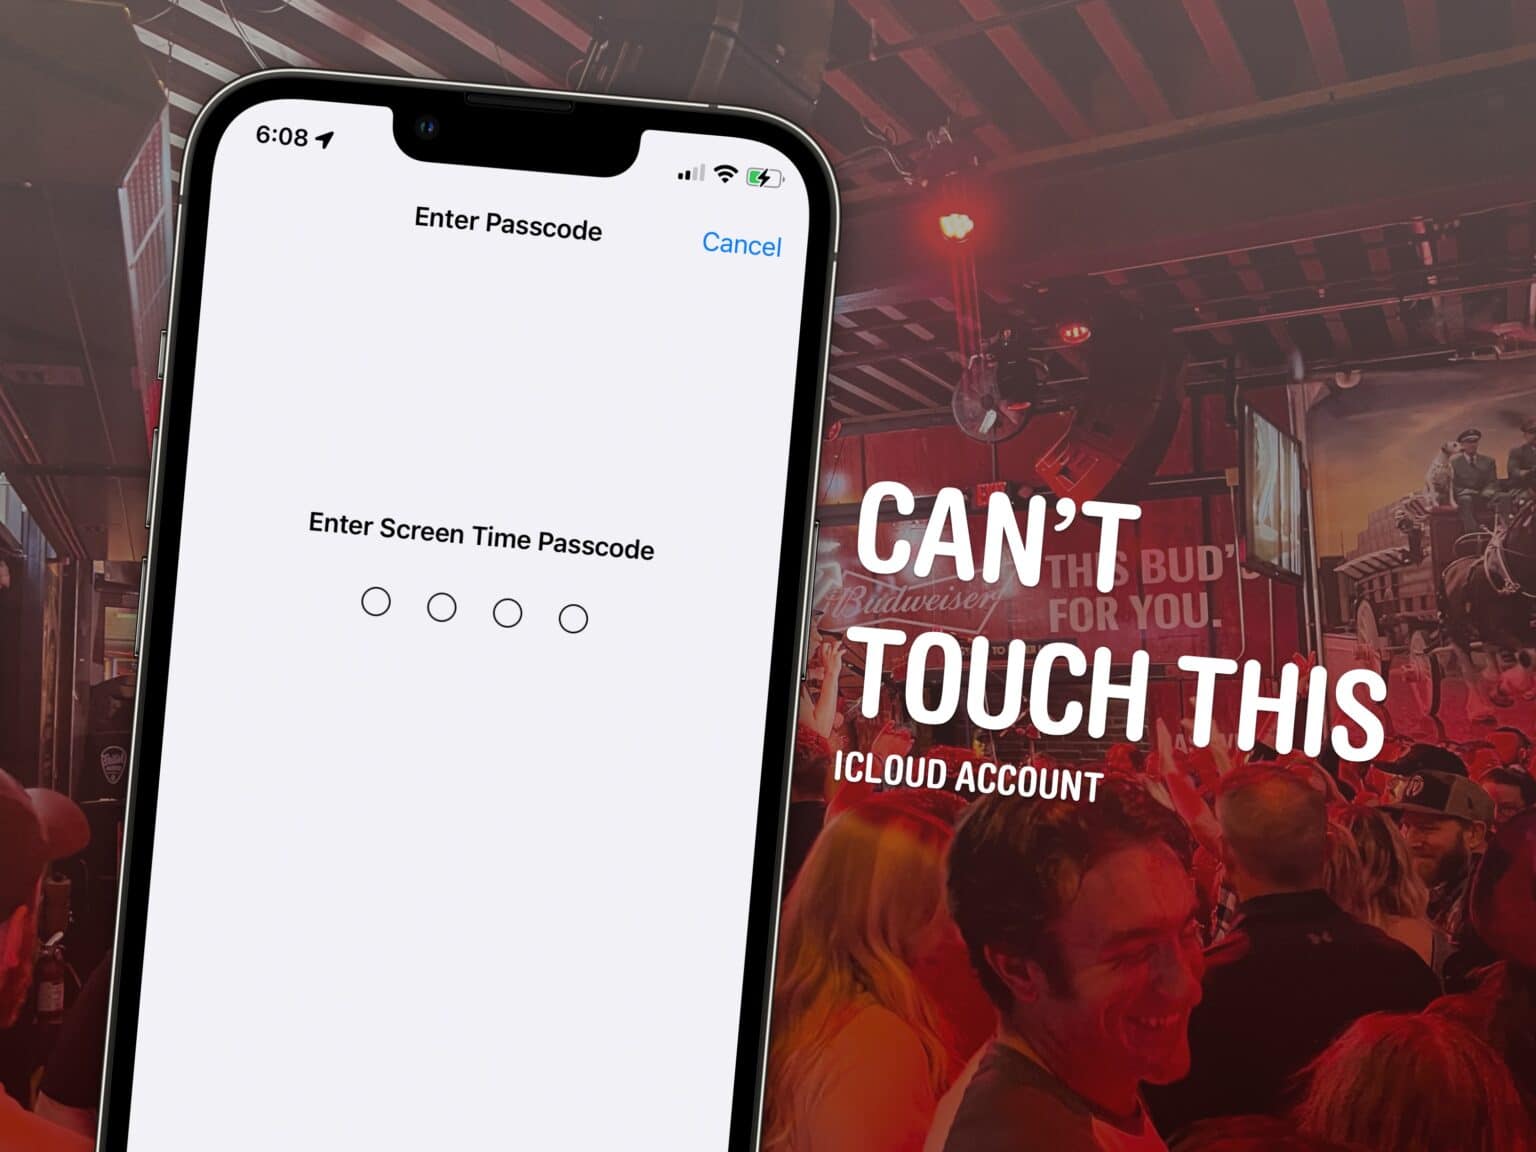
For this simple security-boosting hack, all you need to do is add a Screen Time passcode to your iCloud settings. This feature is originally designed so that parents can restrict their kids from, say, spending all their money on in-app purchases or killing hours upon hours on social media.
In this case, the additional passcode will prevent a thief from accessing your iCloud settings. If your phone is stolen, and the thief tries changing your password on you, they’ll hit a second wall. Meanwhile, it’s enough for you to put your phone in Lost Mode. (This tip comes courtesy of Benedict Evans.)
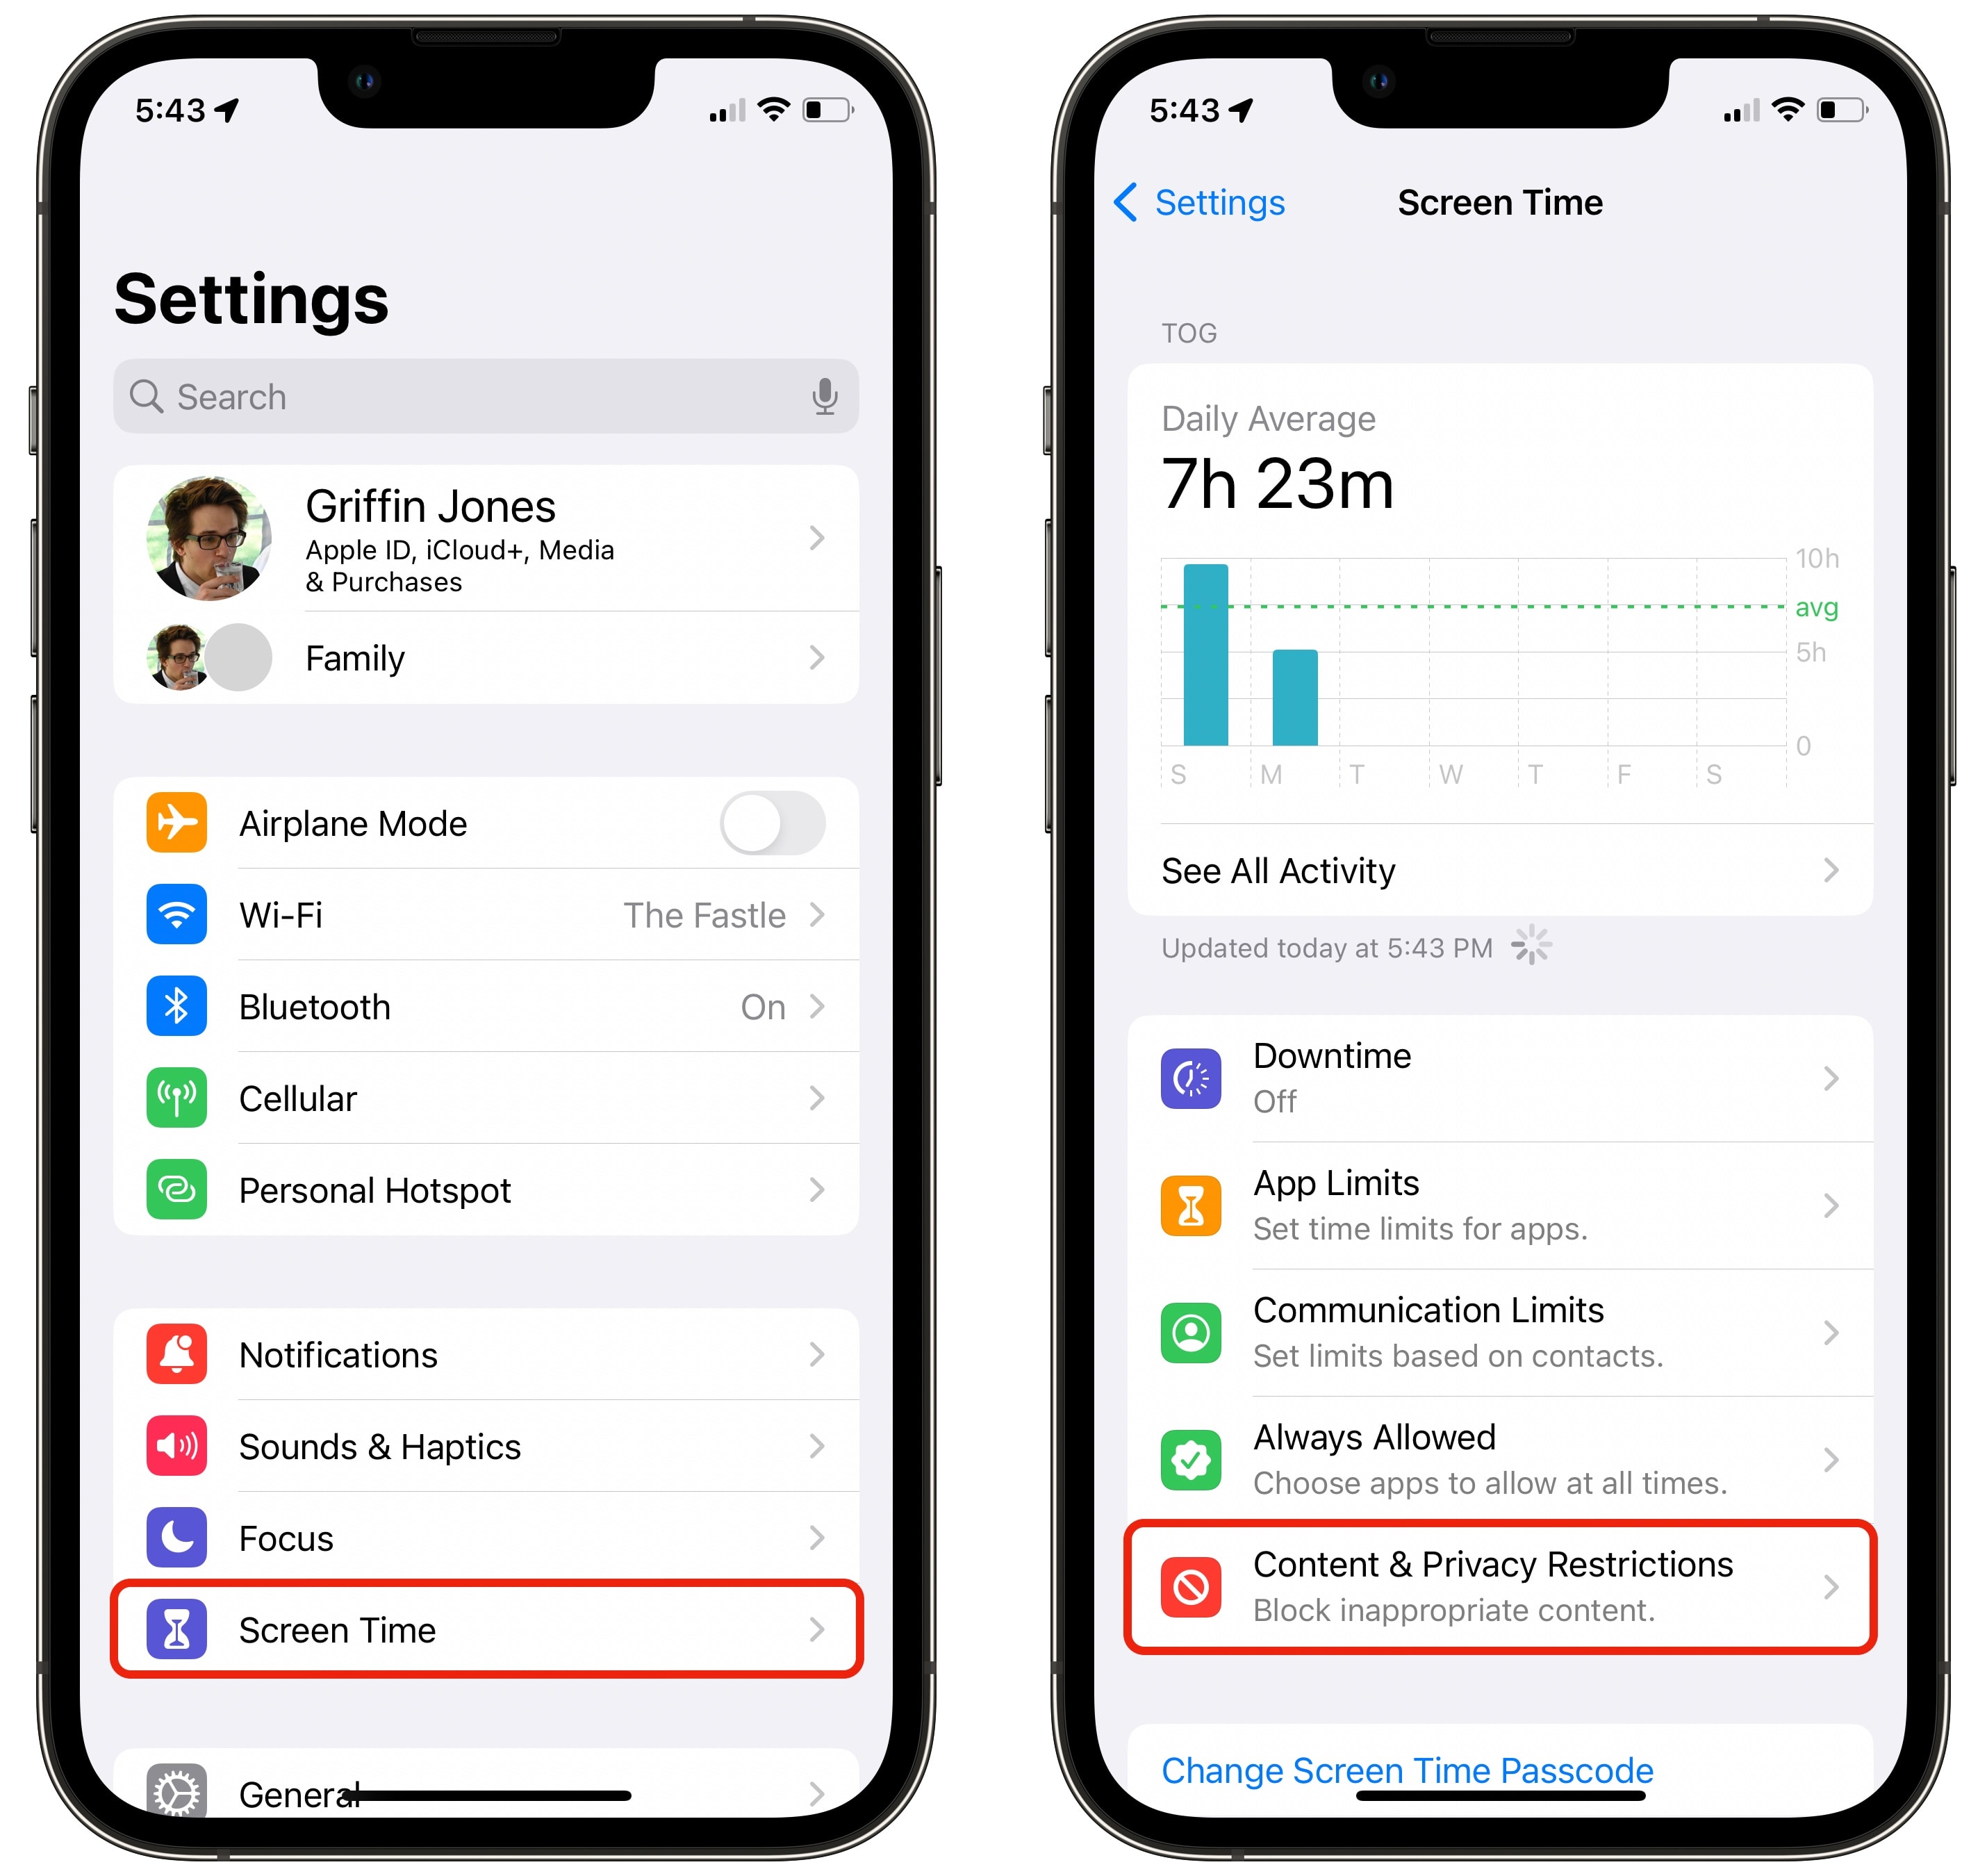
To set it up, go to Settings > Screen Time > Content & Privacy Restrictions and toggle the setting on.

Screenshot: D. Griffin Jones/Cult of Mac
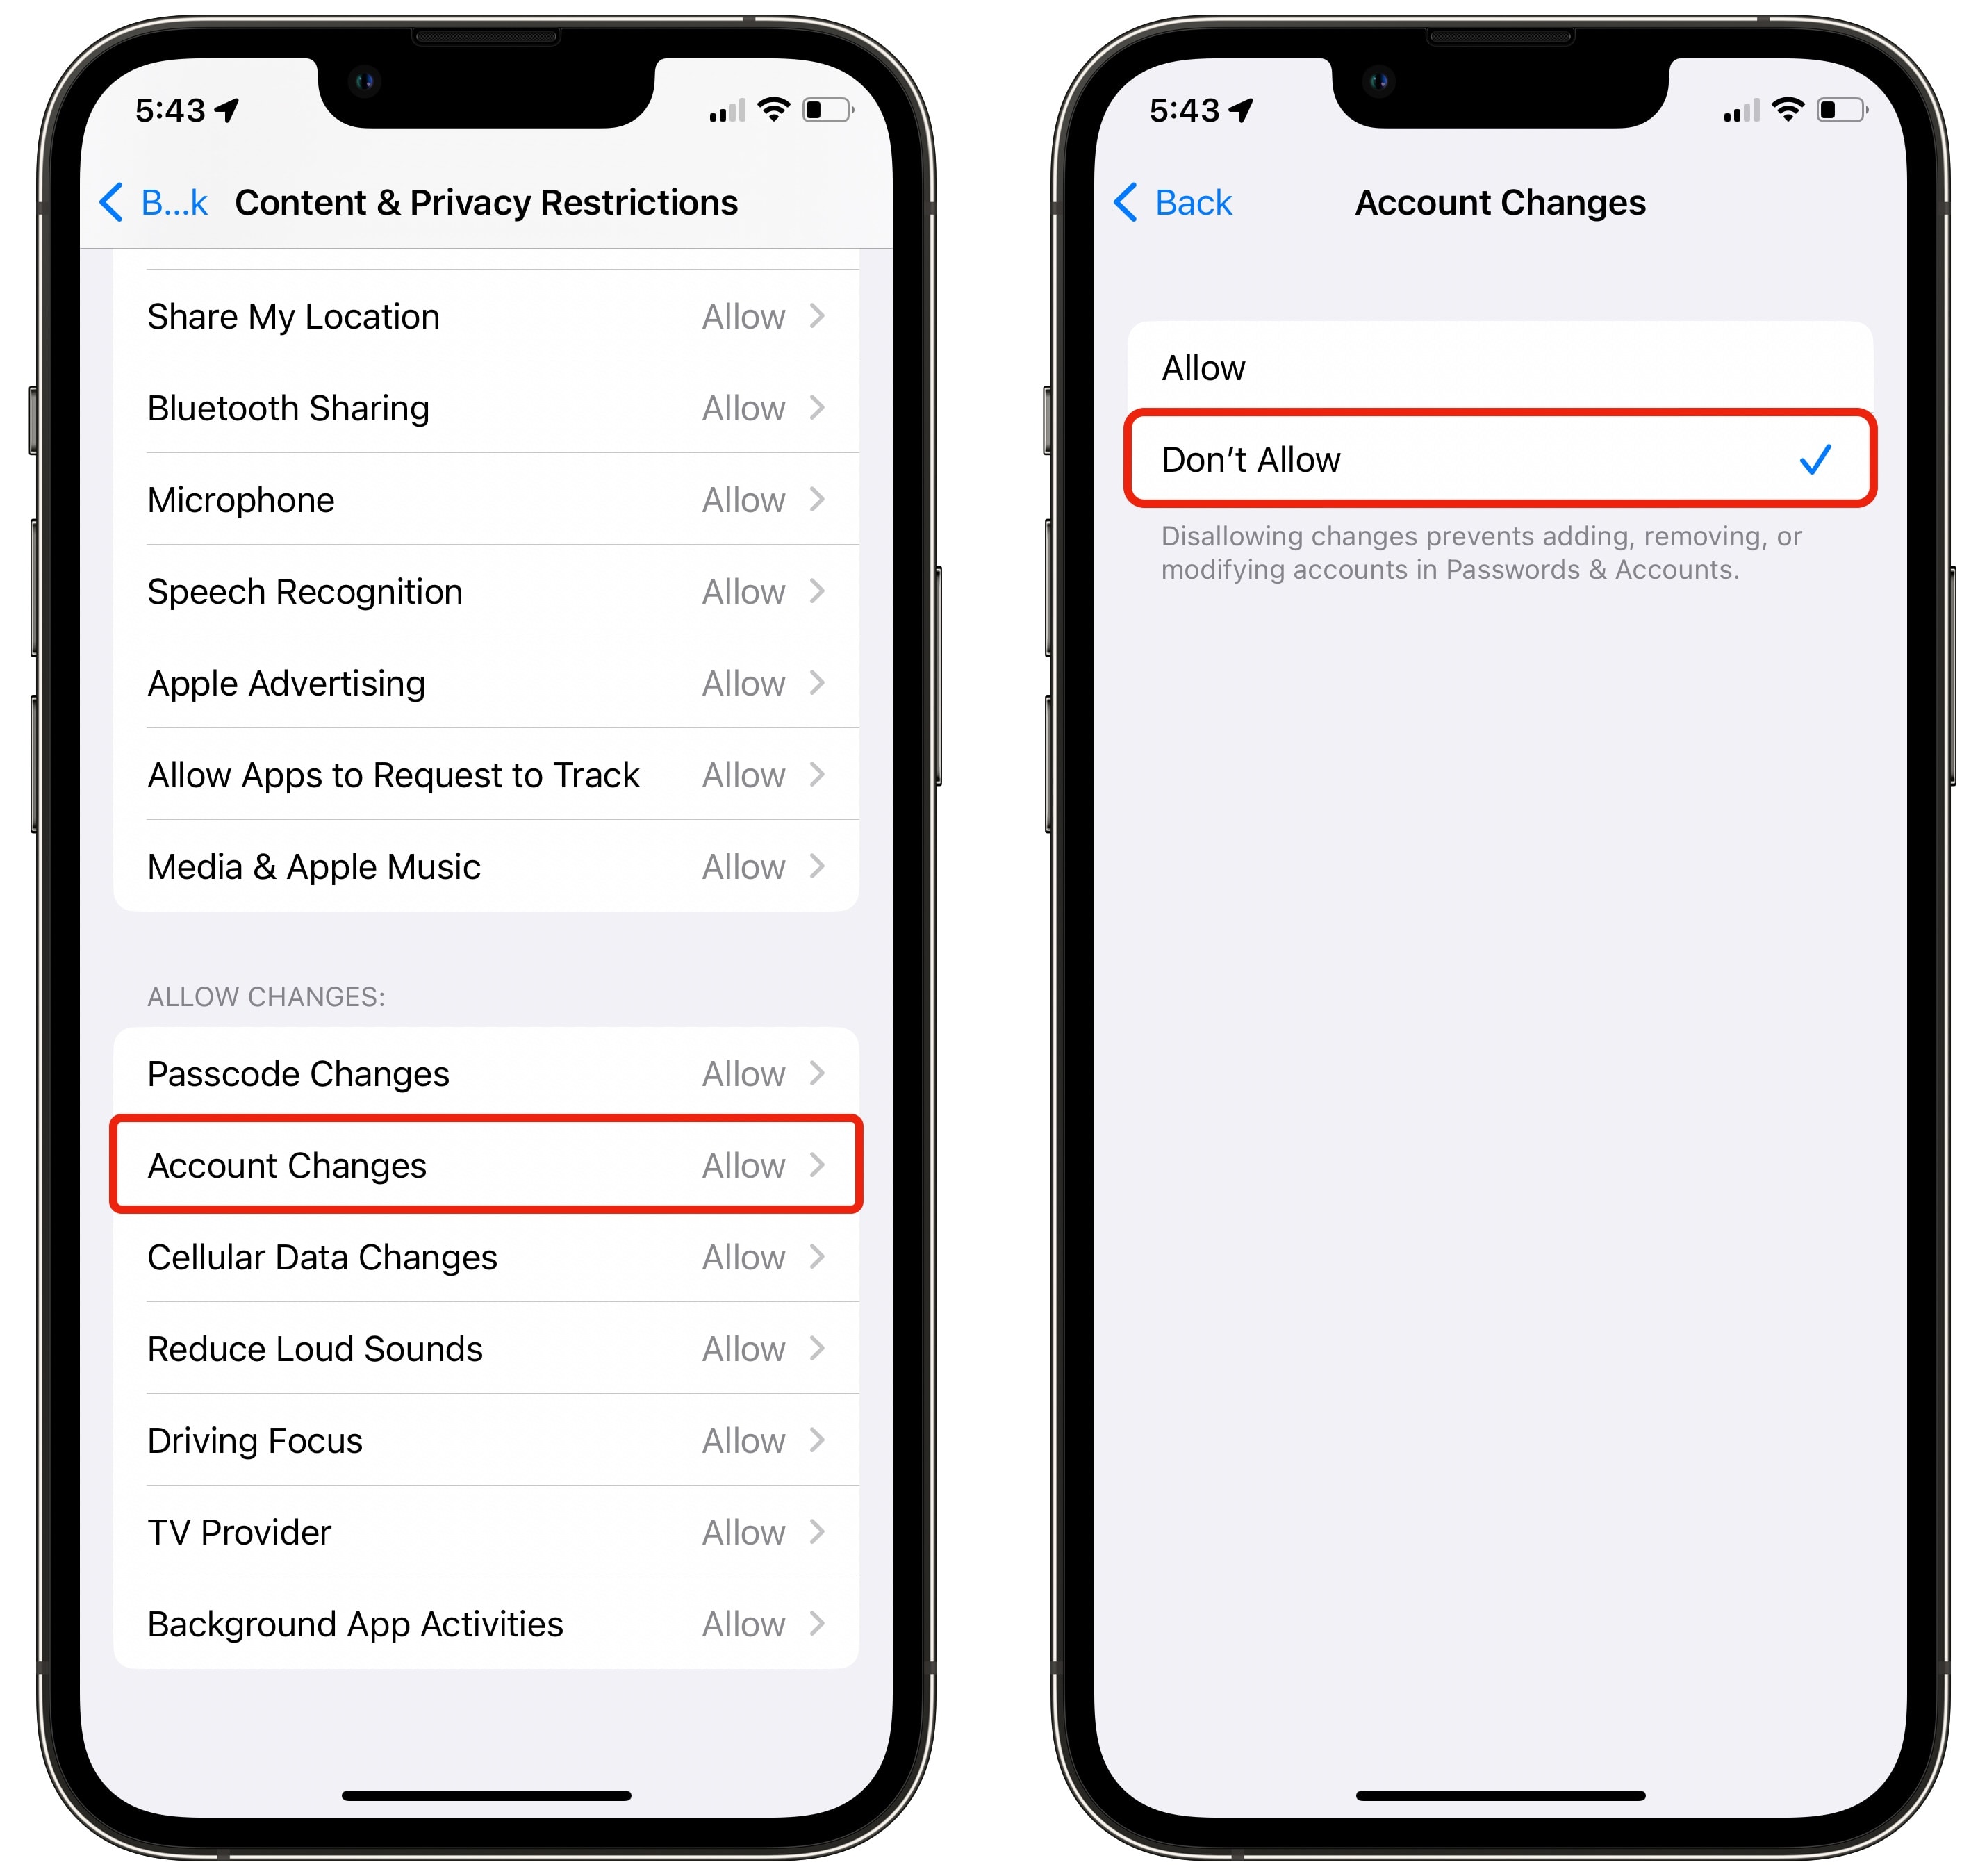
Then, scroll to the bottom of the screen and tap Account Changes > Don’t Allow.
Next, go back two pages to Screen Time, scroll down, and tap Use Screen Time Passcode.
While I encourage you to set a strong passcode for your iPhone, you can get away with a simple, memorable Screen Time PIN. It’s pretty unlikely that someone will get both. Not to mention, your phone passcode is reinforced in your head every time you manually unlock your phone — much more common than updating your iCloud account.
After you’ve made this change, iCloud settings are grayed out. If you need to get back in, you need to go to Settings > Screen Time > Content & Privacy Restrictions and enter your PIN to turn them off.
More tips for keeping iPhone secure
Here are some additional tips for keeping your iPhone safe in public places.
Don’t enter your passcode in public
The whole operation outlined above is predicated on thieves learning your passcode by spying on you. If you use Face ID (or Touch ID), they won’t be able to learn what it is. Sometimes Face ID doesn’t get your face right away, and brings up the number pad. But if you swipe up again, it’ll try your face a second time.
If you must enter your passcode, protect it like you would your credit card PIN. Cup your hand over your screen or, better yet, wait until you can go to a private bathroom or other safe location.
In fact, you should protect your iPhone passcode like it’s hundreds of times more valuable than your credit card PIN, because it is.
Use a stronger passcode
It’s incredibly easy to look over someone’s shoulder and learn a four-digit passcode. A six-digit passcode, which Apple recommends, isn’t much better.
That’s why I use an alphanumeric passcode. My phone brings up the full keyboard of letters, numbers and symbols. You’d have to get an awfully good look at my screen (and have a damn good memory) to be able to re-enter my passcode after seeing it once.

Screenshot: D. Griffin Jones/Cult of Mac
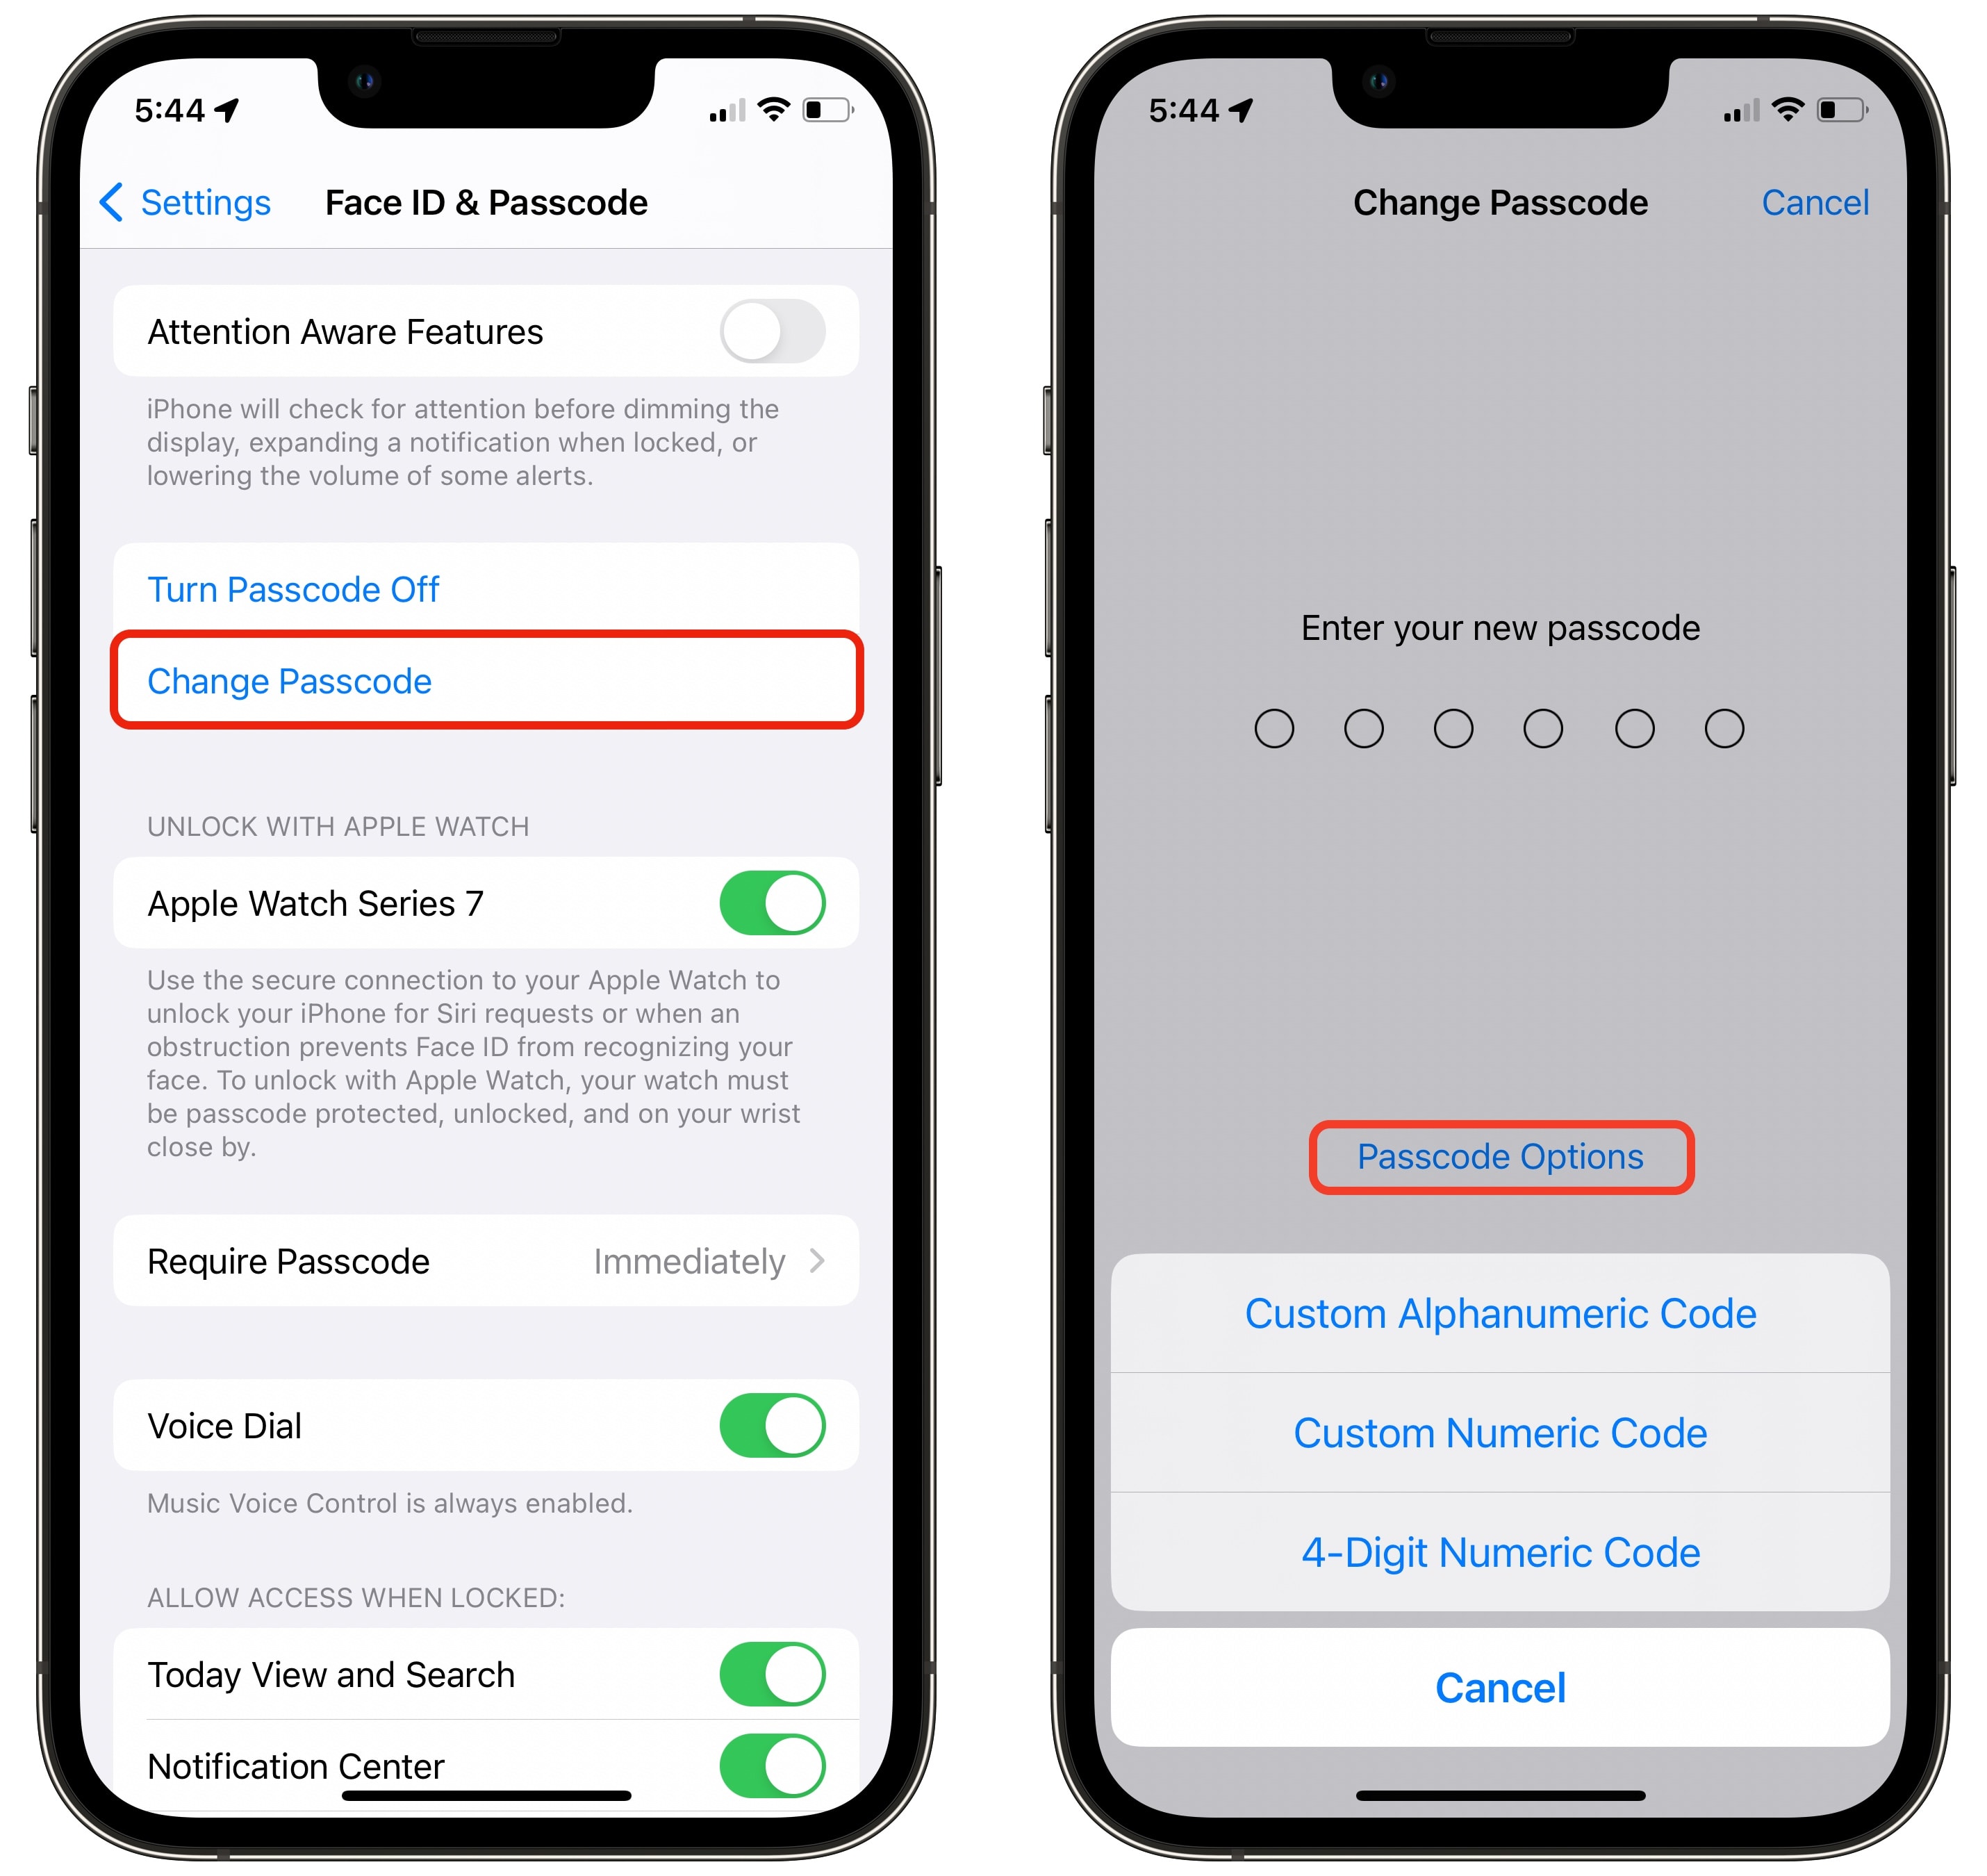
To set up a strong alphanumeric passcode, go to Settings > Face ID & Passcode > Change Passcode. Before you enter a new one, tap Passcode Options to switch to a more secure setting.
Will this be annoying to enter? Yeah, but since I use Face ID, it doesn’t matter. I only have to enter the passcode after rebooting or locking my phone, which happens no more often than once a week.
Back up your important data
If your photos are only in iCloud, you’ll lose everything if you lose your iCloud account. That’s why you should have at least one complete, local backup of your photo library on your computer.
On a Mac, open Photos. In the menu bar, click Photos > Settings… (⌘,). In the iCloud tab, make sure Download Originals to this Mac is enabled.
And be sure to set up Time Machine with an external hard drive if you have one. Two backups is better than one.
Switch to a different password manager
Part of what makes this operation so catastrophic is that if you know someone’s iPhone passcode, and they use iCloud keychain, you can unlock everything from their bank info to their Facebook account.
But if you use a third-party password manager like Dashlane, then you have your eggs in two baskets. Dashlane will act as another wall of defense to your valuable data after you add a password to your iCloud account.
Special offer on Dashlane
Sponsored: As a Cult of Mac reader, you can get Dashlane for free on your first device, or get 50% off the Premium plan using the code cultofmac50. This offer only stands until May 31.


