I hate my friends. I want to show them a photo, or that screenshot I took of those cute otters, and all they can do is take one look, and then swipe off into the rest of my photos. And trust me, you don’t want to know what I have lurking back there. And I also hate myself, because I do the exact same thing without thinking. It’s human nature.
Some apps let you load up a few photos to show to other people, so they can’t pull back the virtual shower curtain and peek at your private photos. But these require that you do extra work to prepare them.
Happily, iOS offers a way to lock down a single image. That way, when you hand your iPhone or iPad over to a friend, or anyone else, they can’t swipe to other photos. In fact, they can’t do anything at all, because you’ve locked the whole touchscreen. Best of all, you can toggle this on and off in a second.
How to use Guided Access to lock the Photos app
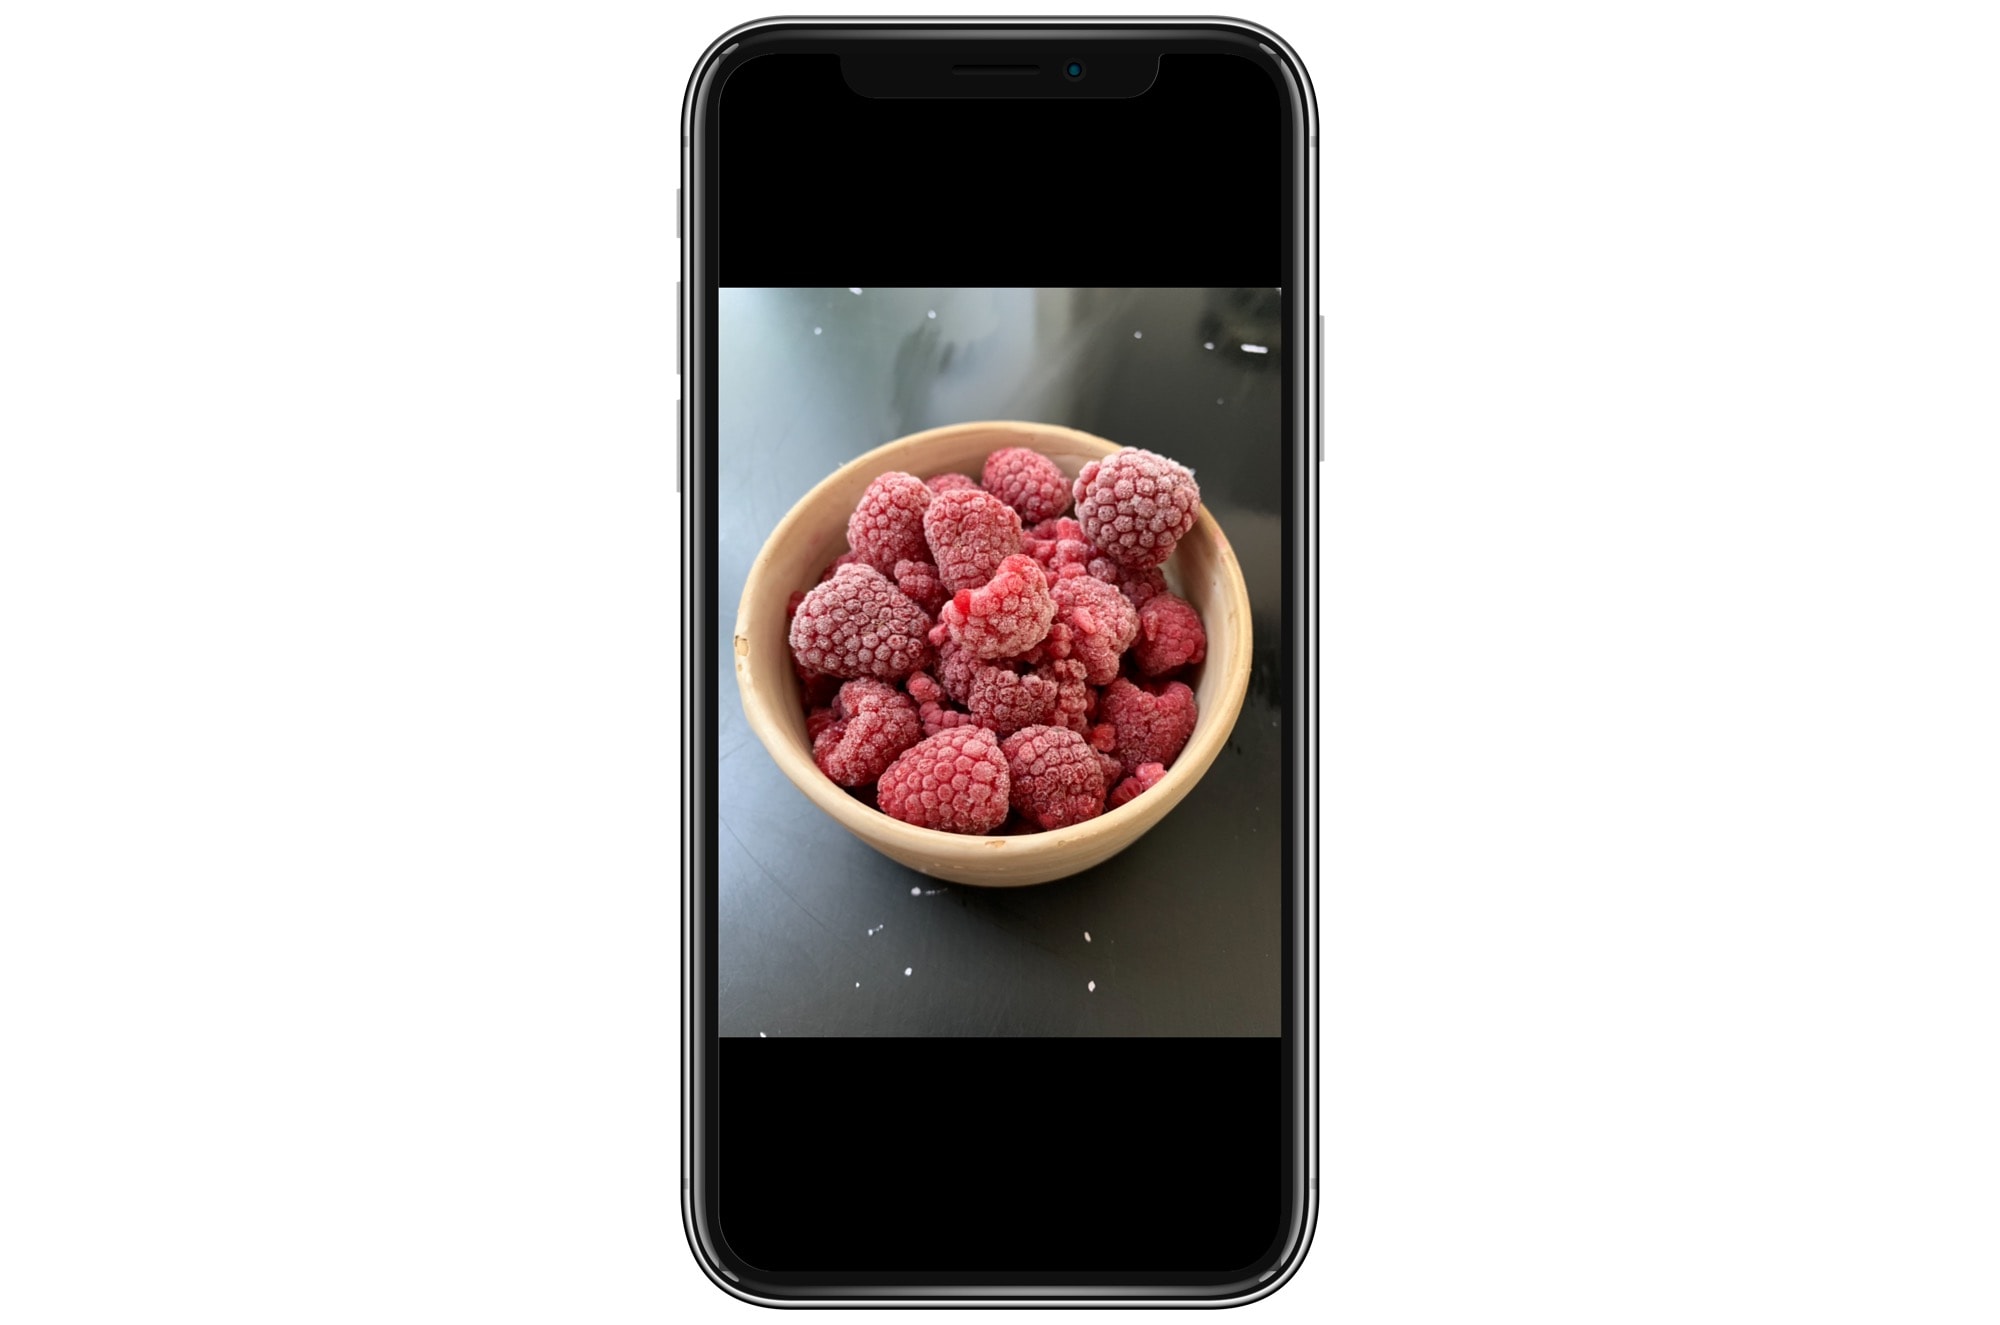
Photo: Charlie Sorrel/Cult of Mac
To make this magic happen, you simply use Guided Access in the Accessibility section of the Settings app. Guided Access is a way of switching off certain interactions with an iPhone or iPad. With it, you can disable hardware buttons, disable keyboard, lock the device into a single app (great for presentations in a public kiosk) and more.
Today we’re going to set it up to disable the iPhone’s touchscreen. The initial setup takes a few moments, but once it’s done, you will be able to lock the screen thusly:
- Triple-tap the home (or side) button.
- Tap the screen to enable guided access.
That’s it! This is a great feature because it’s so easy to activate. To switch off Guided Access, just triple-tap the same button and follow along. This takes a few more taps, because you must enter a passcode to unlock it, but no worries there, right? The danger has passed. Alternatively, you can use Face ID to end a session with a double-tap.
How to set up Guided Access
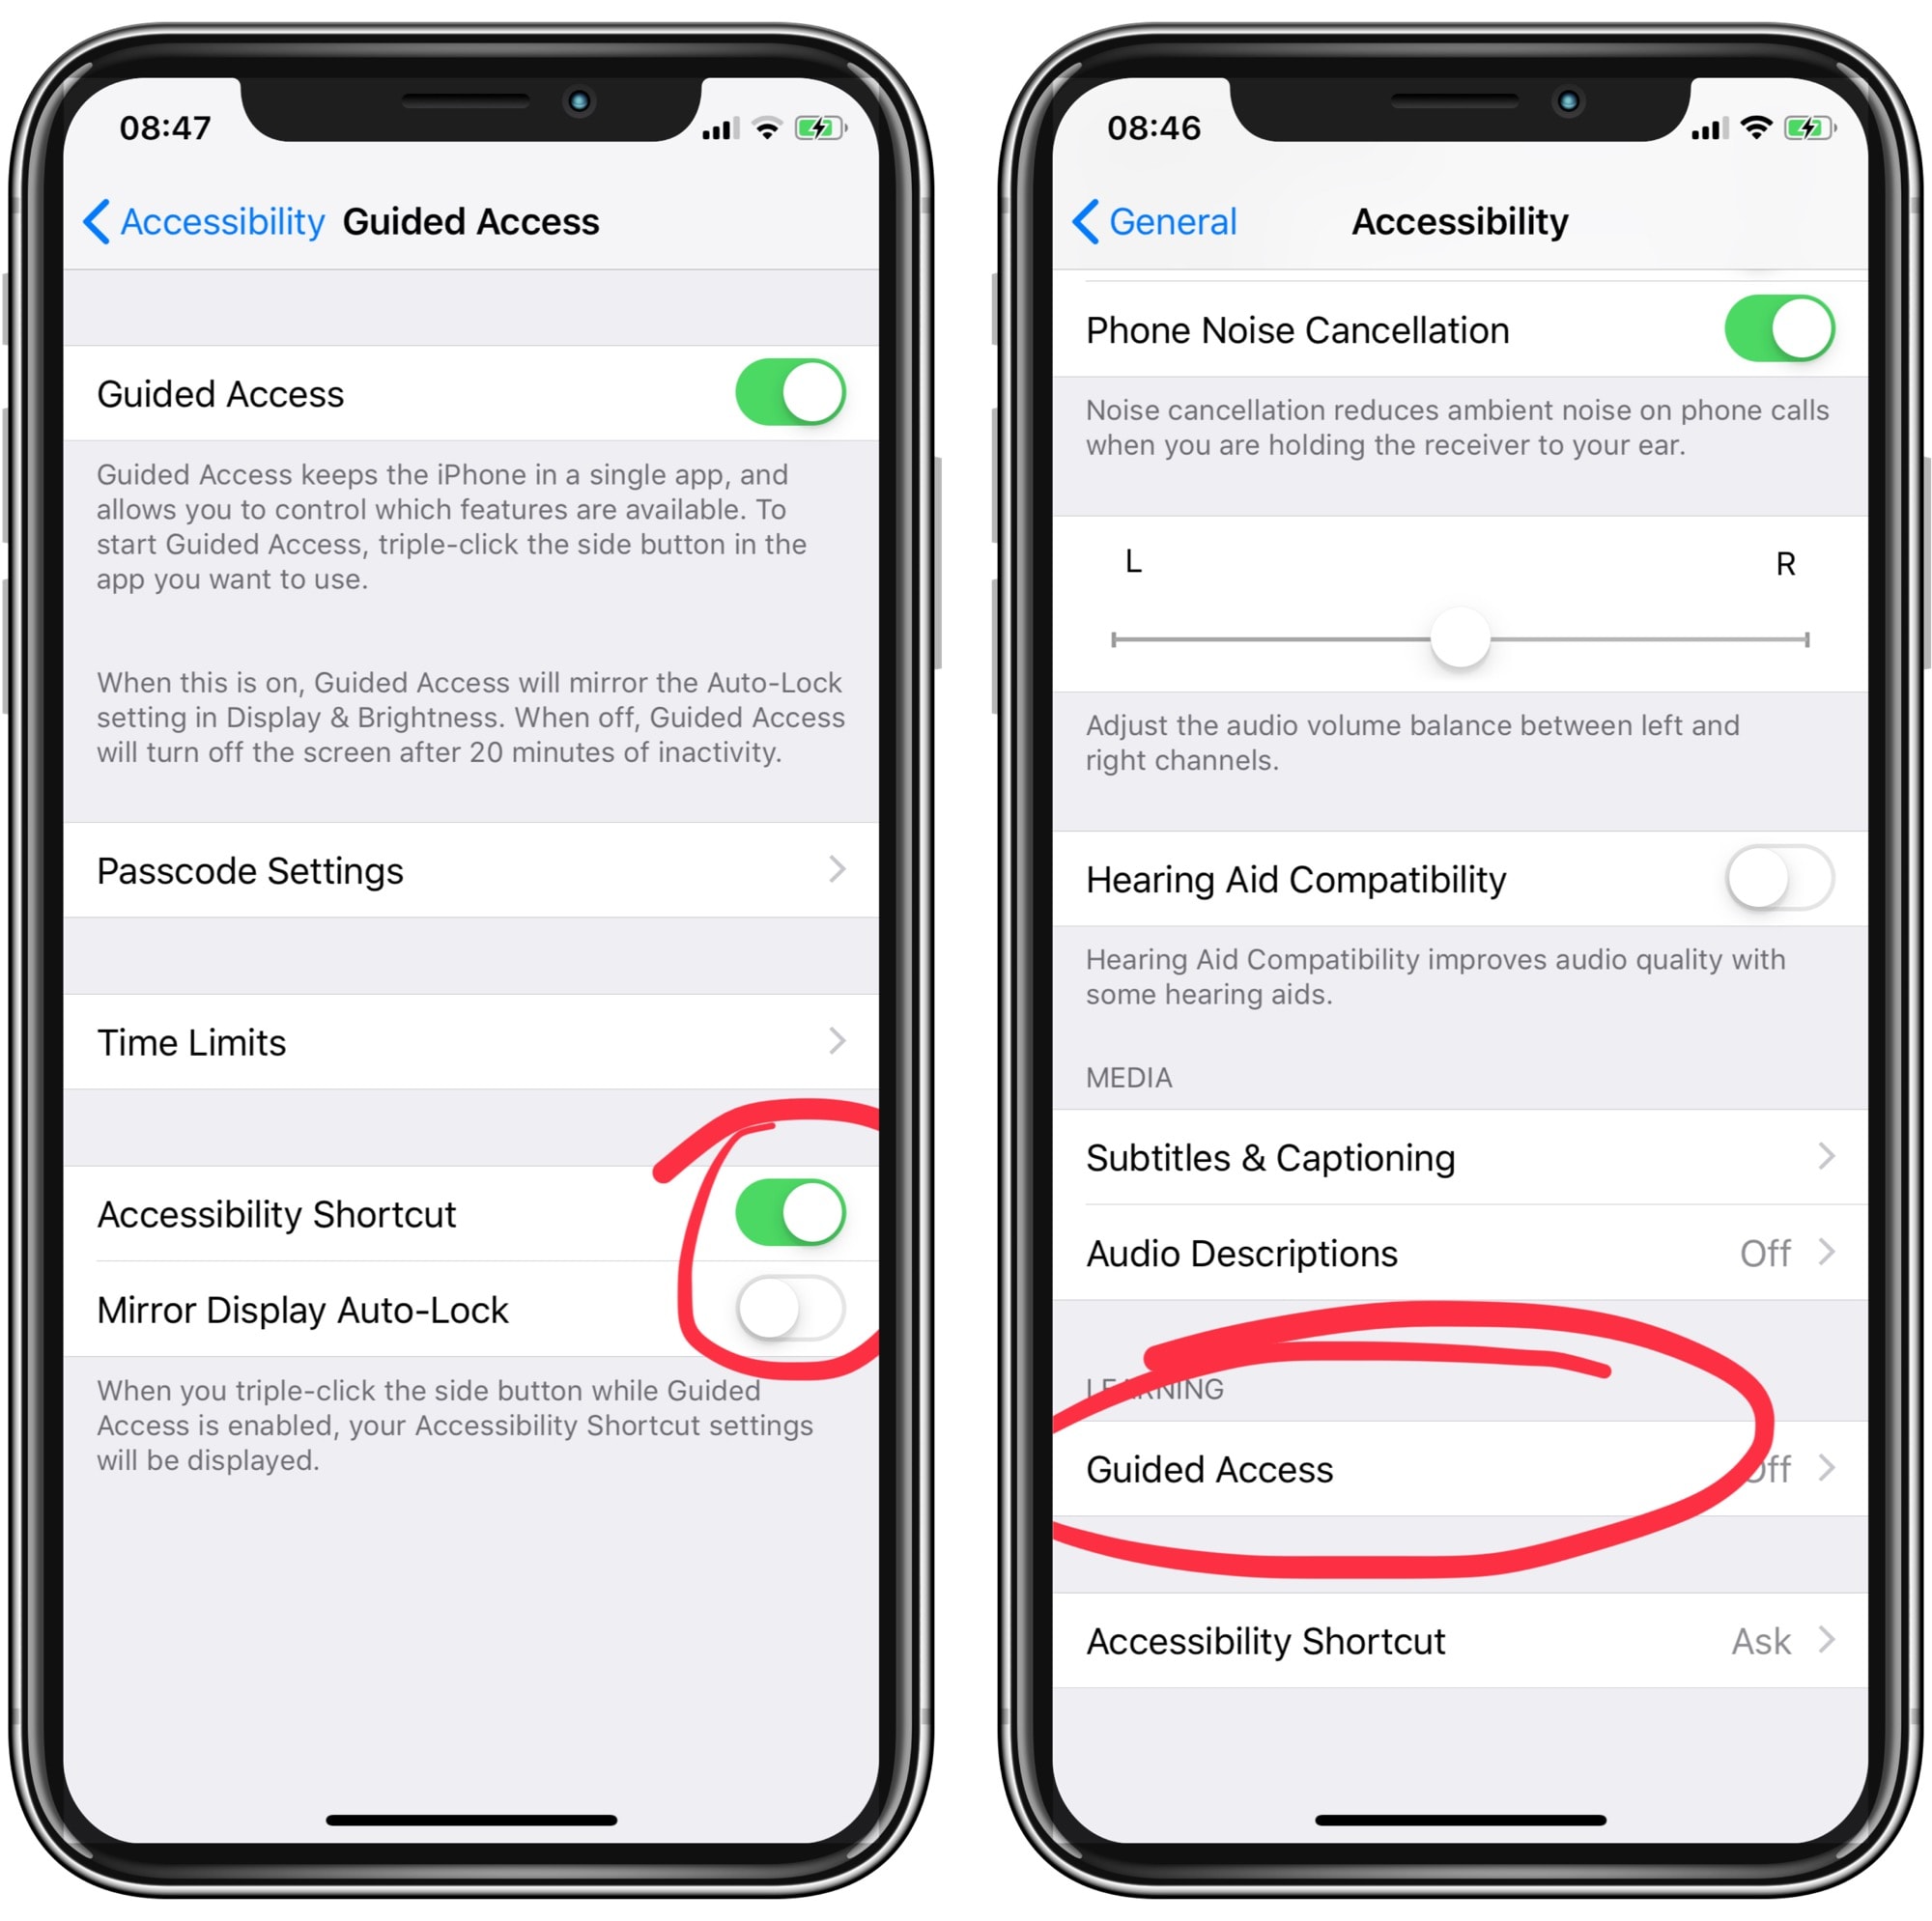
Photo: Cult of Mac
Step one is to open up the Settings app, and go to Settings > General > Accessibility > Guided Access. Then, toggle Guided Access on, and also switch on Accessibility Shortcut. The Accessibility Shortcut is what happens when you triple-click the home button. You can assign multiple actions. And, if you do, a menu will pop up asking you which feature you want to activate.
Then, in this same section, tap Passcode Settings and set a passcode. This will be used to get you back out of Guided Access, so make sure you can remember it. In this case, I guess security isn’t that big of a concern, as you’ll be standing right there. Go ahead and check the option to use Face ID or Touch ID.
Then, close the Settings app and head to the Photos app.
How to disable the touchscreen with Guided Access
When you’re in the Photos app, triple-tap the home (or side) button. You’ll see the following menu1.
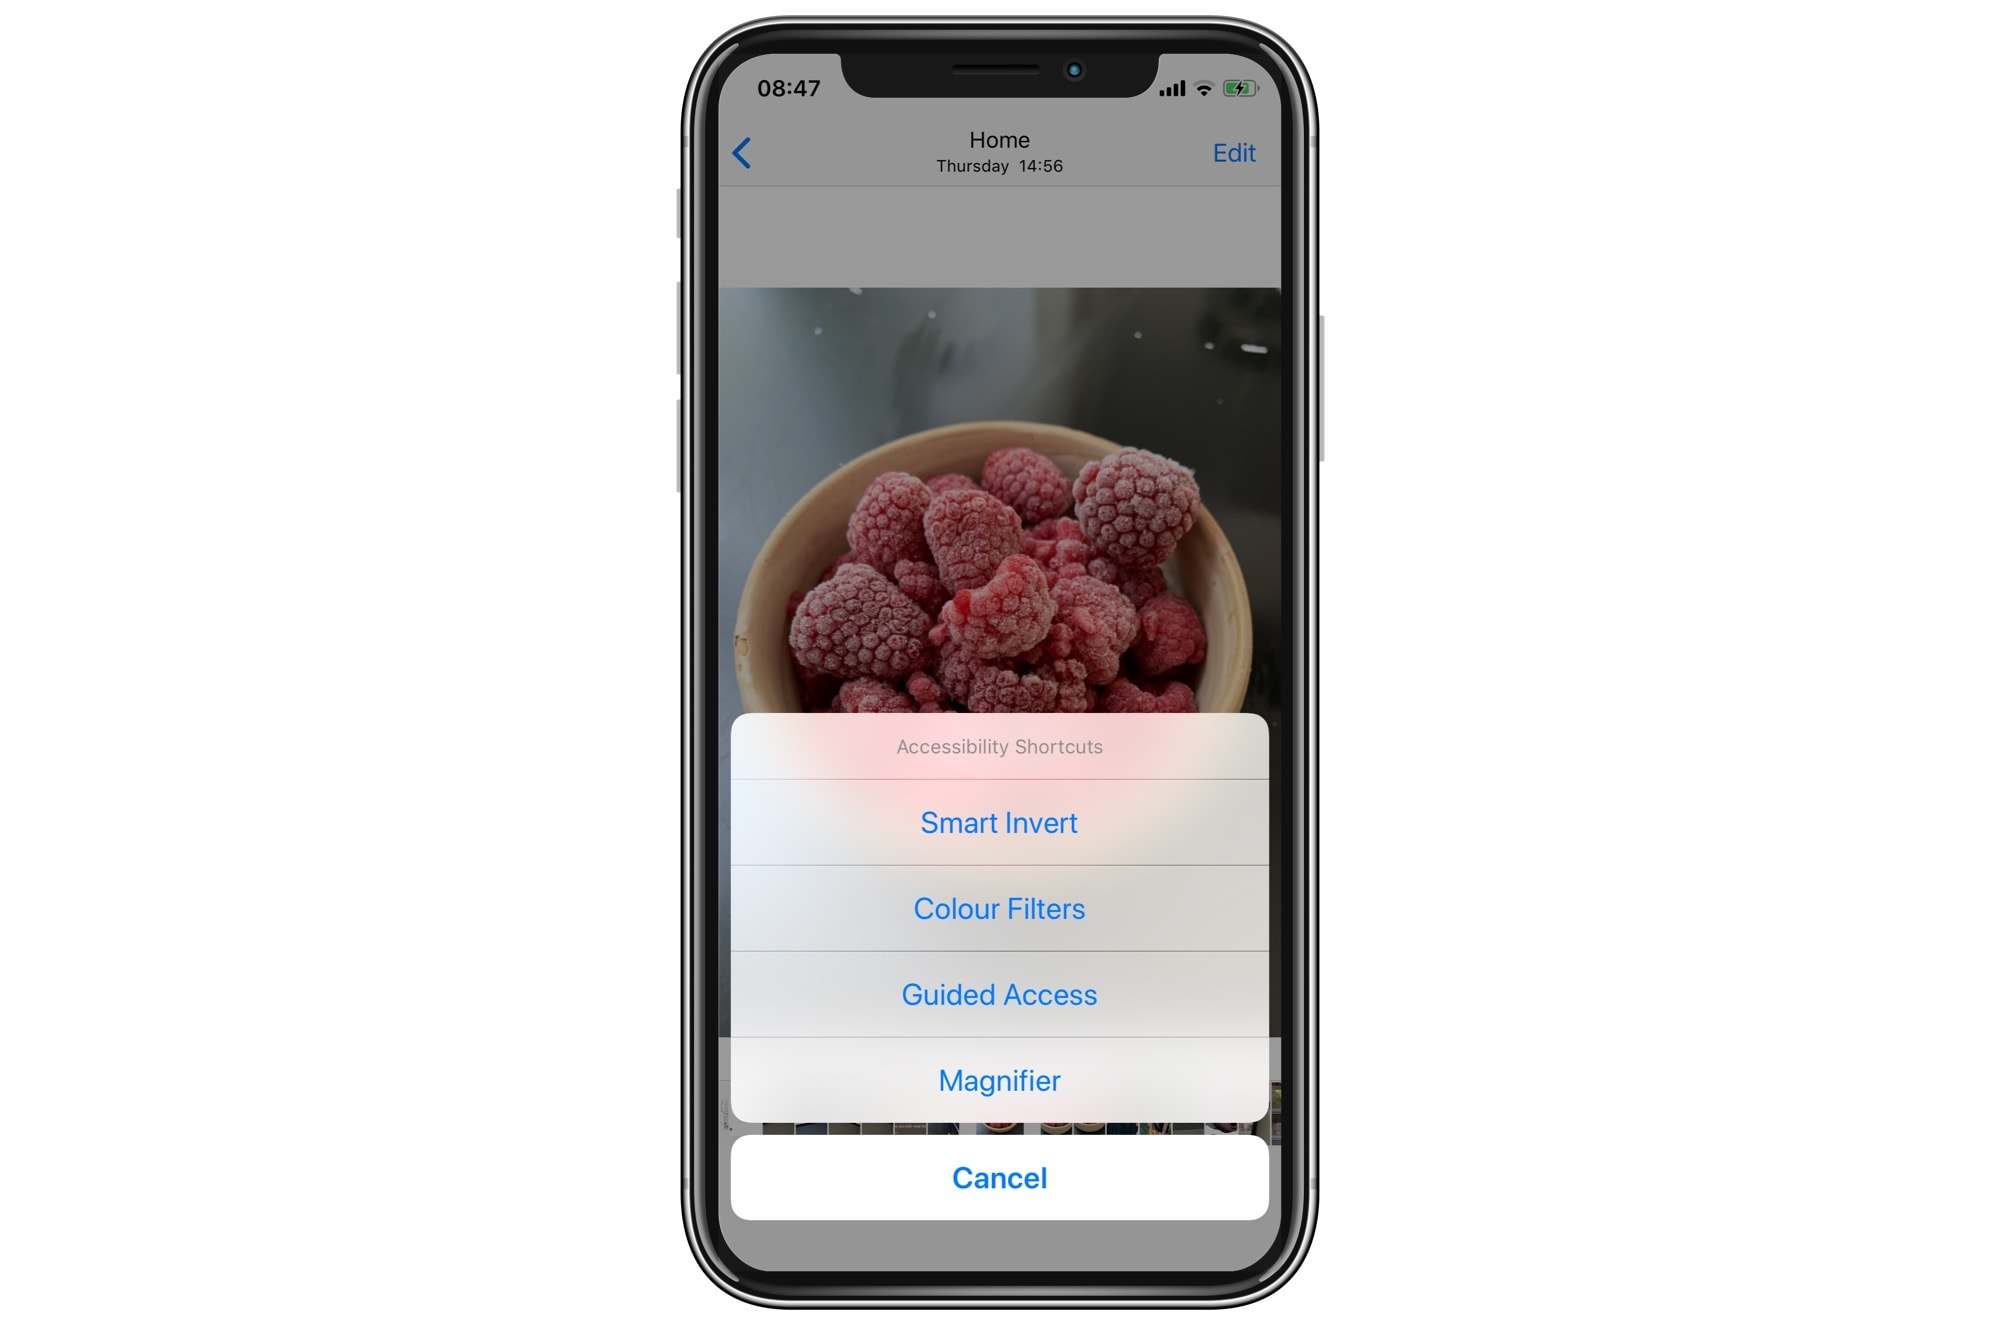
Photo: Cult of Mac
Tap Guided Access. The first time you activate this, you have to configure the features you want to disable. You’ll see this screen. Tap options…
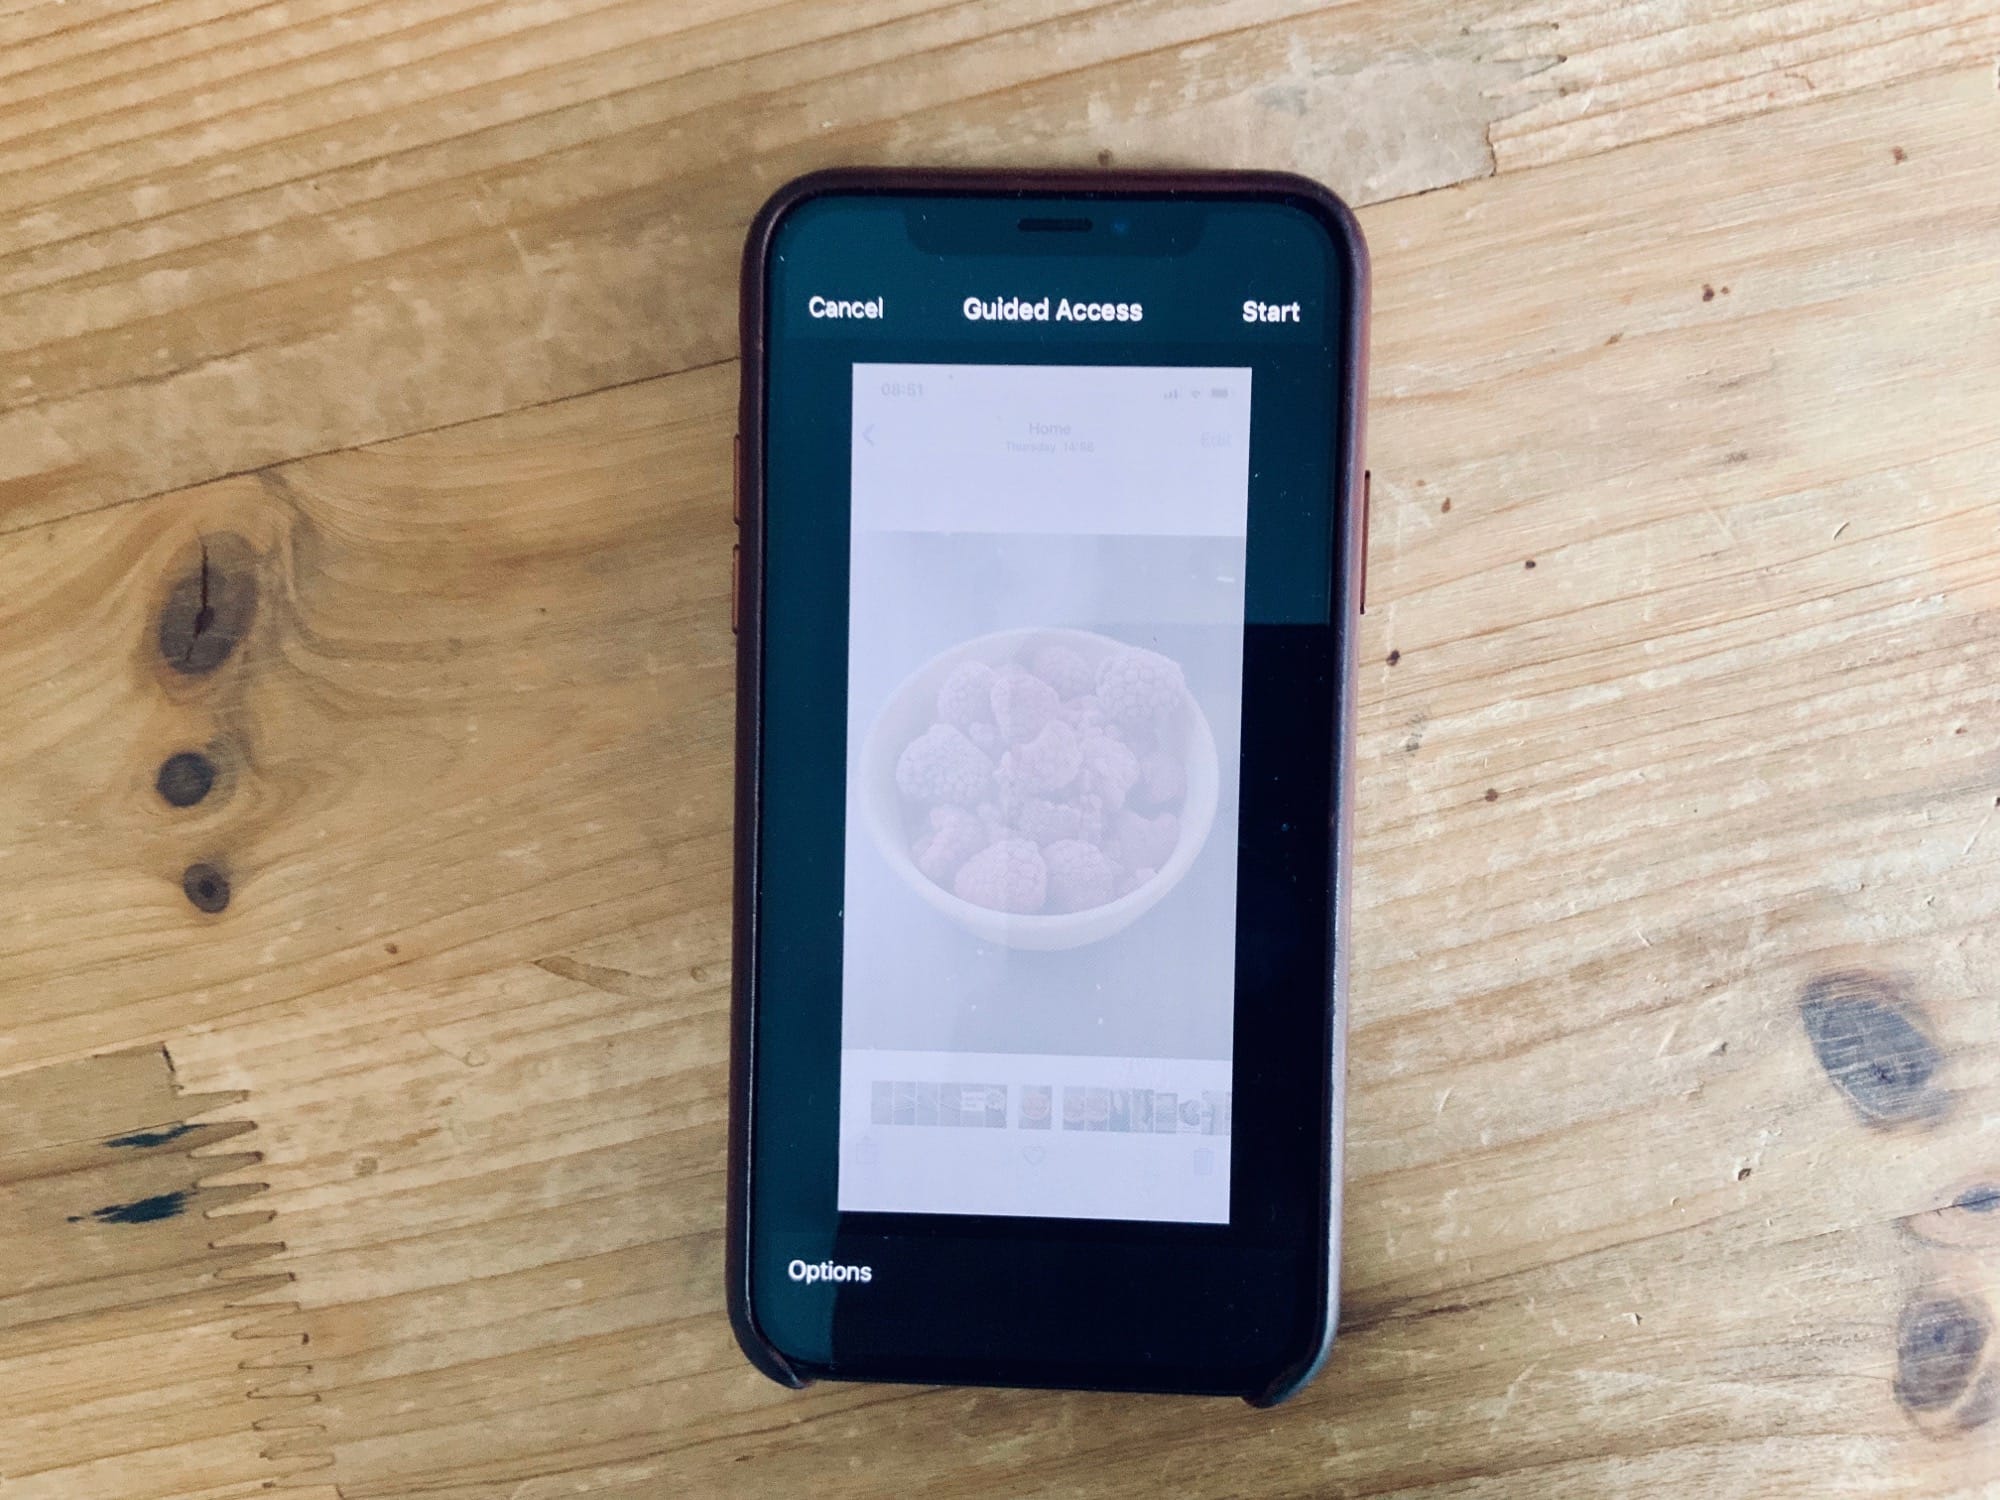
Photo: Cult of Mac
Now you’ll see the options screen (below). The setting you want to switch off is Touch, but you can pick any others if you like. Tap Done, and you will begin Guided Access. That’s it for setup.
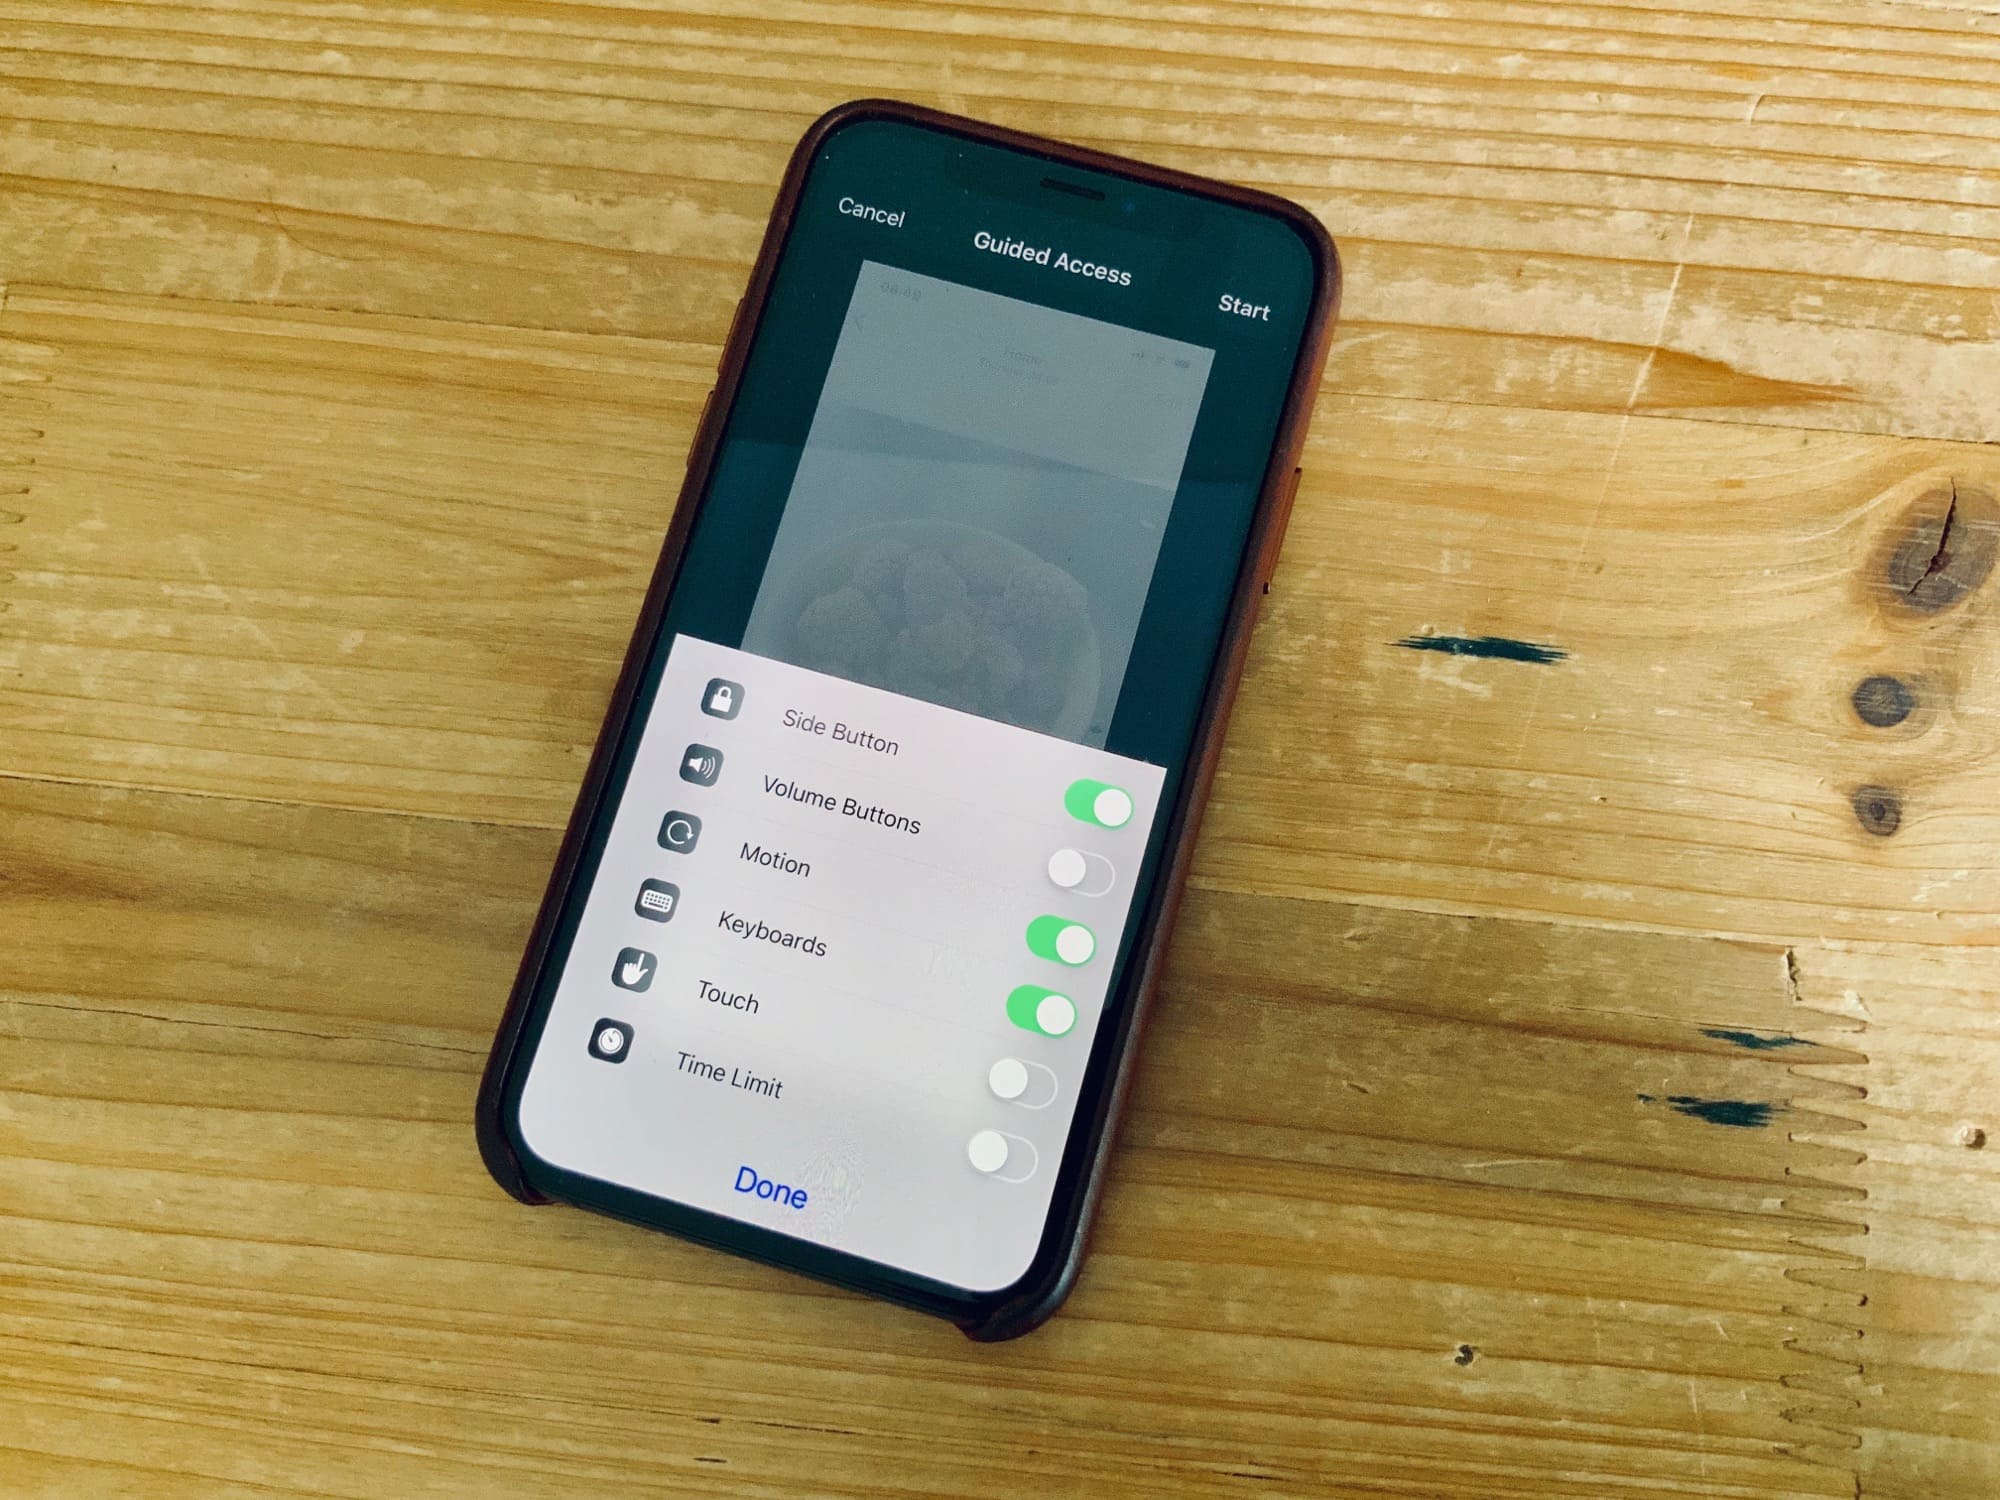
Photo: Charlie Sorrel/Cult of Mac
How to lock the screen with Guided Access
In the future, you won’t need to do all that setup. In fact, ease of use is the whole point of this method over a dedicated app. When you want to hand over your phone to someone else, just triple-tap the home (or side) button, choose Guided Access from the pop-up menu, and you’re done.
You can hand the iPhone or iPad over, and your friend cannot do anything. If the try to swipe, nothing happens. If they tap a button, they’ll see a warning that Guided Access is enabled.
To end Guided Access, triple-click the home button and enter your passcode. If you set the toggle to use Face ID, then you can double-tap the side button, and Guided Access will switch off immediately.
Limits
The main limitation is that you can’t show more than one photo at a time. But you can quickly select the images you want to show, tap the Slideshow button in the Share Sheet, and then enable Guided Access. In this case, you might want to make sure that Motion is left enabled in the Guided Access options screen, so the viewer can turn the iPhone sideways to see landscape view photos and videos properly.
This trick works anywhere on your iPhone. You can use it in any app — Safari, YouTube, or anything you want to let someone see but not manipulate. Go ahead and set it up right now, and enjoy it forever.
- If you only have Guided Access assigned to the triple-tap Accessibility Shortcut, you will skip this menu and go straight into Guided Access. ↩
