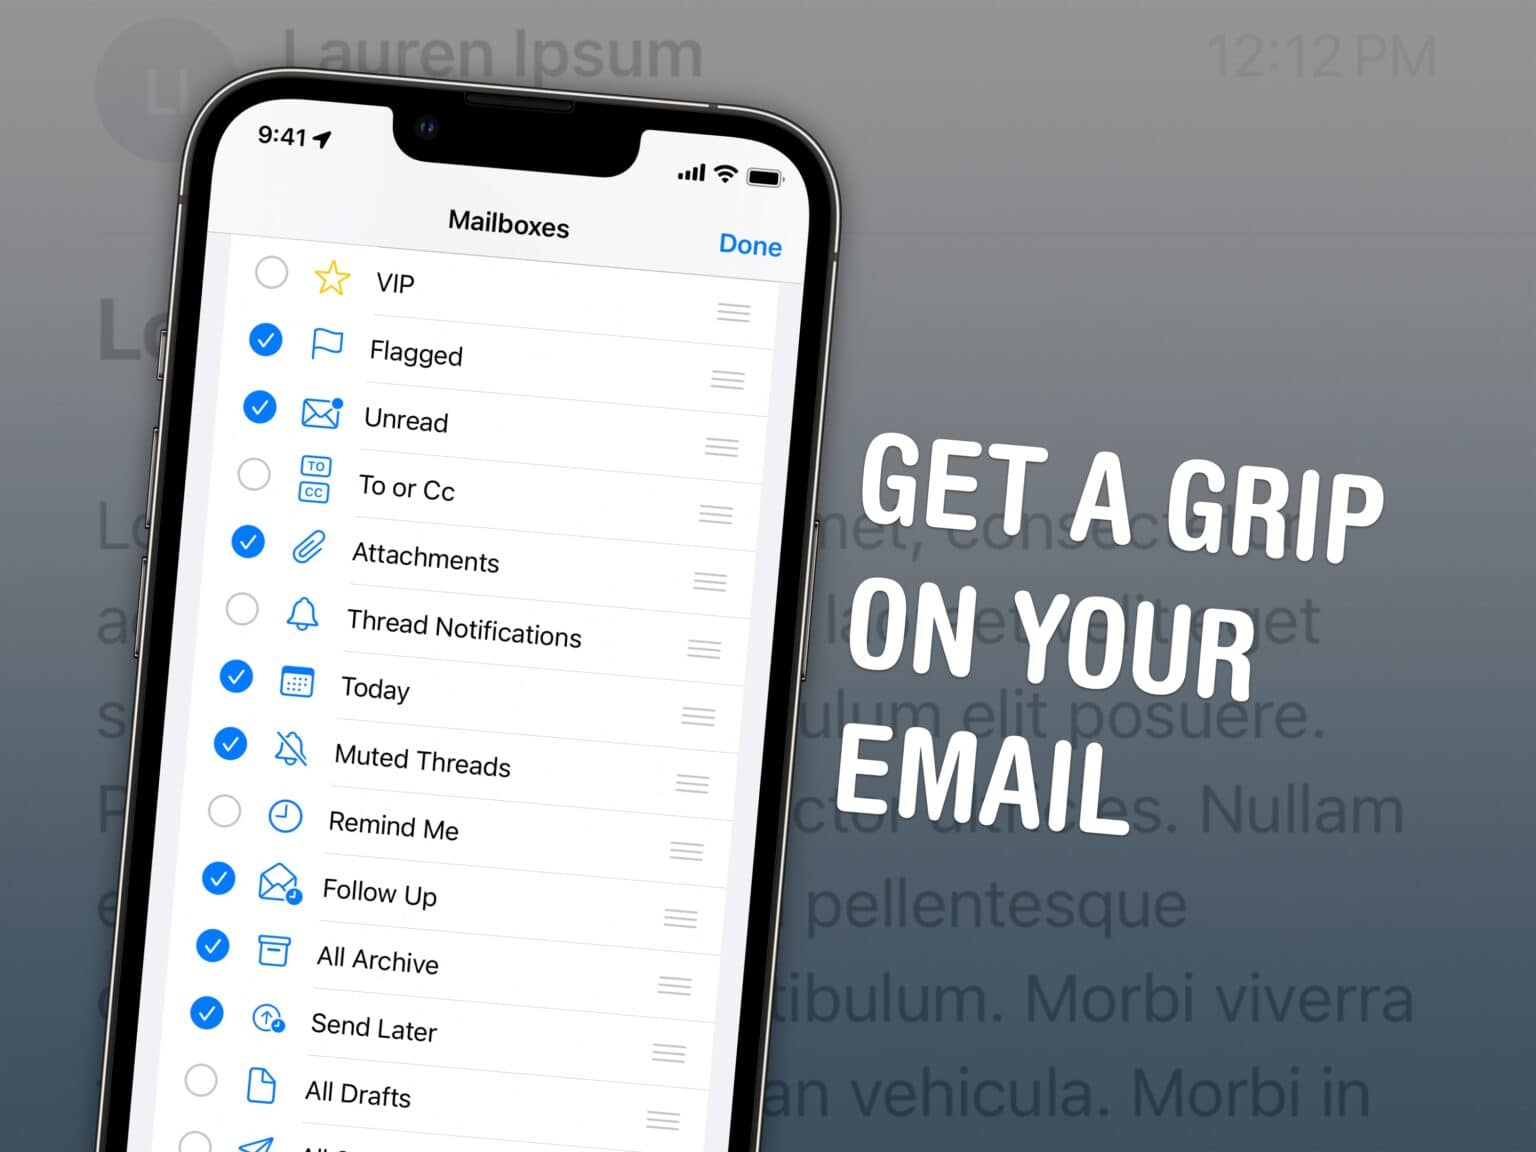
Some people maintain zero unread emails; some let that red badge climb into the thousands. It’s never too late — you can become one of those clean inbox people like me. What can help you along the way to Inbox Zero are these six tips in Apple’s own Mail app for iPhone and Mac that you might not have known about.
Well, beyond the obvious Tip Number 0: You should always hit the Unsubscribe button at the bottom of every unsolicited promotional email as soon as you get the first one. After you kill all those unwanted subscriptions, these six lesser-known Apple Mail features will make you a true pro at managing your email.
Secret features in Apple Mail
If you’re too busy to read our roundup of lesser-known Apple Mail tips, you can watch our quick video:
No. 1: Redirect instead of Forward
Imagine someone sends you an email that needs to be passed along to someone else, but you don’t want to be involved in the conversation anymore.
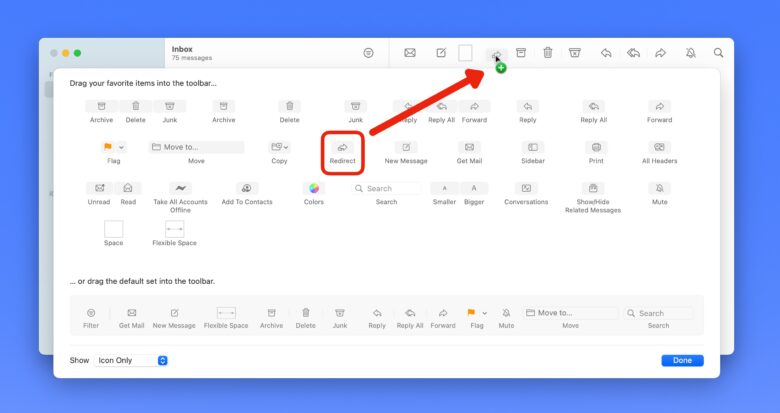
There’s a better way to handle this — Redirect. This will remove you from the conversation from here on out, so you’re no longer at the whim of everyone else in the chain. According to Apple Support, “Only the address of the original sender is shown to the recipient, and the recipient’s reply goes only to the original sender.”
Screenshot: D. Griffin Jones/Cult of Mac
To enable this on the Mac, you need to add it to the Mail toolbar. Right-click (or hold the Control key) on the toolbar and click Customize Toolbar. Click and drag the Redirect button into the toolbar.
Unfortunately, this feature has not made its way to the iPhone or iPad. Maybe we’ll see it in iOS 17 next month at WWDC23 … 🤞
No. 2: Customize the swipe gestures
I rarely delete emails; I’m a serial Archiver. In fact, I’m always alarmed when I set up a new device and find the default swipe-left action tries to Delete instead of Archive. And NetNewsWire, my beloved RSS client, has trained me to use swipe-right as Mark Unread.
Maybe your brain works totally differently and you find holding on to all your old email horrifying. Luckily, we can all have what we want if we customize the swipe actions.
Screenshot: D. Griffin Jones/Cult of Mac
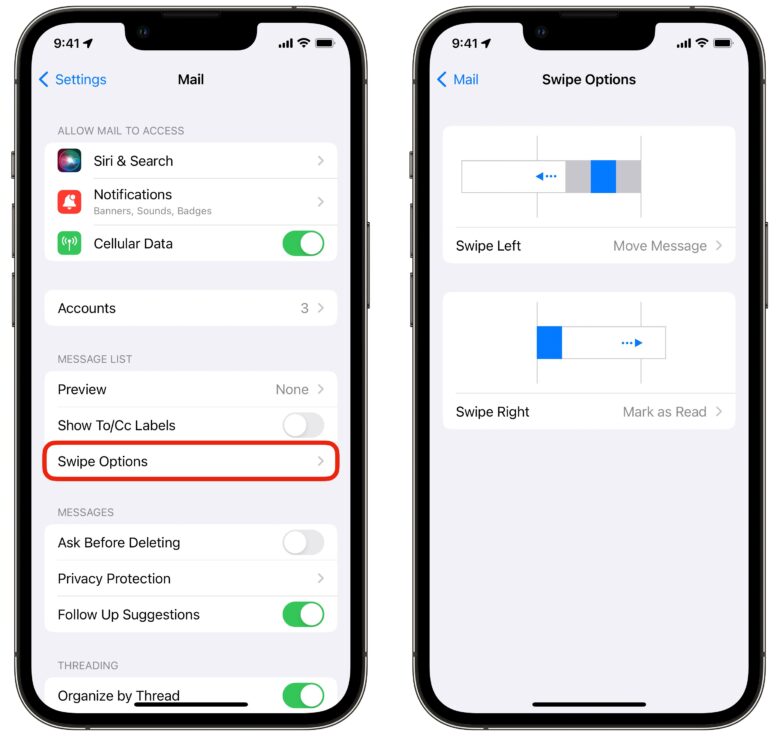
On the iPhone and iPad, go to Settings > Mail > Swipe Options. You can set different actions for Left and Right. I recommend keeping it consistent with your Mac settings so you don’t get confused.
On the Mac, hit ⌘, (the shortcut is actually command comma) or go to Mail > Settings in the menu bar. Click the Viewing tab. Unfortunately, you can’t really customize which swipe action does what. Swipe-right always toggles Read or Unread; swipe-left always discards the message. But you can pick whether discarded messages go to Archive or Trash.
No. 3: Turn on additional mail categories
Screenshot: D. Griffin Jones/Cult of Mac
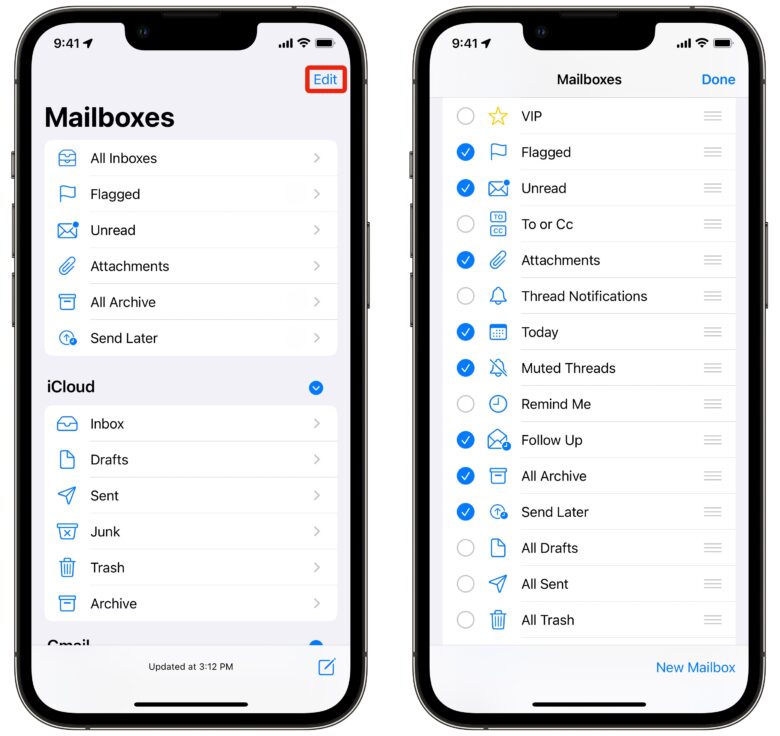
Swipe back on your list of emails and you will see a list of mailboxes with all the usual suspects: Flagged, Unread, Archive, etc. But if you tap Edit in the top right, you can customize this list.
You can turn on smart folders that show your muted threads, email that’s come in today, email with attachments, sent mail you should follow up on, and emails from VIP contacts. I think these are the most useful ones, although there are a few more you can choose from.
No. 4: Compact multi-window mode on the Mac
Screenshot: D. Griffin Jones/Cult of Mac
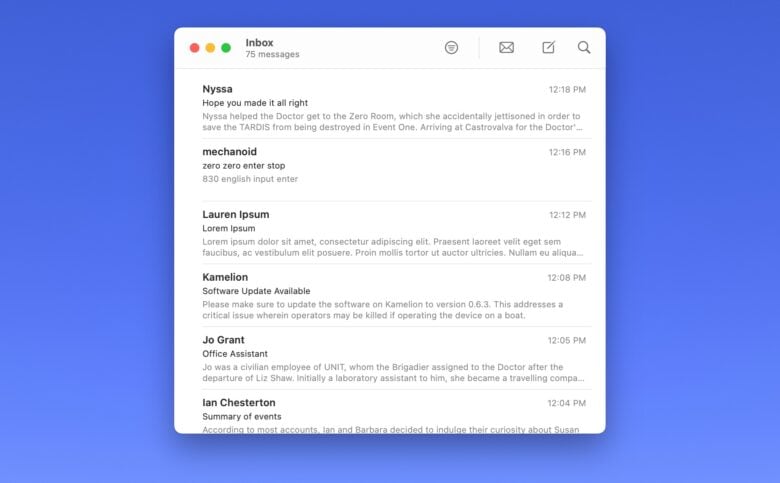
The full three-column layout in Mail can take up a lot of your Mac’s screen space. If you use a 13-inch MacBook Air, you might not want the mailbox list and the email preview on the screen all the time.
To change things up, hover your cursor over the divider between the two columns. Click and drag it so that the preview column disappears. You can do the same thing for the sidebar (or just go to View > Hide Sidebar). Then, you can shrink down the Mail window much smaller than before.
To open an email, double-click it in the list. It’ll open in a new window that you can move around, resize and close completely independently of the message list. You can easily have a bunch of emails side-by-side. To navigate different mailboxes like Sent and Archive, you can use the keyboard shortcuts ⌘1 to ⌘7.
No. 5: See multiple emails at once on iPhone and iPad
Screenshot: D. Griffin Jones/Cult of Mac
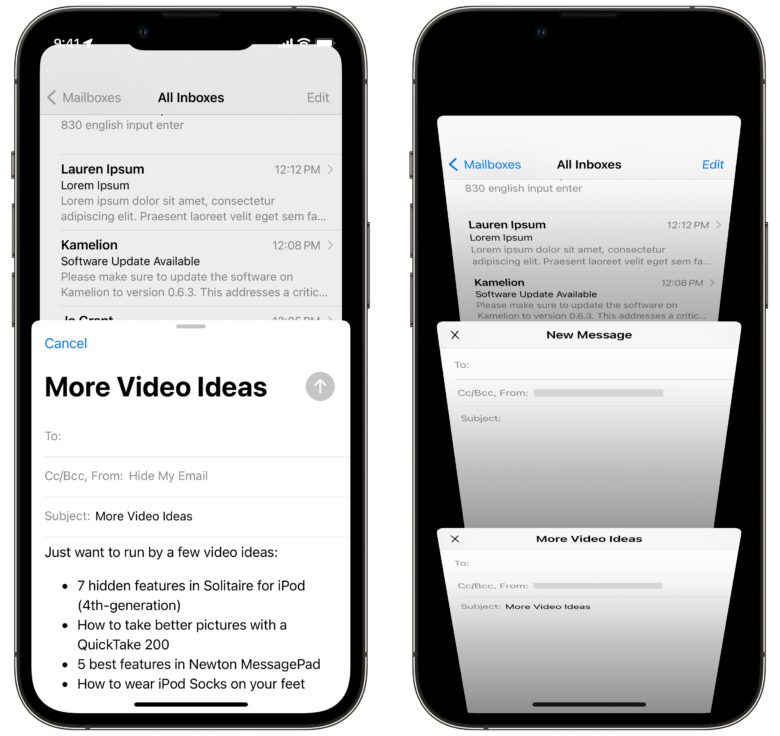
On the iPhone, the New Mail window slides up and takes over the whole screen. But what if you want to go back and look at a different email for reference? What if you need to compose several emails at once? There’s an easy way to view multiple emails at once.
You can swipe down on the pop-up and keep browsing the app. Come back to it at any time by tapping on the minimized title bar.
In fact, you can compose another email at the same time. Tap on the title bar at the bottom to see everything you have open and switch between your drafts.
No. 6: Bigger previews
Screenshot: D. Griffin Jones/Cult of Mac
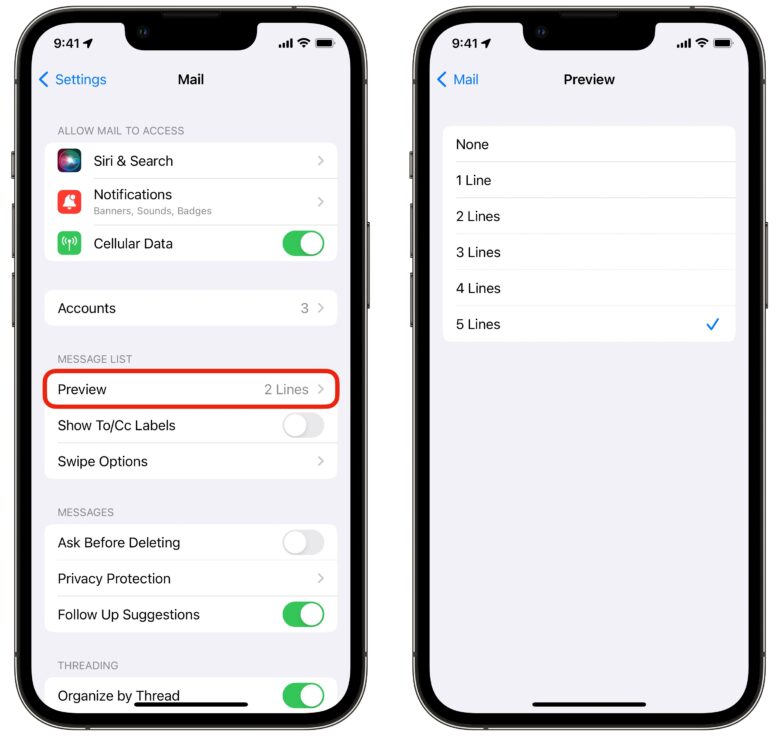
By default, in the message list you see two lines of text to preview the contents of the email. You might want to see more; you might not need email previews at all.
It’s easy to customize exactly how much or how little of a preview you see. On the iPhone and iPad, go to Settings > Mail > Preview and you can set it anywhere from None to 5 Lines. On the Mac, that’s in Mail > Settings > Viewing > List preview.
Some people set it to five lines to be able to see a good chunk of the email’s contents before opening it. Personally, I tried having them off for a while, but didn’t like how dense the list got, so I set it back to two lines.
Get even more Apple Mail tips
Can’t get enough Apple Mail tips? We’ve got loads of other how-tos that explain advanced features like unsending messages and making the most of Apple’s privacy features:
- Every new email trick in iOS 16 that you need to know
- Use Hide My Email to protect your privacy in iOS 15 and macOS Monterey
- Fix the mess caused by Sign in with Apple and Hide My Email
Learn them all and you’ll definitely spend less time dealing with email.
