It’s easy to zoom in on your Mac display and get a closer look at your screen. If the text is just too small to read, or perhaps you’re making some graphics and you need pixel-perfect alignment, a simple tweak to your Mac settings is all you need.
Using your Mac’s Zoom feature, you can hit a keyboard shortcut or use a multitouch gesture to zoom in on your screen. I’ll show you how to use this handy feature. Plus, I’ll cover Hover Text and Display Scaling, two more features that help you embiggen the words on your Mac screen.
How to Zoom in on your Mac screen
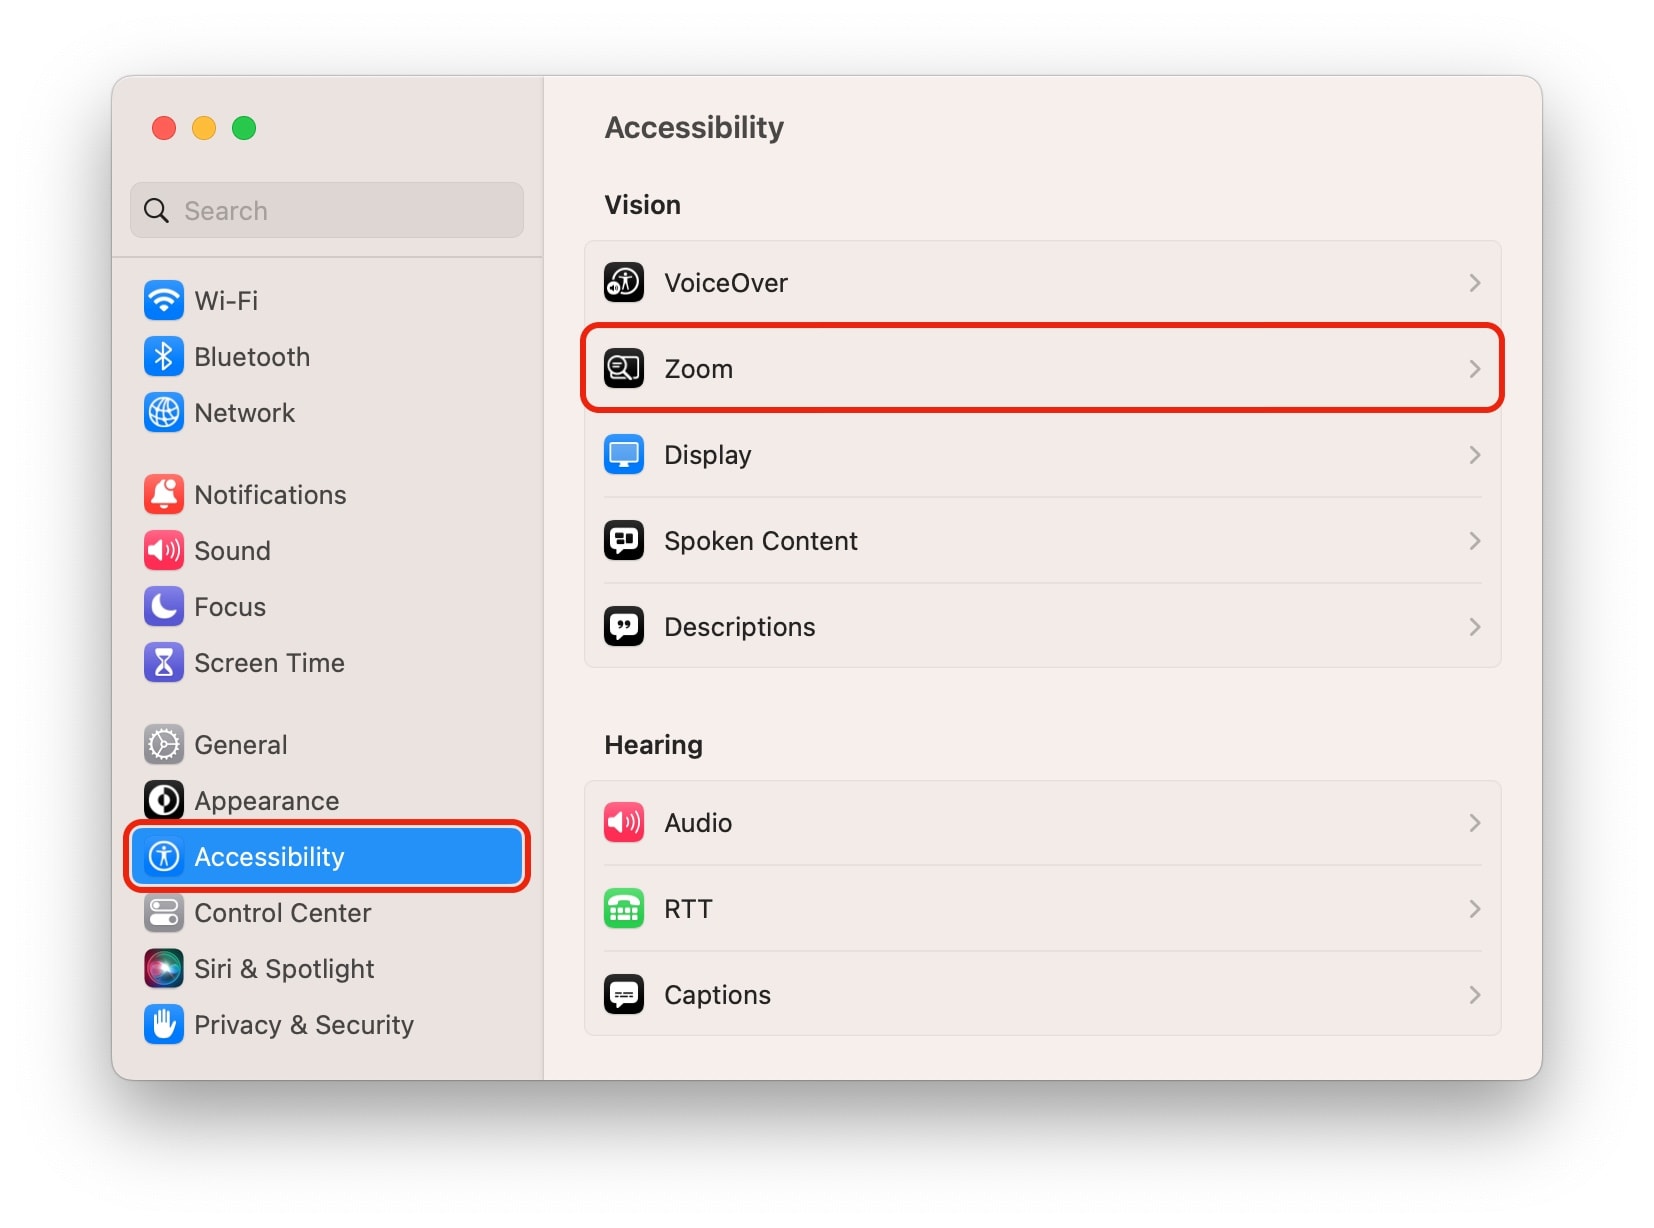
First, check to see if you have this feature enabled already. Open System Settings (it might also be called System Preferences on older versions of macOS) by clicking > System Settings in the menu bar.
Screenshot: D. Griffin Jones/Cult of Mac
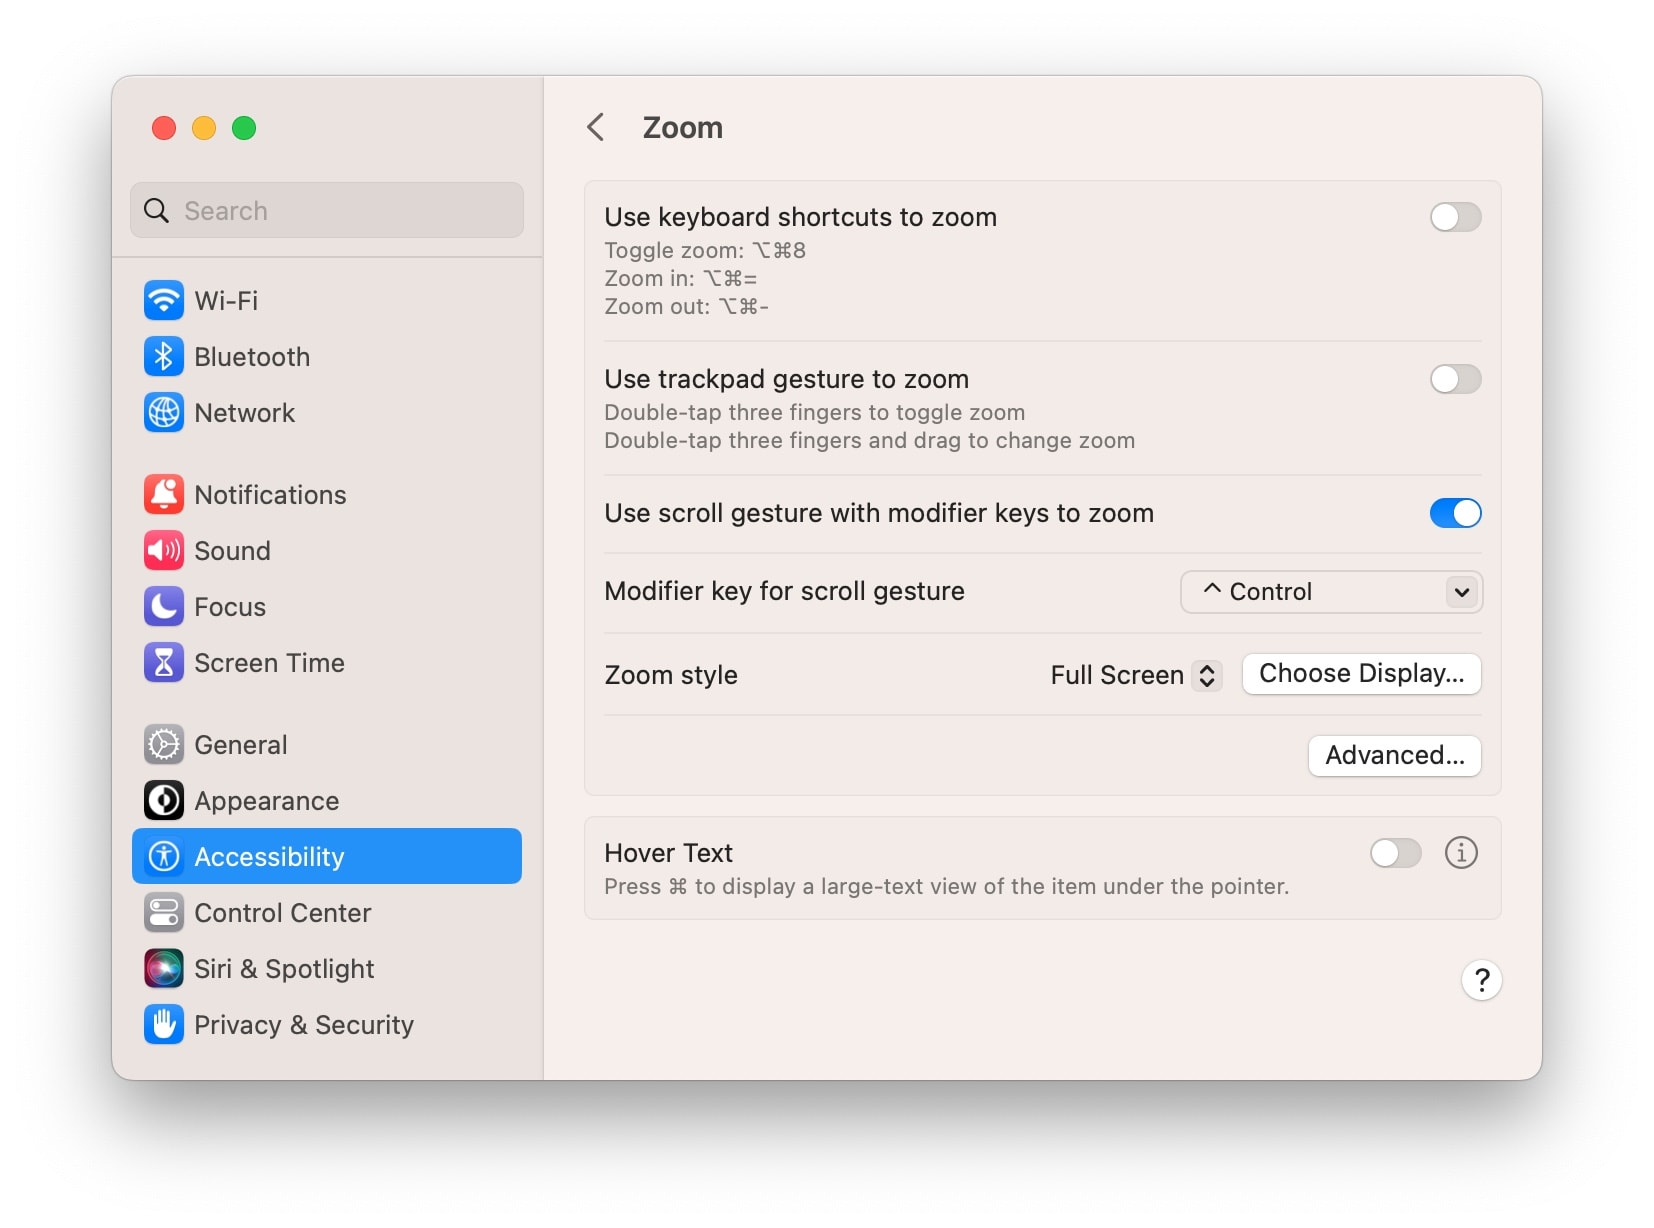
Go to Accessibility > Zoom to find all the options for this feature.
Screenshot: D. Griffin Jones/Cult of Mac
First, you want to enable the feature and choose which ways to activate Zoom. You will find a couple of options. You can activate Zoom with a keyboard shortcut and/or a gesture. Check any or all of these to enable them.
But note:
- The keyboard shortcut is a little obtuse (Option-Command-8). However, if you have trouble performing the gestures, you might find it helpful.
- Another option enables double-tapping with two fingers on the trackpad to toggle Zoom.
- I have the scroll gesture enabled — you hold down the Control key and scroll up or down on your mouse/trackpad to zoom in or out.
3 types of Zoom for your Mac display
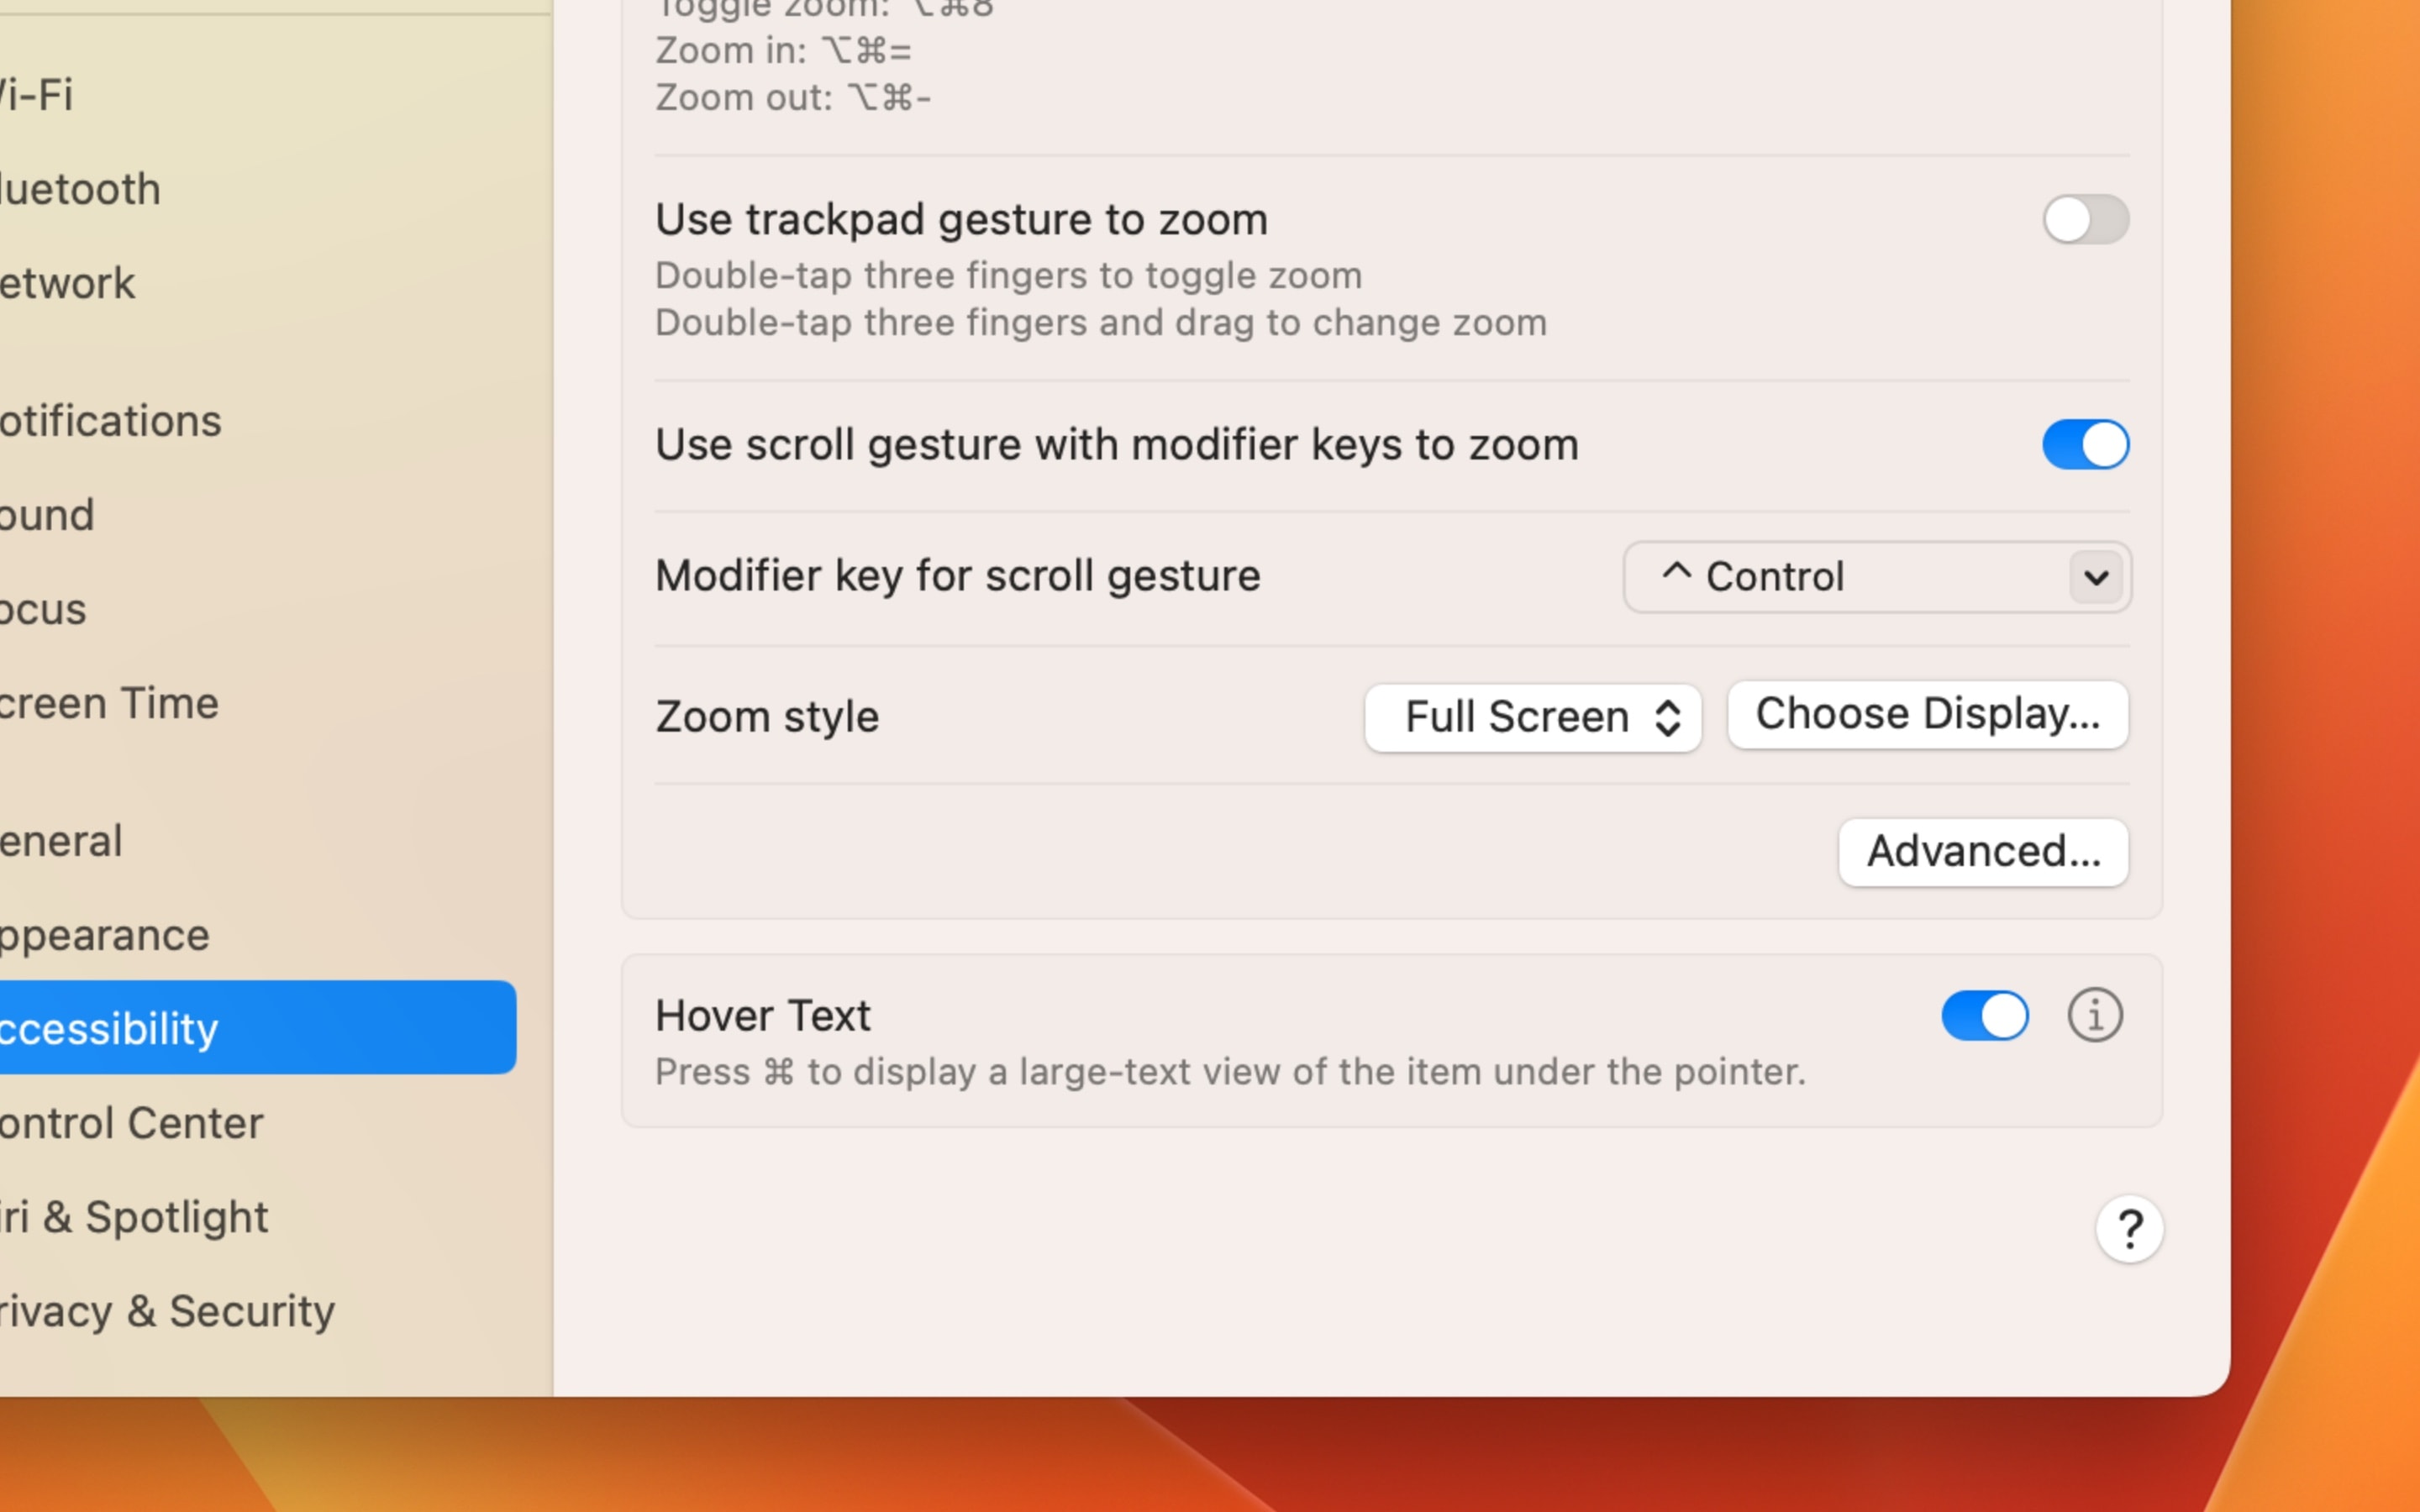
Select Zoom style to pick how you want this feature to work. You can choose between Full Screen, Split Screen and Picture-in-Picture. Each has its advantages, depending on how you work.
Screenshot: D. Griffin Jones/Cult of Mac
As you might imagine, Full Screen makes your entire Mac display bigger. It’s less visually confusing, but it’s easy to feel lost if you zoom in too far. As a graphic designer, I use this setting the most.
Screenshot: D. Griffin Jones/Cult of Mac
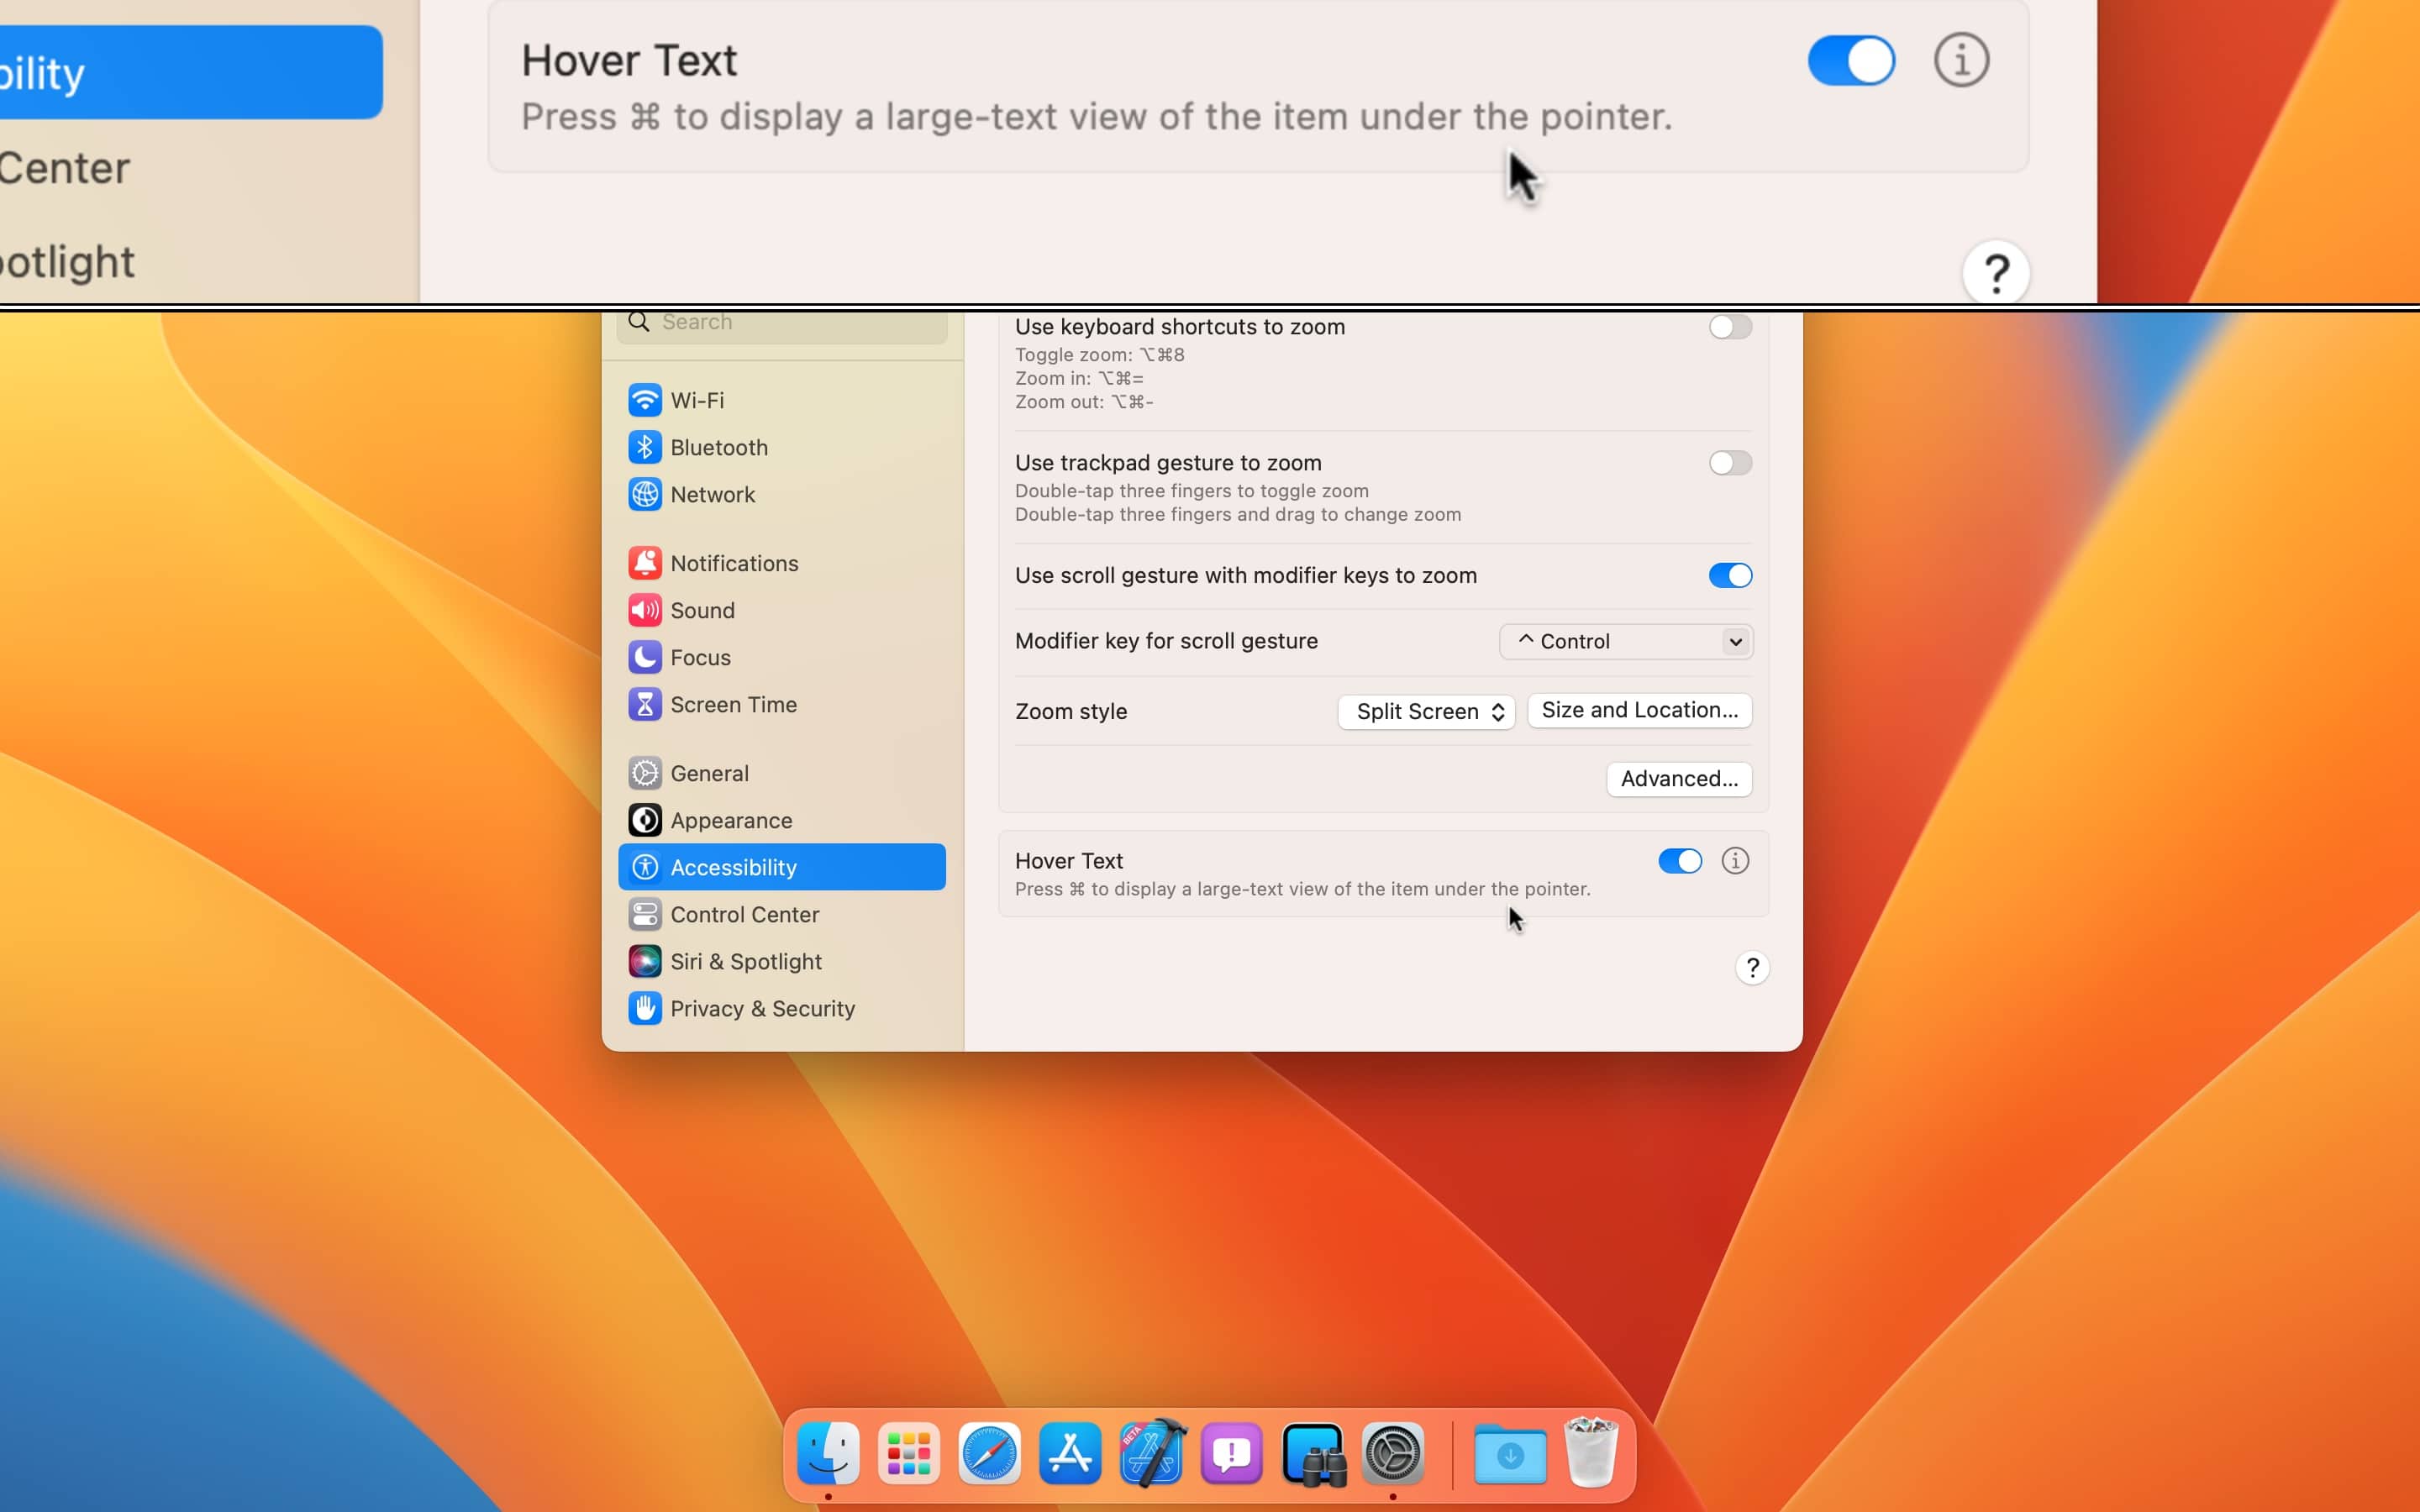
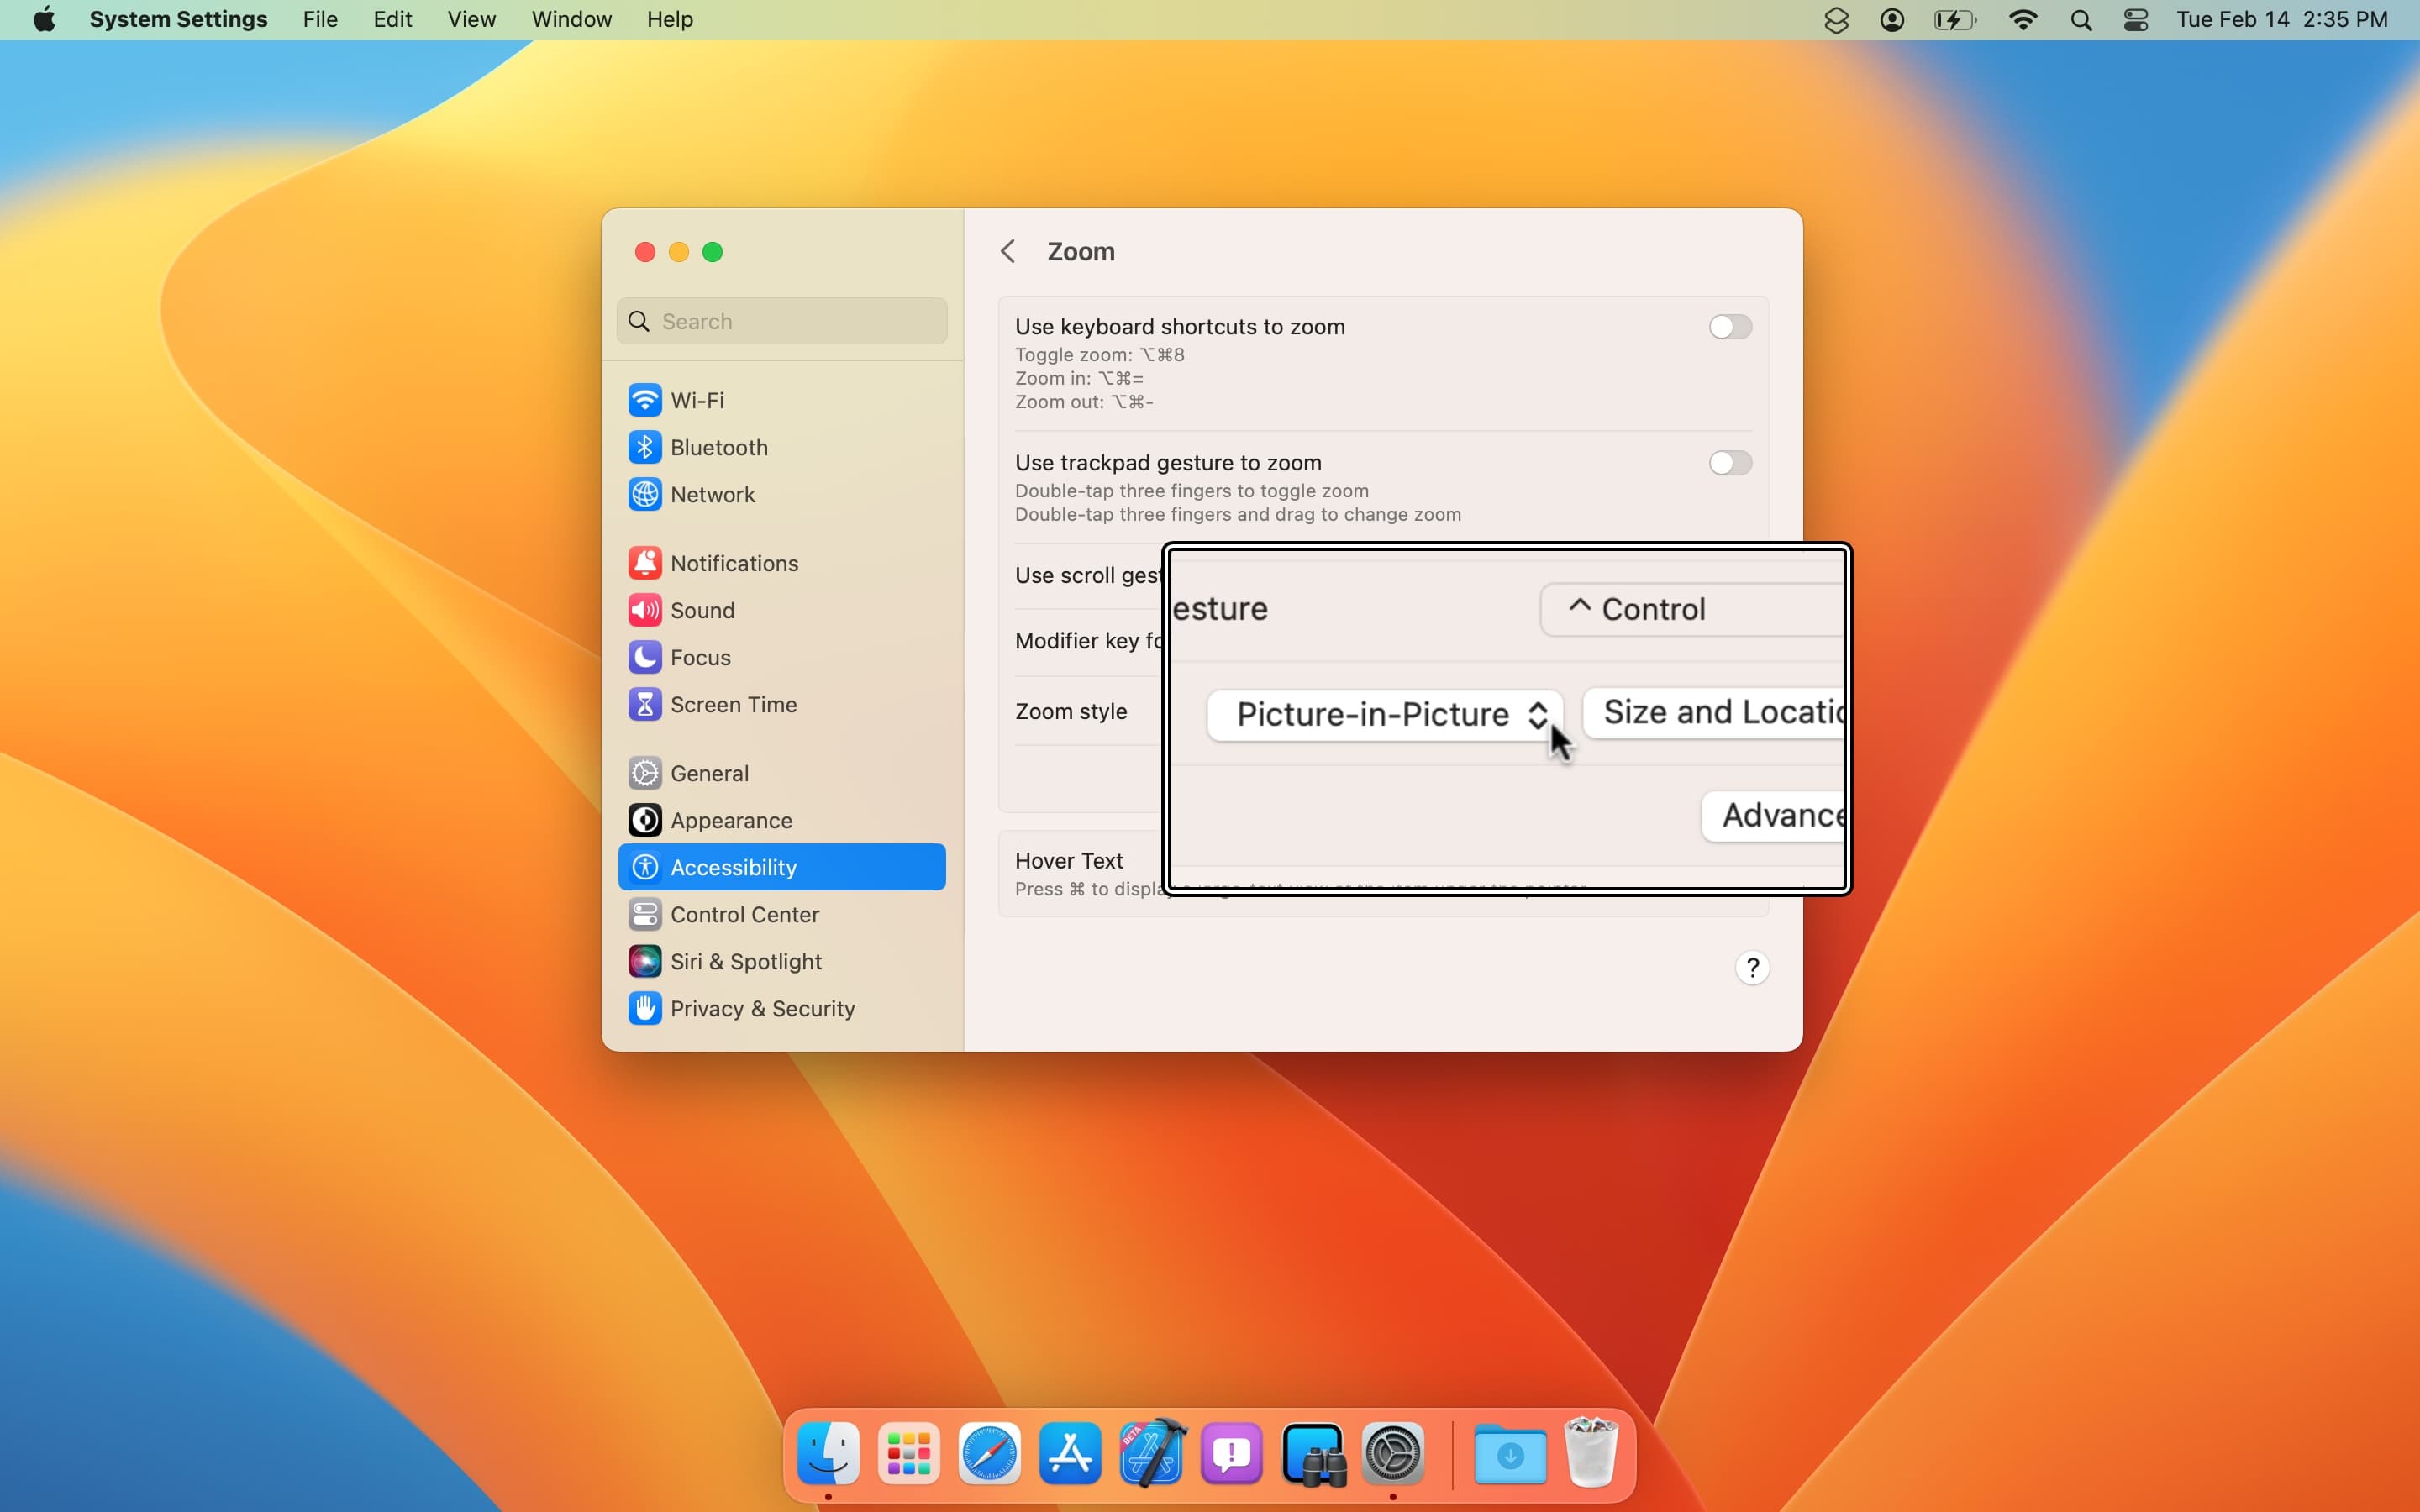
Split Screen will zoom in on the top quarter of the display and leave the lower three-quarters zoomed out. It’s a bit like having bifocal glasses. I find this setting to be finicky and confusing with the default settings, but read on and I’ll show you how to customize it.
Screenshot: D. Griffin Jones/Cult of Mac
Picture-in-Picture creates a small floating window that follows around your Mac’s cursor, acting like a handheld magnifying glass. This setting is perfect for reading a snippet of text without taking over your whole screen.
Screenshot: D. Griffin Jones/Cult of Mac
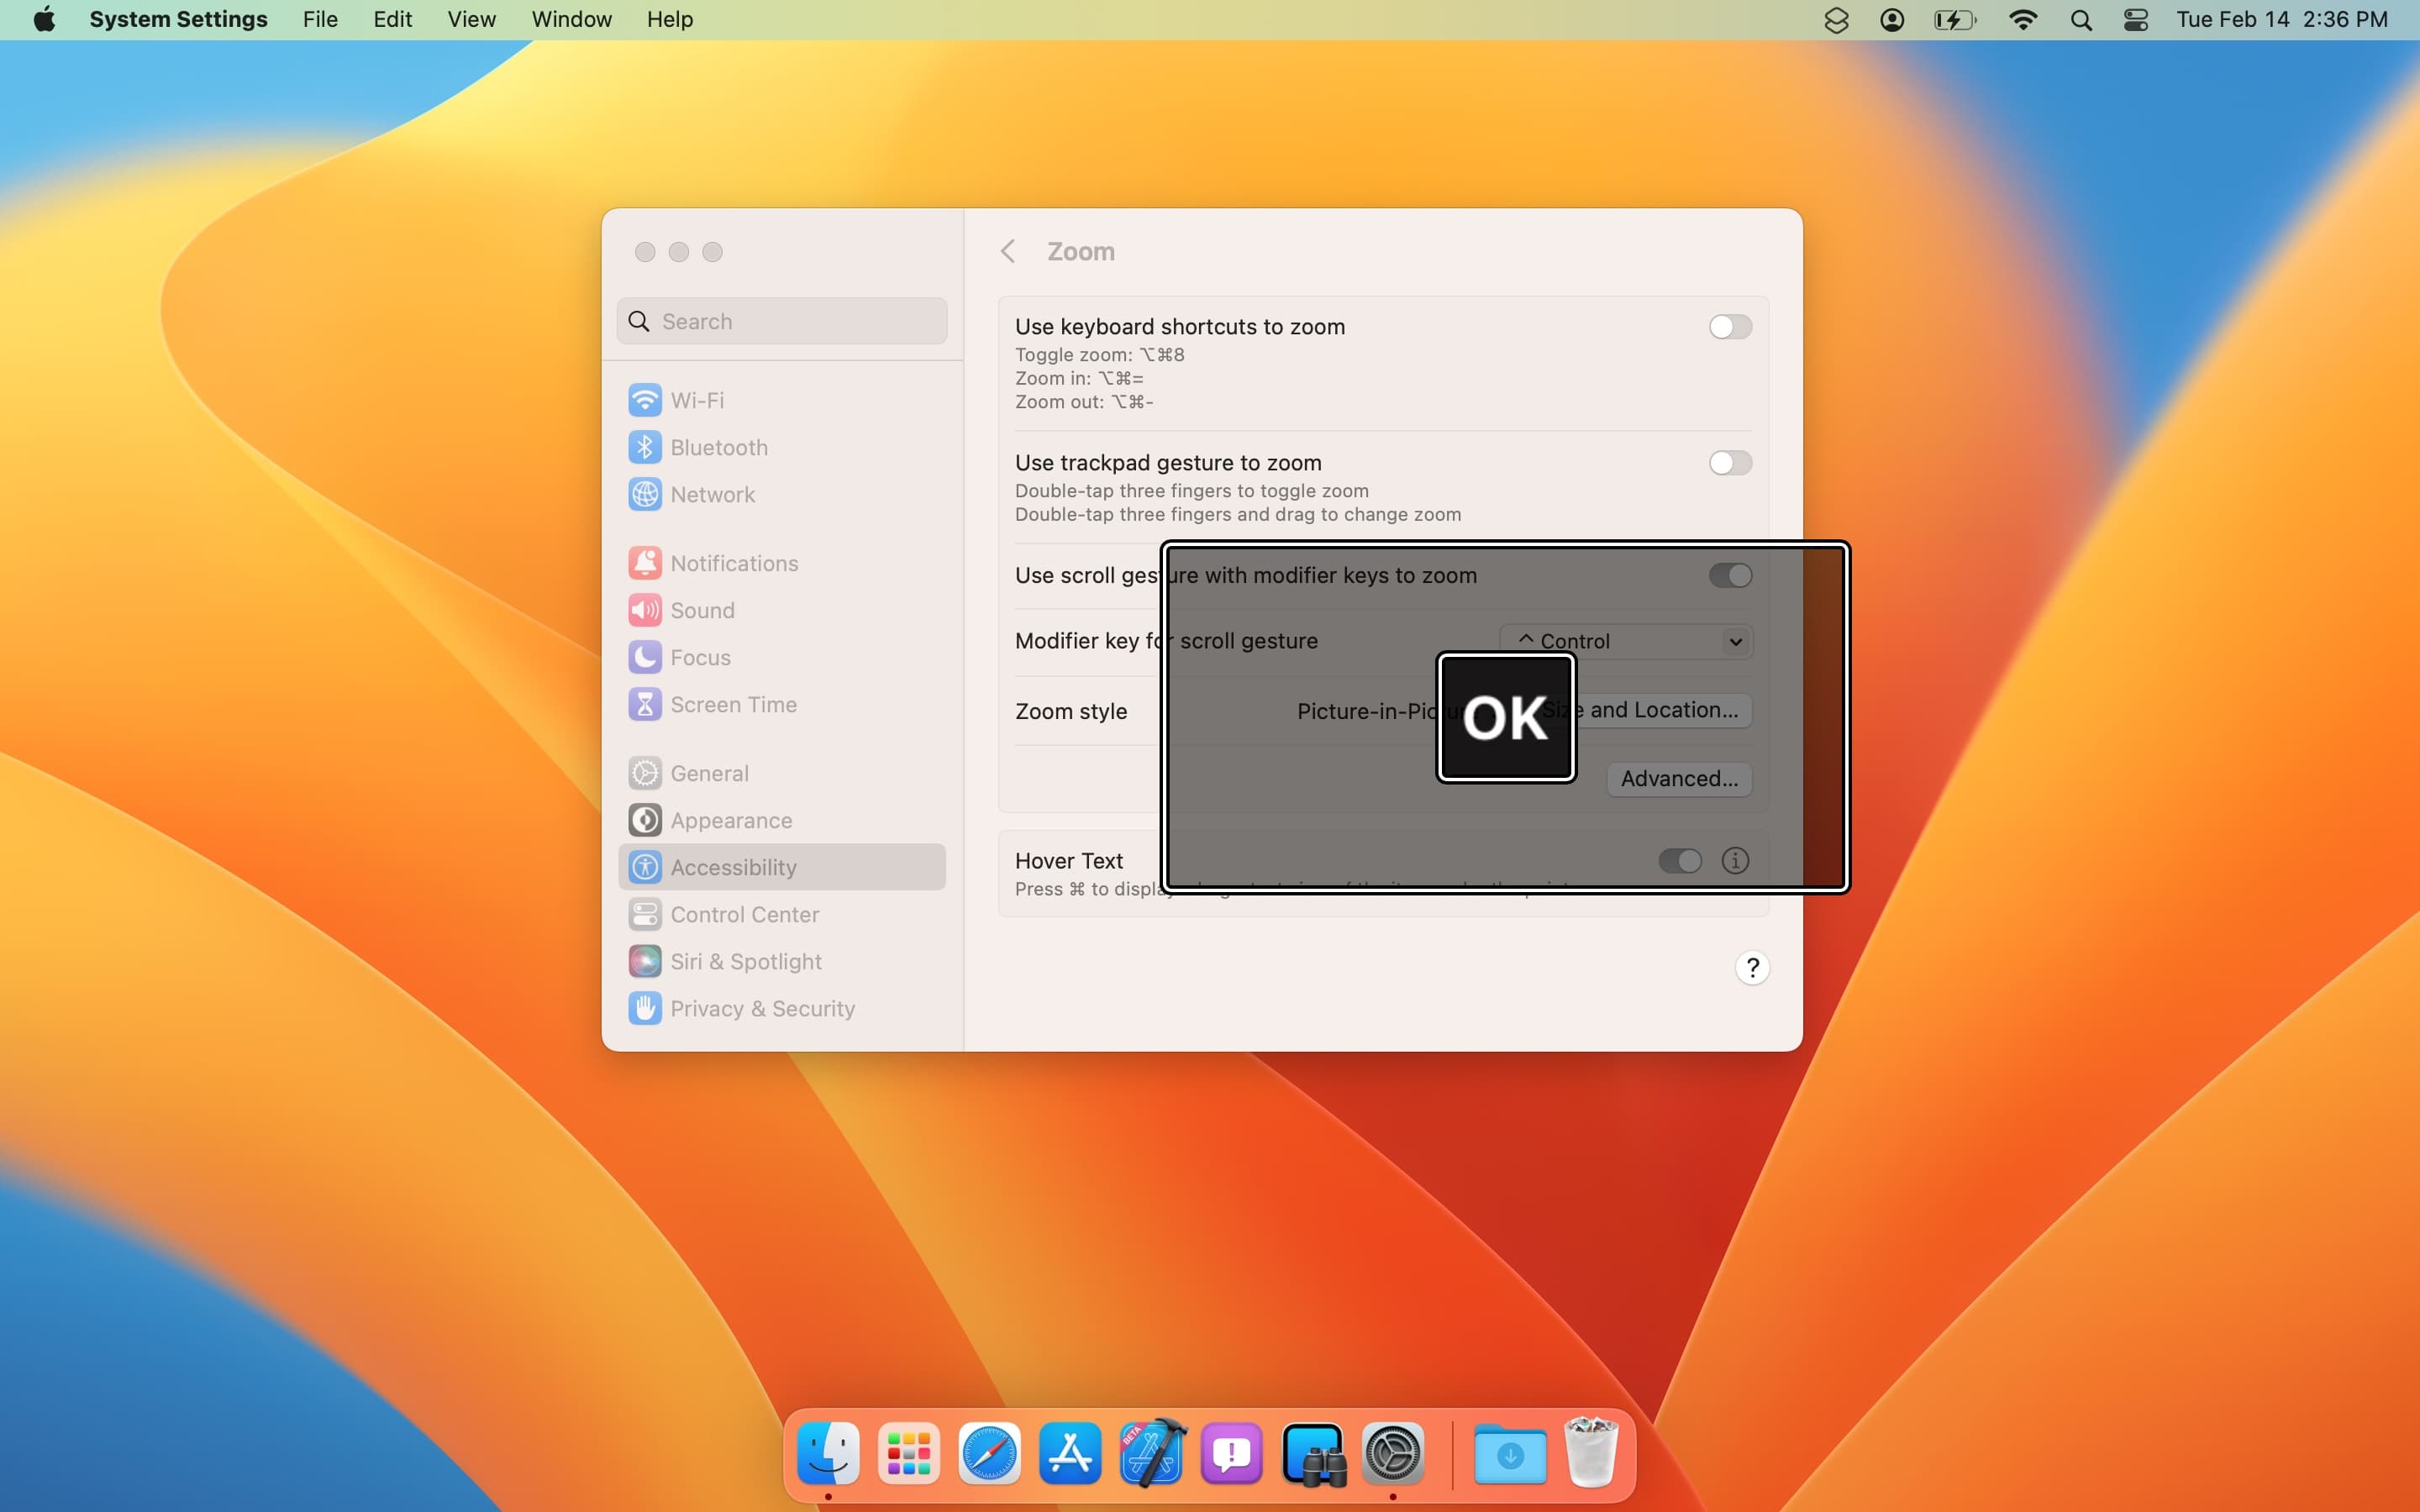
You can click Size and Location… to adjust the size of the Split Screen sections or the Picture-in-Picture window (if you use those settings). Then you’ll see a preview of the magnifier. In this special mode, you can drag the edges to make it bigger or smaller and move it around, just like a normal window. Click OK when you’re done.
Loads of settings to fine-tune how Zoom works on Mac
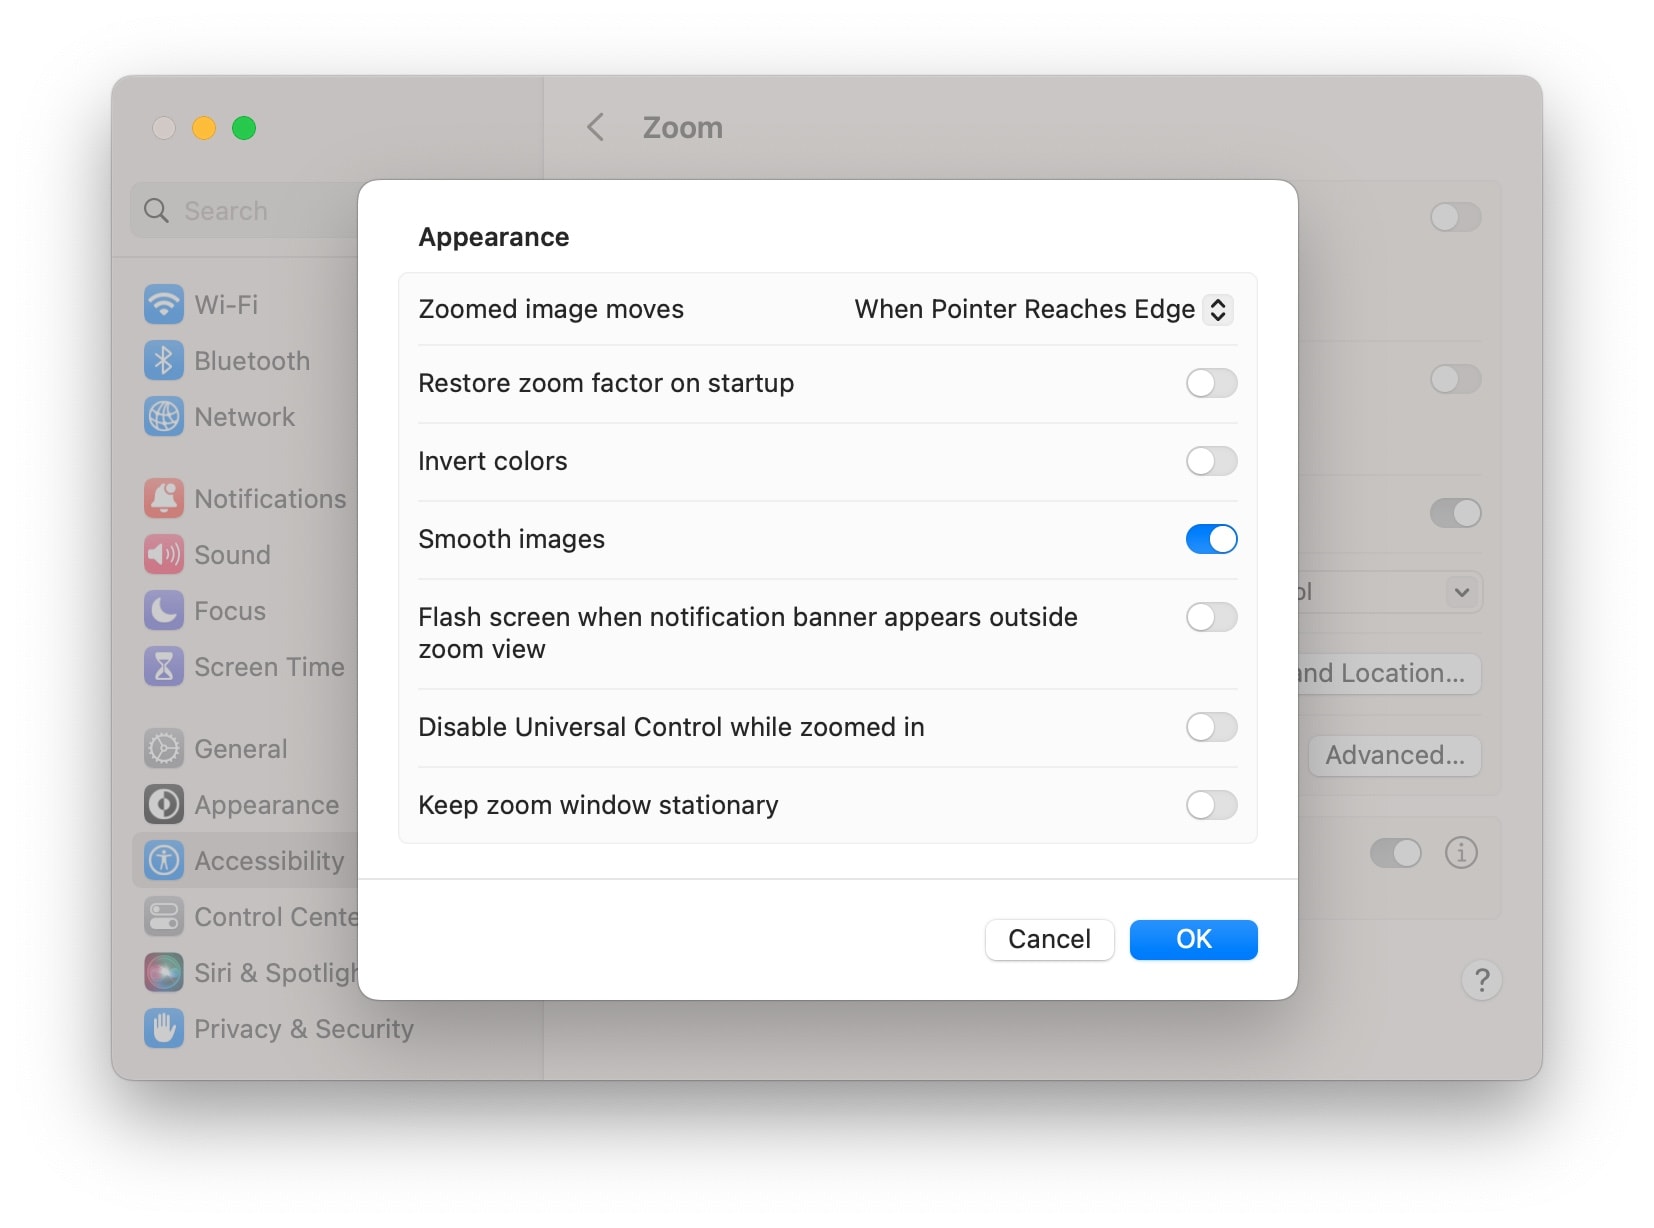
Click Advanced… to check out some of the finer settings of how you want Zoom to work.
Screenshot: D. Griffin Jones/Cult of Mac
You can change whether the zoomed-in image follows the cursor exactly or whether you need to move the cursor to the edge to move the screen. I keep this setting set to Continuously with pointer.
Smooth images will make text look natural and easier to read. Personally, I only use Zoom for making pixel-perfect graphic designs, not for reading, so I leave this disabled.
Flash screen will let you know if you receive a notification (like a text or an email) when you’re zoomed in, in case you can’t see the upper right corner of your Mac’s screen. Enable this if you spend a lot of time in zoomed-in mode.
Scroll down to the Controls section and you can enable some additional keyboard shortcuts to temporarily show the magnifier or change some settings on the fly.
The Follow Focus section offers settings regarding keyboard input. If you have the display zoomed in while you’re on a website filling out a form, for example, and you hit Tab to move the keyboard to the next field, the keyboard cursor might move off the screen where you can’t see it. Enable Follow keyboard focus so that the keyboard input is always on-screen.
It might be confusing if you’re doing one thing and suddenly the screen bumps over to a different place without warning — if you find this disorienting, you can turn down the Movement Speed.
Hover Text might be more helpful
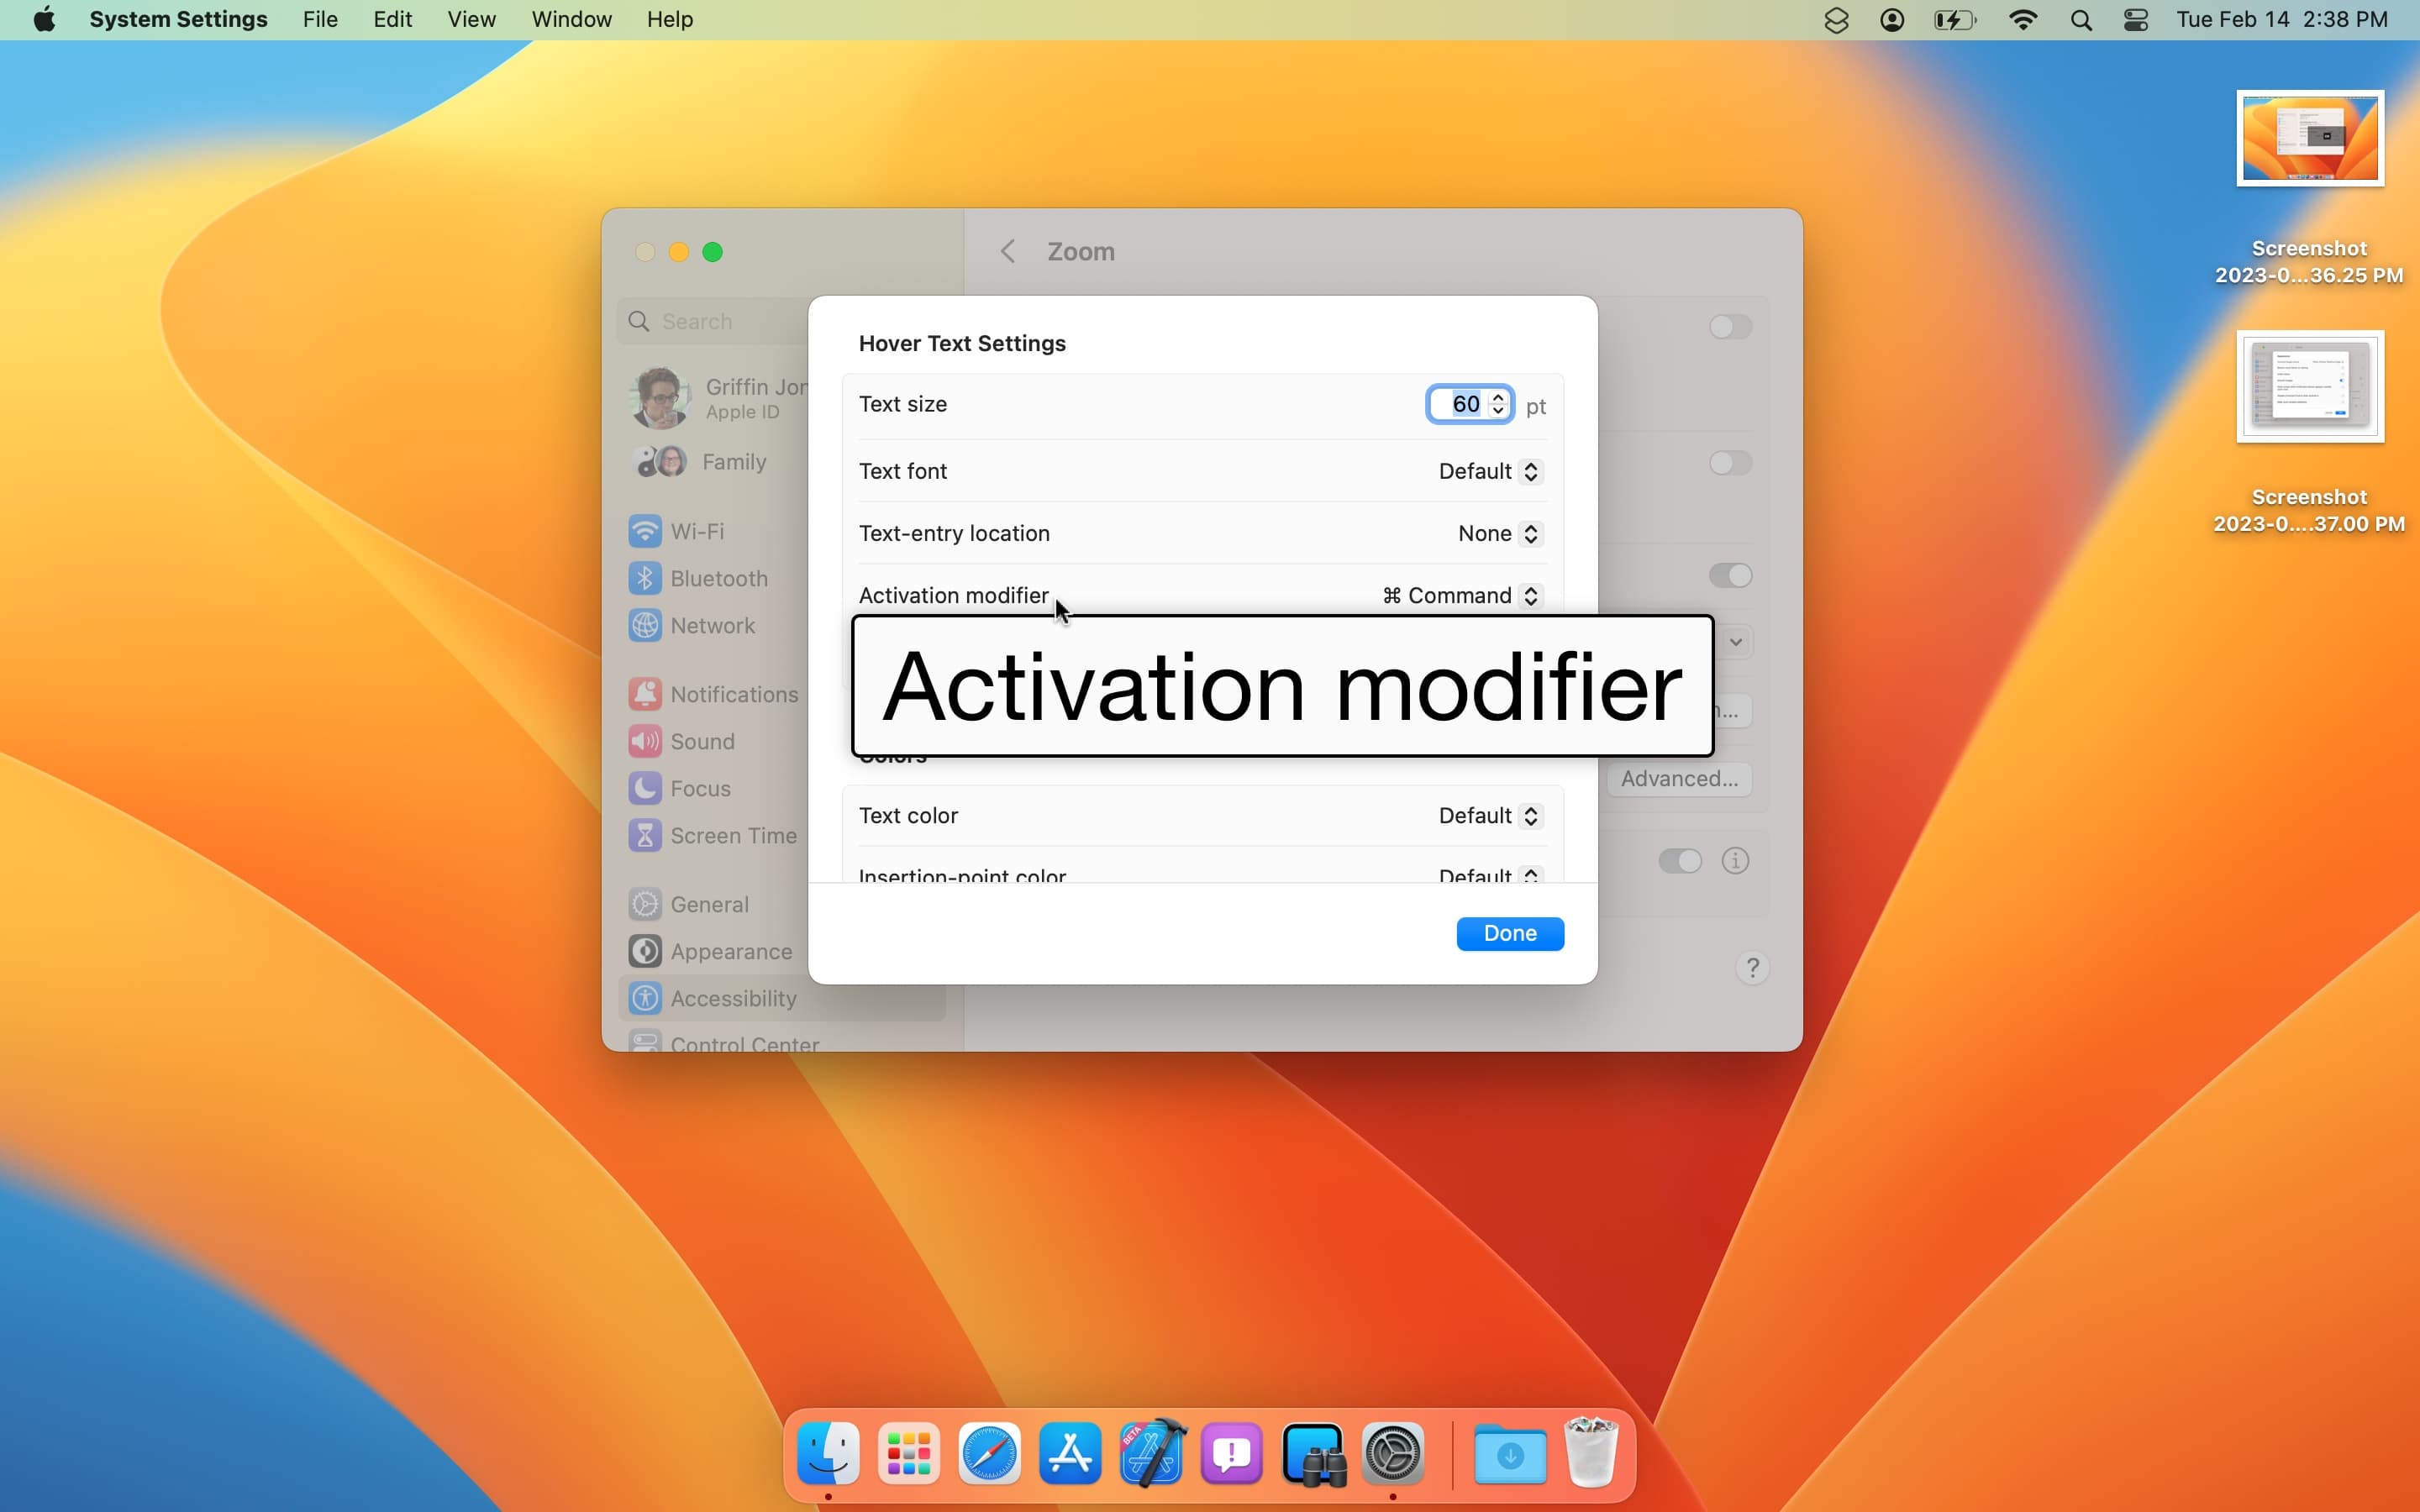
If you only ever use this feature for reading, you might find Hover Text more helpful. With Hover Text, you simply hold down the Command key (⌘) to see a giant preview of any text or controls on the screen.
Screenshot: D. Griffin Jones/Cult of Mac
Hover Text works great. It will instantly show you a giant, magnified version of any text on the screen. If you’re using an app and one of the buttons isn’t labeled, Hover Text will show you the name of the button. If you use Hover Text over a checkbox, it’ll show you whether it’s enabled or not. And, if you use it over a picker, it’ll show you the label (like “Country”) and your selection (like “United States”) at the same time. Apple really thought this feature through.
Click ⓘ to customize how big the pop-up text is, the default font, the key you hold down to show it and more.
Zoom in everything on your Mac display
The Zoom and Hover Text features are handy, but maybe you think they’re too complicated and fiddly for what you want. Maybe you just want everything on the screen to be 25% bigger or something like that.
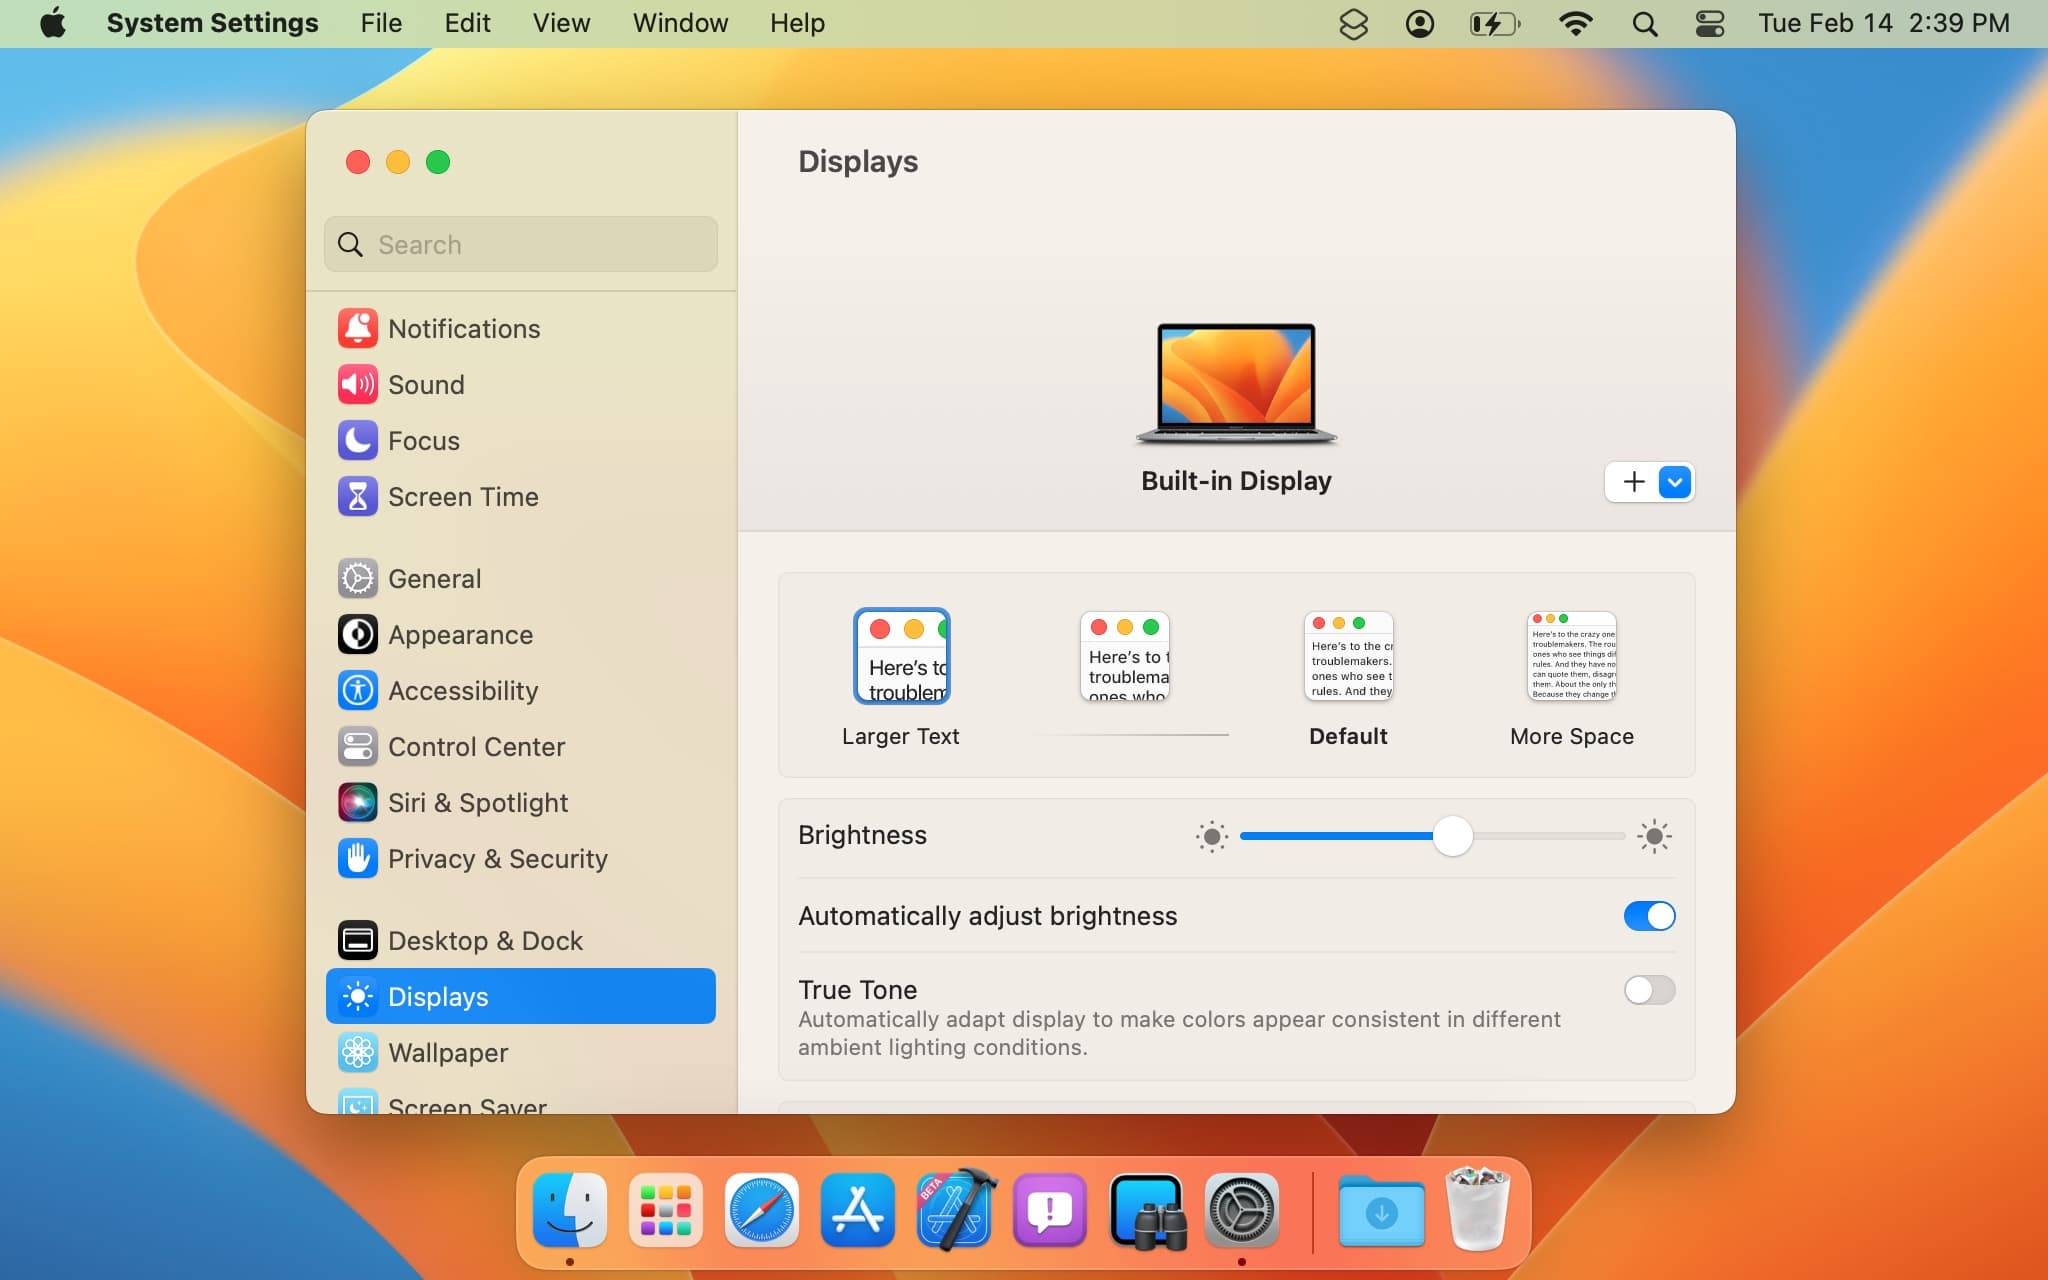
Screenshot: D. Griffin Jones/Cult of Mac
That’s easy to accomplish, too. Just go back to System Settings > Displays. There, you should see an array of about four or five options: Larger Text, Default and More Space. Pick one of the Larger Text options to scale up your entire screen.
This is a slightly more permanent solution; it’ll stay set until you go back here and change it again.


