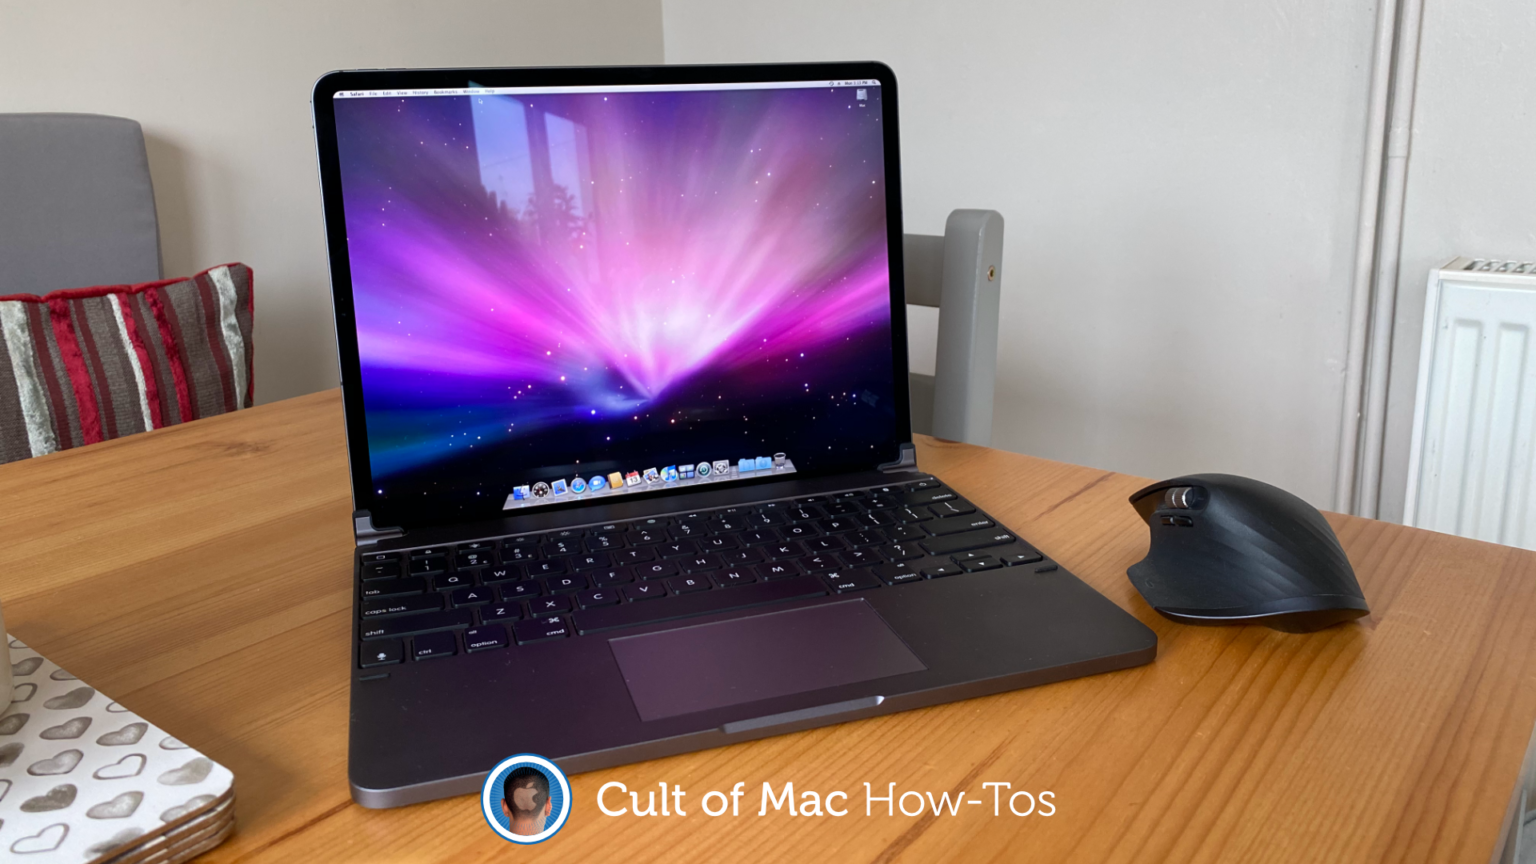
It’s highly unlikely Apple will ever give us an iPad that runs macOS — and that’s OK. Because with a few tricks (that do not require a jailbreak), you can easily install Mac OS X on your iPad all by yourself.
The process won’t void your warranty or interfere with iPadOS in anyway. All you need is a copy of Mac OS X, an app that lets you run virtual machines, and plenty of storage space.
Check out our step-by-step guide to learn more.
There was a time when many iPad users longed for a tablet that ran macOS — a full desktop operating system. But over the years, as iPadOS became more capable, the desire for this faded.
iPad now does almost everything most tablet users could ever want it to do. It runs powerful apps. It boasts a real file browser. And it can read flash drives and external hard disks. You can even be control an iPad with a mouse.
Nevertheless, there’s still something incredibly cool about the concept of running macOS on an iPad. If you’ve always wondered what it might be like, now is the time to try it out for yourself.
How to run Mac OS X on an iPhone or iPad
Using an app called UTM, it’s possible to run Mac OS X Leopard — and earlier versions of Apple’s operating system — in a virtual machine. It’s fairly simple to set up and it’s perfectly safe.
The process has no impact on iOS or iPadOS, so there’s no need to worry about breaking your device. And it uses software, albeit unauthorized by Apple, that you can easily install without a jailbreak.
Interested? Here’s how to get started.
What you need
Before you dive into the installation guide, you might want to read through some of the caveats we outlined at the end. There are also some things you will need to prepare in advance:
- A copy of Mac OS X 10.5 Leopard (or earlier): We can’t tell you how to obtain this, but a simple Google search will. You will need an .ISO file that should be saved directly to your iPhone or iPad. More recent versions of Mac OS X are not compatible.
- Plenty of free storage: That Mac OS X image is going to take up around 8GB of storage space. You also will need around 15GB for your virtual machine’s hard disk. Ensure you have plenty of free storage available on your device before you begin.
- Plenty of free time: Although running Mac OS X on an iOS device isn’t complicated, it is lengthy. The installation process alone takes around two hours.
- AltStore: To install UTM without a jailbreak, we will use AltStore, the self-described “home for apps that push the boundaries of iOS.” Follow our guide on how to install AltStore if you don’t already have it running on your iPhone or iPad.
- UTM: Finally, you will need to download the UTM app package (free) to your device from GitHub.
With all these things ready to go, we can begin.
Installing UTM
The first step in the process is to install UTM:
- Open the AltStore app.
- Tap the My Apps tab, then tap the + button.
- Select the UTM app package and wait for it to install. You will need to have AltStore Server running on your Mac or PC.

Screenshot: Cult of Mac
Creating a virtual machine
That was easy, wasn’t it? Now, it’s time for the exciting bit — creating your virtual machine and running Mac OS X. There’s quite a bit you need to do here, but it’s all relatively simple:
- Open the UTM app.
- Tap the + button in the top-right corner to begin creating your virtual machine.
- Give your machine a name.
- Under the System section, change the architecture to PowerPC and the system to Mac99 based PowerMAC.
- Give your machine some memory. It will have 512MB by default, but you can increase this if you wish. Note, however, that if you give the machine too much memory, iOS or iPadOS will kill the UTM app. It is advised that you don’t allocate more than a quarter of your device’s total RAM.
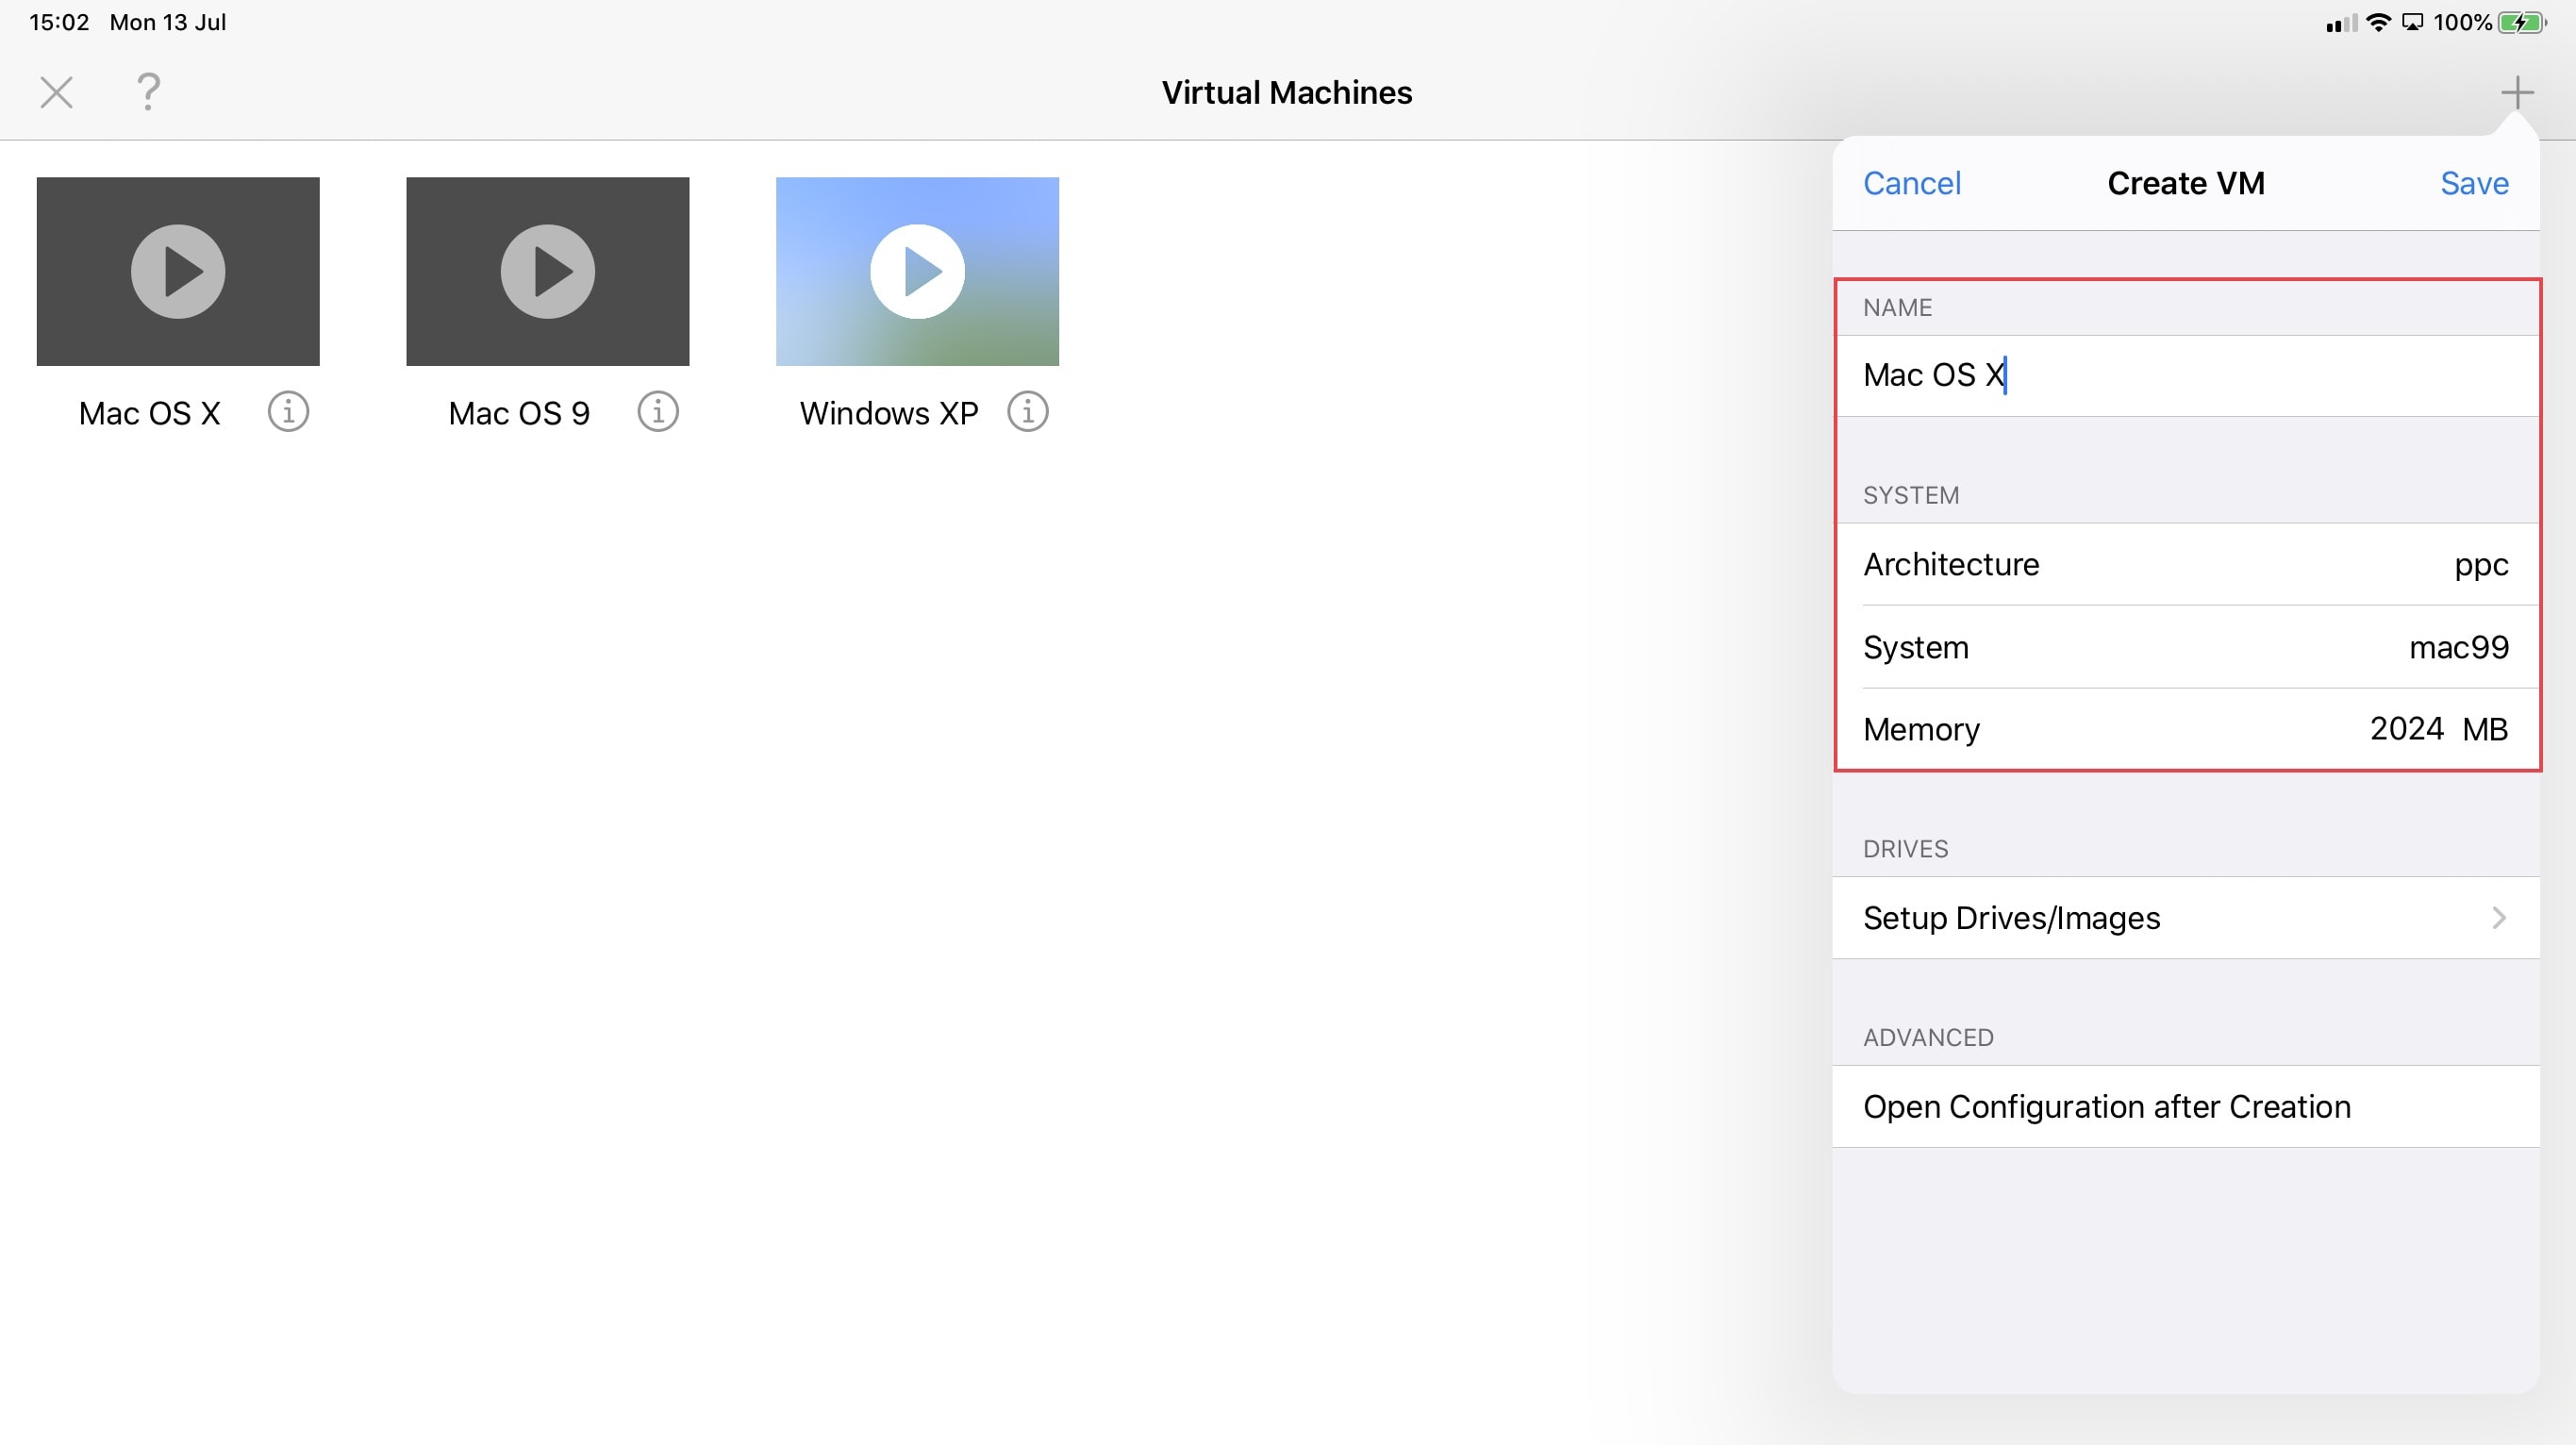
- Under the Drives section, tap Setup Drives/Images.
- Here’s where we’ll give the machine a virtual hard drive and the Mac OS X disk image. Tap the + button.
- Tap Path, then tap the + button again. Then tap Import, and locate and select the Mac OS X .ISO file you downloaded earlier. Tap the disk image, then change Image Type to CD/DVD Image. Then tap Back.
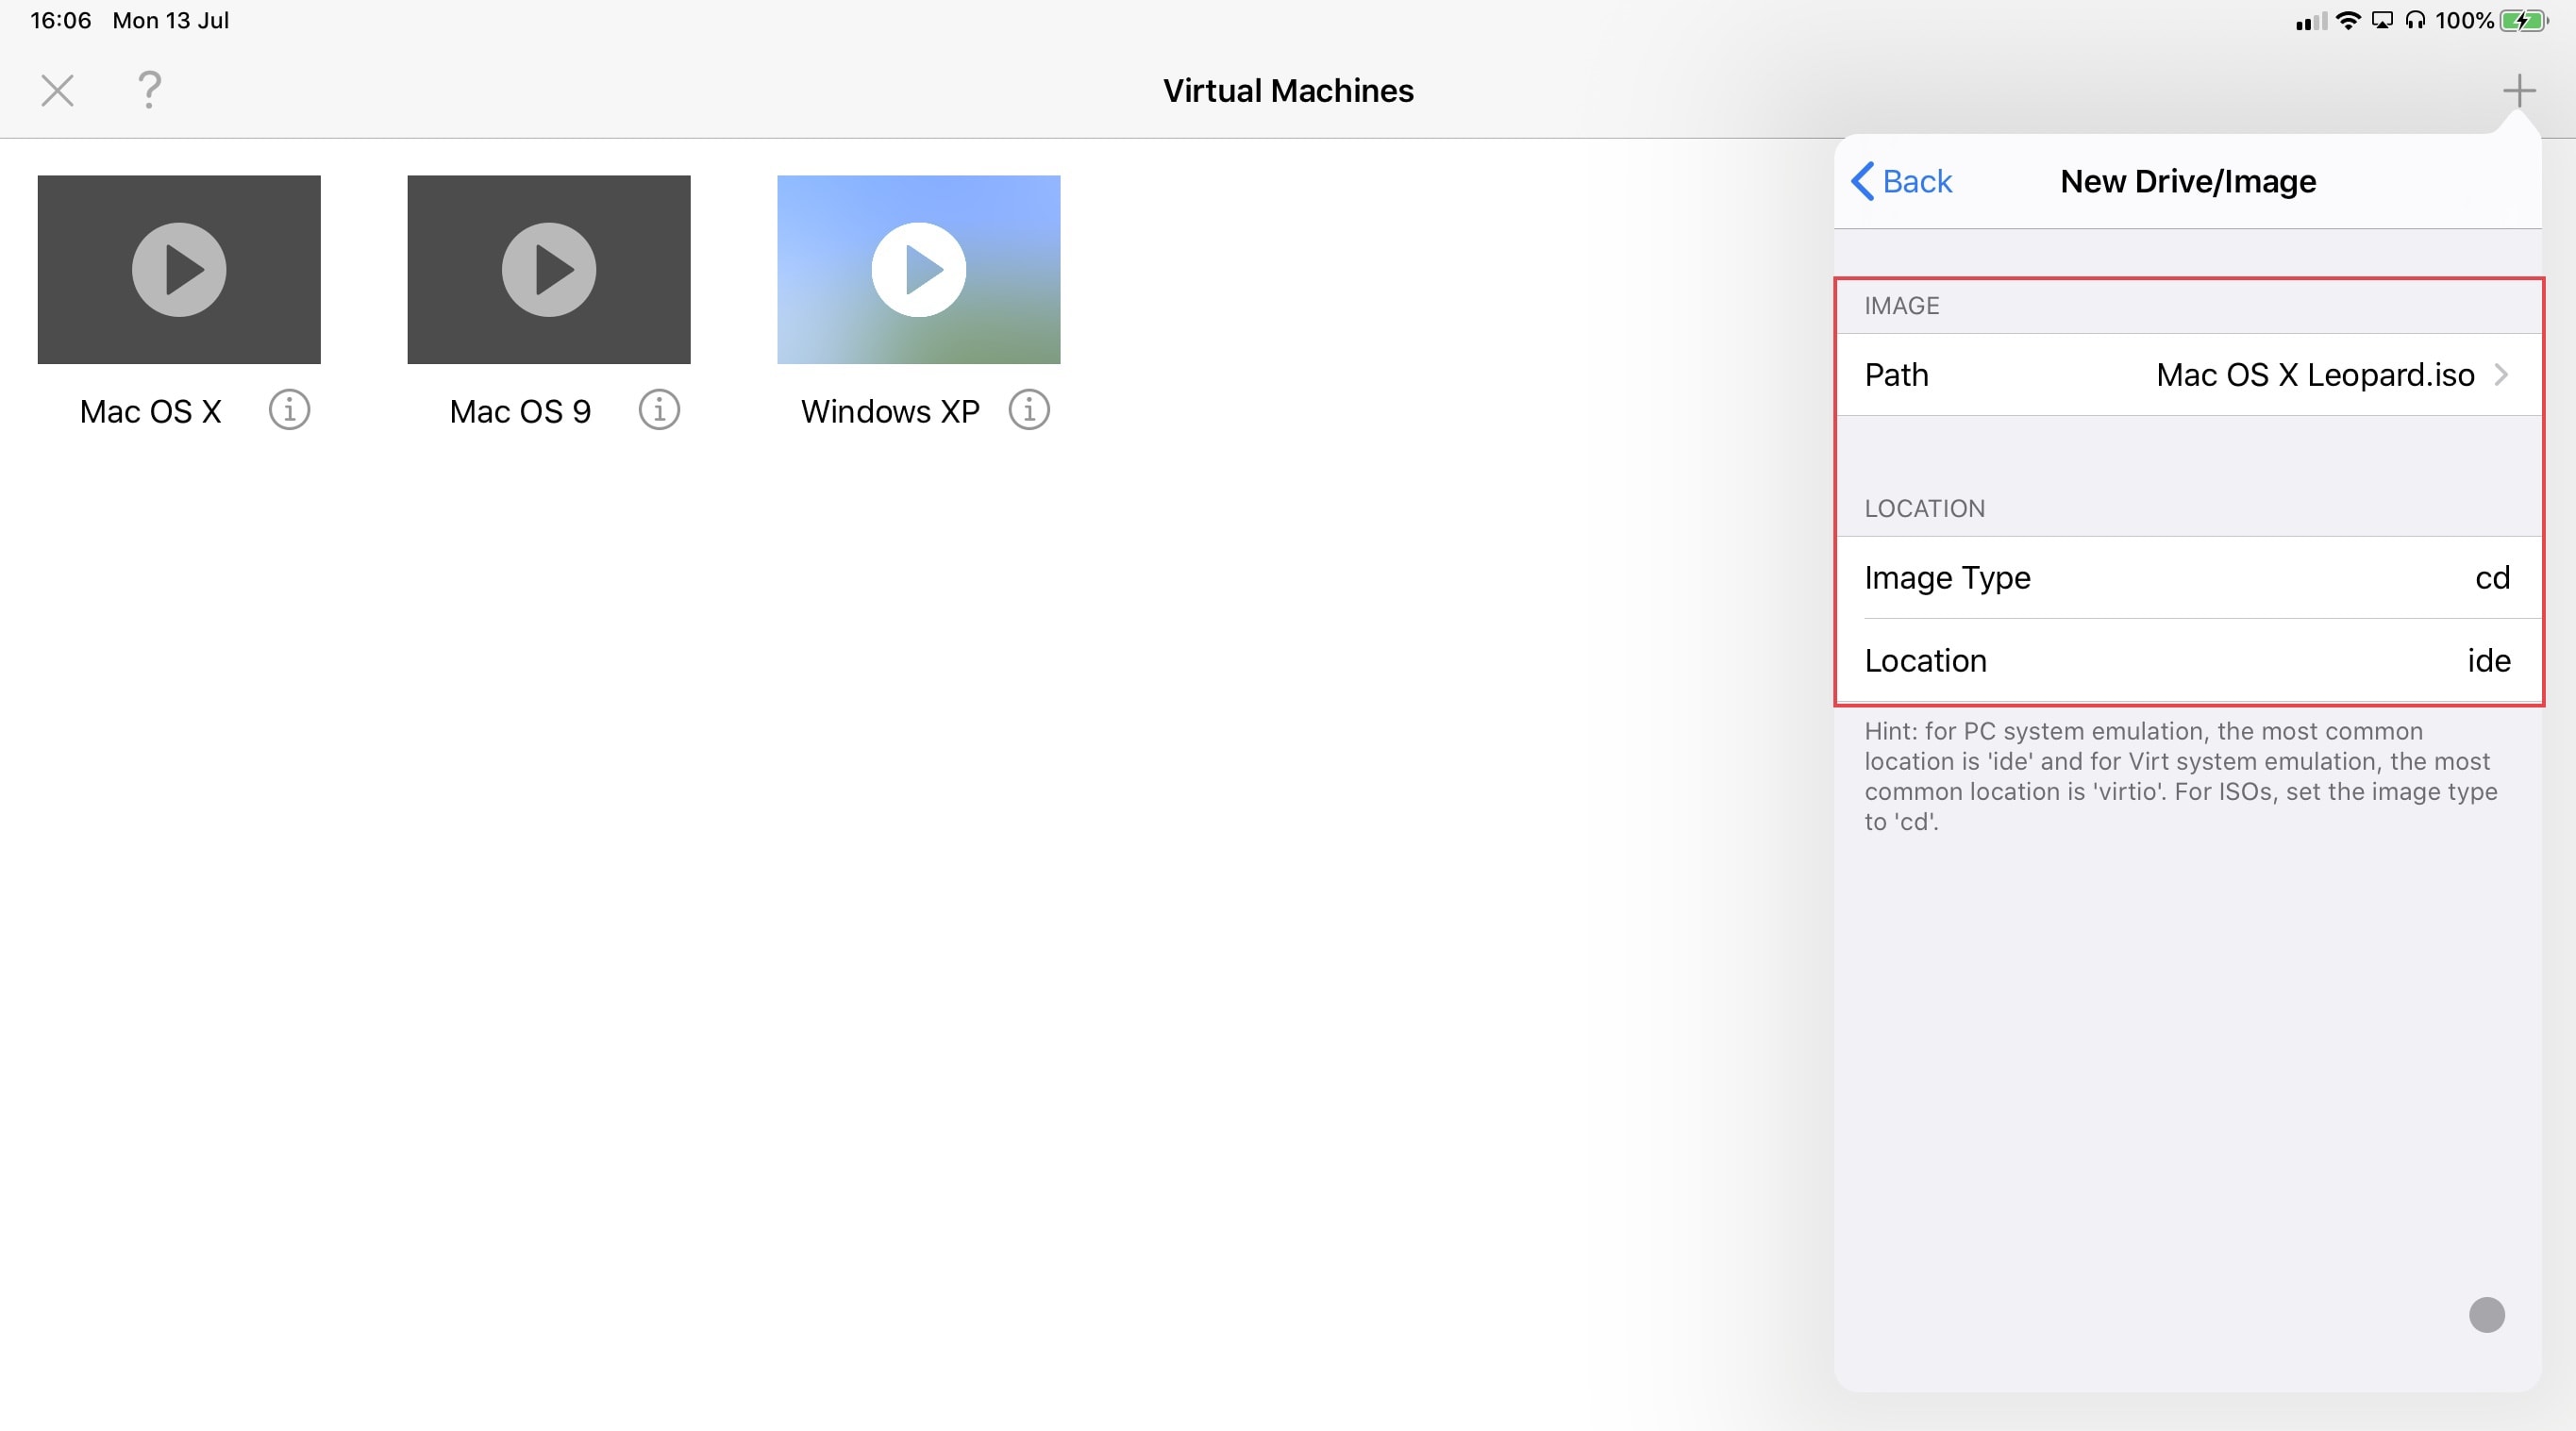
- Tap the + button again, then tap Create. Give your machine’s hard drive a name, then specify its size. You will need to allocate around 15GB (15,000MB) for Mac OS 10.5 Leopard, but earlier versions may require less. Tap Save.
- Ensure both drives appear in the list, then go back by tapping Create VM.
- Now tap Save.
Disable the virtual machine sound card
Your new Mac OS X virtual machine should appear in UTM with a play button. It’s not quite ready to run just yet, however. We first need to disable the machine’s sound card, which will prevent it from working:
- Tap the i button alongside the virtual machine’s name.
- Tap Sound, then tap the toggle to disable it.

- It’s finally time to boot your machine by tapping the play button.
Setting up Mac OS X
If, after a few minutes, you see the Apple logo on your screen, you’ve done everything correctly and you are booting into Mac OS X setup. If you get an error, repeat the steps to ensure you didn’t miss anything.
Before you can start installing Leopard, you will need to format your virtual hard drive by following these steps:
- Click Utilities in the menu bar, then click Disk Utility…
- Select QEMU HARDISK.
- Click Erase, give your drive a name, then click Erase…
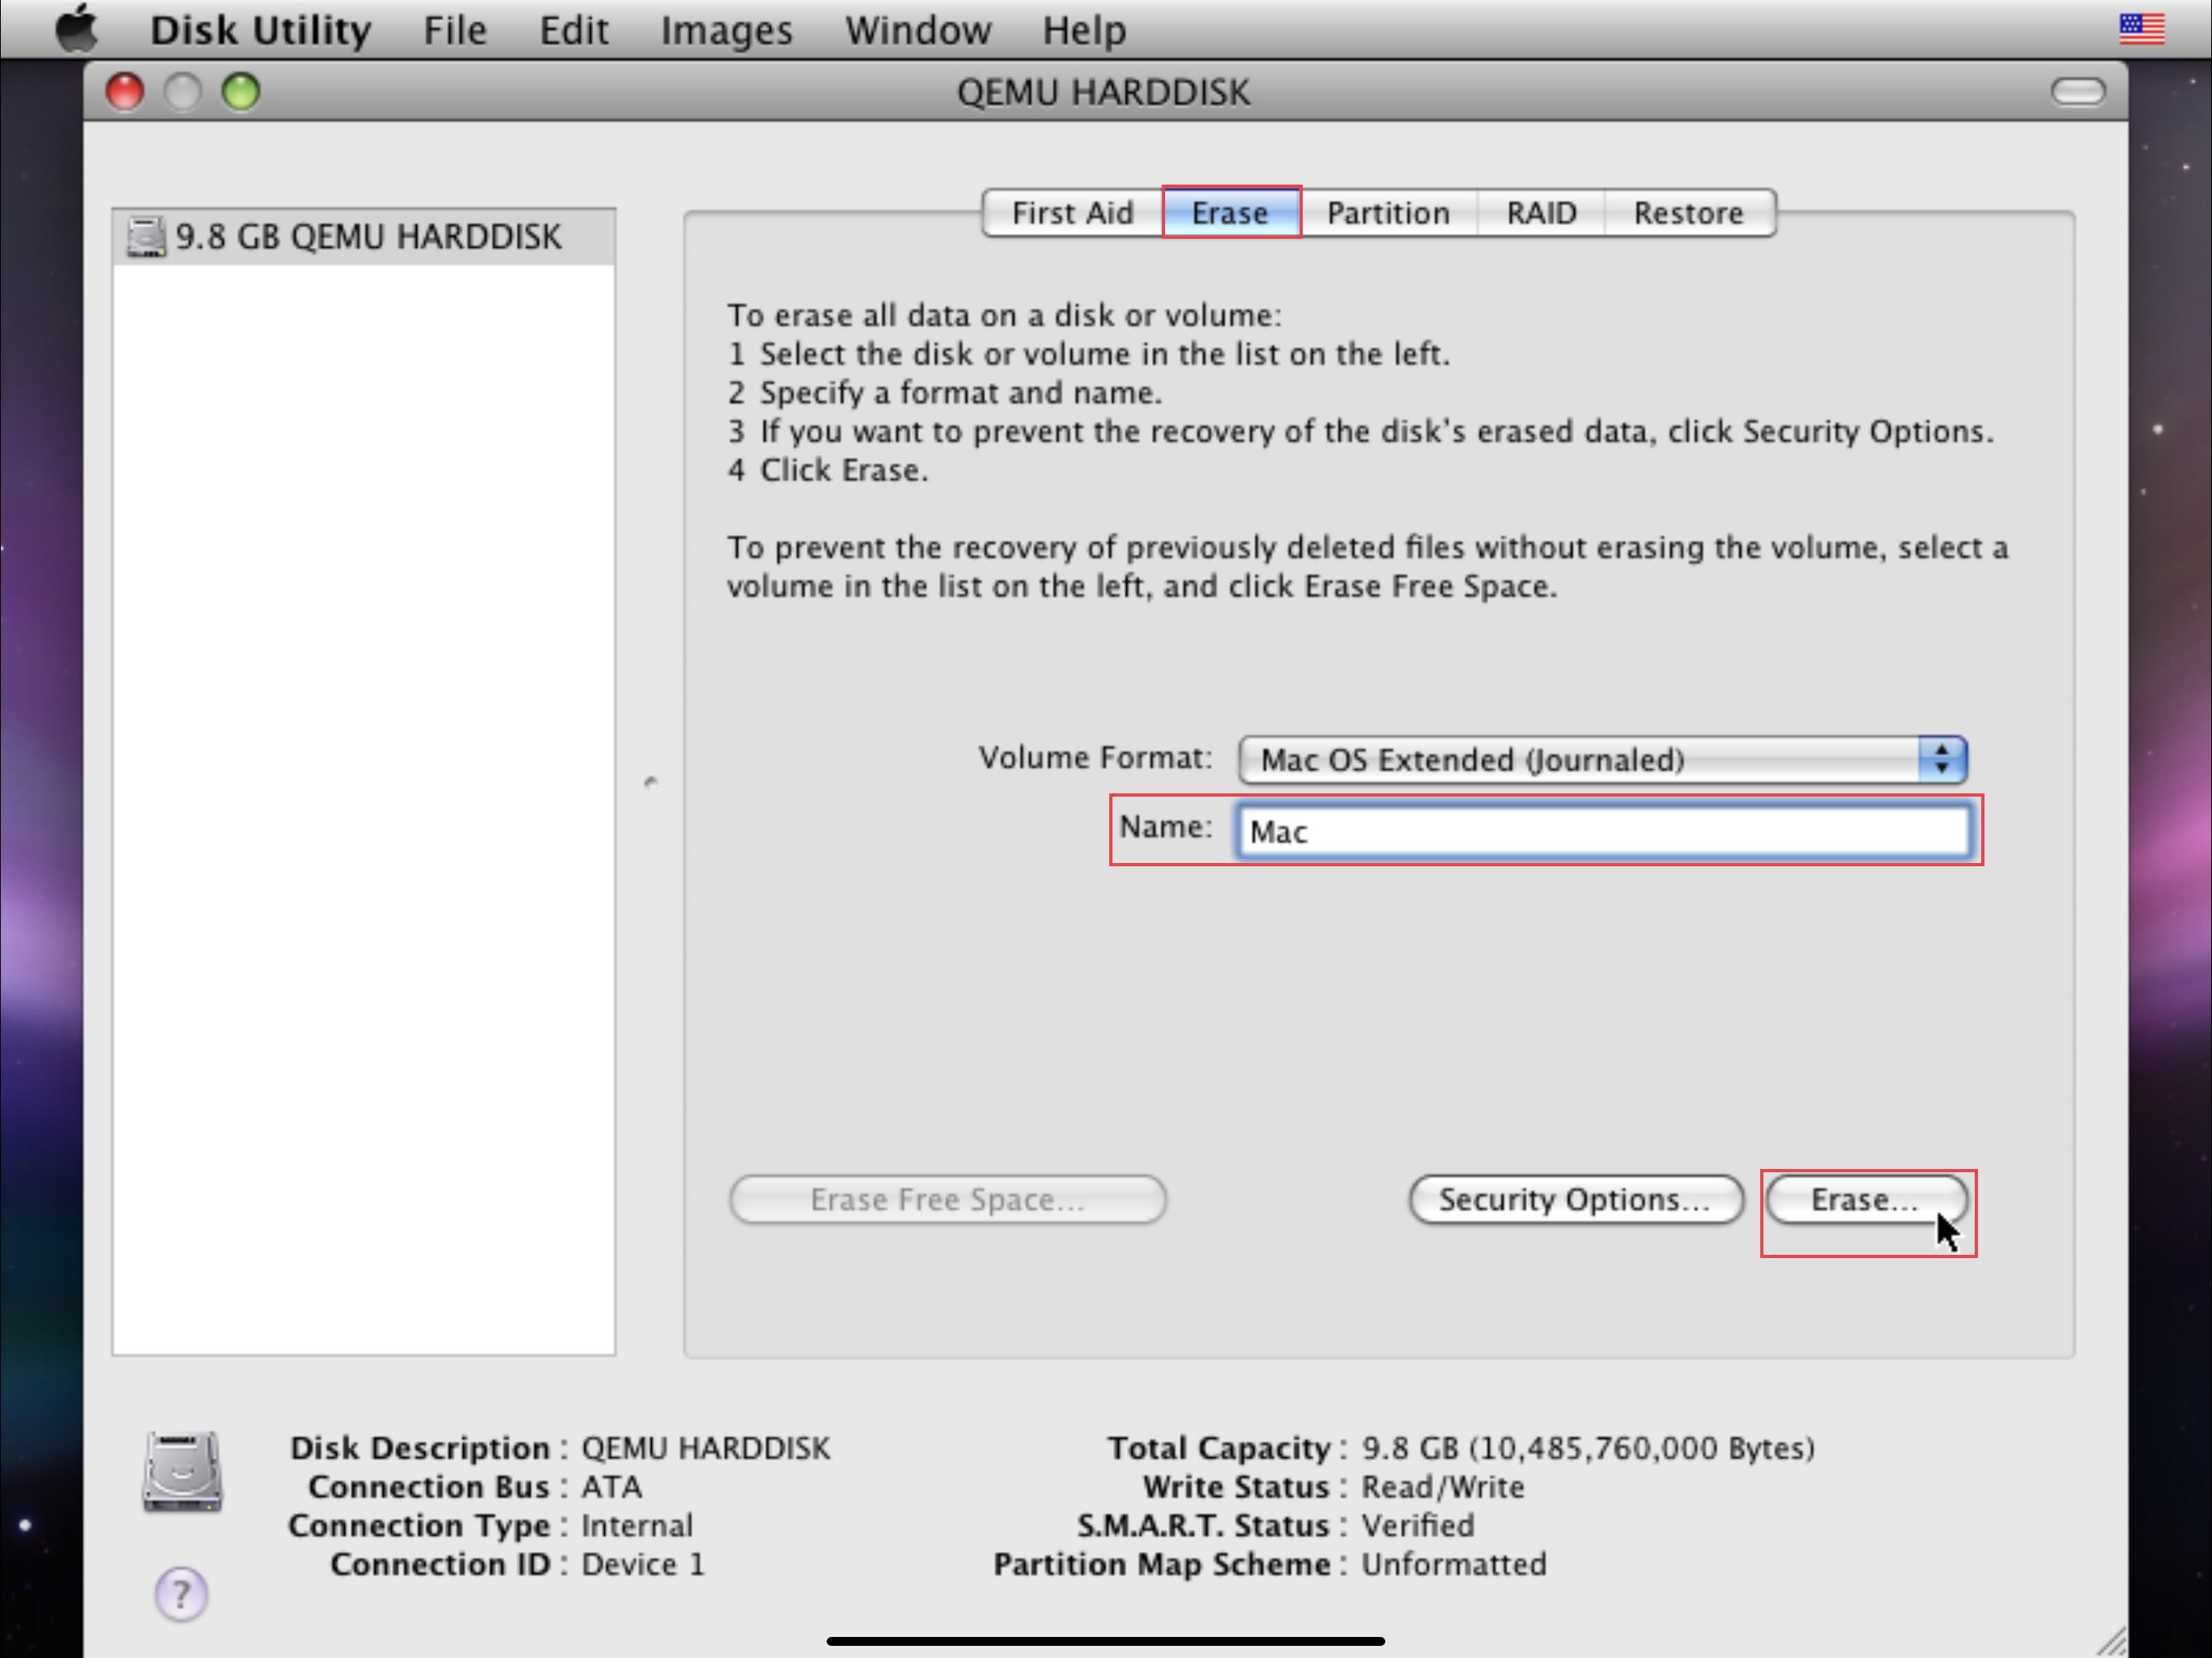
Once this process is complete, you can close Disk Utility and return to the Mac OS X installer. This will be familiar to anyone who’s installed Mac OS on a computer before — just follow the steps.
Note that it takes a long time to install Mac OS X Leopard. I had to wait around two hours. You will want to leave your device to do its thing and come back later. Just ensure it is plugged into power.
When the installation process is complete, you will see an “Install Failed” error that suggests it wasn’t successful. Don’t worry — this is normal. Follow the steps below to continue:
- Shut down your machine by tapping the power button in the UTM toolbar. The app will close.
- Reopen the UTM app.
- Tap the i button alongside your machine’s name.
- Tap Drives/Images, then tap Edit.
- Delete the Mac OS X .ISO from the list. When asked if you want to delete the disk image data, tap No.
- Tap Back, then tap Configuration.
- Under Boot, tap Try booting first from.
- Select Hard Disk.
- Tap Configuration again, then tap Done.
You can now restart your virtual machine by tapping the play button. It should boot into the Mac OS X setup process. Complete the final steps and you’ll be taken to your desktop.
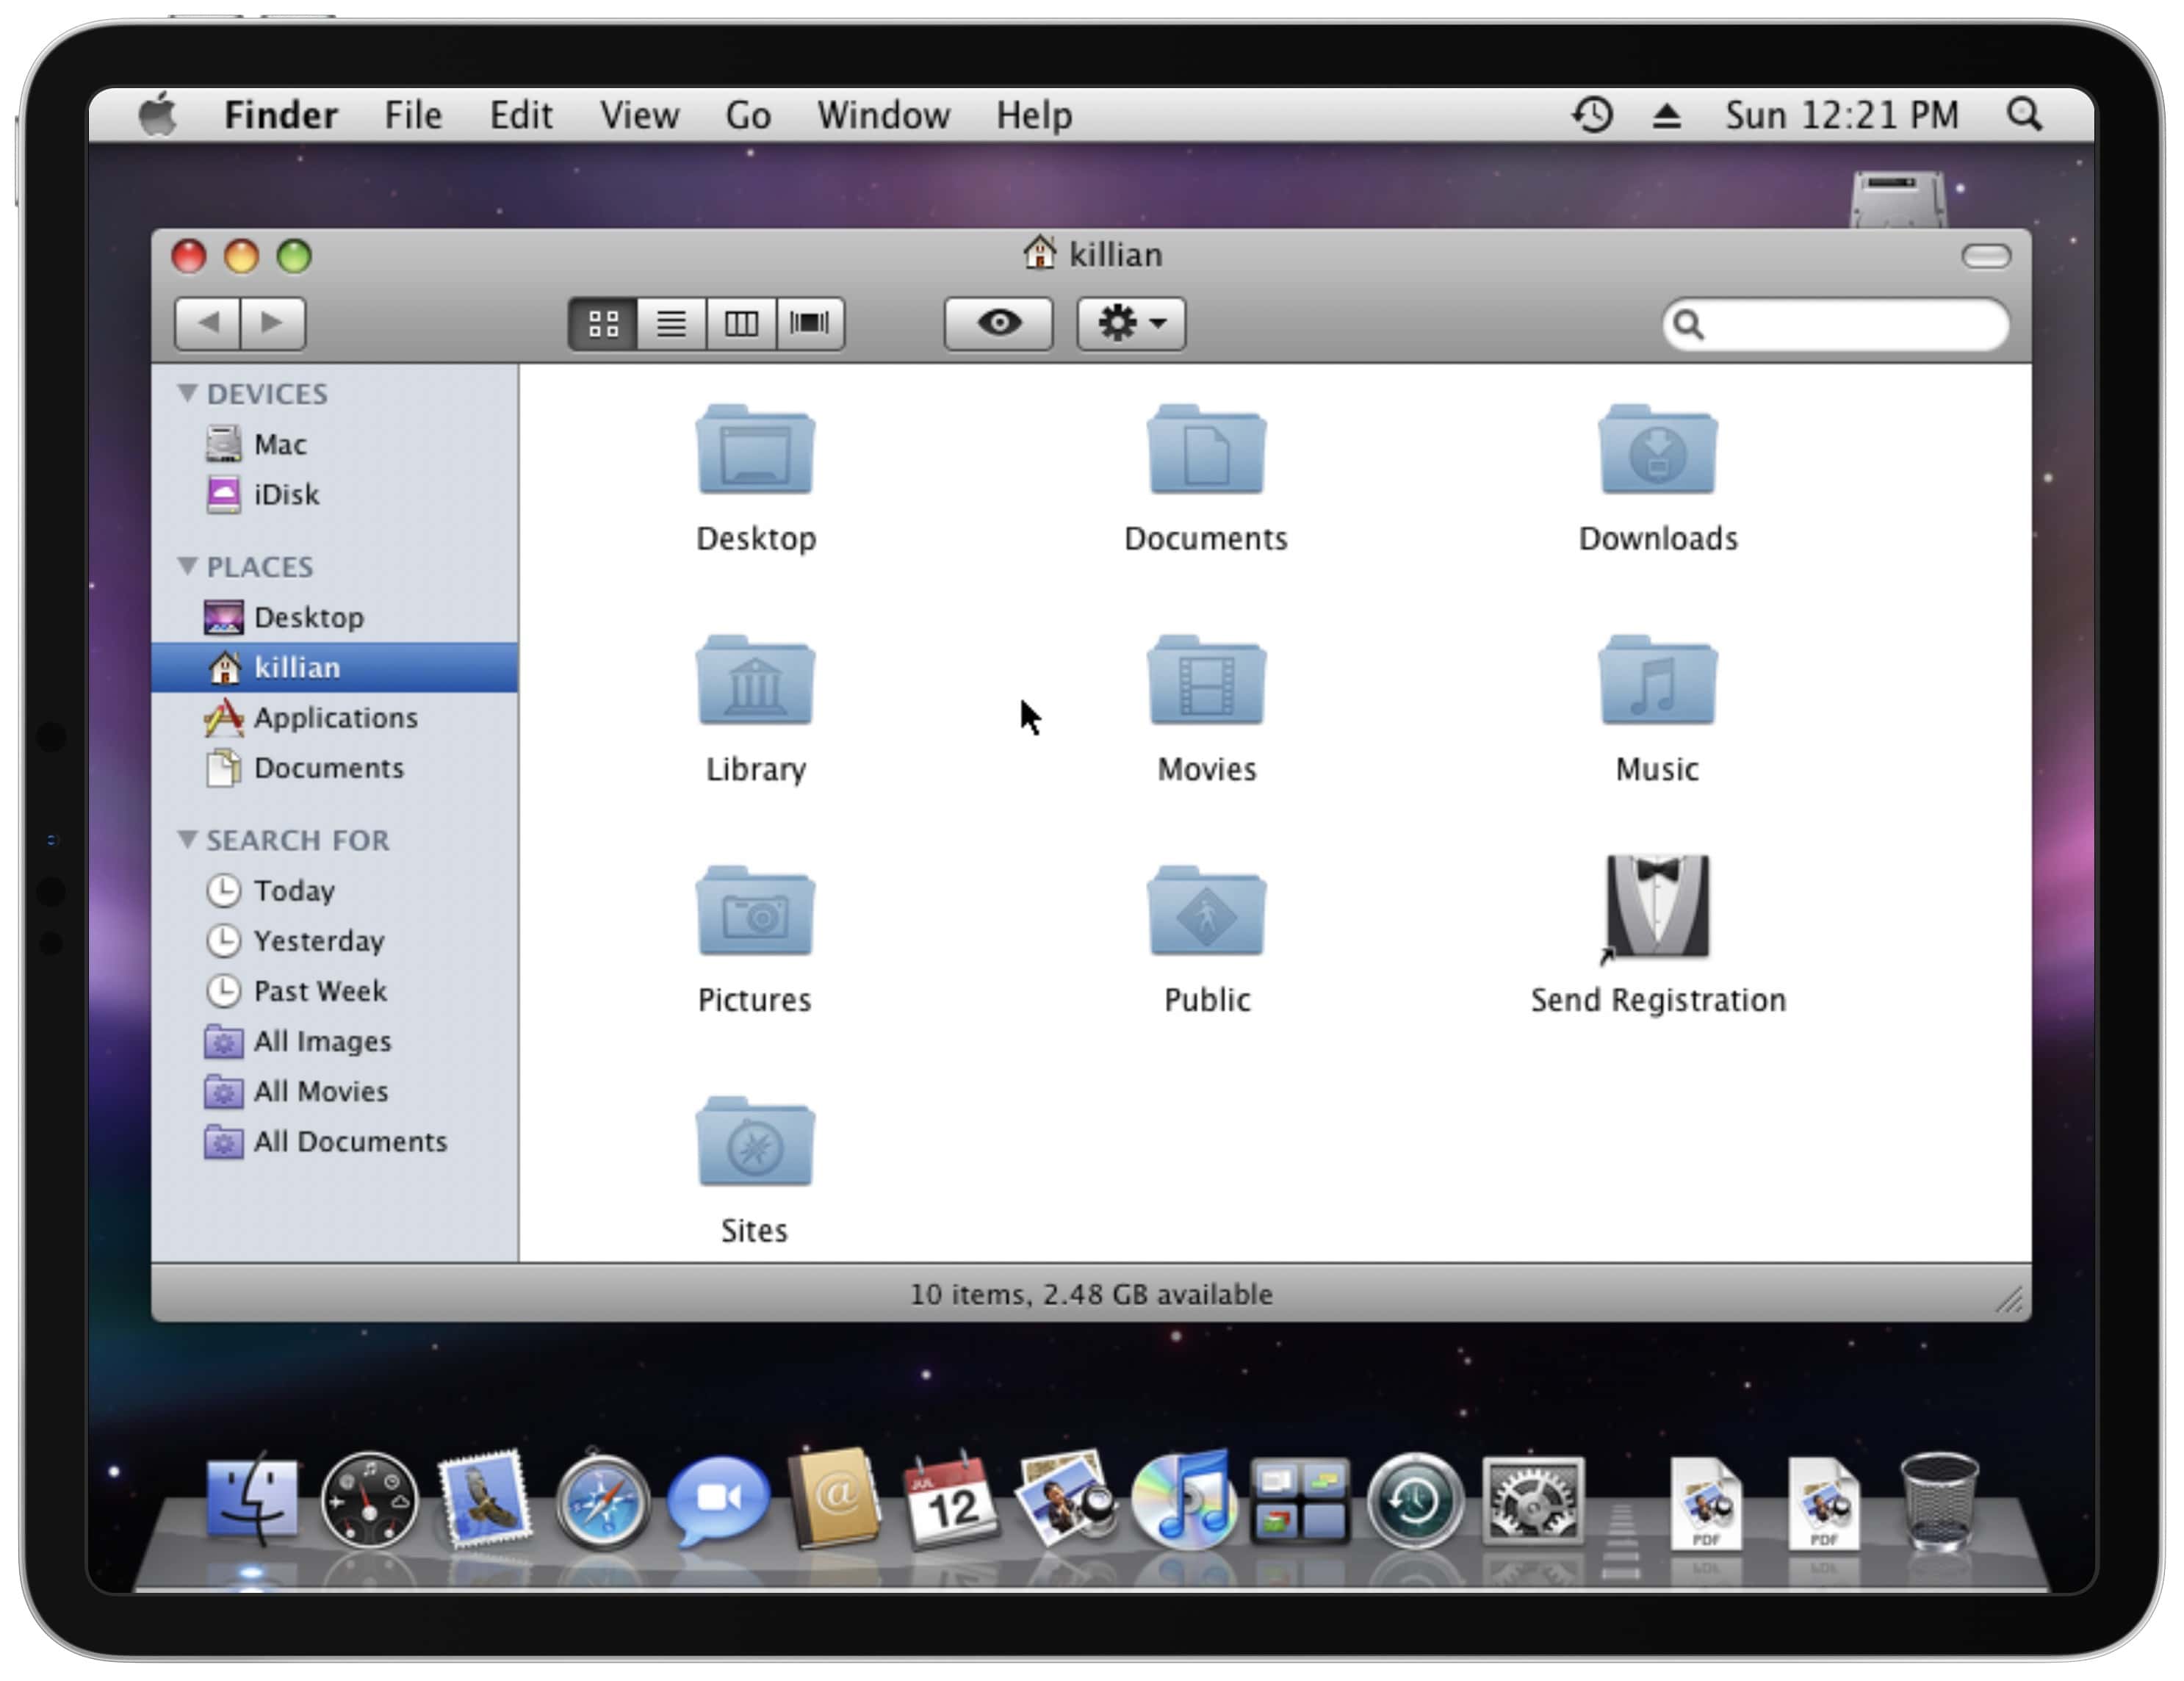
Image: Killian Bell/Cult of Mac
You now have an iPhone or iPad that runs Mac OS X.
The caveats
As I mentioned above, getting Mac OS X running on an iOS device isn’t too complicated — it’s just long-winded. Is it worth it? That depends on what you intend to do with it, because there are some big caveats.
Not only is Leopard old now, but you’re running it on a virtual machine that has a PowerPC processor (using an X86 CPU doesn’t seem to work) that isn’t compatible with modern software.
Safari won’t load modern websites. iChat is dead. iTunes is too slow to be of any use. And many of the other apps — like Mail, Contacts and Calendar — are available (and much more useful) on your iOS device.
If you have spare time to kill and you feel like taking a trip down memory lane, it’s certainly a lot of fun. Just don’t expect to be making Mac OS X your primary operating system on iPhone or iPad.
