By now, you already know how to customize the regular stuff on your AirPods and AirPods Pro. You just find them in the list of connected Bluetooth gadgets, and tap the i button to see a list of handy settings. But what about deeper-level customization? Like most things in iOS, there’s an extra set of advanced AirPods Pro settings inside the Accessibility settings. You even change double-squeeze speed of the AirPods Pro stems if you want to slow things down.
Let’s take a look.
Change the squeeze duration on AirPods Pro
To control your AirPods Pro, you have to squeeze their stems. A single squeeze for play/pause, a double squeeze to skip forwards, and a long squeeze to invoke Siri, or to change the noise-cancelling mode.
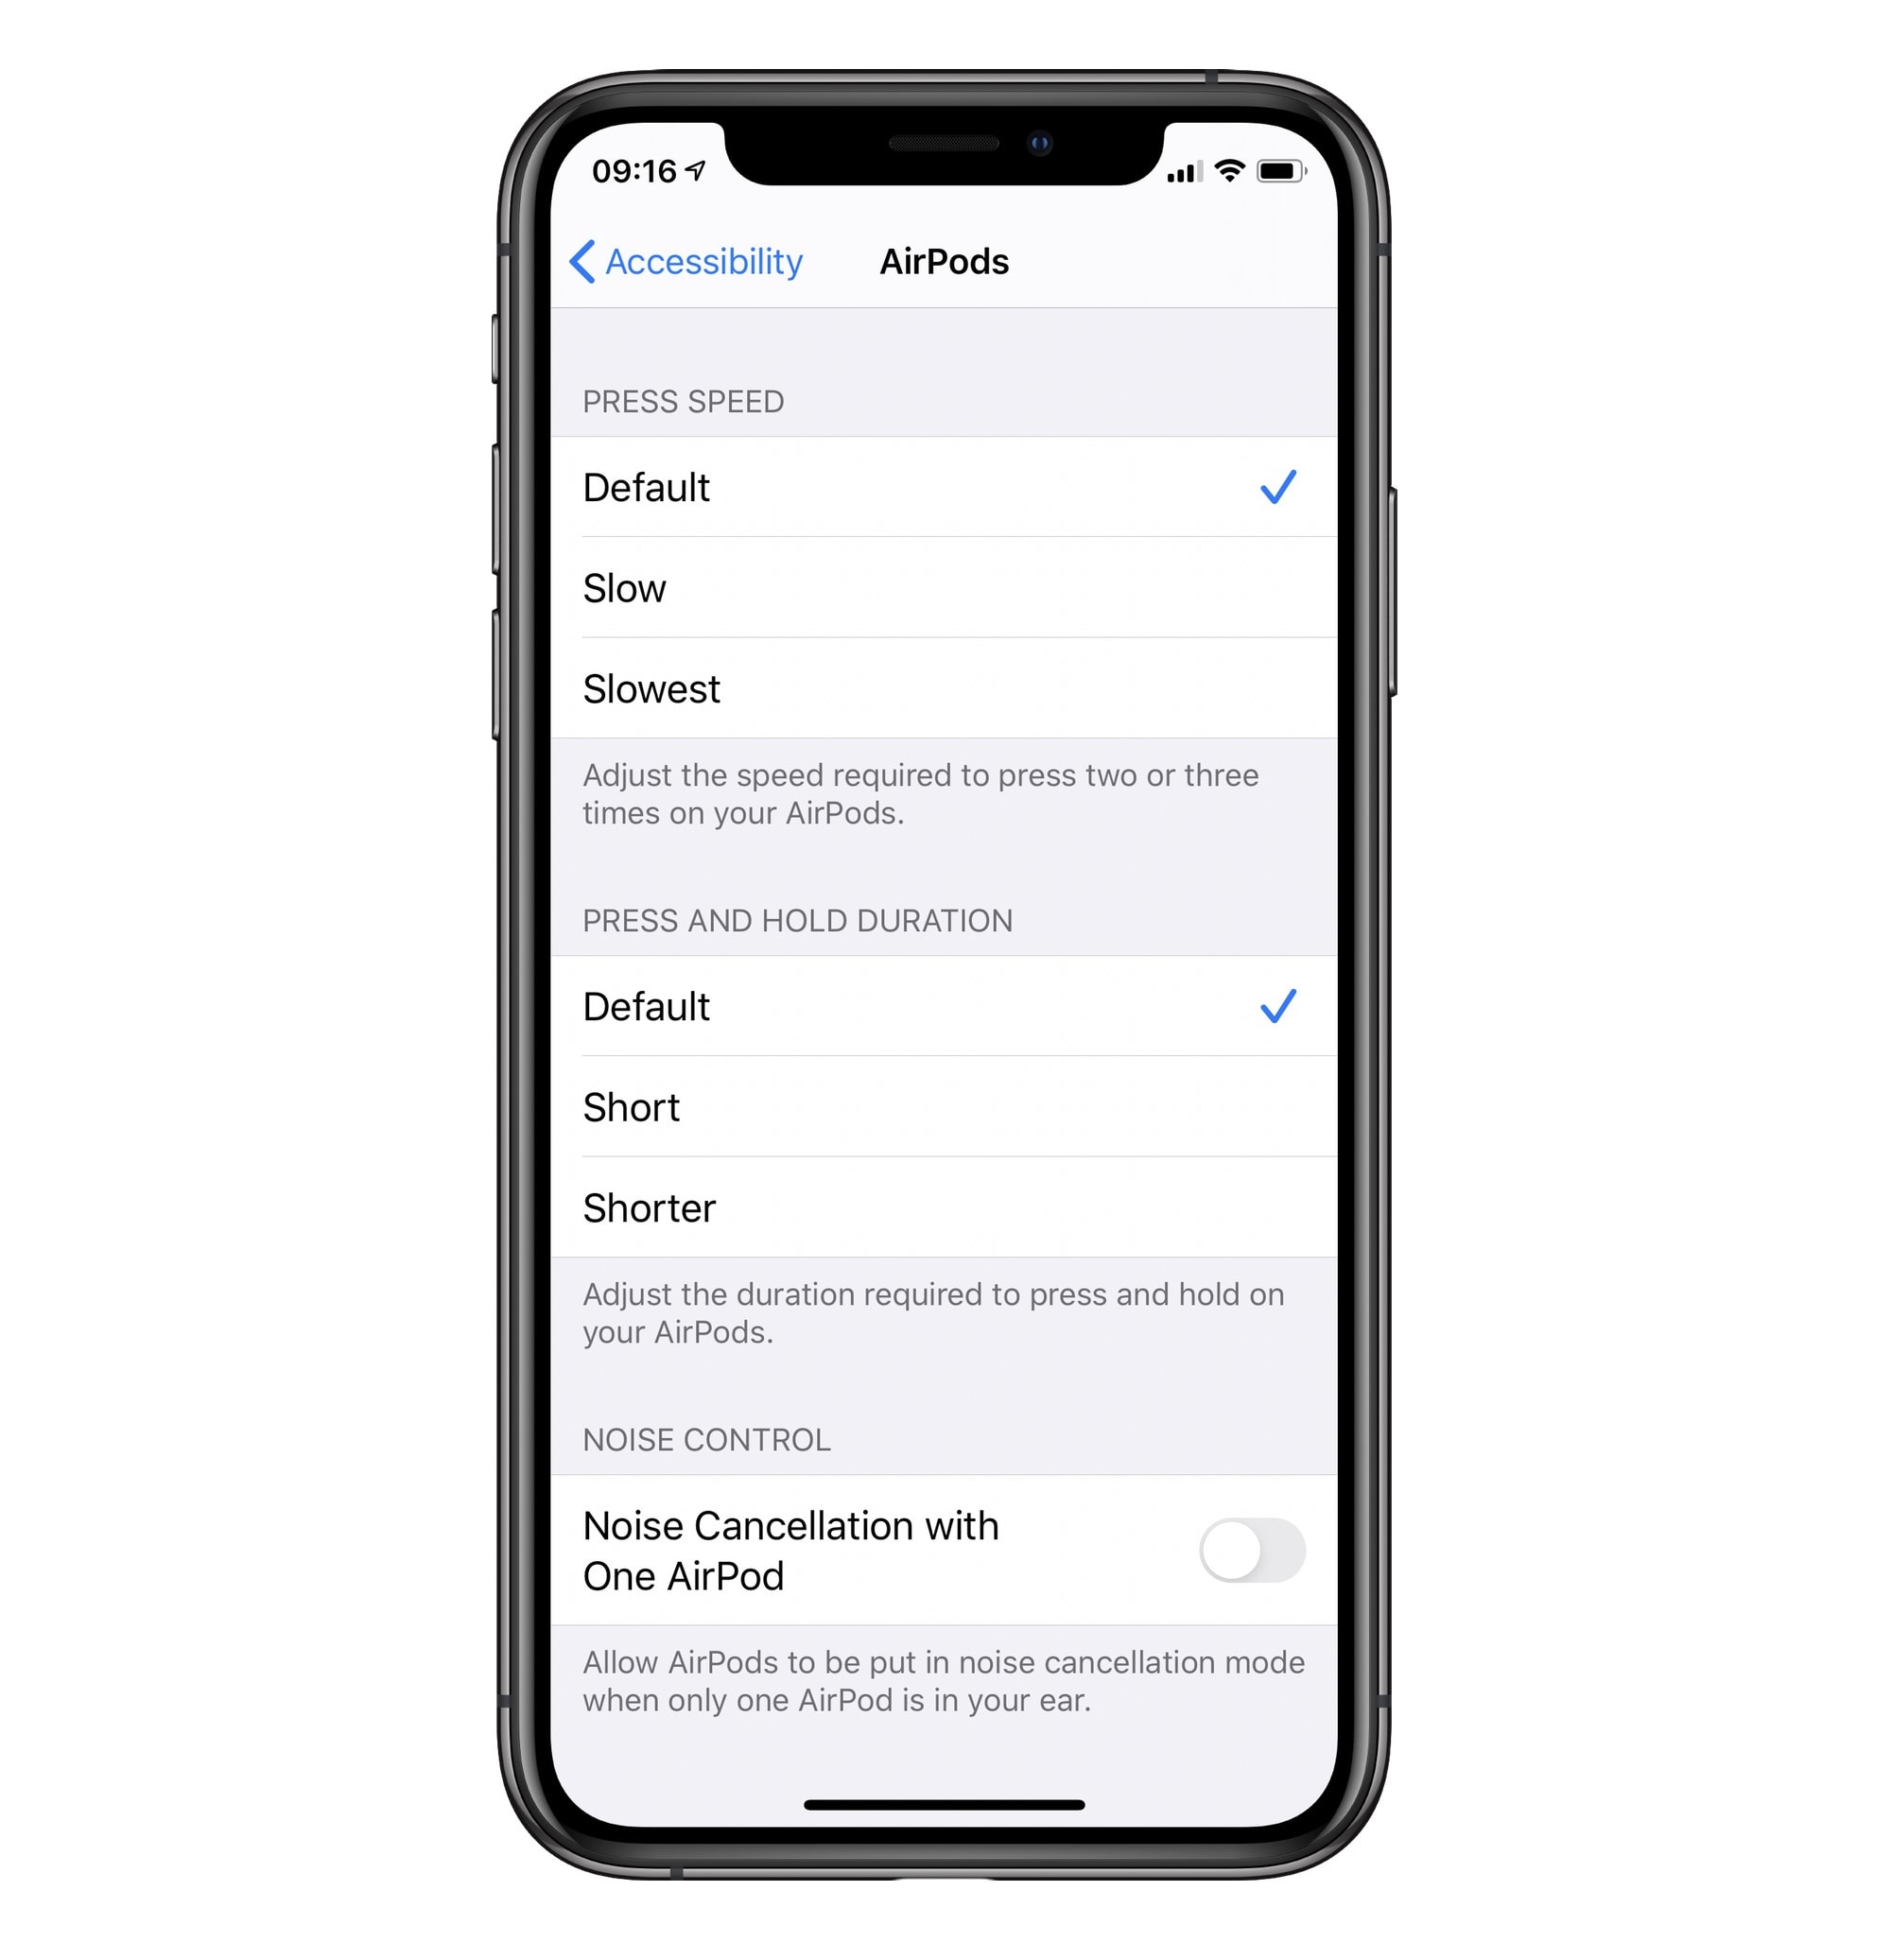
If you go to Settings > Accessibility > AirPods, you can change the squeeze duration for these gestures. You can make the double-squeeze longer, so you don’t have to be quite so quick. And you can make the squeeze-and-hold shorter, so you don’t have to wait around for Siri to kick in. Take a look:

Photo: Cult of Mac
In here, you can switch the Press Speed from Default, to Slow or Slowest, and change the Press and Hold Duration to Short or Shorter.
And look to the bottom of this screen to see the options for customizing noise cancellation:
Noise-cancellation with just one AirPod
This setting lets you put your AirPods in noise-cancellation mode, even when you’re only using one of them. This is probably useless in many cases — after all, if you’re only listening through one ‘pod, all that noise is coming in the other ear. Then again, it might make single-ear listening more comfortable, because you won’t have to turn up the volume so loud. And if you only have hearing on one ear, then this is perfect for you.
Advanced AirPods Pro settings
Like most accessibility settings, these aren’t just for customizing features that you normally find difficult to use. In fact, it’s almost as if the Accessibility section of the Settings app is turning into an advanced-settings section. I like that a lot.


