While iPhones have pretty much replaced standalone video cameras, they don’t offer the same level of polish that a dedicated video camera or DSLR produces. It’s true that “the best camera is the camera you have with you,” but you can almost always spot a video shot on a phone.
The quality gap isn’t purely due to the lenses and tech within our phones, though. Bad habits make plenty of iPhone videos look lackluster. To show just how good an iPhone video can be, I put all my filmmaking knowledge to use for the montage below.
Instead of using my $3,000 video camera, I picked up my iPhone. With a minimum of accessories, I managed to produce what I think is a pretty cinematic video. You can see the results below — and then I’ll give you some useful tips and tricks for shooting iPhone videos like a pro.
This post contains affiliate links. Cult of Mac may earn a commission when you use our links to buy items.
Pro iPhone video tips
Considering I shot all that with an iPhone 7, I think the footage looks great. When I showed it my friends who work in video production, they were hard-pressed to realize it was shot on a device that fits inside my pocket.
I’ll run you through all the iPhone video tips and tricks I used to produce the montage in the how-to video below.
Below you’ll find a slightly more detailed look at the tips in the video, along with links to some of the concepts and products mentioned.
Don’t use Apple’s stock camera app
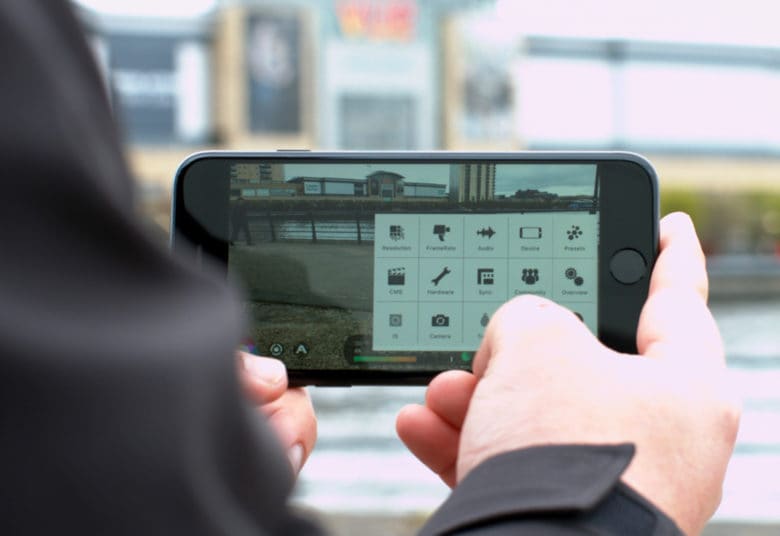
Photo: Ste Smith/Cult of Mac
While it’s super-handy to access from the lock screen, the stock iPhone camera app lacks crucial controls necessary to shoot pro-level video. Sure, you can tap the screen to lock in a focus or exposure point … but that’s about it. In addition, the iPhone 7’s built-in camera app limits the bit rate of 4K video to 47 Mbps to keep file sizes down.
You can record higher-quality video and gain more control using one of several third-party apps. My pick of the lot is FiLMiC Pro. At $15, it might seem pricey for an app. But if you shoot a lot of video on your iPhone, it’ll be worth every cent.
FiLMiC Pro gives you options
Why FiLMiC Pro? First off, it lets you shoot video at higher bit rates, which in turn means better image quality.
Second, it’s full of easy-to-use and powerful tools that let you take complete control when shooting video. The app basically transforms the iPhone’s camera into a pocket-size DSLR (in terms of functionality at least). With FiLMiC Pro, it’s extremely easy to control exposure and focus with two iPod-like wheels on either side of the iPhone’s touchscreen. White balance can be controlled through a color palette or predetermined presets or two custom presets of your choosing.
Setting your white balance and exposure before hitting the record button eliminates the iPhone’s tell-tale auto white balance. That’s where the video cycles through hues of orange and blue, with the exposure jumping from super-bright to dark, depending on where you’re pointing the camera.
FiLMiC Pro’s little scroll wheel for focusing makes it super-simple to create cinematic pull focus shots, in which you shift the focus from an object or person in the foreground to the background. Plus, the app’s peaking and zebra overlays let you double-check all your settings and make sure the object you want in focus is as sharp as can be.
Frame rates are also easily adjustable within the app, from the cinematic 24 frames per second all the way up to 120 or 240 fps (depending on your iPhone model).
Keep it steady!
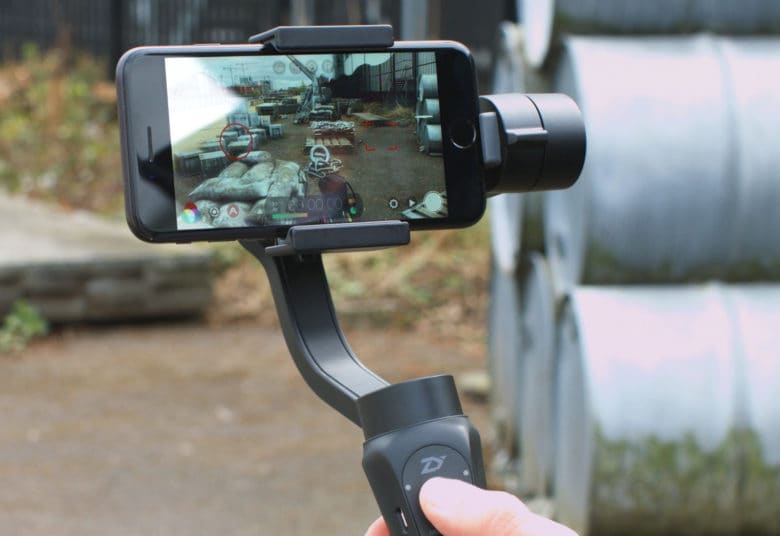
Photo: Ste Smith/Cult of Mac
Unless you’re watching the The Blair Witch Project or Cloverfield, a shaky camera is a big tell that a video got shot on an iPhone. More often than not, professional video makers use tripods or Steadicam rigs to keep viewers from feeling nauseated while watching videos.
If you don’t have the funds to buy professional-grade gear, or maybe wouldn’t make consistent use of it, low-cost options can deliver similar results.
Don’t want to spend a single dollar on accessories? Your best option is to simply lean on objects or even a person to keep a fair amount of shake at bay. Unfortunately, this will limit your movement. Creating a lovely, smooth pan or tilt will end up looking like a wobbly mess unless you’re blessed with the hands of a surgeon.
If you want to spend the minimum, invest a few dollars in a tripod mount. This will let you mount your iPhone onto any tripod, so you’ll be able to keep your iPhone perfectly steady while you make nice smooth camera movements. These can start at a couple of bucks on Amazon, but I’ve opted for Studio Neat’s Glif, which comes in at $28. I love the small and simple design, plus the construction is solid so my iPhone feels super-secure.
Get yourself a gimbal
Spend a little more and you can get a gimbal, one of the latest and most popular options for steadying your camera. A gimbal reduces vibrations and shakes caused by movements, using three motors to keep the camera level. It gives the illusion that the camera is floating through air.
All of this allows for smooth movements when filming handheld shots. Gimbals prove especially great for tracking shots, where you’re following a subject or moving around something. This adds to the cinematic feel of your video.
The most well-known gimbal is the DJI Osmo. But at $300, it’s not really entry-level gear. Luckily, more and more companies are producing great three-axis gimbal alternatives at a lower price point. The one I’ve been using is the Zhiyun Tech Smooth-Q gimbal, which comes in at $139 on Amazon.
At that price, the Smooth-Q gimbal offers much better value than the Osmo — and still produces amazing results.
Avoid zooming
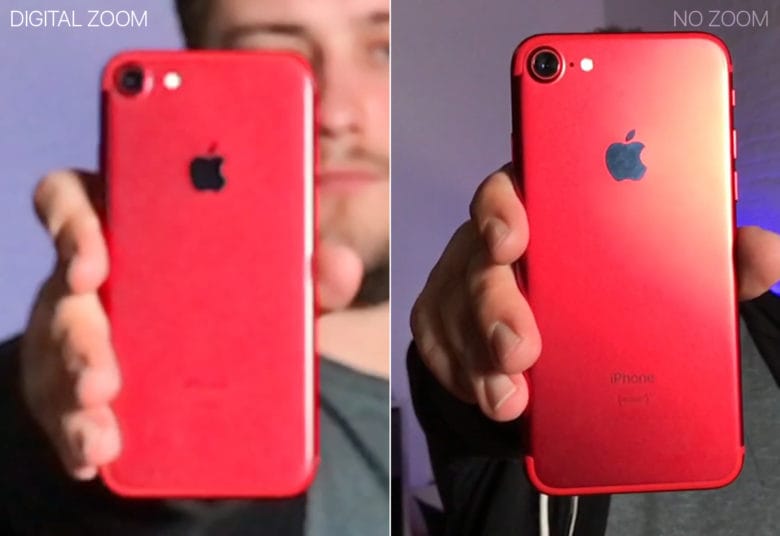
Photo: Ste Smith/Cult of Mac
Never zoom while filming video. Not only does it ruin the clarity and quality of your video, it pulls your viewers straight out of what they’re watching rather than letting them enjoy the visuals.
A digital zoom quickly kills the quality of your video. When you’re exerting this much effort to get the best video your iPhone can capture, you don’t want to ruin everything with grainy, stretched footage. If you need to be closer to something, move physically closer.
You’ll retain all the quality of your iPhone’s camera, and being closer will also result in developing depth of field. The background of your shot will begin to go out of focus while foreground objects stay tack-sharp, drawing the attention they deserve.
If you want to slowly move closer to an object, use a gimbal and track in. Use an office chair with wheels (or something similar) to slowly push in. The difference will be night and day.
The only time I’d say it’s acceptable to zoom is if you’re switching between the two lenses of the iPhone 7 Plus.
Video lighting and sound

Photo: Ste Smith/Cult of Mac
Lighting can make a huge difference in how good your video looks. Any selfie queen knows this. But when filming with the iPhone, the more light you have to work with the better. Even though the iPhone camera’s low-light performance improved by leaps and bounds in the past few years, video captured in a dark room still looks pretty grainy.
Obviously, you can’s always control the lighting in your shots, but it’s something you should constantly keep in mind. If you can move to somewhere with just a little bit more light, it can make a huge difference. In the example above, the image on the left was produced using just ceiling lights. For the image on the right, I added an extra lamp pointing at me. The difference is pretty clear.
Sound also plays a crucial part in video — especially if you’re talking to the camera or presenting a video for, say, YouTube. Using an external microphone such as the Rode smartLav+ will make a huge difference in quality. It also means you can be further away from the camera when filming. (As you can probably tell from the video above, nothing helps that much if you’re filming in the wind.)
Make every frame count
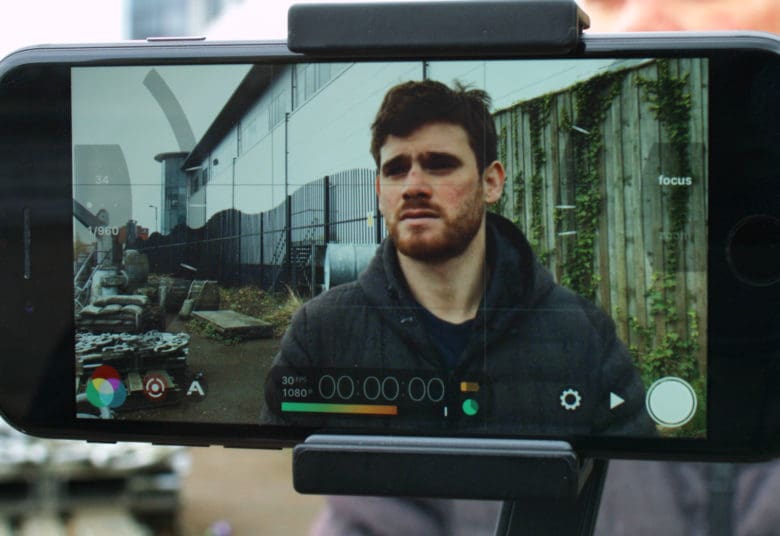
Photo: Ste Smith/Cult of Mac
My final tip doesn’t require any additional products or apps, but will make a huge difference. Learn to properly frame every shot. (And I don’t just mean shooting in landscape as opposed to portrait.)
Rather than just randomly pointing and shooting, put a little bit of thought into how you frame each shot. This will go a long way toward producing outstanding video.
Both the iPhone camera app and FiLMiC Pro offer grid overlays. They help you balance a shot naturally: There are points in an image where content just “snaps” into place.
Using the grids to frame your shots makes your video imagery more visually pleasing. If you want to learn more, search Google for the “golden spiral” or the “rule of thirds.” But basically, all you need to know is to turn on the grids in your camera, and either align your subject to one of the intersecting lines or stick your horizon onto one of the horizontal lines.
There’s no set rule, as it’s all a matter of taste. However, the grids give you something to measure your taste against. Also experiment with frame rates and camera movements.
Once you’ve shot all your video, it’s time to edit everything together. I use Adobe Premiere on my Mac day in and day out. But plenty of apps, such as Apple’s new Clips, allow you to edit great videos straight from your phone.
Show us your own iPhone video
Hopefully, these iPhone video tips can help you produce more amazing videos than usual. If you’ve shot any videos on your iPhone, leave a link in the comments section, as I’d love to check them out. Also make sure to subscribe to the Cult of Mac YouTube channel to stay up-to-date with all our latest videos.
