Here’s a secret: OS X has a password generator built-in, but many people will never even see it. Here’s how to make it easier to get to.
100 Tips #40: How To Generate Strong Passwords


Here’s a secret: OS X has a password generator built-in, but many people will never even see it. Here’s how to make it easier to get to.
![Become an iPhone Game Developer In 10 Steps [How To] OLYMPUS DIGITAL CAMERA](https://www.cultofmac.com/wp-content/uploads/2010/11/neilferguson.jpg)
Neil Ferguson, developer of Virus Strike, explains how to become a successful iPhone game developer in 10 steps.
I believe that anyone can develop an iPhone game. I recently developed a physics-based puzzler for the iPhone, Virus Strike, on a zero budget despite having zero experience developing iPhone games. It wasn’t easy, but there are very few set-up costs if you have the right skills and approach.
Admittedly, I’m an experienced programmer – I started developing on a BBC Micro at the age of 8 and now work full-time for a software start-up in London. Obviously, my experience helped me when I was developing Virus Strike, but I don’t think you necessarily need to have any programming experience to develop a successful game. Just follow these 10 steps:
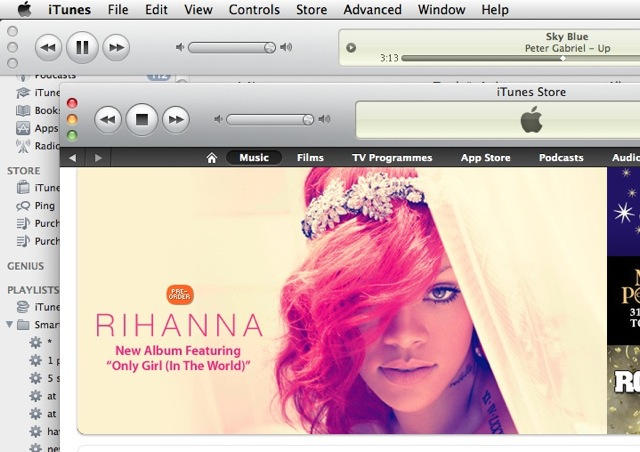
It’s natural to assume that iTunes is a monolithic one-window application, because there’s no obvious way to view your vast database of music, videos and apps in anything other than just that one window.
No obvious way, but it is there.
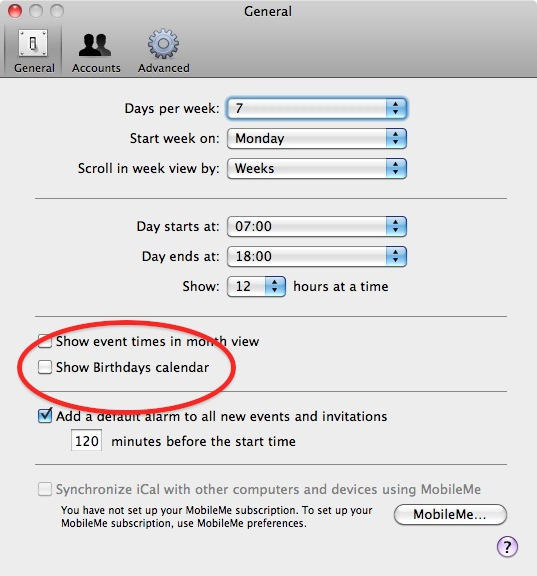
Now you have a Mac, what’s the easiest way to remember people’s birthdays? Apple thought of that, and built a useful tool right in.

On a Mac, the green “Maximise” button (found alongside the yellow “Minimise” button and the red “Close” button in the top-left corner of every window) doesn’t do what you’re used to its counterpart doing on a Windows PC.
In current versions of OS X, “Maximise” really means “display the contents of this window in the most efficient way possible,” – and different applications will interpret that in different ways, and in different circumstances. The results can be frustratingly unpredictable, especially for newcomers who aren’t used to a Mac.
![Bookmark Cult of Mac’s New Mobile Site to Your iPhone’s Home Screen [How-To] IMG_1419](https://www.cultofmac.com/wp-content/uploads/2010/11/IMG_1419.jpg)
Cult of Mac joined the mobile vanguard Friday with a dedicated mobile version of the site’s content at https://m.cultofmac.com/. An automatic redirect should take mobile users to the leaner, cleaner version optimized for mobile devices but if Internet caching prevents that at present for particular users, simply point your device’s browser to the mobile URL.
Once you’re there, follow the easy steps below to place a Cult of Mac site icon in the next empty space on your (in this illustrated case) iPhone’s home screen, from which you’ll be able to easily access all the great news and information posted here daily.
![Uninstall Flash for Mac OS X in Seven Easy Steps [How To] post-67699-image-c4fa0f653ed1f134b33ccf20a1f340e8-jpg](https://www.cultofmac.com/wp-content/uploads/2010/11/post-67699-image-c4fa0f653ed1f134b33ccf20a1f340e8.jpg)
Here’s a simple how to that will lead you and your computer to an internet without Flash just like on your iPhone, iPad, or iPod touch. I think most of you won’t miss it, but if you do you can reinstall it.
I’ll have to say that when I went cold turkey and kicked the Flash habit, that I’ve had for years, I didn’t suffer from withdrawals. In fact, I found my browsing experience with Safari to be a whole lot better and definitely more stable than before. I don’t have any regrets about it so far.
Some people might recommend, ClickToFlash, which is a Safari plug-in that blocks flash content and doesn’t allow it to run unless you allow it or you add specific sites to a “white list. ” It’s a great plug-in, but I prefer to use fewer plug-ins and no Flash. You on the other hand might think otherwise so ClickToFlash might worth a look for you.
![How to undelete files in Mac OS X [MacRx] Are You Sure You Want To Empty the Trash?](https://www.cultofmac.com/wp-content/uploads/2010/11/Undelete.jpg)
It’s happened to us all: You delete a file, folder or entire disk, then realize you’ve made a mistake. You reach for your backup – and you don’t have a backup. What now?
There are several utilities available to help recover deleted files under Mac OS X. Your chances of success depend on how the file was deleted and what you’ve done since then. Unfortunately you will also lose your original filenames, though some reconstruction is possible.
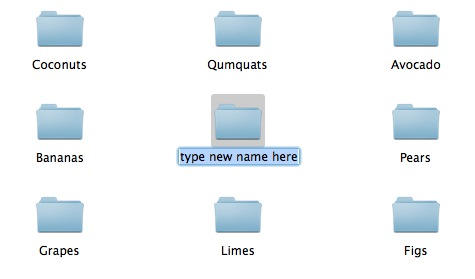
This is one of those simple little things that’s so obvious, and so simple, that it’s easy for newcomers to miss.
How do you rename a file on a Mac? If you’re coming from Windows, you’ll be accustomed to right-clicking on it and choosing the “Rename” menu item, but it’s not there on OS X.
![How To: Jailbreak Your iOS Device Using Pwnage Tool for Mac [Jailbreak Superguide] post-65697-image-824601f44f85132384d897ac538e27ae-jpg](https://www.cultofmac.com/wp-content/uploads/2010/10/post-65697-image-824601f44f85132384d897ac538e27ae.jpg)
The Pwnage Tool by the DevTeam hacker group allows you to create custom iPhone firmwares for the purpose of jailbreaking, to get full control over your device (see why you should jailbreak here).
Currently, the Pwnage Tool version 4.1.2 allows you to jailbreak a device already on the latest firmware. However, it will NOT unlock the device, enabling it to be used with different GSM carriers worldwide.
You can also use greenpois0n by Chronic Dev to achieve the same. There’s practically no difference between the different tools, except for the fact that they come from different dev teams.
![How To: Jailbreak Your iOS Device Using greenpois0n [Jailbreak Superguide] post-65666-image-3740c29ceff034500d1ca33d70c46842-jpg](https://www.cultofmac.com/wp-content/uploads/2010/10/post-65666-image-3740c29ceff034500d1ca33d70c46842.jpg)
Chronic Dev has released its Mac version of greenpois0n, his 1-click jailbreak solution (see why you should jailbreak here). However, it will NOT unlock the device, enabling it to be used with different GSM carriers worldwide.
It is pretty easy to use and worked perfectly with my iPhone 4. Besides the tool, there’s a ‘Loader’ application that gets automatically installed on the iPhone after jailbreak, which gives you option to install Cydia.
You can also use Pwnage Tool by DevTeam to achieve the same. There’s practically no difference between the different tools, except for the fact that they come from different dev teams.
Here’s see how it works.

Apple’s App Store has a lot of great software — the problem is finding it. With more than 250,000 apps to choose from, it’s hard to find the genuinely good software among thousands of substandard and me-too efforts. The star-rating system doesn’t work, and it’s easy to miss recommendations on sites like this one.
We’re pleased to announce a major new feature of the site: an app discovery and recommendation service powered by Mplayit’s App Tapp platform.
CultofMac’s App Finder helps you to find, share and discuss great apps. But the real power comes from signing in with your Facebook account. This allows you to get app recommendations from friends and colleagues. You can get also follow app experts, get personalized app recommendations, and share the apps you like with friends.
Using our App Finder is pretty self-explanatory, but here’s a brief tutorial showing how it works:
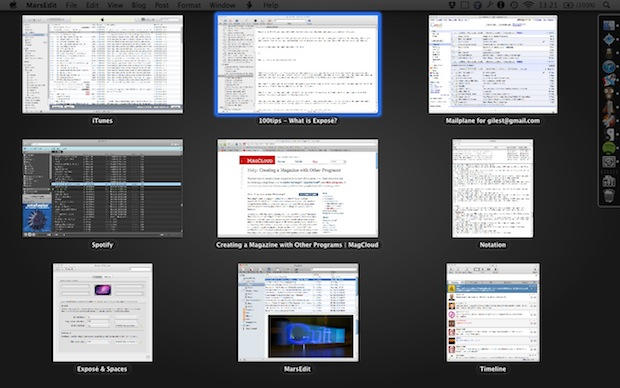
Exposé is an OS X feature designed to help you move around many documents and applications quickly and easily.
All you have to do is push a button (or move your mouse in a particular way, or drag your fingers on the trackpad), and all your open windows, from all your open applications, will be displayed on screen at once, shrunk down so that you can see them all.
![Use Adobe Flash on Your Jailbroken iPhone 4 in 3 Easy Steps [How to] post-63820-image-3f7713033b73beca9b0f9026003b271e-jpg](https://www.cultofmac.com/wp-content/uploads/2010/10/post-63820-image-3f7713033b73beca9b0f9026003b271e.jpg)
Today, I will show you how to add Flash playback to your jailbroken iPhone 4 in three easy steps using an app called Frash by Comex.
![How To: Jailbreak Your iOS Device Using limera1n [Jailbreak Superguide] post-63537-image-76b796e4b326a8e08423f185daaca37b-jpg](https://www.cultofmac.com/wp-content/uploads/2010/10/post-63537-image-76b796e4b326a8e08423f185daaca37b.jpg)
George Hotz a.k.a GeoHot has released the Mac version of limera1n, his 1-click jailbreak solution. However, it will NOT unlock the device, enabling it to be used with different GSM carriers worldwide.
It is pretty easy to use and worked perfectly with my iPhone 4. Besides the tool, there’s a limera1n application that gets automatically installed on the iPhone after jailbreak, which gives you option to install Cydia.
Here’s see how it works.
Ingredients:
![Prevent iTunes From Updating Your Jailbroken iPhone’s Firmware [How To] GreenPois0n on Macbook](https://www.cultofmac.com/wp-content/uploads/2010/10/macupdate.jpg)
If you recently used Limera1n or GreenPois0n to jailbreak your iOS device, and want to make sure that iTunes doesn’t automatically update your device’s firmware whenever the next update is released by Apple, then here is a quick fix to prevent you from accidentally updating your iPhone/iPod/iPad.
![Make Your Own Free Ringtones in iTunes 10 in Nine Easy Steps [How To] post-58047-image-003d20afbf893fa43113869b7e64188b-jpg](https://www.cultofmac.com/wp-content/uploads/2010/10/post-58047-image-003d20afbf893fa43113869b7e64188b.jpg)
Apple made a lot of changes to iTunes when it introduced version 10. A lot of those changes were cosmetic, but some of them included removing features like ringtone creation. Luckily, you can make your own ringtones out of any song in iTunes 10 using these nine easy steps.
All you need to get started is a copy of iTunes 10 installed on your Mac and your music library.
![Why is my Mac running so slow? [MacRx] Slow-Computer-Collage](https://www.cultofmac.com/wp-content/uploads/2010/10/Slow-Computer-Collage.jpg)
Macs are solid machines, but (like many of us) they have a tendency to slow down and get more lethargic over time. Launching and switching programs takes longer, the dreaded Spinning Beach Ball appears more often, and soon even simple tasks become arduous. What’s going on?
Many things can decrease performance, but several culprits are common: not enough disk space, not enough RAM, and running too many apps at once. I see these in my consulting business regularly.

In nearly every single Mac application you use, you’ll find the Hide command. It’s a very useful thing to know about.

On Windows, you got used to the Minimize command, which sent any particular document or application window down to the Taskbar at the bottom of the screen. OS X has a similar feature, which is also called Minimize.

When you’re viewing something like a web page, or an email message, or a PDF – anything that isn’t a text field for typing in – you can use the spacebar to scroll down in page-sized increments, just like a Page Down key that you were probably used to having on a Windows machine, and now won’t have if you’re using a Mac notebook.
It’s just as easy to go in the opposite direction. You can scroll up again by hitting Shift + spacebar.
(For the record, Page Up on a Mac notebook is officially done using Function+Up Arrow, and Page Down with Function+Down Arrow. But a lot of the time, using the spacebar is quicker and easier.)
I would never have thought to include this in the list of 100 tips, because I thought it was so universal. I’ve been using this trick for so long, it’s become second nature, and I just assumed that everyone used it.
But a post on Reddit today caused the penny to drop: it turns out that many of the readers there hadn’t discovered this little gem, so I thought it was worth passing on to you as well.
(You’re reading the 32nd post in our series, 100 Essential Mac Tips And Tricks For Windows Switchers. These posts explain to OS X beginners some of the most basic and fundamental concepts of using a Mac. Find out more.)
![Use Your Mac to Copy Your Old DVDs & Burn Them to Disc [How To] Screen shot 2010-09-20 at 9.37.39 PM](https://www.cultofmac.com/wp-content/uploads/2010/09/Screen-shot-2010-09-20-at-9.37.39-PM.png)
One of the biggest problems with physical media is that it breaks. As soon as your DVD gets a couple scratches it’s rendered un-usable and worthless. Copying a DVD with encryption isn’t as easy as it should be. The good news is that with this walkthrough Cult of Mac will show you how to do it.

At the top of many OS X applications you’ll see something like this:

…a row of buttons, known as the Toolbar. This particular Toolbar is from word processing application Bean; different apps will have different buttons and different toolbars, but they will all look something like this.
The point is, wherever you see a Toolbar like this, you can customize it to suit your needs. You can put more buttons up there, or have just one or two. Or none at all.
Here’s how you do it.

If you’ve updated iTunes to 10.0.1 in the last day or so, you might have noticed that Ping is pushing itself in your face rather more forcefully than before.
One thing: there’s the Ping sidebar on the right. Another: there’s a new Ping drop-down menu that appears in your music library, alongside any song you have selected.
They’re fine if you use Ping, but if you don’t, you might want to get rid of them. The sidebar is easy to deal with, you can hide it with a click. But the drop-down menu requires a little more tinkering to get rid of.
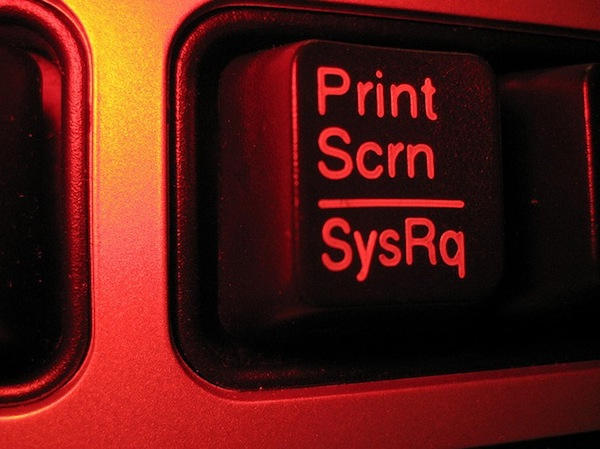
Windows users are accustomed to a “Print Screen” or “PrntScrn” button on their keyboard. When hit, the computer takes a picture of the current screen and saves it to the clipboard, ready for pasting into a graphics program.
So where’s the PrntScrn button on a Mac? How do you take a screenshot?
Vance L from Australia contacted us at [email protected] saying that when he switched from PC to Mac, he spent 10 minutes looking for that button before realising it wasn’t there. But as he found out, there’s another way.