As a Mac user, you already know how to take a quick screenshot with the ⌘⇧3 and ⌘⇧4 shortcuts. But did you know that you can also capture a video recording of your screen? If you’re running macOS Mojave, making a Mac screen recording proves as easy as hitting a shortcut, just like grabbing a screenshot. Older Macs can do it, too, albeit with a little more futzing.
Recording the screen in macOS Mojave
Let’s start with the easy one. To capture a screen recording in macOS Mojave, just hit ⌘⇧5. You could probably have guessed that. When you do so, a new screen-capture bezel appears on the screen, with options for video capture as well as regular screenshots.
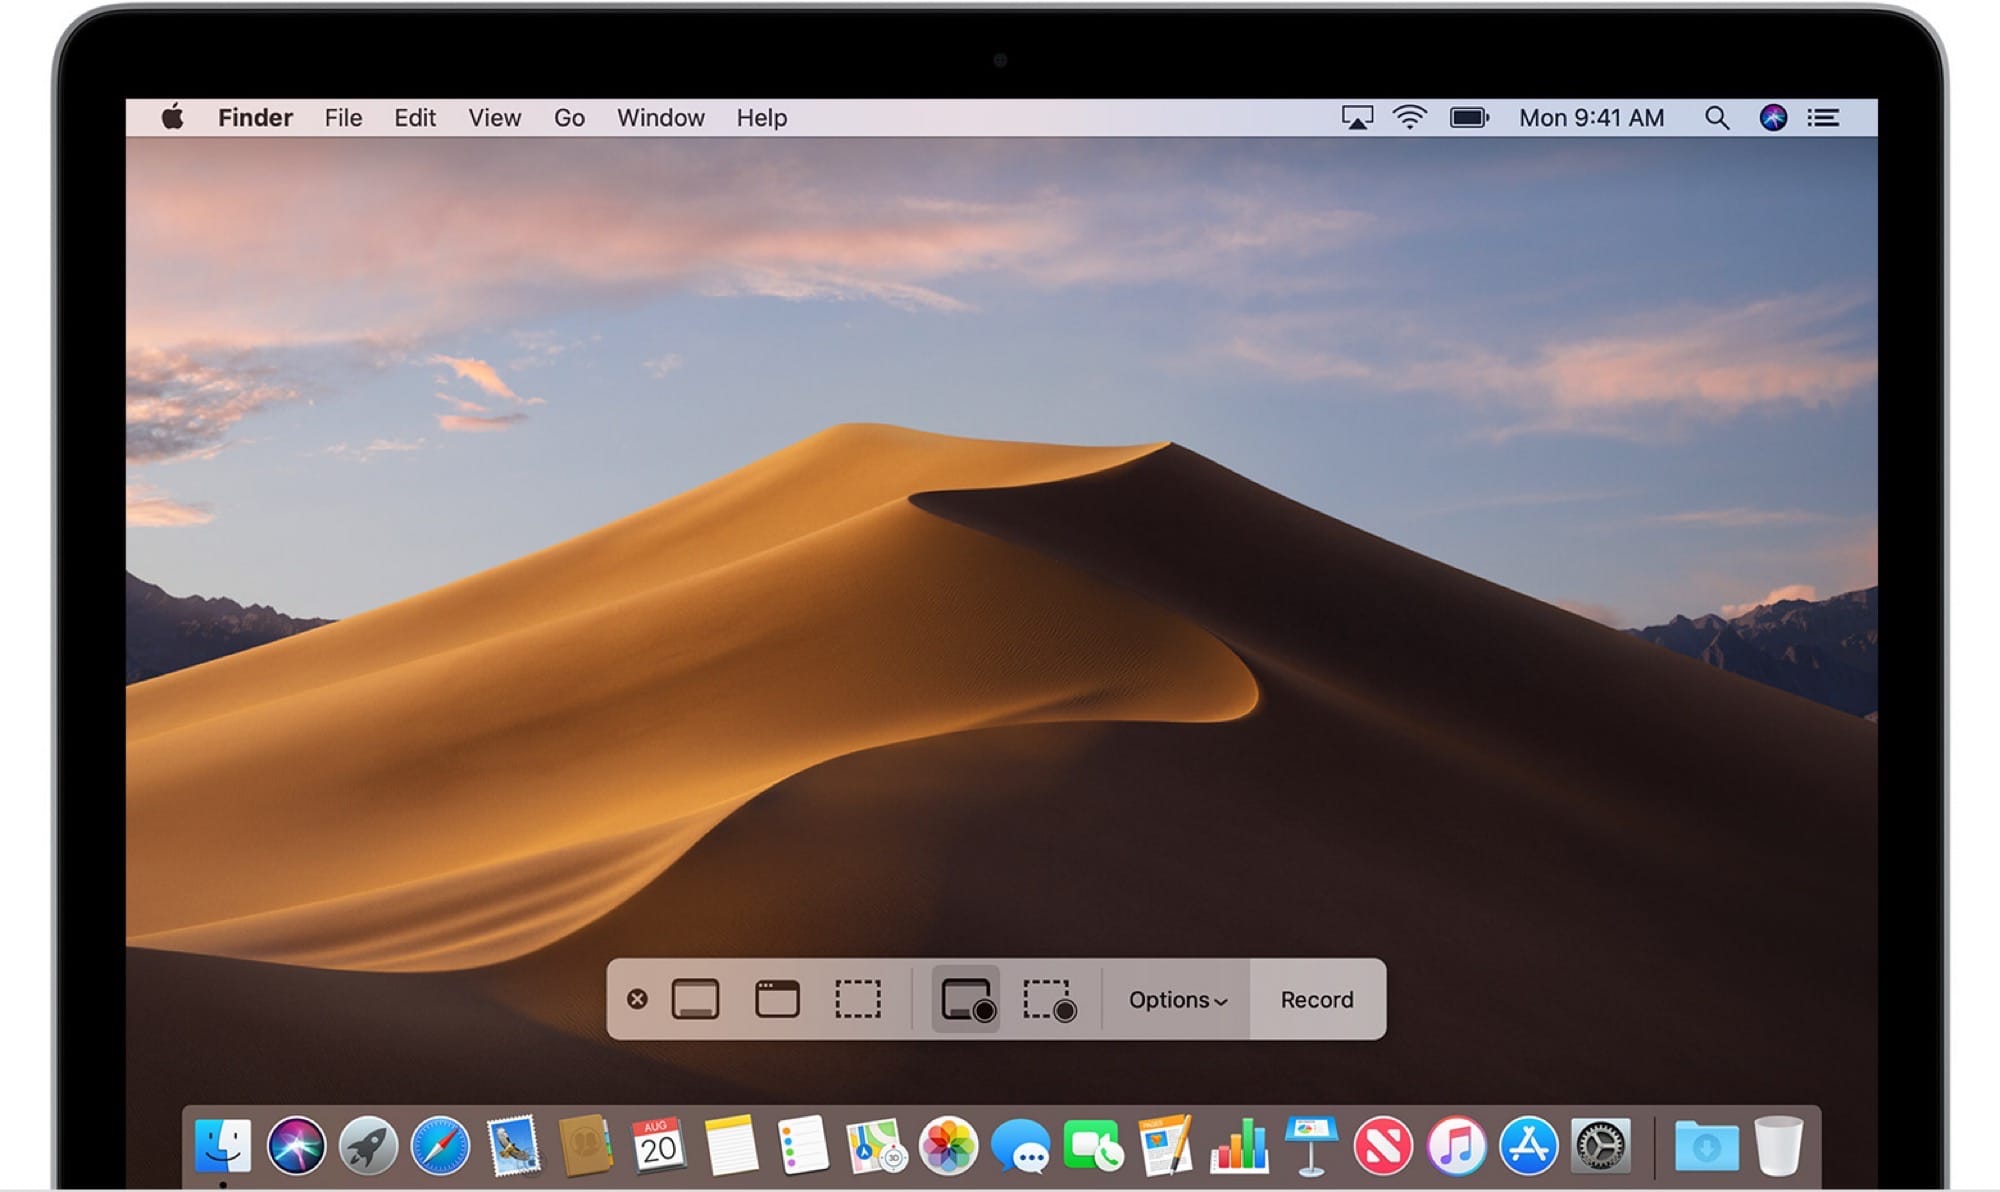 Mojave’s ⌘⇧5 screen capture panel.
To capture video, click on the fourth icon — the first one with a little recording circle overlaid onto a screen icon. The mouse pointer will turn into a little camera, and you can click on any screen to start recording. Yes, this works with multiple screens connected to your Mac.
If you only want to capture a section of the screen, use the next icon in the floating panel. This brings up a selection tool, and you must click and drag to select the portion of the screen you want to record. Once done, click the Record button at the rightmost end of the tool panel.
Once you finish recording, a thumbnail will appear on-screen, floating above the desktop. Click this thumbnail to share the clip or edit it. You also can drag that thumbnail directly to another location.
Recording the screen on older Macs
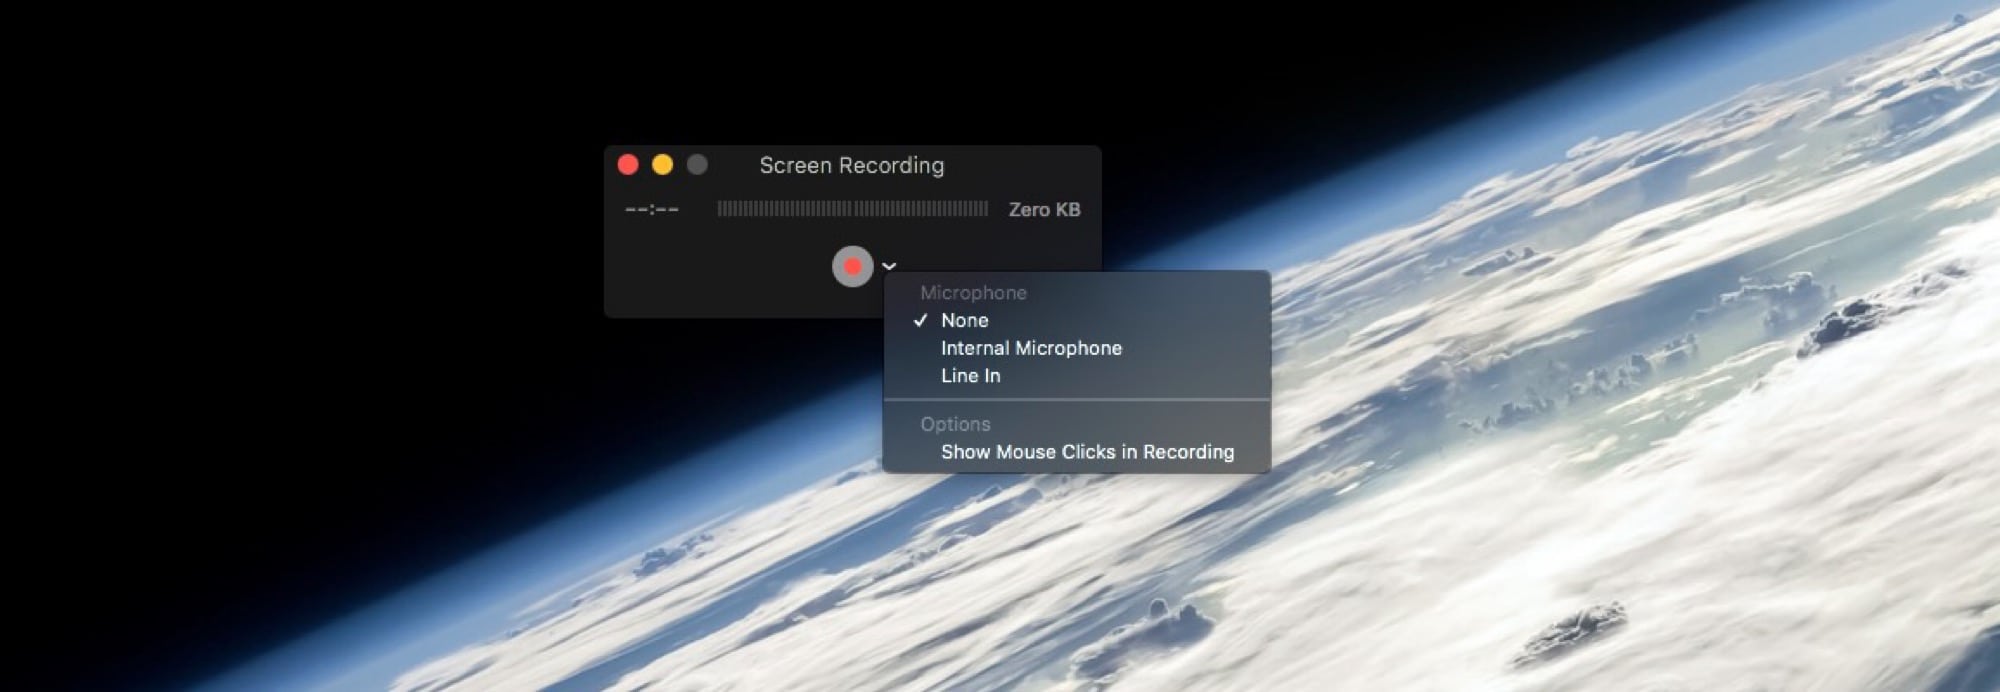
Photo: Cult of Mac
On pre-Mojave machines, you can capture screen recordings with the QuickTime Player app, which comes preinstalled on all Macs. (You can find it in the Applications folder.) To record the screen using QuickTime Player, launch the app, and choose File > New Screen Recording from the menu bar. Alternatively, you can use the ⌃⌘N keyboard shortcut.
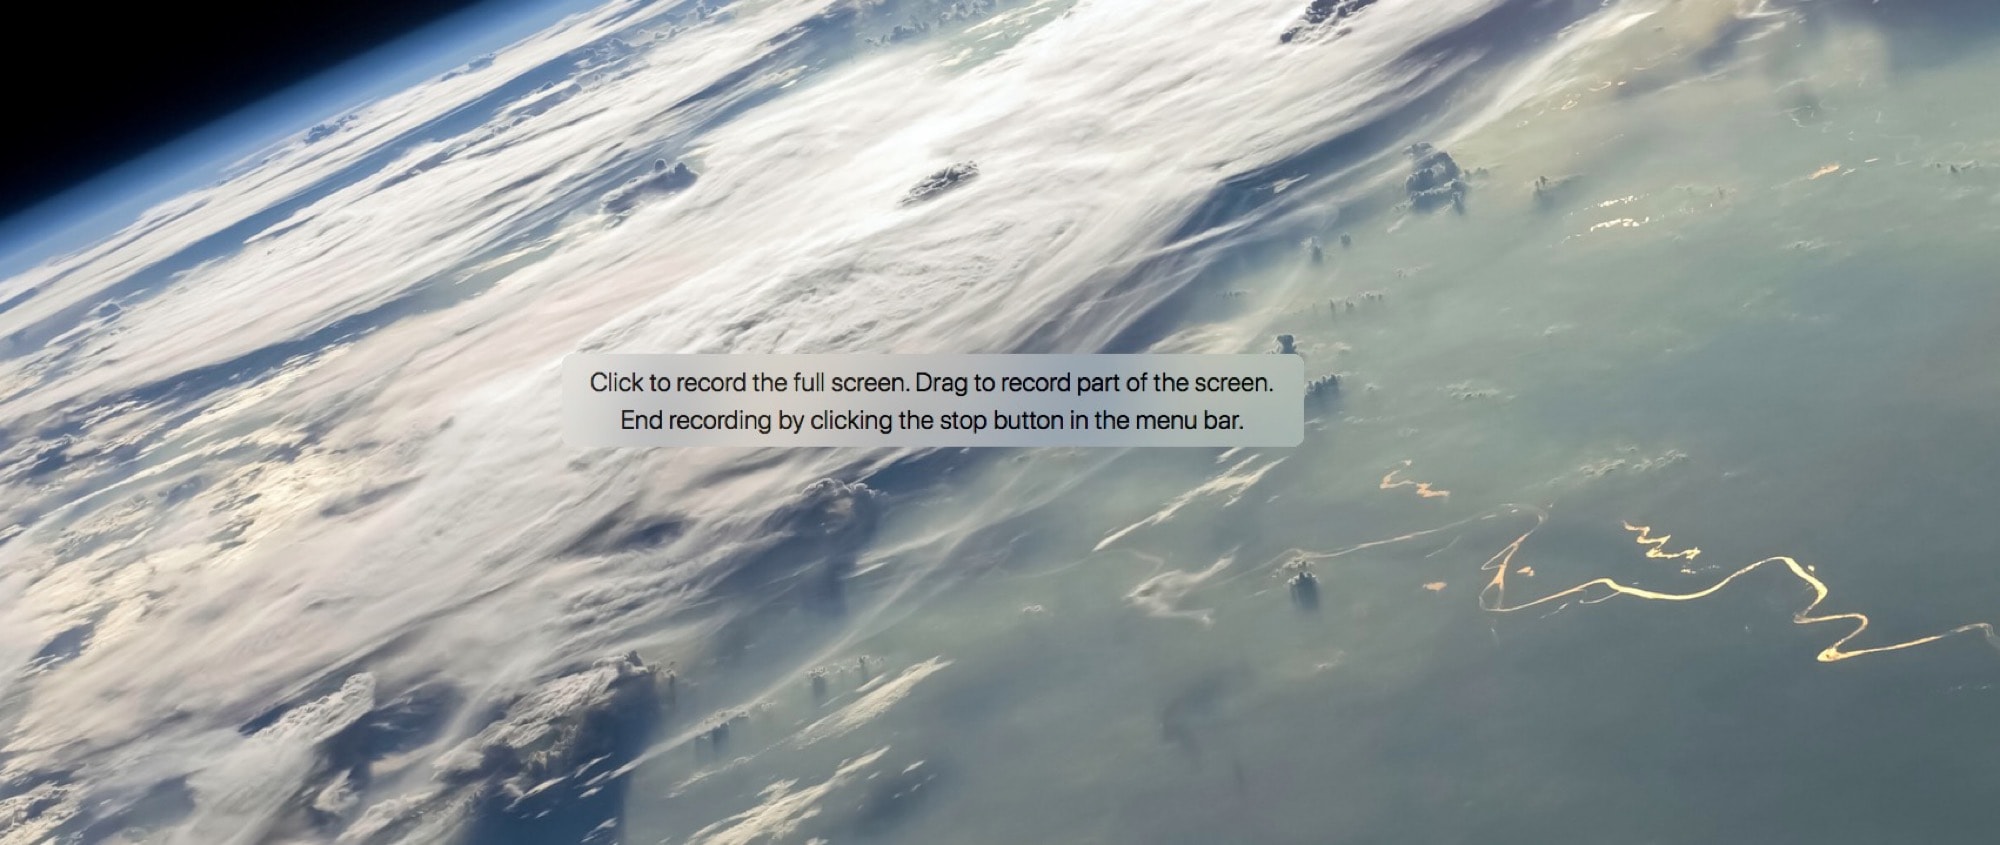
Photo: Cult of Mac
Next, you will see some on-screen instructions. You will be asked to either click anywhere to start recording the entire screen, or to click and drag to make a selection. If you opt to make a selection, you get to keep trying until you get a selection you like. When you’re ready to record, click the Start Recording button in the middle of your selection.
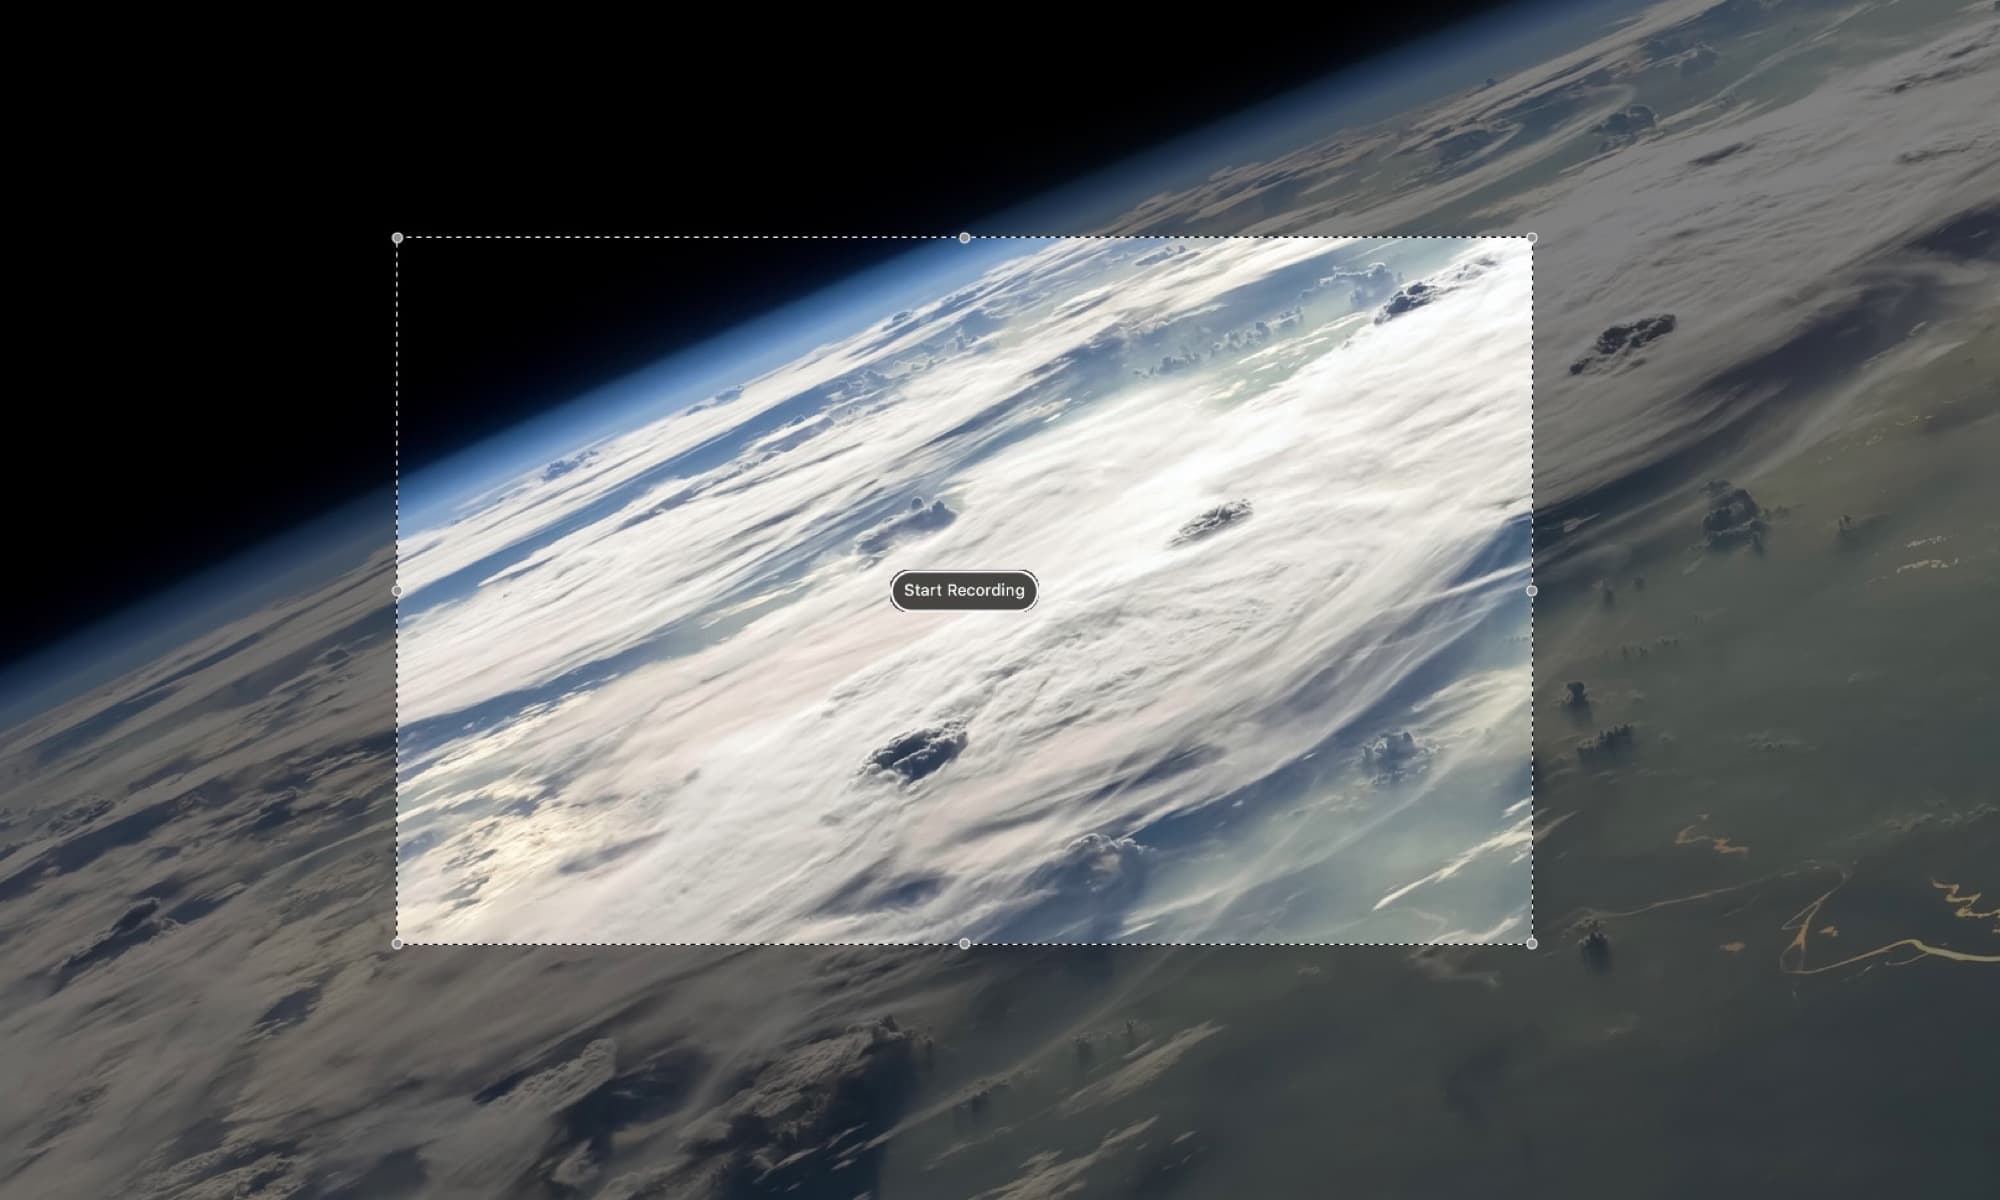
Photo: Cult of Mac
In either case, you can stop recording by clicking the Stop button in the menubar.
You new recording will be opened in an editing window, ready to be saved.
Old vs. new screen capture options in macOS
Mojave’s screen-capture tools are great. I also like how it generates iOS-style floating thumbnails so you can quickly interact with the captured screenshots and videos, without having to dig through all those icons on your messy desktop.
But the QuickTime Player method lets you make Mac screen recordings just as quickly, once you’ve opened the app. I guess it doesn’t possess the immediacy of the ⌘⇧5 shortcut trigger. But seeing as you must take extra steps to actually start recording in Mojave, in the end it makes no difference.
Oh, and one more thing — the screen-capture tool has a great extra feature — Show Mouse Click in Recording. This shows a black circle around the mouse pointer whenever you click, making it fantastic for instructional videos.
