You might be willing to share your iPhone’s passcode with other people, but what if you have sensitive notes you don’t want anyone else to see? Protect them with their own password.
Here’s how to secure individual notes on iPhone, iPad, and Mac.
It’s common that an entire family might share the same user account on a Mac, or that you might let your partner use your iPhone or iPad. You would happily hand over your password in these situations.
That doesn’t mean others should have access to everything, though. It’s easy to prevent them from reading notes that you would rather keep to yourself by giving those notes their own password.
Keep sensitive notes secured with a password
The password you use to secure your notes can be completely different to the one you use to secure your iPhone, iPad, or Mac itself. It should be easy to remember and short enough to type quickly.
You can use Face ID or Touch ID to unlock protected notes, but if you’re using a Mac without Touch ID, and you’re accessing protected notes a lot, you don’t want to be typing lengthy passwords every time.
There’s one important thing to remember, too: You can only protect notes that are saved locally on your device or synced to iCloud. Notes synced with third-party services, like Google, can’t be protected.
When you’re ready to proceed, start by creating a password for your notes using these steps:
On iPhone and iPad
- Open the Settings app.
- Tap Notes, then tap Password.
- Create a password, then specify whether you also want to use Touch ID or Face ID to unlock protected notes. Add a password hint if necessary.

Image: Killian Bell/Cult of Mac
On Mac
- Open Notes.
- Click Notes in the menu bar, then click Preferences.
- Click Set Password.
- Create a password, then specify whether you also want to use Touch ID to unlock protected notes. Add a password hint if necessary.
Once a password is set, you can start protecting notes that you don’t want others to see:
On iPhone and iPad
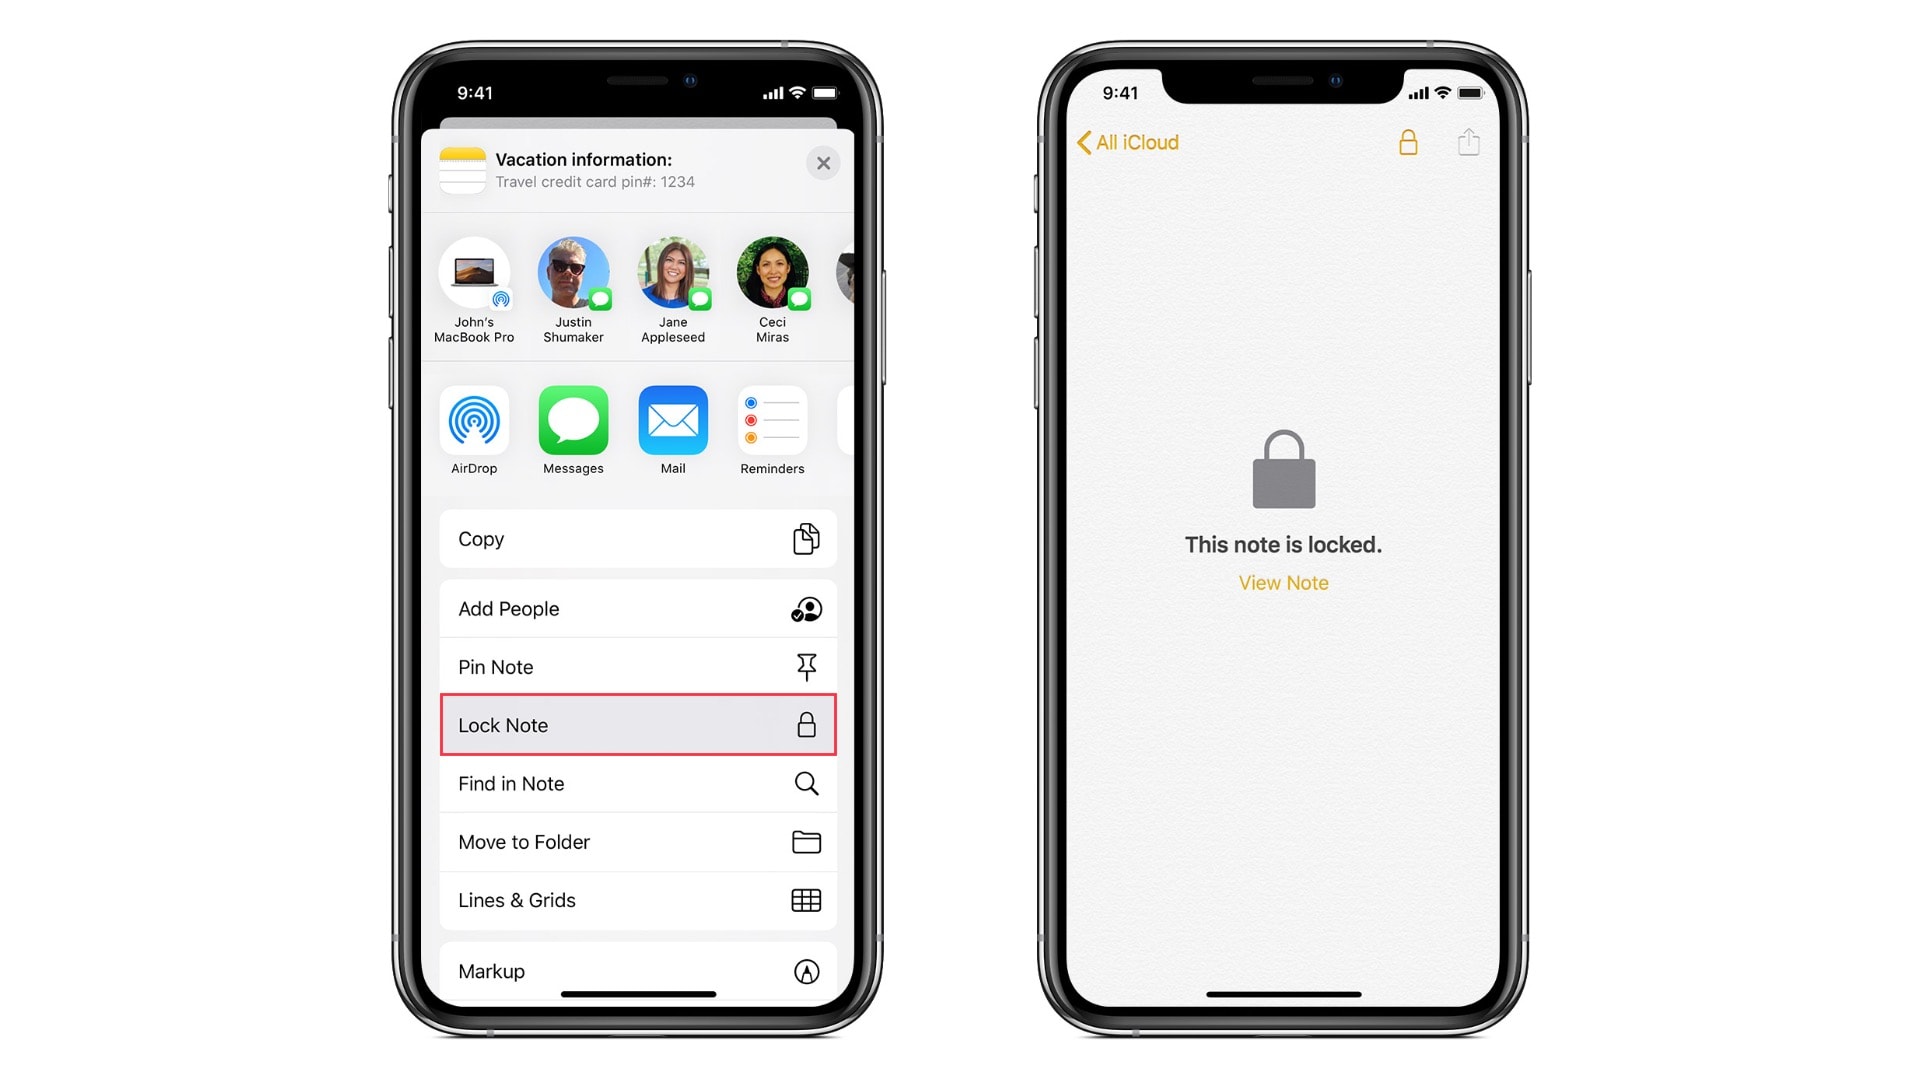
- Open the note you want to protect, then tap the Share button.
- Tap Lock Note.
Your note is now protected, but it remains unlocked until you leave it. You can lock it manually and hide its contents at any time by tapping the padlock icon at the top of the note.

Image: Apple
On Mac
- Open the note you want to protect, then click the Lock icon.
- Click Lock Note.
Important: Don’t forget your password
Before you start protecting your notes, it’s important to remember that once they’re locked, there’s no way to gain access to them without your password. If you forget it, they’re gone for good.
It is possible to reset or create a new Notes password at any time, but this won’t change the password on notes that are already protected.


