One great recent addition to GarageBand for iOS is the Visual EQ, an equalizer that is about as far away from the 1980s-style bank of sliders as it’s possible to get. The Visual EQ also shows you a waveform of the actual sound you’re adjusting, so you can see as well as hear the effects immediately. This visual element, combined with a clever three-“band” EQ, makes this a very powerful tool for shaping your music.
How EQ works
There are several ways to add EQ, or equalization, to your music, but they are all essentially the same. EQ boosts or cuts the sound level for a particular frequency of sound. The obvious use is to boost the bass on your car stereo, but it can be a lot more surgical than that.
For example , when recording and mixing music, you might want to boost the middle frequencies on a guitar, and cut its bass a little, so it doesn’t step on the toes of the bass guitar. For a song, the EQ might make a particular track sound worse, but when it is combined with the rest of the tracks in the song, the whole sounds better.
It’s a little like baking a cake. You don’t use salted butter and salt together. You use blander unsalted butter so you can be sure the final mix is balanced.
Visual EQ and analyser
The key part of GarageBand’s Visual EQ is the visual analyzer. But before we get to that, let’s find the Visual EQ panel.

Photo: Cult of Mac
With a project loaded up in GarageBand, select the track you want to EQ, then tap the little track settings icon, which looks like a panel of three sliders. Then tap the title of the Plug-ins & EQ section. Then tap Visual EQ, which has until now been switched off. You’ll see the panel cover half the screen. If you haven’t already, press play to start the track.
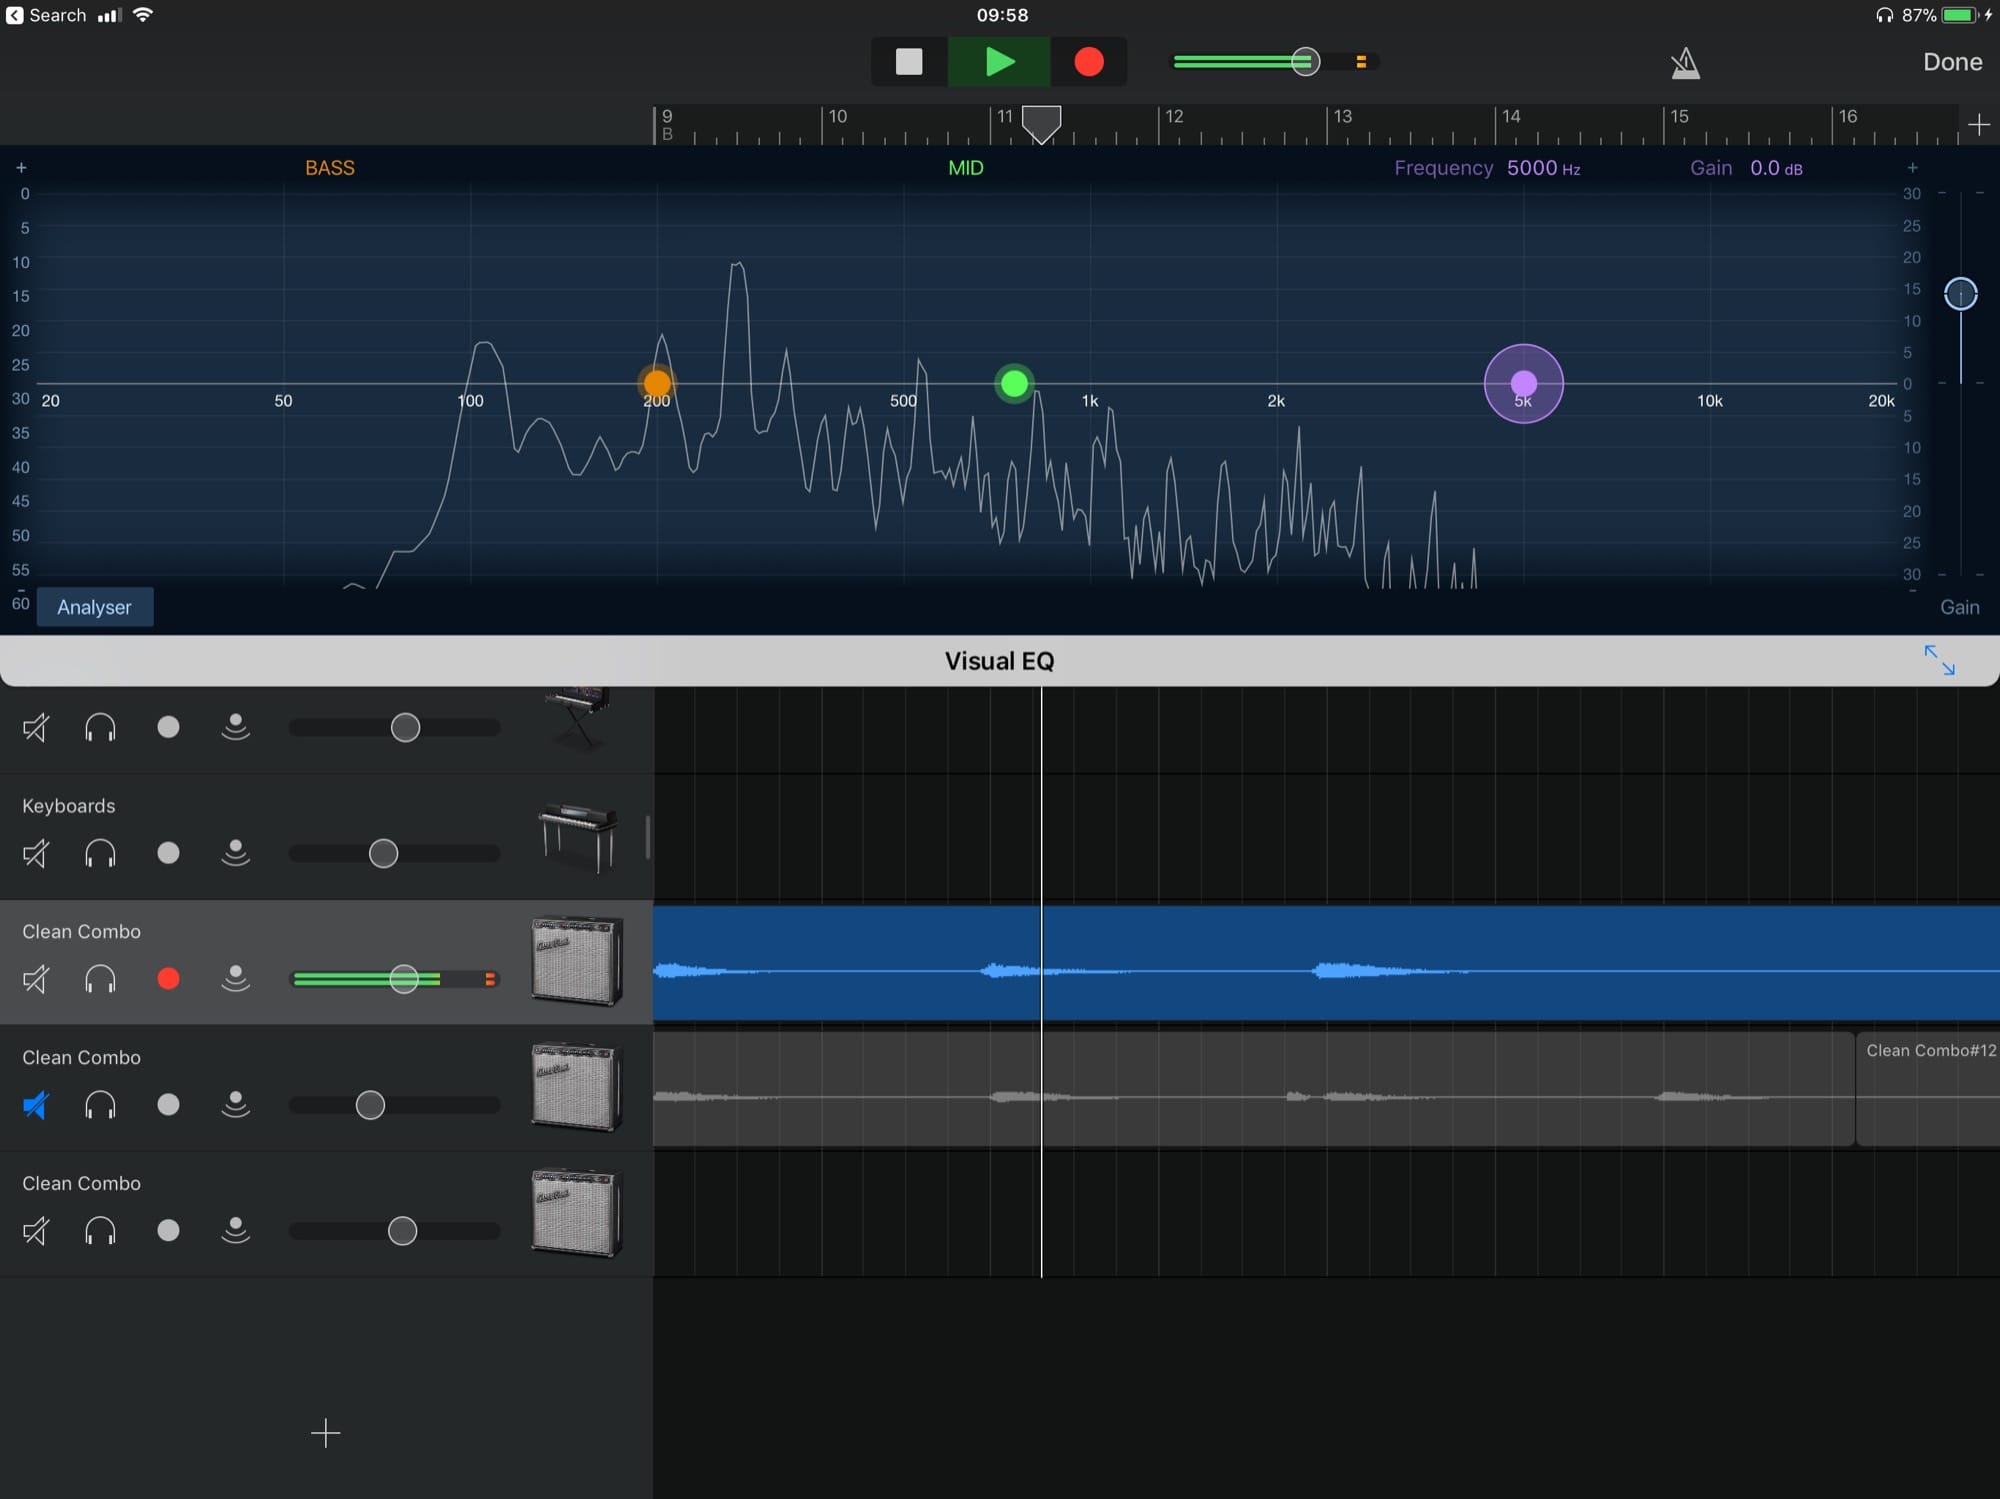
Then, tap the Analyzer button at the bottom left of the panel. This is the most visual part of the Visual EQ. As you can see, it displays a live waveform of the track, showing you exactly the levels of each frequency. With that knowledge, we can go to work.
How to use the EQ in Visual EQ

Photo: Cult of Mac
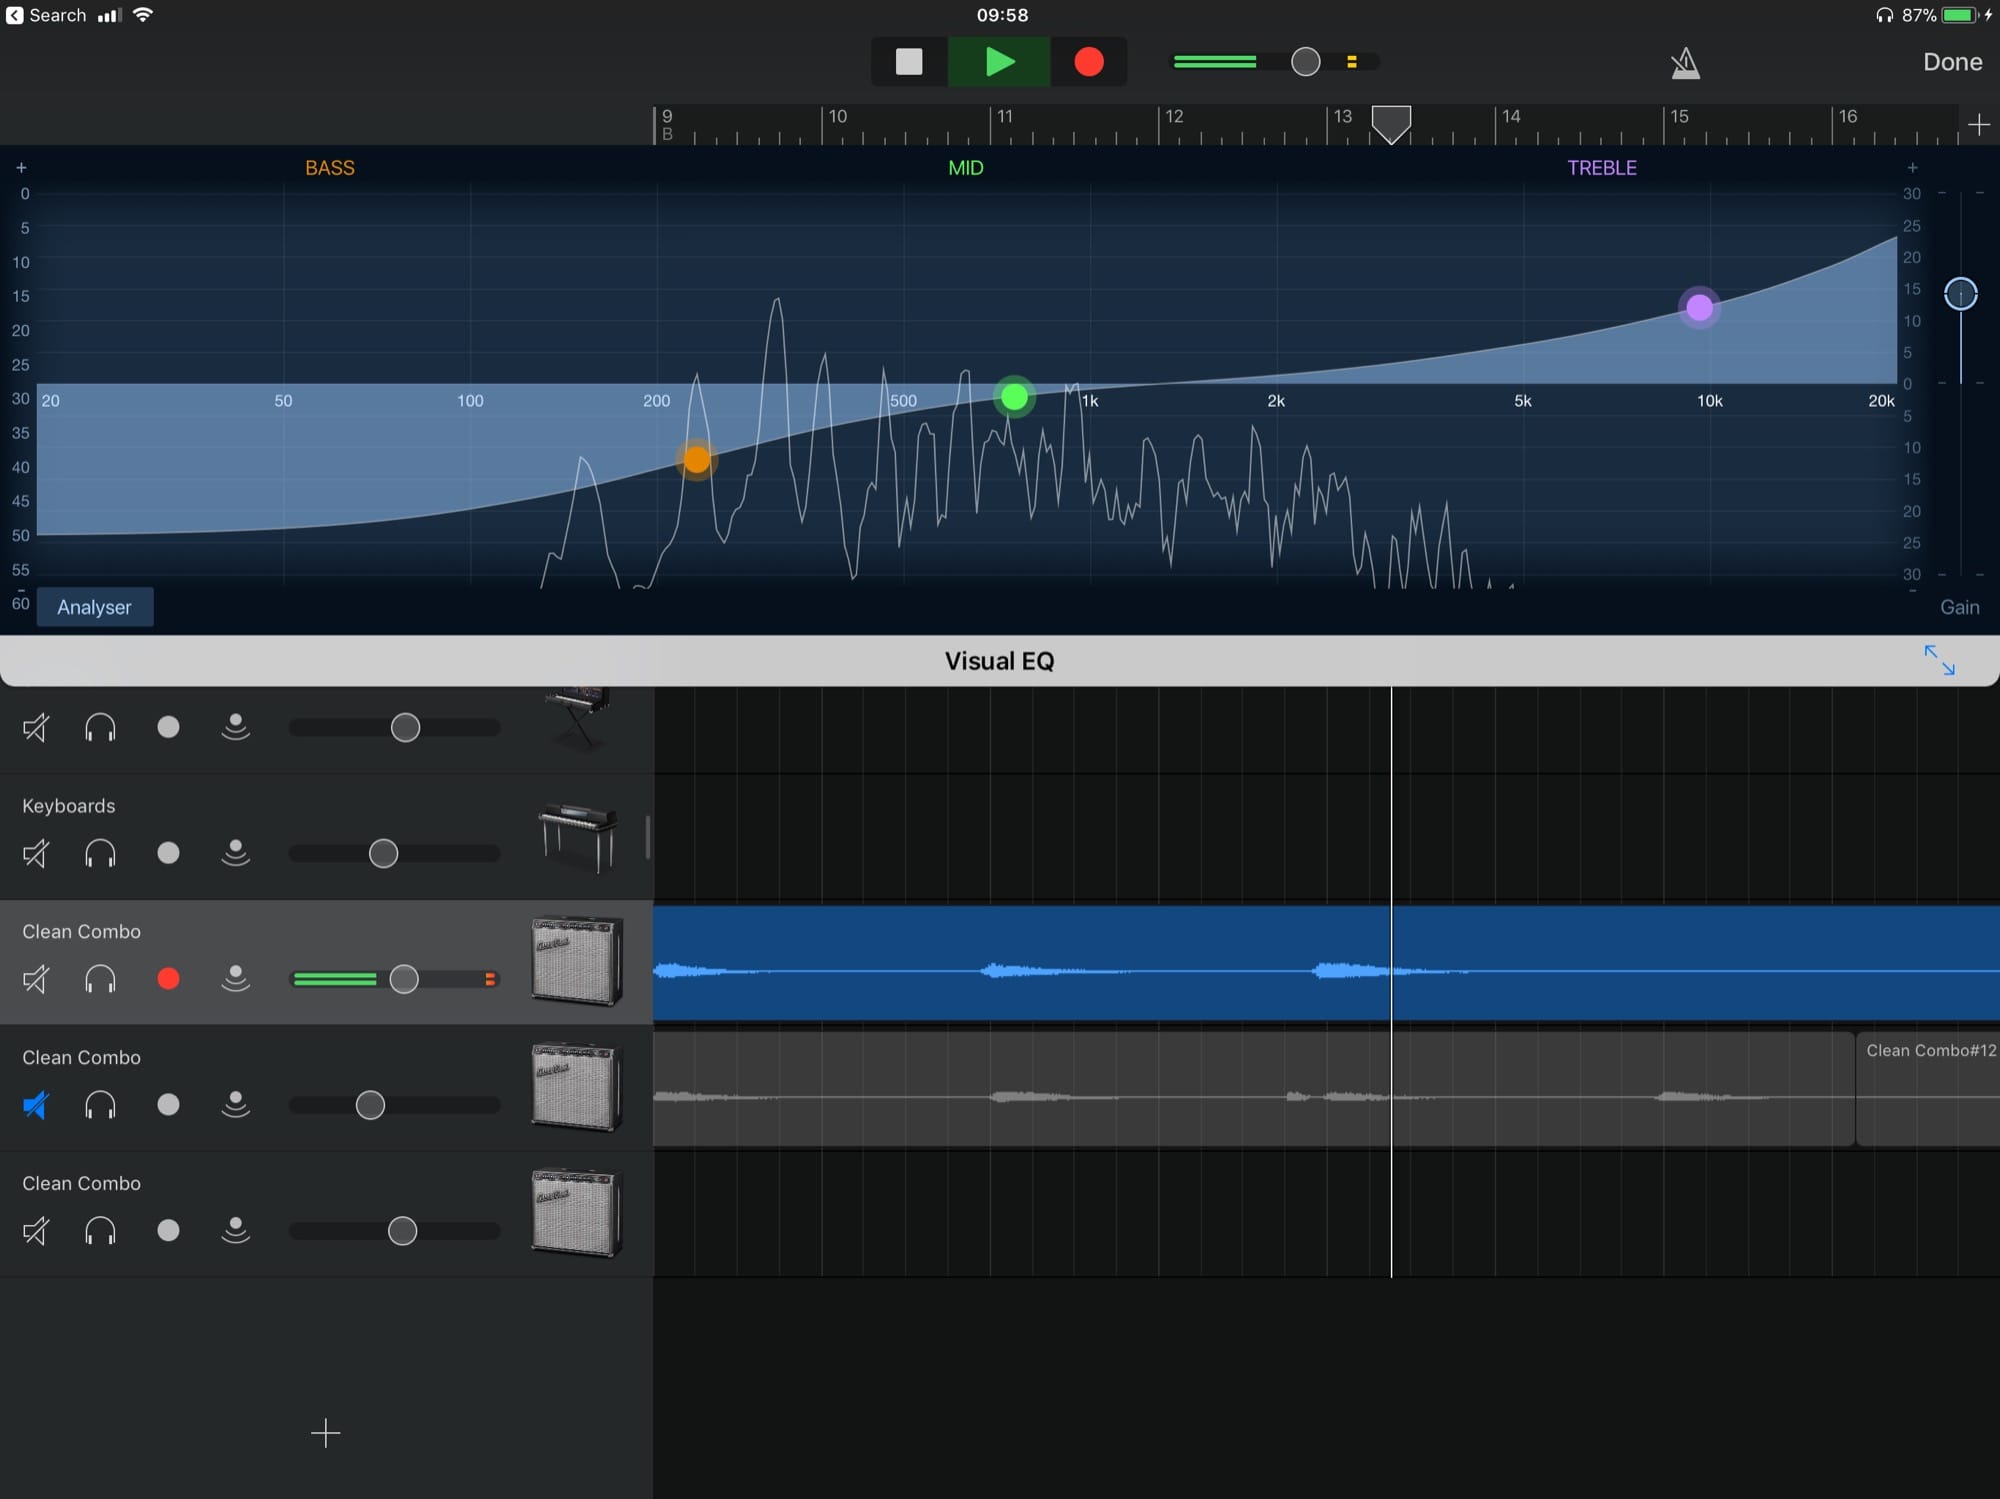
This is the easy part, in terms of mastering the controls. It might also be the hardest part, in terms of deciding how to EQ the track. You’ll see three colored circles on the EQ line, one each for bass, mids, and treble. To cut or boost any of these, just slide them up or down. And to fine-tune the frequencies affected by each slider, you can move it left (bass) or right (treble).
The three adjusters don’t all work the same way either. You’ll see that the mid control creates a symmetrical peak or a valley in the EQ line. Move the bass or treble controls and the adjustment tapers off all the way to the left or right of the panel. That’s because the bass and treble act more like shelving adjustments. You are effectively setting a cut-off point for the top or bottom frequencies, and choosing the gradient of that cutoff.
Free-range EQ
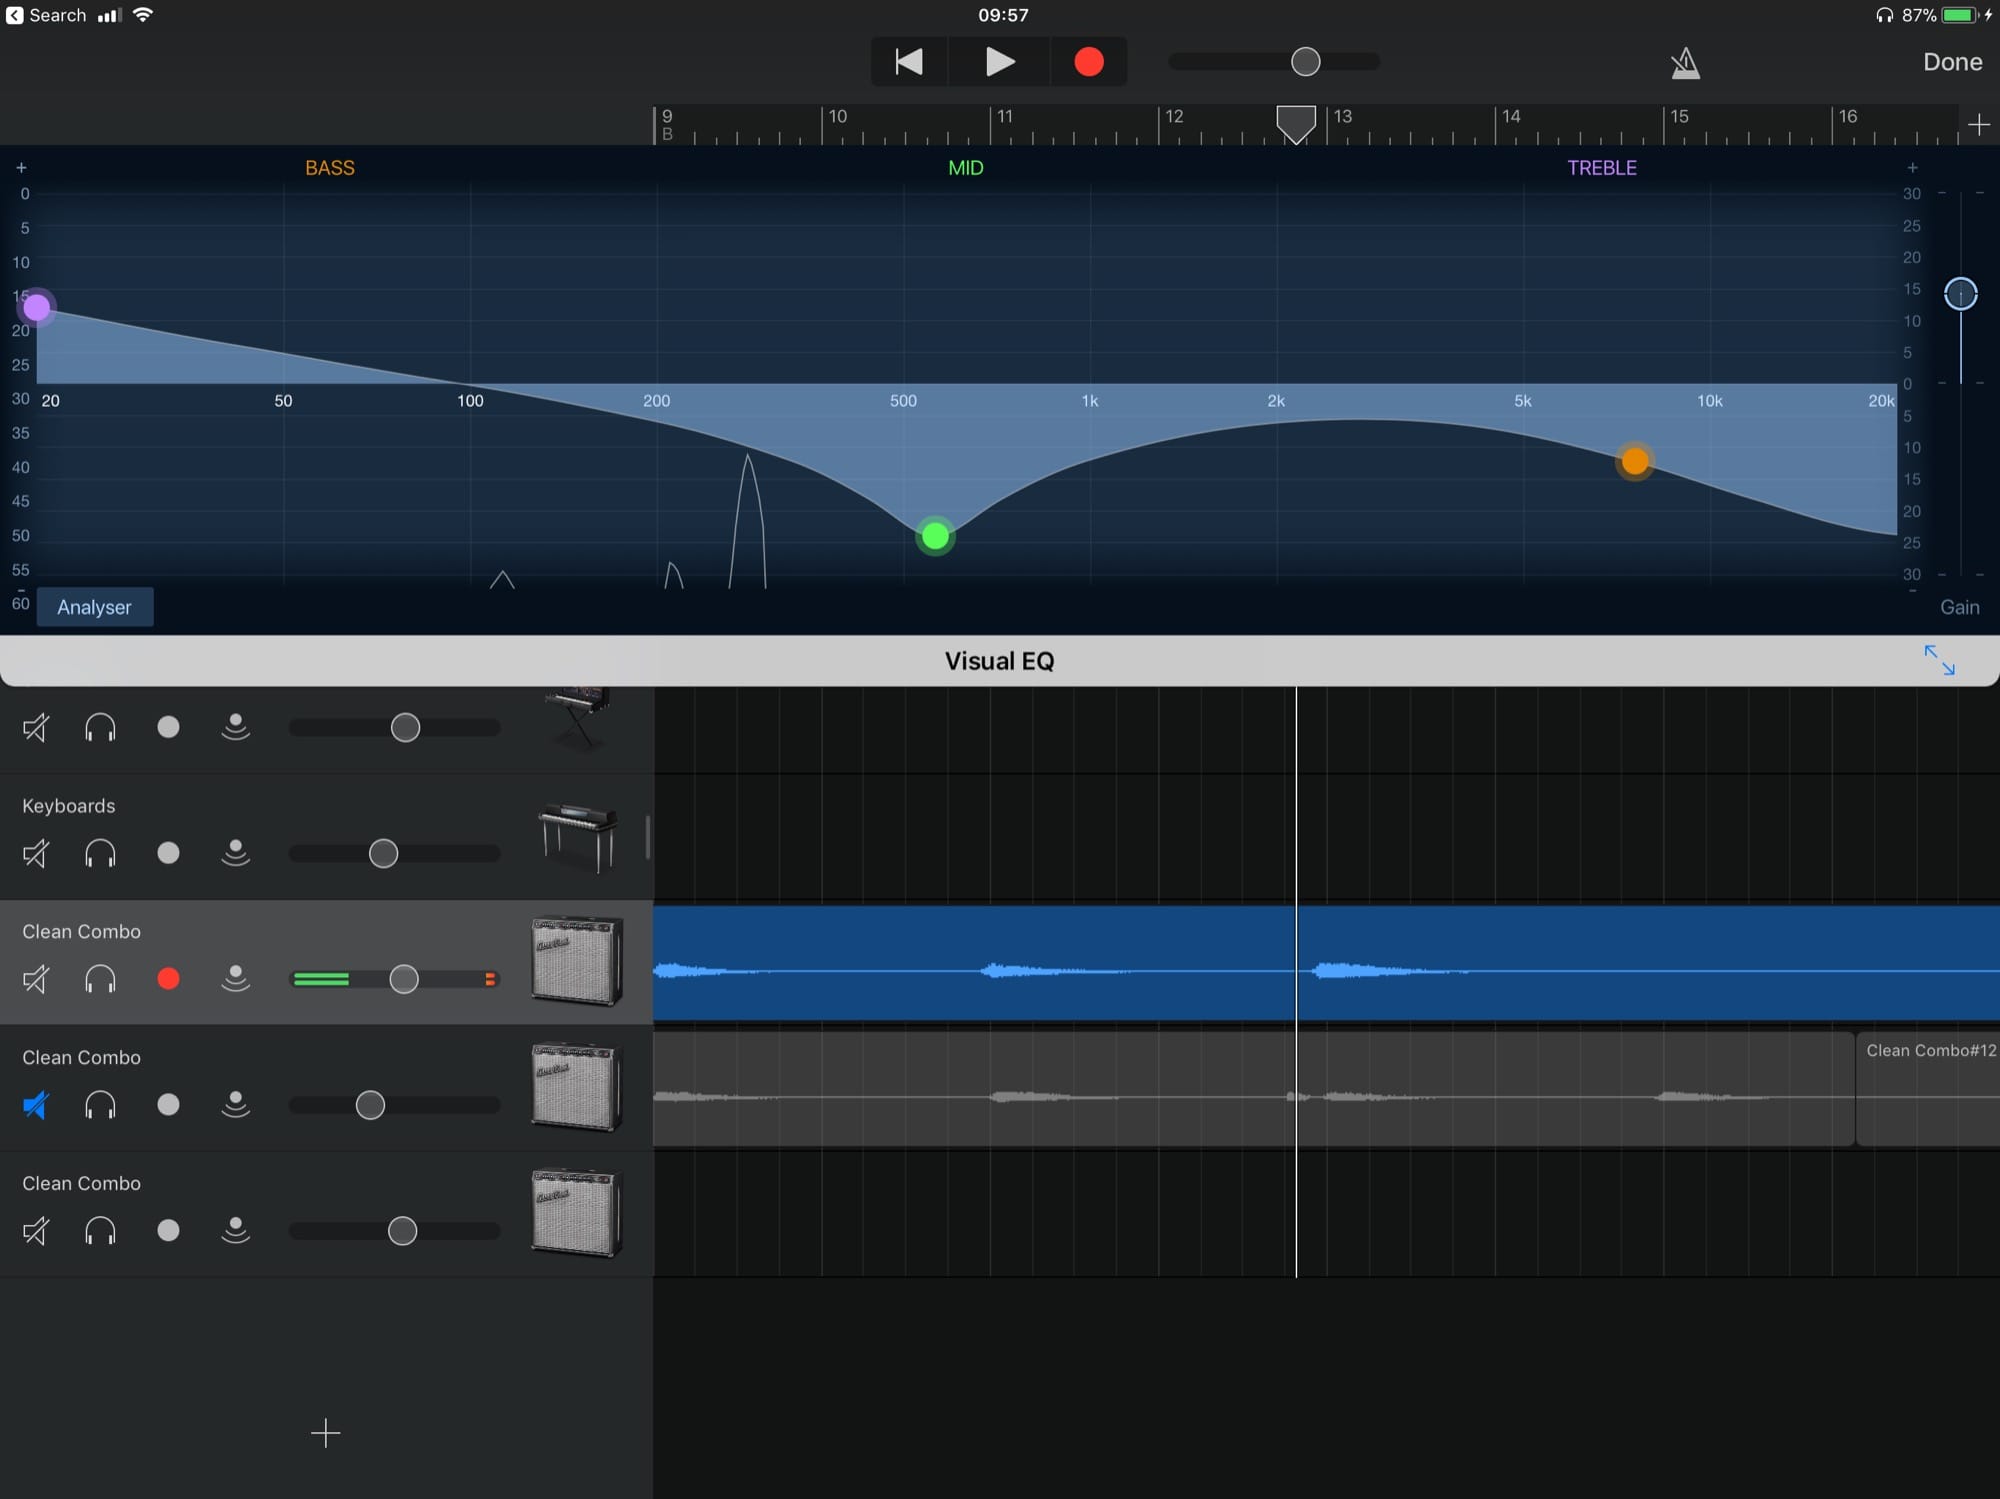
The other trick here is that the points aren’t constrained. So you can slide the bass all the way up into the treble section and vice-versa, to really sculpt the sound. You can also move the mid node anywhere along the frequency line, to surgically cut or boost a frequency. Thus, you could boost the bass in general, then move the mid control into the bass zone to cut out just one rogue frequency.

Photo: Cult of Mac
Combined with the visual feedback from the live analyzer, this is very powerful.
Finally, at the far right of the Visual EQ panel you’ll see the Gain slider. This is an overall boost or cut for the track, and is meant to let you compensate for any volume loss (or increase) resulting in your EQ tweaks. It’s also a way to get an extra boost to a very quite recording, but this will also boost any noise in the track, so things could get hissy.
Pro tips
That’s it for Visual EQ on iOS. It’s simple to use, but very powerful. If you EQ your tracks well, then you can turn a decent-sounding project into an amazingly polished one, and all without fancy mastering tools or anything else. And before we go, here are a few extra tips for using Visual EQ.
- You can switch tracks with the Visual EQ window still open, to quick tweak EQ on different tracks.
- Double tap a node to reset it back to its default position
- Tapping on one of the adjustment circles briefly shows the gain level and frequency applied by that adjuster.
- Tap the Solo button (a headphone icon) on the track you’re working on to hear it alone, or with the rest of the song. This is a great way to check how your adjustments are affecting the individual track, and the mix as a whole.


