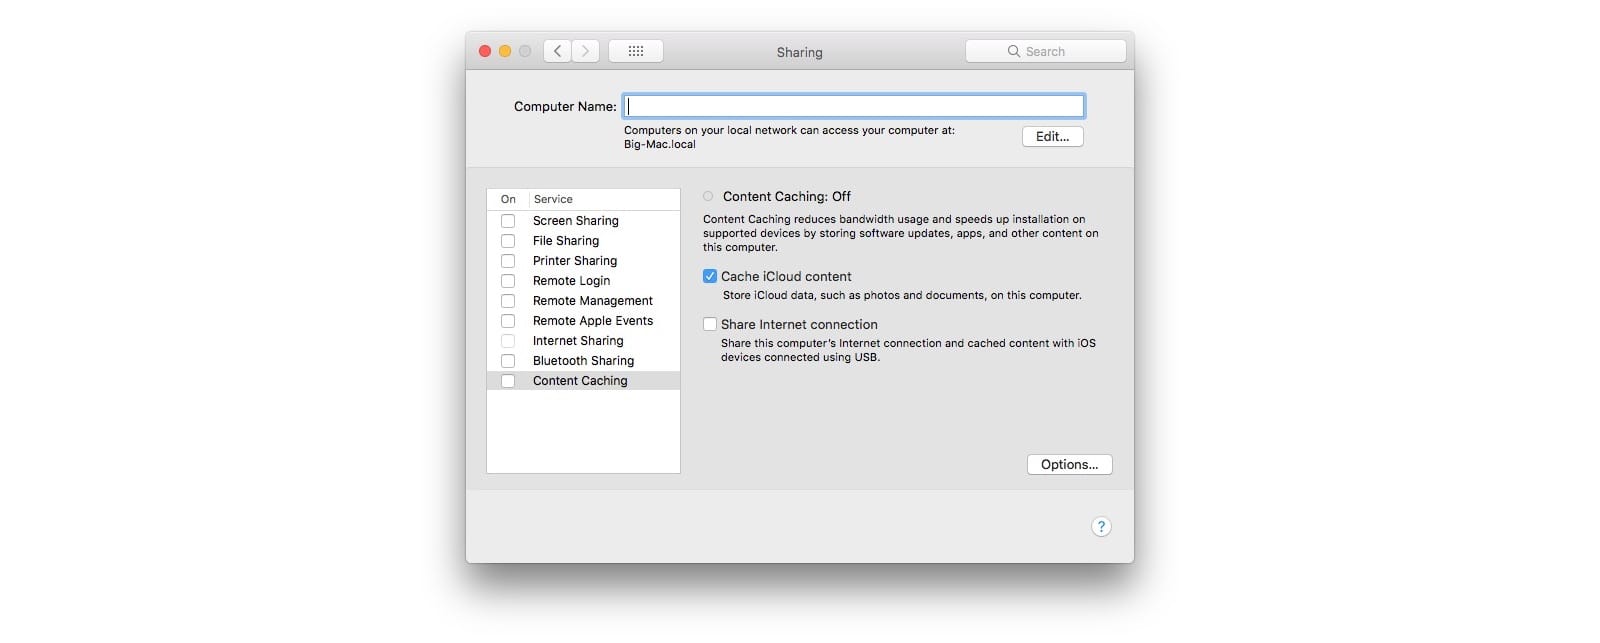
When iOS update time rolls round, you probably run through all the devices in your home, downloading those multi-gigabyte updates over and over. If you have a few iPhones, plus a couple of iPads, it all adds to a lot of data, and a lot of waiting. New in macOS 10.13 High Sierra is Content Caching, which stores these downloads on a Mac, so they only have to be downloaded once.
This doesn’t only save on internet data usage. It also makes it way faster to update several devices. And it’s not just updates either. Content caching can also cache iCloud documents, your photo library, and app updates.
Cache cachet

Photo: Cult of Mac
Content caching is a fantastic idea, especially if you have an always-on (or often-on) iMac in your home or office. Instead of having to download the same stuff over and over, you only do it once. Then, any other devices on your network pull their data from your Mac, instead of from Apple’s servers. That’s probably a boon for Apple’s data bills, but for us it could make a huge difference to update speeds. When this feature is switched on, both Mac and iOS content is saved locally.
macOS 10.13 Tip: have lots of iOS / Mac devices in your house? And a Mac that's usually on? Turn on "Content Caching" in Sharing prefs, and updates will be downloaded to all your devices from your Mac, saving time and bandwidth. https://t.co/xHCK8Fuot8 pic.twitter.com/WeewCtcnnH
— Cabel (@cabel) December 19, 2017
The people who will see the biggest difference are those with slow internet connections, and those with networks that have a lot of users i.e. businesses, or organizations like schools. But if you ever sat waiting for your iPhone to upload a day’s worth of photos over a slow DSL connection, you’ll love content caching too. Your iPhone will sync to the Mac instead, which can then run in the background to do the dirty work of uploading. It’ll even save your iPhone’s battery.
How to enable content caching on macOS High Sierra
This part is easy. Just open up the Sharing prefpane in System Preferences, and check the box next to content caching. It’s the new entry at the bottom of the list. And that’s it. From now on, content will be cached on your boot drive.
Options, and optional options

Photo: Cult of Mac
There are a few settings you can tweak here, To start, click the Options… button. The default location for the content cache is your boot drive, but that can fill up fast. In the options screen you can select a different location for the caches, as well as limiting their size. If you only have one volume in your Mac, then limiting the cache size is the way to go.

Photo: Cult of Mac
If you hold down the Option key, the Option button will turn into an Advanced Options… button. Click that and you can really get yourself into trouble. You can choose what parts of your network can access cached content, as well as controlling which peers will share data (you can set several machines to do content caching, and they will sync amongst themselves). These options are good for folks administering large networks.
Bonus: Restore from backup
According the this twitter thread, your iCloud restores fro backup are also way faster, because much of the content of the backups is now stored locally.
And the iCloud content caching means that backups of iCloud library and iCloud Drive are saved locally so that when you wipe and restore an iOS device – most of the restore from iCloud backup is local network speeds. Buh-bye multi-hour and multi-day restores from iCloud backup.
— (@bmike) December 19, 2017
That’s a pretty neat feature right there. In fact , the whole content caching thing is pretty neat. It has been available on OS X Server for a while, but now it’s on the regular macOS, we can all switch it on and benefit.


