Halide is yet another iPhone camera-replacement app, only this is one you’re going to want to use. Why? because it not only adds extra control to the stock camera app, it is also easier to use than Apple’s built-in app. In addition to being one-handed simple, Halide adds power features like manual focus and RAW capture. It’s quite a feat.
What Halide doesn’t do

Photo: Halide/Cult of Mac
There are only three downsides to Halide. One is that you can’t launch it by swiping left on your iPhone’s lock screen. The other is that it launches a touch slower than the stock app, but only from cold. If you force-quit both apps, then launch them, the Camera app is ready instantly on an iPhone 7, whereas Halide takes a second to get going. If you have used Halide recently, though, it too is instant. The other thing missing is the ability to fire the shutter by hitting the iPhone’s volume buttons. You can only use the on-screen shutter release.
Halide also lacks video capture, self-timer, square images, and panoramas. Which is to say that it’s fine-tuned for taking still pictures. If you want those other modes, you can switch back to the built-in app.
Taking a photo

Photo: Halide/Cult of Mac
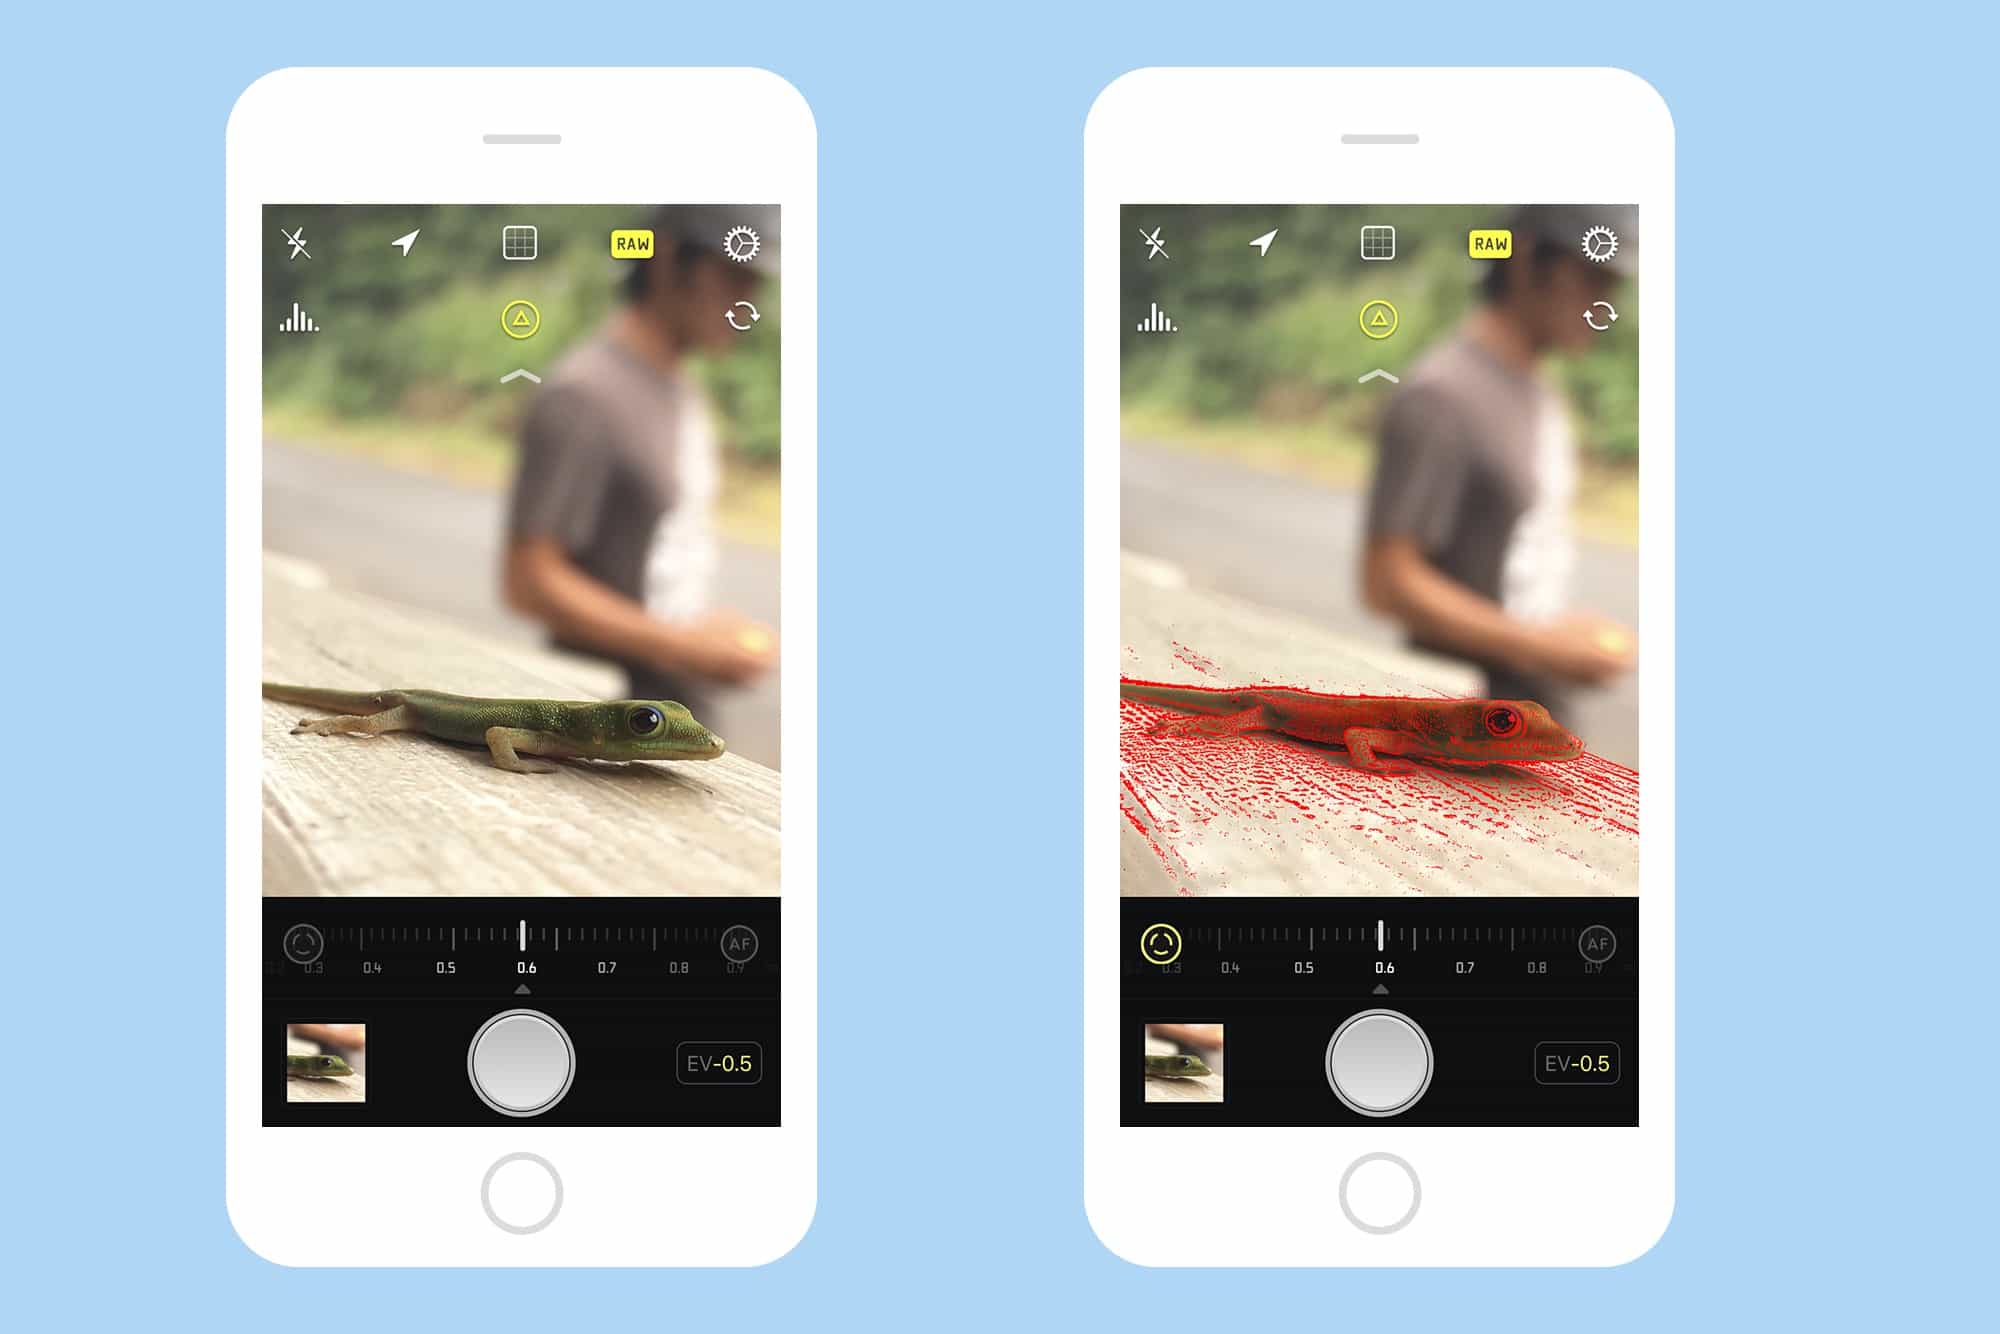
Halide uses gestures for control, which means that you can get a lot done just by swiping. If you like, you can just point the camera at your subject and tap the shutter button, and it will take care of everything automatically. But even here, control is easier. Tapping the flash icon toggles the LED lamp on and off, for example, instead of popping up another three-choice option, like the stock app. Swiping up and down almost anywhere on the screen allows you to adjust the exposure, instead of having to fiddle with a little adjuster box like in the default Camera app. Even switching geotagging on and off is easy thanks to a dedicated button (which can be hidden or always visible — see below).
Auto Vs. manual
Auto and manual modes are not sharply divided in Halide. In auto, for example, you can tap to focus, and swipe to adjust the exposure. To access manual focus, you just swipe the focus adjustment “dial” out and you’re there. It’s analogous to grabbing the focusing dial of a pro-level SLR or rangefinder (Leica) camera: It’s just sitting there, ready to be used. If you want to let the camera take over again, tap the A button that sits next to the dial.
Focus peaking

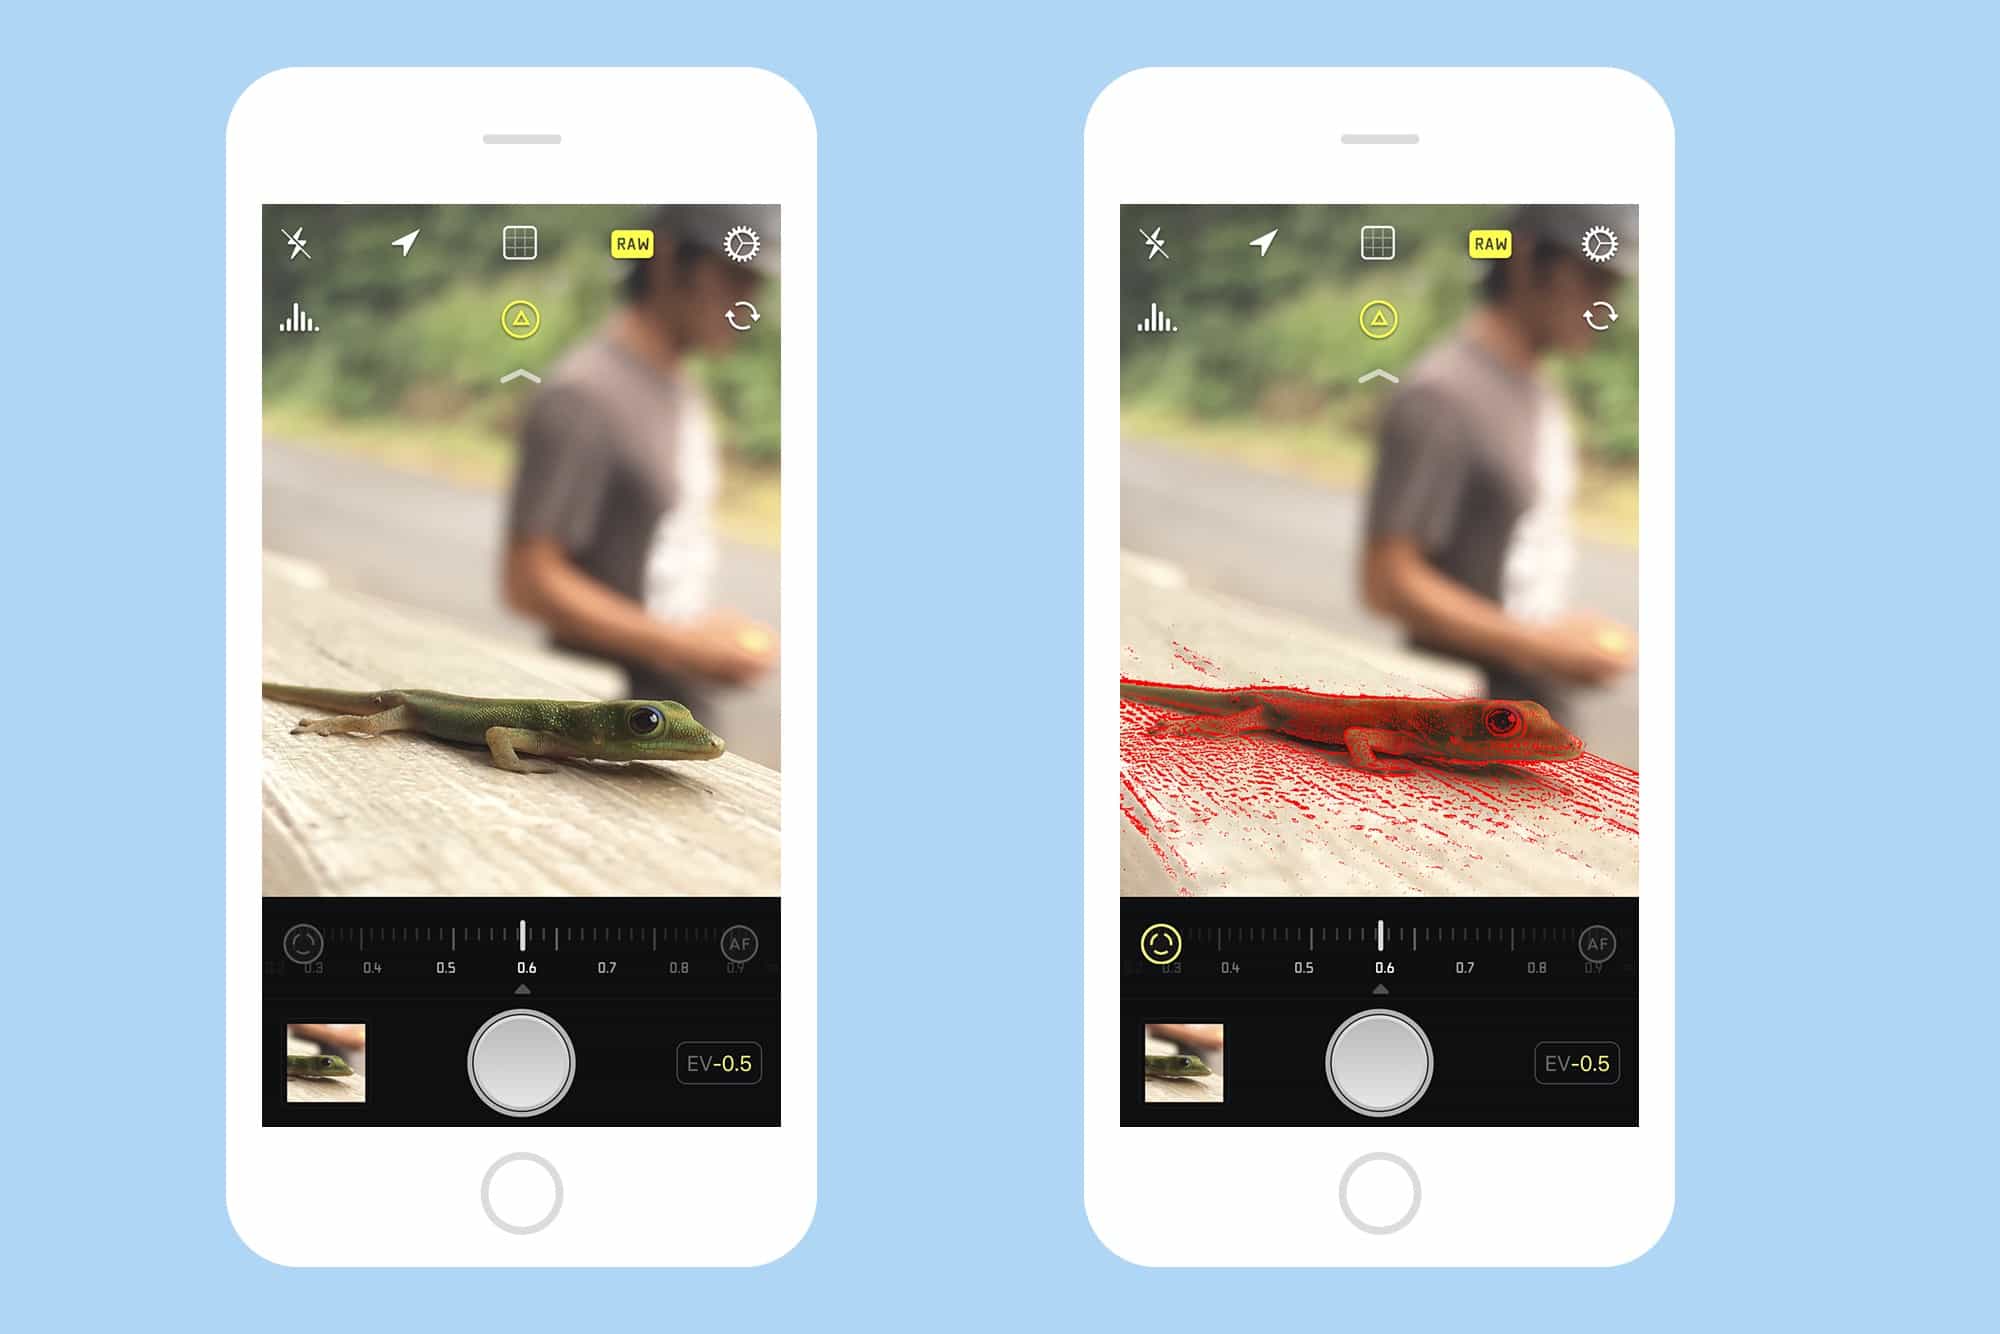
To help you with manual focus, Halide uses focus peaking. This is a feature from video cameras, which has found itself in stills cameras in recent years. Focus peaking indicates anything that;’s in focus by highlighting its edges in red. It’s a surprisingly intuitive way to work, which is probably why we’re seeing it more often. It’s great because you can see at a glance which parts of the frame will be sharp. To access it, you tap an icon which only appears when manual-focus is active.
Quick settings
All of Halide’s settings can be toggled quickly, using persistent on-screen icons. Two of these icons are available at all times, at the top left and right corners of the screen. The rest appear in a row when you swipe down from the top of the screen. You can customize which icons appear where using drag-and-drop. I have the histogram and the selfie-camera switch as my main shortcuts, with the rest — grid, RAW, flash, and location — all in the pull-down row. There its also a permanent auto/manual button up at the top, and tapping it opens up settings for ISO (sensor sensitivity), and white balance. You can’t set a custom white balance with Halide, however. You’re stuck with the presets.
Finishing touches
Halide has some lovely hidden surprises. For example, when you activate the on-screen grid, to help you line things up, it also activates a level. In normal shooting, the level takes the form of a rectangle that stays level when you tilt the iPhone: when the iPhone is also level, the rectangle lines up with the one in the center of the grid. When you have the iPhone held flat, when taking a photo of something on a table, for example, the view switches to a “bubble,” or two circles, one fixed and one roving, to help you get the iPhone dead level. Another example is that, when shooting in silent mode, the app gives a little vibration
Halide is full of nice touches like this, which is even more surprising for an initial launch release. The app even has its own Leica-like font, specially commissioned for Halide. The attention to detail is impressive. Even the built-in manual is cool, styled like a paper manual of old. Not that you’ll need the manual, because the app really is super intuitive.
Halide is just $2.99, available now on the App Store.


