Lightroom for the iPad is here. It’s called Lightroom Mobile, and it runs smoothly on anything down to an iPad 2 (or first-gen mini). You can use the app to edit and organize any photos in your Lightroom collections, and it syncs automatically (and near instantly) with Lightroom on your desktop (you’ll need to upgrade to v5.4).
And the price? It’s free, but only if you already subscribe to Adobe’s $10-per-month Photoshop Photography Program, which also gets you the desktop versions of Photoshop and Lightroom. There’s also a 30-day free trial to check it out.
So how does it work? Lets take a nice long look.
How It works
LR Mobile works with Smart Previews, the compressed DNG (RAW) files that were added in Lightroom 5. On the desktop Smart Previews allow you to store your big RAW files on an external drive and keep the smaller Smart Previews on your MacBook Air’s little SSD, while retaining full edit capabilities. Now they also work on the iPad.
Photos are synced using Collections, the basic organizational unit of Lightroom.
Collections
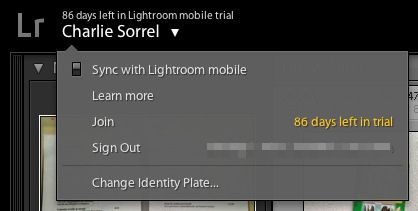
Lightroom Mobile only works as a companion app to the desktop version. To use it, you sign in to both versions with your Apple ID. You’ll now see some new double-headed arrow icons on the left side of your collections. Just click these arrows and that collection is now synced with LR Mobile. Any edits you make in one place are almost instantly reflected in the other.
This is because LR Mobile is pretty much an online app. It pulls in the images on demand, downloading them from Adobe’s servers. If you like, you can mark a collection for offline editing, but in practice the whole thing is so fast you don’t really need to (on Wi-Fi anyway – you might eat your entire month’s bandwidth pretty quick on 3G or LTE)
The Interface
The interface has been well thought out. It’s as simple as can be, but no simpler. Taps, swipes and pinches all have their place, as do two and three finger taps – a two-finger tap cycles the metadata display in any view, and a three-fingers tap toggles the before/after view of your edits.
The main screen shows your collections, and introduces the sorting options that appear in all views – tap the text at the top of the screen to access this picker:
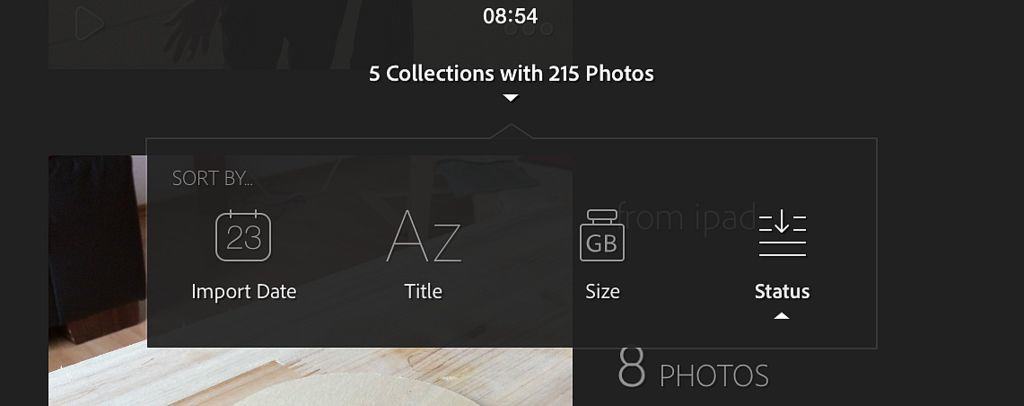
… and sort by import date, title, size or status.
Each collection has a play icon and an ellipsis. The play icon starts a slideshow (more below), and the ellipses brings up this neat options panel:
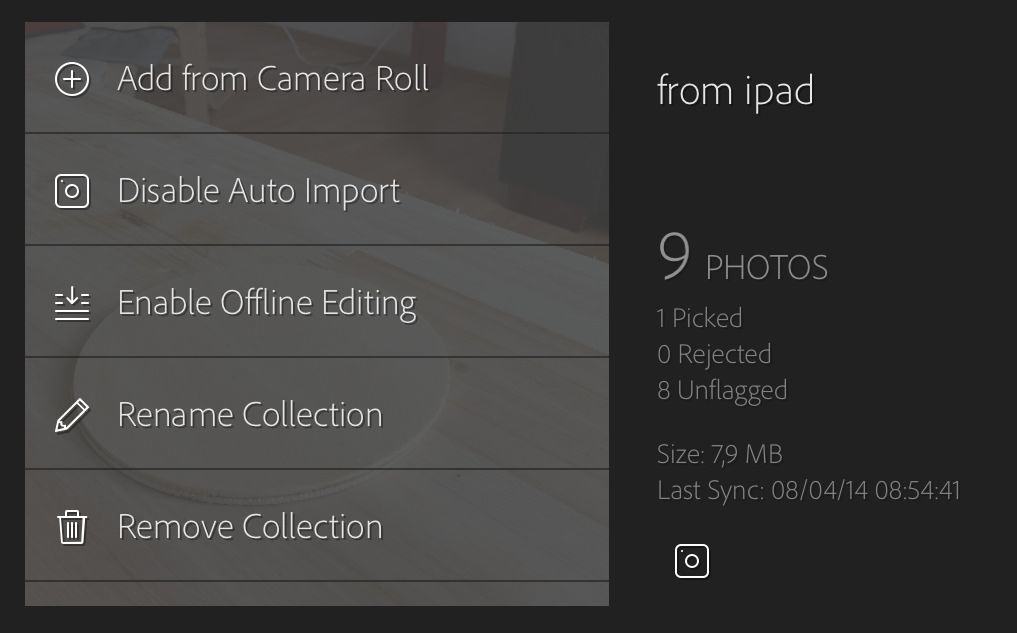
This lets you add photos from the iPad’s camera roll (or any other folder), enable offline editing, rename the collection or remove it and enable auto-import.
Auto Import tell LR Mobile to take any new photos from your camera roll and import them into this collection. It only works with the camera roll though – you can’t set it to grab picture from a certain folder, or from your imports directory.
Viewing
Once inside the collection, you can swipe and tap to navigate and open pictures, and use the sorting options to sort and filter the images. Thus you could show all rejected photos, ordered by size. The sorting option popover stays active on the screen until you dismiss it by tapping elsewhere, so you can quickly cycle through views until you get the one you want.
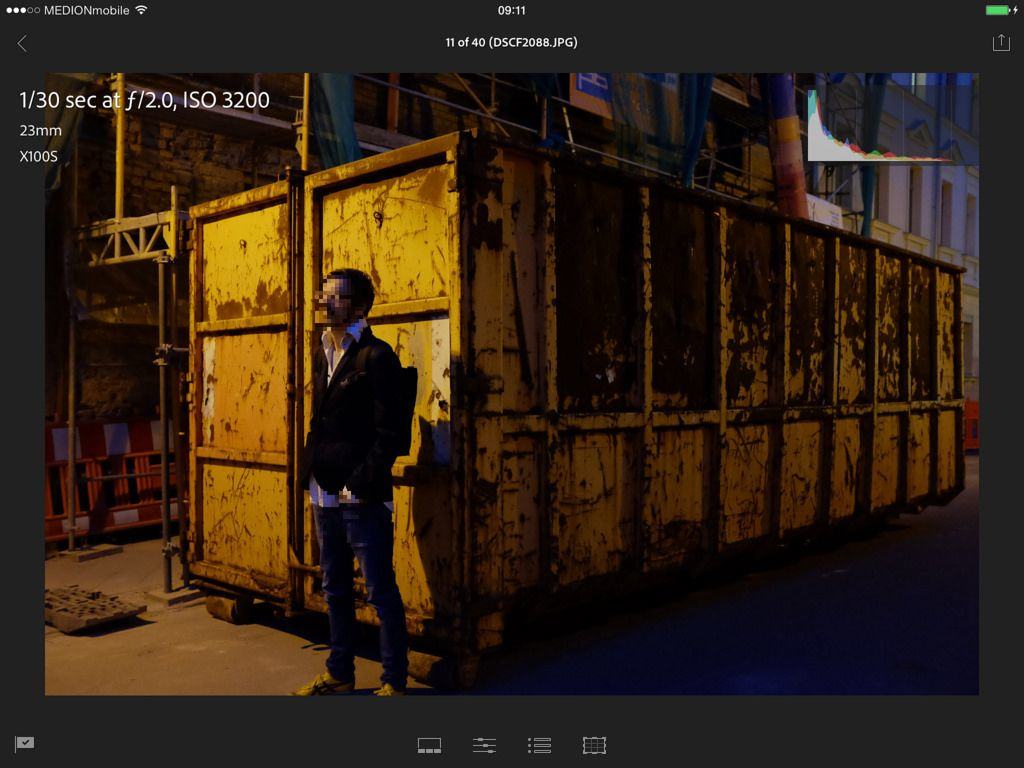
Then we come to the main picture view. You can view the image alone, or with overlays (a one-finger tap switches views), and cycles the overlays between the standard EXIF data and color histogram you are familiar with from desktop LR. Pinch or double-tap to zoom, and swipe up or down to flag or reject an image.
This gesture, the vertical swipe to set (and reset) flags, combined with swiping left and right to switch photos, is way, way better than picking and viewing on the Mac. It’s quicker, more intuitive (thumbs UP and thumbs DOWN), and more comfortable, becasue you can do it from the sofa. If you like things old school, you can tap the pick status icon at bottom left to cycle the options.
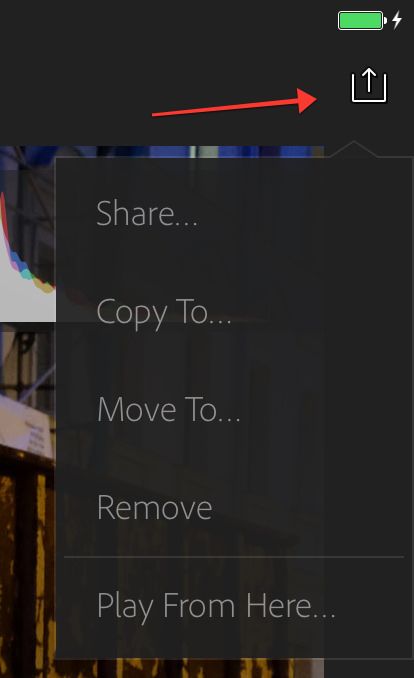
You can also share photos from this view, using the share arrow at top right. This takes you to the standard iOS 7 sharing sheet, where you can remove the image entirely, move or copy the photo to another collection (copying doesn’t actually create a new file – it works more like tagging), or start a slideshow.
Slideshows
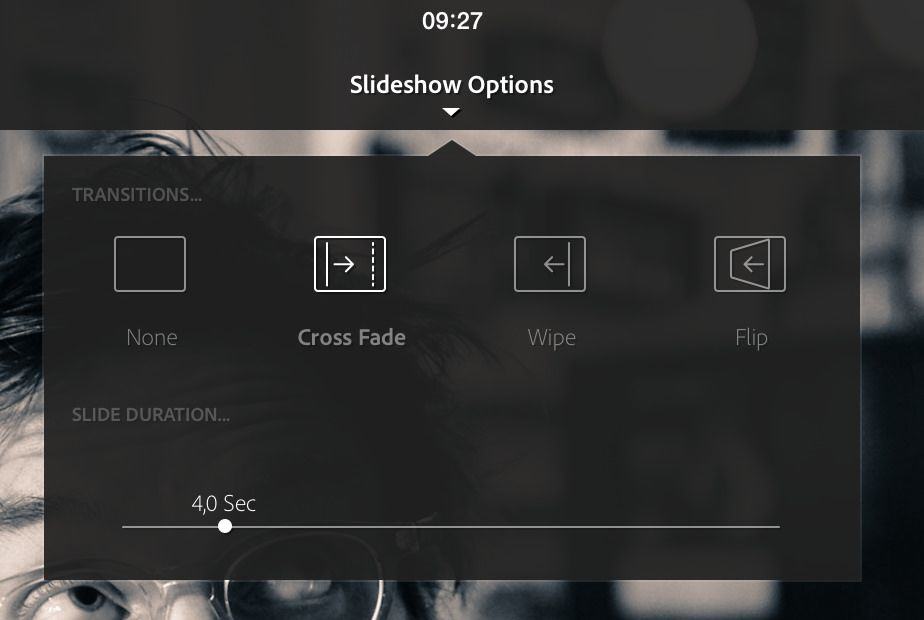
Slideshows are actually pretty neat, and you get a choice of transitions as well as control over how long a photo is on screen.
They don’t seem to play well with AirPlay though. You can force it through mirroring, but I can’t get regular AirPlay to work.
At the bottom of the screen you’ll see these four icons. They each toggle a different view. The first is what I call the “timeline view,” which shows you a row of thumbnails from the current collection. This lets you quickly navigate while still viewing an photo/ It’s great for comparisons between shots – just tap on a picture to open it.
And then we get on to the other views, all of which are for editing your picture.
Editing
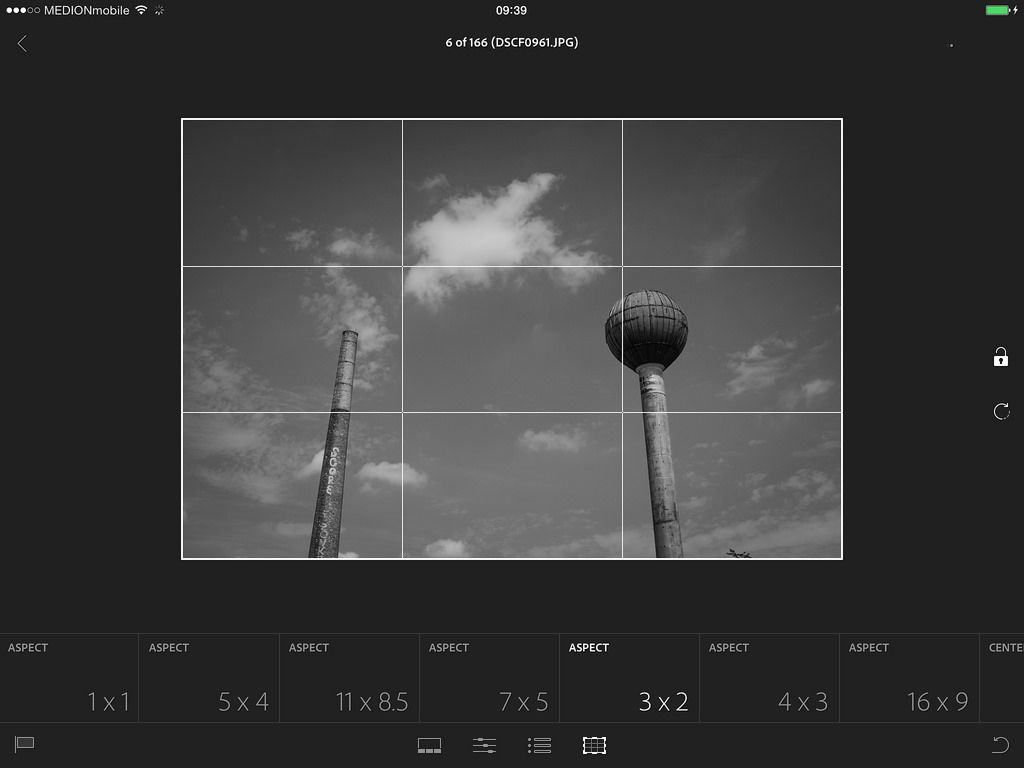
The LR Mobile “Develop Module” is limited compared to the desktop version, but you get a lot of control. If you think of it in terms of other iPad editing apps then you’ll be pretty pleased with what it can do. If you think of it in terms of the original Lightroom 1.0, you’ll be amazed.
The three develop views are for Adjustments, Presets and Crop. Crop is the simplest, with options for various fixed aspect ratios. And cropping, like all edits in LR on either the iPad or the desktop, is lossless and fully reversible.
Basic
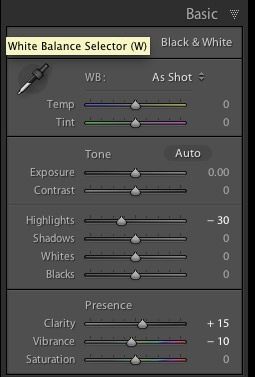
The basic edit view gives you all the tools from the Basic panel in desktop LR, allowing adjustments for exposure,m clarity, white balance (including a white balance picker loupe), clarity, vibrance and saturation.
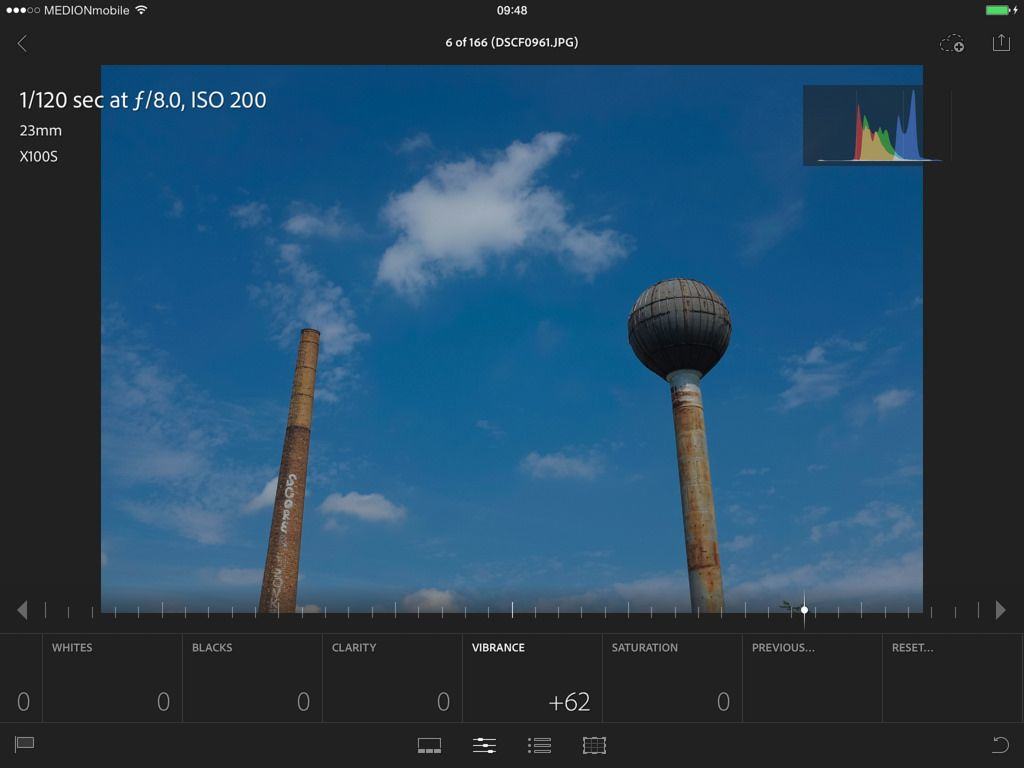
Adjustments are applied by tapping the appropriate control and then using the horizontal slider. It’s a bit like Snapseed, only without the up-and-down part (up and down swipes control the pick/reject flags, even here). The number next to the adjustment updates to show how much of an effect you’ve applied.
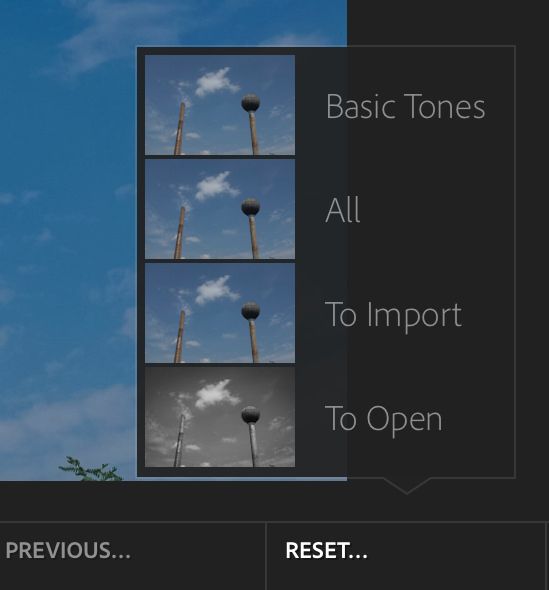
There’s also a reset button here that lets you reset various parameters. You can reset to how the image was when you opened it this time, or back to when it was first imported. You can also reset the “basic tones,” (the adjustments of exposure and so on) or “All,” which nukes everything. You get thumbnails showing the results of you action too, which is awesome.
Effects and Presets
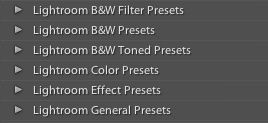
Here you can use Lightroom’s develop presets. Right now you’re limited to the ones that come built in to LR on the desktop, but they’re good. During a demo on Friday I asked if user presets were coming, and the answer was as you’d expect – it’s something the Adobe folks want to do, but not yet.
Presets are shown as thumbnail previews, making selection easy. I find them a little heavy handed compared to the effects you can get in other iPad apps, but that’s almost moot – these are the exact same effects that you get on the desktop. Which brings me to…
Sync
If you make a crop or add an effect or anything else, the changes are synced back to LR on the desktop, and vice-versa. And it’s almost instant (depending on your network speed of course) So, while you can’t use your own presets yet, or apply some of the weirder or more advanced edits (lens corrections, curves and so on), you can apply these on the desktop and see the results on the iPad.
Sync uses its own storage, aside from the 20GB Creative Cloud storage you get when you sign up for your $10 per month account.
How To Kinda Use Your Own Presets
And here’s a great hack for you. There’s a little “Previous” button at the bottom right of the Basic and Presets views. This lets you apply the edits from the previous photo that you edited or viewed.
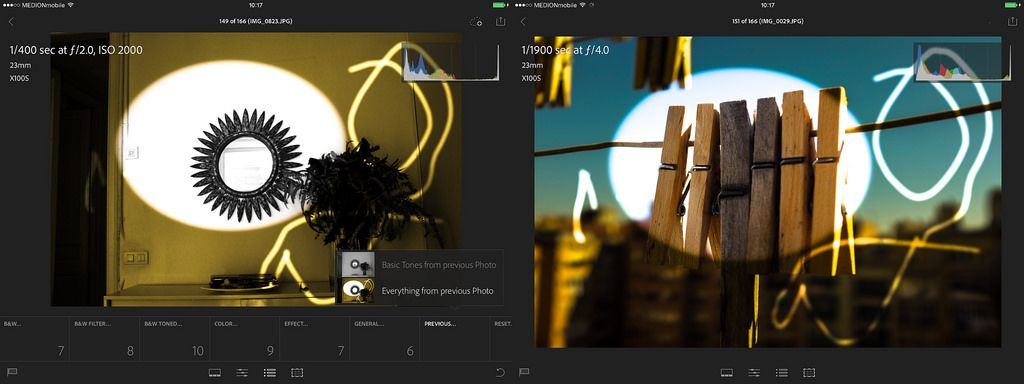
So, if you apply a lens correction, or a crazy, psychedelic set of curves to a photo in LR on your Mac, you can apply those same edits on Lightroom Mobile – just view the edited photo, then switch to another one (use the film-strip/timeline view for this as you need to switch straight to the next picture) and choose to apply the previous edit.
This even works with frickin nutso edits like the one above, made using curves and the clone tool, plus a radial filter. In theory, you could apply a set of presets to a set of photos, put those photos in a collection, sync that collection and then apply those edits using the Previous button, but it’s not exactly easy.
What LR Mobile Doesn’t Do
Here’s my wish list:
iPhone version just for adding photos. I take a ton of pictures on my iPhone, and I want them in LR. Right now I have to do that via desktop import, or via the iPad using Photo Stream, which is a) lame and b) doesn’t give full-res photos. An import-only version of LR for the iPhone would be great. Bonus marks for making it upload in the background like Flickr
Auto-import of imported photos. I’d like to be able to auto- import anything that comes onto my iPad via the camera connection kit. Currently, auto-import into LR Mobile collections is from the camera roll only. I understand that the iPad version can’t handle RAW files, but as I shoot JPG on my X100S I don’t care.Also, what about importing the JPG previews from RAW photos and then syncing these up with the RAWs when I import them to the desktop?
RAW+Smart Preview. This is one for camera manufacturers. We can shoot RAW+JPG. What about RAW+Smart preview. Awe-some.
Conclusion
This isn’t Lightroom on the go. It’s a companion app to LR on the desktop. And once you get used to that, you’re going to love it. It does a large chunk of what you would do on the desktop, only on the iPad. These days I hardly do much more than simple edits in Lightroom anyway, the odd tweak here and there, plus marking as a pick or a reject.
And for the handful of photos I do want to spend more time on, there’s always the Mac.
I’m excited about this. Lightroom on the Mac also started out dead simple, but always lightning fast. Then it added more and more tricks, but never at the expense of it’s core purpose. I expect that, with the yearly update cycle removed, LR Mobile will be evolving even faster.
Source: App Store
Source: Adobe Lightroom blog


