 your Mac using Time Machine [MacRx]")
Backing up your computer is like flossing teeth or mowing the lawn – something you know you should do but usually don’t. Apple has gone to great lengths to make Time Machine, the backup program included with Mac OS X Leopard and Snow Leopard, easy and fun to use. Those aren’t terms which you typically hear applied to backup programs, and these efforts are to be commended.
Time Machine is easy to setup, but restoring files is not as intuitive. Many of my clients ask me for help with how to do this, and how to ensure that their backups are running reliably. Time Machine allows for restoration of files, folders, applications or an entire Mac, depending on your need.
A review of the process couldn’t hurt. Like chicken soup from Grandma …
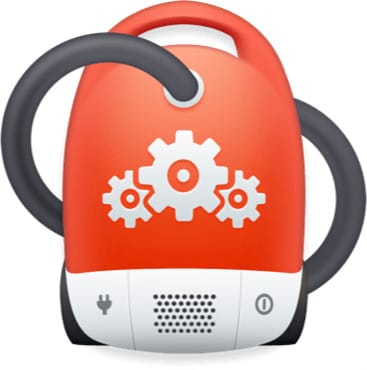
Got old, unnecessary files junking up your Mac?
Backing up loads of unwanted files can slow down your Time Machine backups and adversely affect your Mac’s performance in other ways. CleanMyMac makes it easy to spot old files you no longer need so you can trash them safely.
Setting up Time Machine backups
Time Machine requires a separate hard drive on which to store your data. You can’t back up to the startup drive. Any USB or FireWire disk will work. Get one with at least twice the capacity of your startup drive (larger is better). You can also use a Time Capsule and some network drives (more on this below).
The default way to setup a Time Machine backup is dead simple. Connect the backup drive to your Mac. If you haven’t yet set up Time Machine, when you plug in the disk, a dialog will pop up asking if you wish to use the drive as a backup disk. Click Use as Backup Disk and things will start automatically.

Pretty basic, ehh?
If this dialog doesn’t pop up (or to change an existing backup configuration) open up System Preferences –> Time Machine. Click on the Select Backup Disk… button, select the drive you wish to use for backups, then click Use for Backup…

You can also save backups to an Apple Time Capsule, a hard drive shared by a system running Mac OS X Server (Leopard or Snow Leopard) or (in some cases) a USB hard drive attached to an Apple Airport Extreme router (requires firmware 7.3.1 or higher – this works but is not officially supported). Backing up to shared drives is convenient, though slower, and can be less reliable than a directly attached drive. If your networked drive is Time Machine-compatible, it will show as an available choice in the Select Disk… window.
Excluding items and verifying that backups are running
Time machine has few setup options, but does offer some control.
To exclude items from your archive, open System Preferences –> Time Machine and click on Options… In this window, you can add files, folders or entire drives that you don’t want included in your backups. External drives connected to your Mac are not included in backups by default, you can change this behavior here.
Use the Time Machine menu in the Mac toolbar to verify the status of your backups. The menu is a small clock in a circle near at the top right corner of your screen. When Time Machine is backing up your data, the circle and the clock hands spin counter-clockwise. Click on this menu to see the time of the Latest Backup. You can run an immediate backup by choosing Back Up Now.

If you see an exclamation point inside the circle, it means there is a problem with your backups. Time Machine is known to stall out from time to time (no pun intended). Many times you can simply choose Back Up Now to get things running again. If not, Time Machine will display an error message (which may or may not be helpful). More on this below.
Restoring files from Time Machine archives
You use the Time Machine application to browse your archives and restore files. This is located in your Applications folder, and is placed in the Dock by default on new Mac user accounts. The Time Machine app is the most useful (and coolest) part of the program. Add the icon to your Dock if it isn’t already there.

When you launch Time Machine your screen morphs to a “time tunnel” view of your computer. The overlapping windows indicate files on your computer now (frontmost window), and at progressive snapshots in the past. The right side of your screen has bars listing the dates and times of saved backups.

Click on any date bar to travel “back in time” and view the contents of your computer on that date. The arrows pointing back and forward near the bottom right of the screen step things through one snapshot at a time.
Browse through your hard drive on any date to find the file, folder or applications you wish to restore. You can use the Spotlight search field to help find items. You can’t open files while in Time Machine, but you can preview many items using the Finder’s Quick Look feature – select the file and press the Space Bar to view the contents.
Once you find what you need, select the file or folder, then click on the Restore button at the lower right of your screen. Time Machine will “zoom out” back to your normal desktop and restore the item to its original location.
Presto, your data is restored. This is one of the Coolest Visual Effects I’ve ever seen any program do, much less backup software. Really, really impresses the friends and neighbors.
It’s worth browsing through your backups a few times to get familiar with how things are stored. The ability to browse backups also helps verify that Time Machine is running correctly.
Sometimes the item you’re restoring still exists on your hard drive – for example, a newer version of a document you’re trying to restore back to an earlier state. In this case, Time Machine will pop up another dialog giving you the option of keeping the Original file, the Restored copy, or Both.
View Mail and iPhoto archives, browse other disks or restore an entire Mac
In addition to browsing the Finder, Time Machine also allows you to view past versions of your Mail and iPhoto data directly from within those applications. To do this, launch Mail or iPhoto and make sure the program’s window is frontmost on your screen. Then click the Time Machine icon, and the “time tunnel” display will show snapshots back in time of your Mail folders or iPhoto Library. If you’ve accidentally deleted something from your Inbox, here’s a way to get it back.
You can browse Time Machine archives on different disks by right-clicking (or control-clicking) on the Time Machine icon in the dock. The menu will provide a choice to Browse Other Time Machine Disks… This can be used to restore files to a different drive or system from which they were originally backed up.

Sometimes you may need to restore you entire computer, such as after a drive crash. You can use your Time Machine archive in conjunction with the Mac OS X Installer to do this. Boot from the install DVD and once the Installer starts running, choose Utilities –> Restore System from Backup. Be advised this may take a long time – many hours, or even overnight – but it works in an emergency.
All that glitters …
Time Machine is simple to use and the price is right. However, it is not robust, professional software. As noted, it is not uncommon for Time Machine backups to stall occasionally – or permanently. This problem gets exacerbated when backing up to network drives, particularly shared backup drives. In my experience, locally attached USB or FireWire drives work most reliably, and Time Capsules or disks shared from an Airport Extreme router encounter the most problems.
I hope to cover troubleshooting Time Machine errors in a future MacRx column. Meanwhile, Apple’s Support website contains lots of good information about solving Time Machine issues. There is also a good overall tutorial called Mac 101: Time Machine on the same site.
Adam Rosen is an Apple certified IT consultant specializing in Macintosh systems new and old. He lives in Boston with two cats and too many possessions. In addition to membership in the Cult of Mac, Adam has written for Low End Mac and is curator of the Vintage Mac Museum. He also enjoys a good libation.

