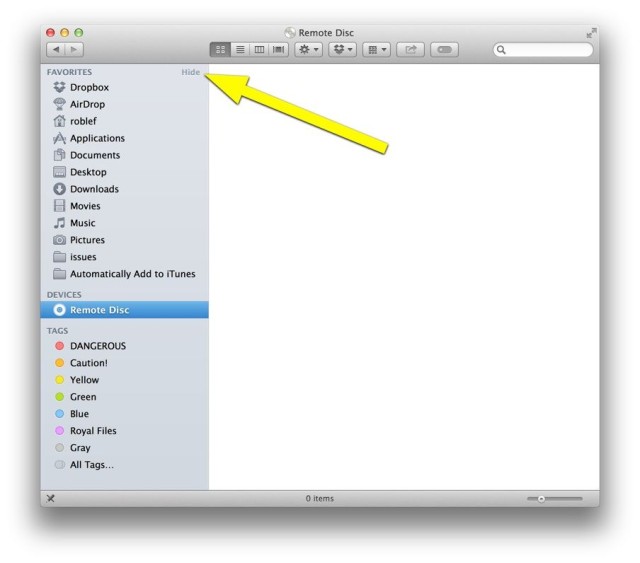
The OS X sidebar, introduced in Mac OS X Panther (10.3), has gotten an increased set of features over the years, including the most recent changes in Mountain Lion, which let you Hide and change the order of your Sidebar items.
These changes carried over to Mavericks, and it’s possible some of us forgot that we could do these things, if we even knew it in the first place.
In the spirit of showing you how to do do stuff you may have missed, here’s how to add things to your Sidebar, hide them when you don’t want to see them, and then move them into a different order over there on the left-hand side of your Finder window.
First off, you can completely get rid of the Sidebar by clicking on the separator line between the Sidebar and the rest of the Finder window and then dragging it all the way to the left. This has the same effect that the little button in the upper right-hand corner used to have in earlier versions of OS X.
Next, if you want to add things to your Favorites in the Sidebar, simply open a Finder window to those items, and drag and drop them into the Favorites list. To delete, just click and drag them away from the Sidebar until you see the little cloud icon. Let go and it will poof away.
To simply hide things over in the Sidebar, all you need to do is hover your mouse cursor over the Sidebar title (Favorites, Devices, Tags) and then click on the little “Hide” button that shows up to the right of the title. To Show it again, do the same thing, only click “Show.”
Now you can neat and tidy your Sidebar as much or as little as you like.
![How To Add To, Hide And Reorder Those Pesky Sidebar Items [OS X Tips] Sidebar](https://www.cultofmac.com/wp-content/uploads/2014/04/Sidebar.jpg)


