iCloud is a pretty neat system, working in the background across a ton of different apps without much input needed from us users, except our login name and password. It lets you sync Notes, Reminders, save documents, keep game saved-states, and even manage your music collection
Track Your Notes With iCloud
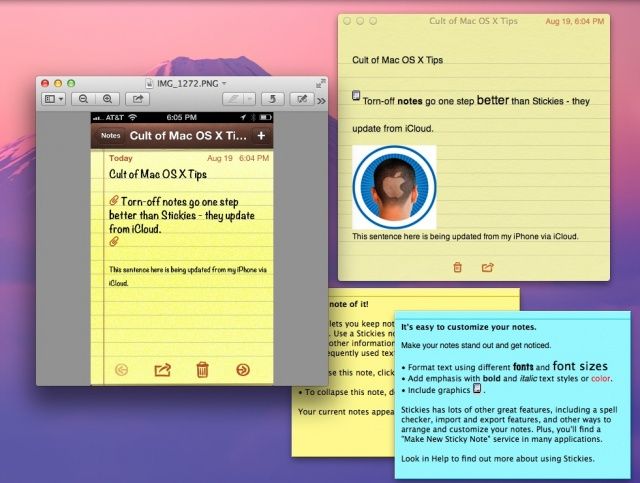
I’ve been a big fan of Apple’s Stickies app since way back in System 7.5. It’s great to be able to have a little floating place to type notes and keep track of things right on the Mac, without having to resort to anything as mundane as an actual, paper-based sticky note.
The one thing Stickies doesn’t do well is synchronize across devices. With OS X Mountain Lion, however, you can make this happen using Notes and iCloud.
Head into the System Preferences and click on the iCloud preference pane icon. Once in there, add in your Apple ID and login with your credentials. Be sure to check the Notes app as an app you want to sync via iCloud. You can have many Macs set up with the same iCloud account, making this a nice way to sync notes privately across computers you’re using daily, like your work and your home computer, or your laptop and desktop Mac. If both machines are logged in to iCloud, the notes will sync up in close to real time.
Another advantage here is syncing your Notes up with your iPhone or iPad. Tap into the Settings app on your iOS device and then swipe down to iCloud. Tap iCloud and then add the same account that you did on your Mac. Be sure to toggle the Notes app sync to ON. When you open Notes on your Mac or on your iPhone, now, the note will sync to either device, again almost in real time.
To pin your note to your Mac screen, launch Notes on your Mac, then double click on the note you want to “tear off.” It will open in a non-standard window, and basically float there, ready for easy access. Try it–change the note on your Mac, your iPhone, and your other connected devices, it’s really quite fun.
Via: OS X Daily
Dump iCloud As The Default Save Location In Text Edit
These days, Text Edit, Apple’s basic text editing program, uses iCloud as the default location for saving files. Which is all very fine and dandy, but what if you don’t want to save all your random Text Edit stuff in iCloud? Are you out of luck?
Nope, of course not! We wouldn’t even be writing this tip if you were.
There’s a simple Terminal command which will set the default to your local hard drive instead of iCloud. You can still save to iCloud, of course; it just won’t be the first place that shows up when you hit “Save” while working in Text Edit (or any other iCloud-enabled apps).
To make this desirable outcome happen, launch Terminal from your Utilities folder, itself in the Applications folder. Once Terminal launches, type or paste the following command in:
defaults write NSGlobalDomain NSDocumentSaveNewDocumentsToCloud -bool false
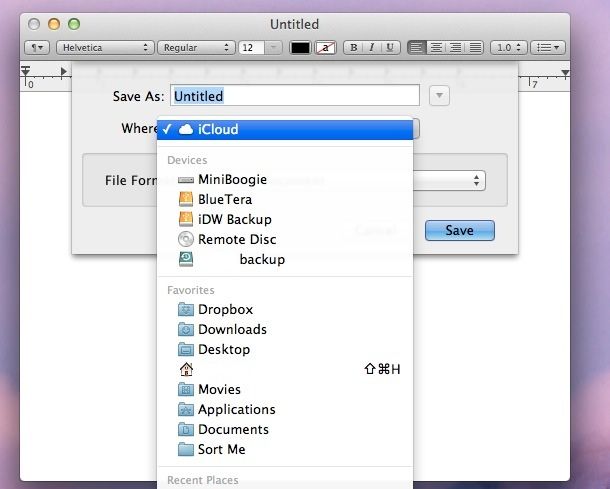
Now, when you go to save a file in Text Edit or other iCloud-enabled apps, the default will be on your local Mac, instead of iCloud. I set my destination to the Documents folder. You can still save to iCloud, of course, just click on the popup menu and choose iCloud as your save location, as per usual.
If you find yourself wanting to save stuff to iCloud more easily, again, and want to turn things back to the way they were, simply type or paste the below command into a Terminal session. Easy!
defaults write NSGlobalDomain NSDocumentSaveNewDocumentsToCloud -bool true
Now it’ll all be back to iCloud as normal. Hooray! You can thank us later, or in the comments below.
Source: Macworld Hints
Use Shared Reminders To Collaborate
Got a holiday or b-day wish list you’d like to share with significant others, making sure they never need to directly ask you what you want ever again? How about a grocery list that you can add to, secure in the knowledge that your husband or wife will know to stop and get garlic at the store on the way home from work? Or even a shared task list for your work teammates, guaranteeing that you can hold them responsible for stuff on “the list?”
Sounds pretty handy, right? Well, you can make it happen fairly easily: use Reminders on the Mac, an app that comes with Mountain Lion and syncs via iCloud to iOS devices, as well as with iCloud.com. Here’s how to set it up.
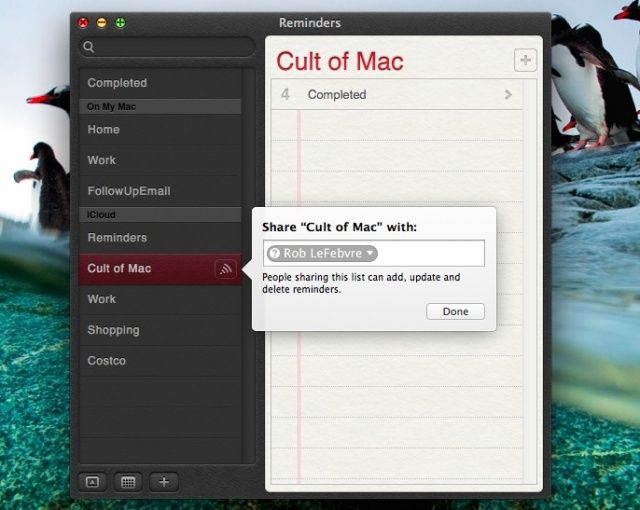
Launch the Reminders app on your Mac the way you usually do, whether via the Dock, Launchpad, or a double click. Once it’s up and running, create a new iCloud list by clicking on the Plus button in the lower left of the Reminders window and selecting “iCloud” from the list type pop-up menu. Now, hover your mouse over the new list, and click on the little broadcast icon to the right of the list name.
You’ll get a bubble that allows you to type in an address of a person in your Contacts list, or anyone with an iCloud account. People you share the list with can add, update, and delete reminders as well, making this a great way to manage a list with multiple people. The people you share the list with will be able to access the Reminders on their Macs as well as their iCloud enabled iOS devices.
You can also access your shared lists on iCloud.com, and add people to the shared list there as well if you’re away from your Mac. You won’t be able to do that on your iOS device, making an iPhone or iPad more of a passive display device for shared Reminders.
Source: OS X Daily
Use iClouDrive To Access Your Files Like Dropbox
Remember iDisk? It was a great feature of the otherwise forgettable MobileMe service, and it let you access your free Apple-provided internet disk space just like Dropbox or Google Drive do now.
Interestingly, you can make iCloud work the same way, with a little app called iClouDrive, from Zibity Software. Here’s how.
Head over to the Zibity Software website, and download iClouDrive. Once downloaded, drag it to your Applications folder for easy future access.
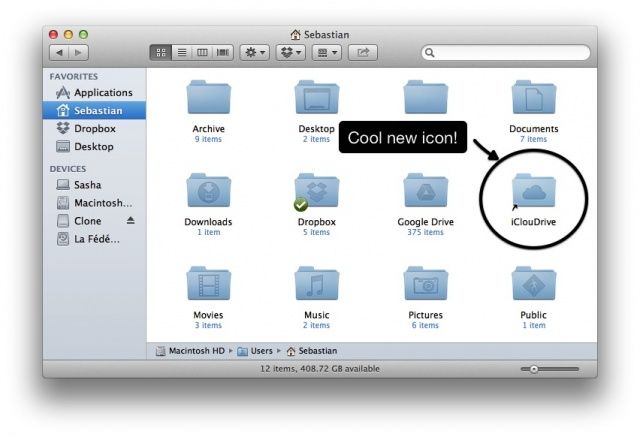
Launch iClouDrive from your Applications folder, or wherever you left it on your Mac, accept the licensing agreement, and click on the Continue button to put a folder called iClouDrive in your home folder on your Mac. Then click on the Enable iClouDrive button, and enter your administrative password for your Mac. Finally, click the OK button after you’ve read how iClouDrive works.
If you want to set up your iClouDrive in a location other than in your Home folder, press and hold the Option key when you click the Enable iClouDrive button. You’ll get a window asking you where you want the iClouDrive folder.
Basically, anything you put in this new folder will be available on any Mac that has iClouDrive on it and is logged in to the same iCloud account from Apple. It uses the space available to your Apple iCloud account at whatever level you chose when you set up iCloud–even the free account.
Find your iClouDrive folder in your home folder. You can drag it out to the sidebar next to your Dropbox or Google Drive folders there, giving you yet another way to sync stuff across the internets. Hooray!
To disable iClouDrive, delete everything you’ve put in your iClouDrive folder, and then drop the iClouDrive folder to the trash. You’ll need to do this on every Mac you set up with the app. If you don’t empty the folder, the stuff in it will continue to take up space in your iCloud account.
Source: Zibity Software
Via: Macworld Hints
Use iCloud To Manage Your iTunes Match Settings
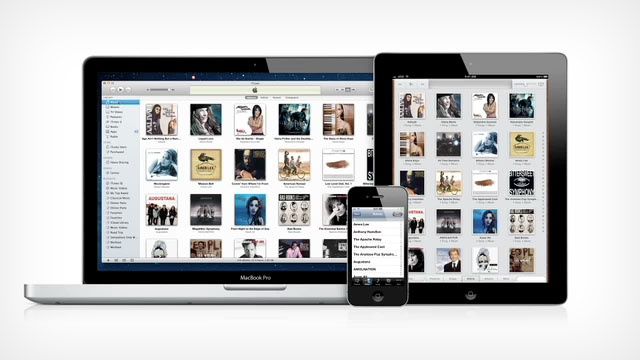
iTunes Match lets you access your music library from any Mac and any iOS device, as long as you are authenticated to each one. It uses the power of iCloud to see what music tracks you own, so you don’t have to sync each individual track to each device like the olden days. With iTunes Match enabled, you can play and download tracks to up to ten different iOS, Mac or Apple TV devices you log in to. Here’s how to manage your subscription.
Launch iTunes, and then log in to your account settings in the iTunes store. On the general Account Info page, you’ll see a section called iTunes in the Cloud under your Apple ID summary. You’re able to manage all the registered devices here, as well as turn your auto-renew settings off and on.
Look at the Manage Devices window to see the list of all the devices that are logged in as iTunes Match devices, listed by the date you added each device. You can remove each device manually here as well, freeing up one of your ten allotted spots. It can take up to 90 days to totally remove a device from your list of authenticated devices, though, so you want to plan ahead.
You can turn off auto-renew in the iCloud section of the iTunes account settings, as well, to keep it from automatically renewing the $25 per year subscription, which gets renewed precisely one year after you buy it.
To disable an iOS device from using iTunes Match, you can tap into the Settings app, and go into the Music section to manage your iTunes Match settings there.
![Mastering iCloud On Your Mac [Feature] overview_gallery_documents](https://www.cultofmac.com/wp-content/uploads/2013/03/overview_gallery_documents.jpg)
