iOS 6 comes with a host of new and improved features for us all to play with. We’ll be messing about in there over the next several weeks, helping you find the hidden tips, tricks, and features of iOS 6. Today, however, we’d like to show you the ten killer tricks we’ve found in iOS 6 to date.
Some of these tips may seem simple, while others may not be applicable to your own personal situation. Regardless, we hope that we can show you the coolest tips and tricks for your new iOS device, whether it’s a new iPhone 5, a new iPad, or anything that comae out before; iOS 6 will support the iPhone 3GS and up, the iPad and up, and the iPod touch third generation and up, so have at it!
Use VIP in Mail app

Open an email from the user you want to add to the VIP list, tap and hold on their email address in the header at the top, tap Add to VIP. Open Mail, go to Mailboxes, tap on the right facing arrow, scroll to the bottom and tap Add VIP… Choose the person you want to add from your Contacts list. Tap VIP Alerts at the bottom to create a custom alert style, including Notification Center, visual alert, app icon, specific sound, and whether to Show Preview or not. You can also get to this screen via Settings > Notifications > Mail > VIP
Use Guided Access

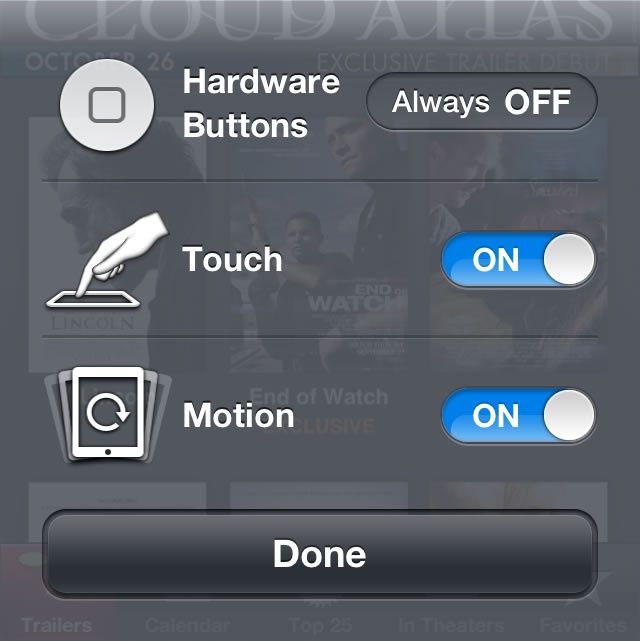
Launch Settings, then tap on General. Scroll down and tap on Accessibility, then scroll again to the Learning section. Tap on Guided Access, and toggle it to ON. Tap on Set Passcode to require a code to get out of Guided Access mode. When in the app you want to use with Guided Access, say a math app for a student in school, triple-click the Home button to bring up the Guided Access option. Tap Options to set the Hardware buttons to OFF, and toggle Touch or Motion controls. Circle areas on the screen with a fingertip or stylus to restrict access to that section. Tap Start to begin and the restricted areas will dim. Triple click the Home button to disable Guided Access and enter your password if you set one up.
Create Panoramas with the Built-In Camera App

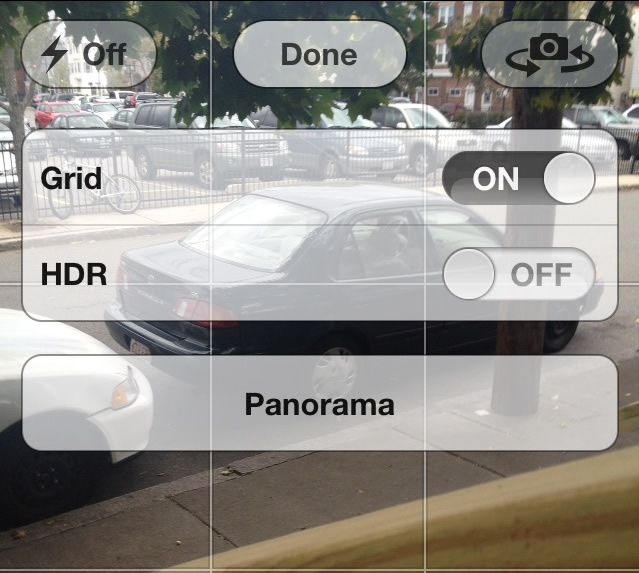
Open up the Camera app, tap Options. Toggle Panorama to ON with a tap from the list that includes Grid, HDR, and Panorama. Hold the camera out, pointing at the leftmost area you want to capture in a panorama. Slowly move the camera left-to-right, keeping the area you want to capture within the guide line strip.
Enable 3D Flyover in Maps

First of all, know that only certain cities are set up for 3D flyovers, like Seattle, Chicago, and Copenhagen. If you are in one of those cities (or just want to check it out), type in an address or landmark, like Seattle Space Needle, and Maps will go there. Simply tap the 3D button in the lower left, and then use a pinch out gesture to Zoom into the map. Use one finger drag to move around the map. To rotate around the landmark, or change the tilt of the landscape, use two fingers to spin the map or tilt.
Respond to Phone Calls with a Message

When someone calls that you don’t want to talk to, you can now respond with an explanatory message instead of just silencing the phone. You can respond with a message that says, Call you later, I’m on my way, What’s up, or you can type a custom message. You can also have it remind you to call back later, in 1 hour, or when you leave. Choosing the latter will send you a Reminder from the Reminders app when you leave your current location.
Launch Apps With Siri

Click and hold the Home button. Say, “Launch Mail,” or “Safari” or “Angry Birds.” Siri will then launch your chosen app. Simple, yet exciting!
Use Offline Reading Lists

Sometimes it’s just not convenient to read a long-form article on the web when you actually receive the link. Services like Instapaper and Readability fill the void, as well as the Reading List option in iOS’s Safari app. To use the feature, tap the little Share button in the lower right of Safari’s screen and then tap the Reading List icon with the glasses on it. To access the Reading list when you have no data connection, simply open Safari and hit the Bookmarks button to get to the list of sites you’ve added.
Upload Photos Directly in Safari

Until now, anyone needing to upload a picture or other media to a website such as WordPress or Shutterfly was out of luck. IOS 6, however, now allows media uploading via Safari’s broader support for HTML media uploads. To use this feature, head to any site that you can upload media to, like Flickr, for example, and click on the Choose File button. You’ll have a chance to take a new photo or use one from the Camera Roll. Tap through, choose your photo, and hit Upload.
Integrate Facebook

To be able to share cool apps or songs that you find via Facebook, you’ll need to set it up. To do so is fairly simple. Launch Settings with a tap and tap into the General settings section. Scroll down to the social networks area, and tap on Facebook. You may be prompted to install the Facebook app; go ahead and do so. Once that’s done, head back into the Facebook settings and tap on Account. Enter your credentials for logging into Facebook there. ONce done with that, back out one screen and set the toggles for all the apps you want to allow to use the Facebook account, including the App Store, Calendar, Contacts, and Podcasts–if you want to be able to share these via Facebook easily from your iOS device as well.
Share Photo Streams

In Settings, Photos & Camera, tap ON the Shared Photo Streams. Then you’ll be able to send and receive sharing invitations from other iOS 6 users.
Tap Edit in the upper right corner of the Photos app, then tap all the photos you want to add to the shared Photo Stream. Tap the Share button in the upper left corner, and then tap Photo Stream. Choose New Photo Stream… and then type in the email address of the person you want to share it with. Give the Photo Stream a name, and then decide whether it can be publicly seen on iCloud.com or not. Toggle the Public Website to ON if so.
So, there you have it: ten killer tips for Apple’s new iOS 6. Let us know if you find any other cool ones in the days ahead; we’ll publish the good ones in our daily iOS Tips column.
![The Ten Killer Tips Every iOS 6 User Needs To Know [Feature] To update or not to update, that is the question.](https://www.cultofmac.com/wp-content/uploads/2012/09/ios-6.jpg)

