Home movies rock, right? What better way to entertain the family than with moving pictures starring the kids at the beach, weird Uncle William putting carrots up his nose, and the four hundredth video walkthrough of your favorite amusement park. In the past, viewers of these home movies had to sit through hours of badly shot footage and horribly raw video and film of all sorts of activities. These days, however, Apple has saved us all with the creation of one of the best darn video editing packages for the average consumer, iMovie. With iMovie ’11, the development team has refined things to a high sheen, helping us all make short work of some fairly professional and complicated video editing activities.
To make things even easier, we’ve put together a list of tips, tricks, and tweaks to help you get the best out of iMovie, the video editing app for the rest of us.
Tweak The iMovie ’11 Interface For A More Classic Look
Not to overstate it, but it’s summer time and as such, it’s time for vacation movies, right? Whether you travel to the banks of the Champs-Elysse, the patriotic visage of Mount Rushmore, or choose a more modest stay-cation, making home movies is a time-honored tradition.
Editing the videos with iMovie on a Mac after you take them is joyful work as well, and those that have been doing it a while may not be huge fans of the current iMovie ’11 visual interface. I haven’t been, until I was able to make a couple of tweaks to make the iMovie of today look and feel more like the iMovie I came to love a few versions ago.
Launch iMovie ’11 from your Applications folder, and then hit Command-Comma. This will bring up the preferences window. You can also use your mouse and click on the iMovie menu, then Preferences. It works the same either way.
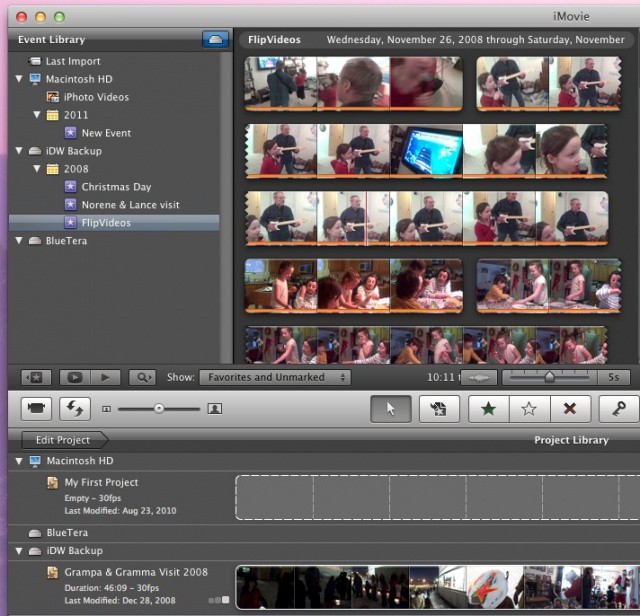
Click on the General tab at the top left of the preferences window, and then click on the checkbox next to Show Advanced Tools. This will add a few buttons and whatnot to the iMovie editing window. The one we’re looking for is at the top right of the Project window – it looks like a little filmstrip. Click on that and the visual style of the project will change from that odd stacked view to a more traditional long filmstrip mode.
Step two to make things look more old school and, perhaps, easier to deal with for video editors with some experience is to switch the Project window with the Events window. To do this, find the button that looks like two opposing arrows pointing up and down, right next to the little video camera icon in the left middle of the iMovie window. Click on the button (Swap Events and Projects will appear if you hover over it with the mouse) and the Project window, now with the filmstrip look, will slide to the bottom while the Events window, with all the film assets from various sources, will slide up to the top left.
Ahhh. Feels much better, doesn’t it? If you ever upgrade to Final Cut Pro or even Adobe Premiere, you’ll feel a bit more at home with just these simple interface swaps.
Use Multitouch Gestures To Save Time
Editing videos can lead to a great sense of fulfillment when you’re all done and showing off the fruits of your labors to a packed house of admirers, but you have to admit that the grunt work can be kind of a slog. Anything that makes the editing process a little faster or a little bit simpler has my vote for being a tip worth knowing about.
iMovie ’11 has a host of under-the-radar tricks that will help you take your editing workflow up a notch. One sweet trick that both saves time and impresses other video editors is using multitouch gestures right on the trackpad.
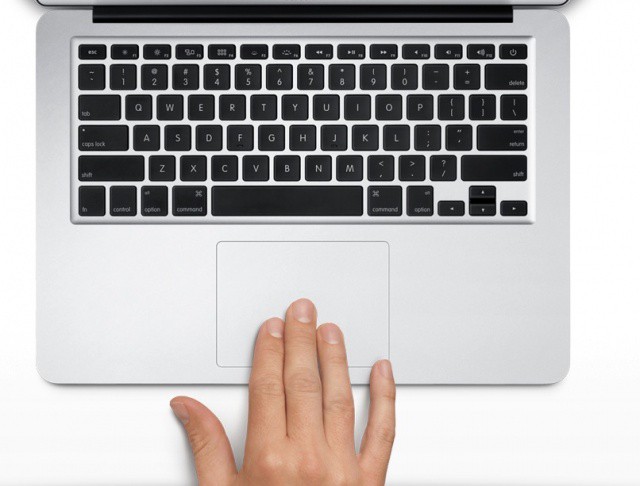
If you’re editing on a MacBook of any kind, you’ll have a trackpad. You could even have a Magic Trackpad with your iMac and we’d be totally jealous. To add new media to your iMovie project using the trackpad is simple. Go to the Event browser and click on a clip, or click and drag to select a portion of a clip that you want to add to the timeline, and use a three finger swipe up on your trackpad. The clip or portion you had selected will be added to the end of your project all magical and such.
Next, if you want to expand your view of the media you’re working with, either in the Event or Project browser, just move your mouse pointer above the media you want to zoom in on and pinch out with your fingers, much like you would when zooming into an image or web page on an iOS device. You can also do the reverse, with a pinching in gesture, which will contract your media view. This can be a bit tricky to do without actually moving the mouse pointer, so be sure to practice a bit.
One last way to multitouch your way to iMovie editing nirvana is to use a two fingered swipe to the left or right to scroll through your video masterpiece. Click anywhere in the clip you scrub through, then touch the trackpad with three fingers at the same time. Swipe in either direction to move the red playhead line to the left or right. This should help you make more precise edits than just clicking on where you think the edit should go, and then click-dragging the mouse along to move the playhead.
Via: MacLife
Import To iMovie Right From Your iPhone Or iPad
Sure, iMovie is now available on the iPhone, iPod touch and iPad, but nothing beats a big old screen to edit your video on. You no longer have to export the video from your iOS device to your iTunes or iPhoto, then import into iMovie. With iMovie ’11, you can bring it right into the app with no middle steps. How refreshingly simple! Here’s how.
First up, launch the camera app on your iPhone or iPad or what have you, and shoot yourself doing something clever, like playing the uke. Then connect your iOS device to your Mac with the white sync cable.
Depending on your Mac setup, iPhoto might open – go ahead and quit it. Image Capture is what I have set to open when I connect a camera, so I quit that instead. Launch iMovie with your preferred method, either via a click on the iMovie icon in the Dock, or double click from the Applications folder, or with a launching app like Alfred.
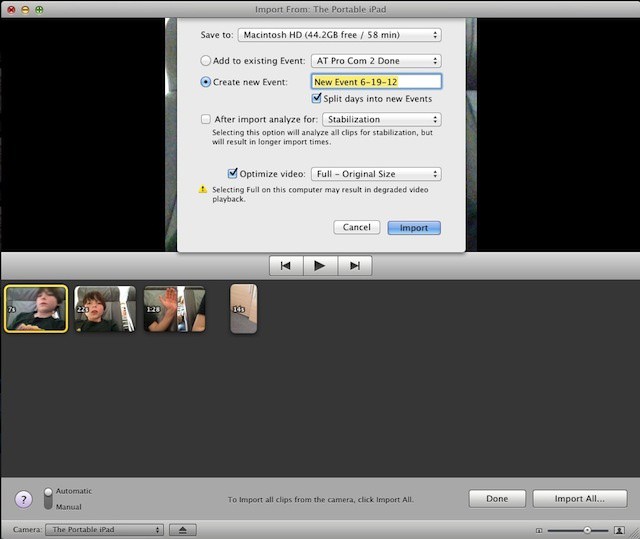
iMovie should open its own Import window automagically, but if it doesn’t (mine didn’t), click on the little videocamera icon on the left side, about halfway down the iMovie window. The Import window will now open, and you’ll either select the clip you want to import, or just hit the Import All button. iMovie will bring up a set of options. Tell it where to save the resulting imported video, put a new name in the Create new Event box, and then decide whether your video needs analyzing for Stabilization, People (faces), or both. You can then click on the Optimize video option box, choosing a final size from the drop down menu. I went for the Full – Original Size optimization option, because that’s how I roll.
Just so you can plan ahead, remember that one hour of standard video takes up 13 GB of hard drive space on your Mac while an hour of HD video takes up as much as 50 GB of your precious hard drive space.
Boom! You’ve just brought in video from your mobile device, straight through, without muss or fuss. You feel pretty good about it, don’t you? Now you can just edit with iMovie, and output as per usual.
Via: About.com
Move iMovie Files Around To Save Space On Your Mac
There are two main reasons to move your iMovie files to an external storage drive. One is that video files take up a LOT of space, and the non-destructive editing that iMovie does can also add to the file load on your main hard drive (or SSD, in the case of a MacBook Air). The other is organizational – you might want to put all your stuff in one, easily accessed place for later retrieval and further editing.
Lucky for you, then, iMovie makes this pretty easy. Here’s how.
First of all, don’t move iMovie projects or events around in the Finder. This will end up breaking all the links between the files, making any future access an utter, corrupted mess.
Instead, hook up your external hard drive and launch iMovie. Just to the right of the Event Library is a cute little hard drive icon. That will show you what drives your Events are located on. Now, just Command-Click and drag the files from that window over to the new drive, and iMovie will make sure all remains connected and editable at a later date. At least until they upgrade iMovie a few more times.
You can do the same thing with your Project Library. With the little hard drive icon still clicked, you should see the project library organized by drive as well. Command-click and drag the project from iMovie to the external drive, and you’ll be asked if you want to move associated Events or just the Project on its own. For this exercise, choose to move the Events and the Project together. iMovie will make it happen all by itself and now you have all your stuff in one place. Nice, right?
Make These Audio Tweaks To Improve Your iMovie
Remember that audio makes up the first half of the term, “audio-visual.” Movies are just as much about sound as they are vision – a fact that Hollywood never forgets; nor should you. Apple made some fairly great improvements to the audio editing capabilities of iMovie ’11, and here they are.
There are several new default ways to see the audio in iMovie, like the new audio waveform mode and color coded warnings when the audio might overdrive the speakers. In addition, Apple has included a new Equalizer feature.
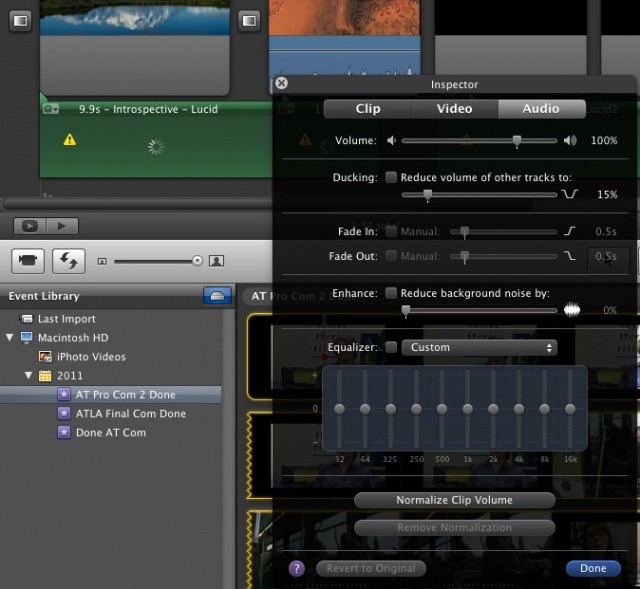
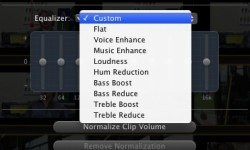 To access this, select the clip you want to edit the audio in and open the Inspector window by double clicking on the clip itself. When the Inspector shows up, click on the Audio tab in the upper right to go to those settings. About halfway down the audio section is the Equalizer. Click on the checkbox next to the Equalizer, then choose a type of audio equalization from the presets in the drop down menu just next to the checkbox. Or, if you know your way around a 10-band EQ, get tweaking.
There’s also, just above the EQ, an Enhance checkbox. Click in it to enable the amount of background noise iMovie can reduce by moving the slider to the right. Be sure to listen to it after you make the adjustment to avoid any unwanted quietness to the foreground sound.
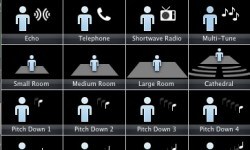 In addition, iMovie ’11 has some cool audio effects you can add to your clips, bringing the auditory side more in line with the video side of things. Again, double click the clip you want to tweak to bring up the Inspector window, and click on the Clip tab at the top left. Click on the button next to the Audio Effect label to bring it up. You’ll see a grid of 20 different audio effects. Press the space bar to start your clip, and hover your mouse over each of the sound effect icons to preview what it will sound like with that audio effect applied. Some of this is downright hilarious. Especially the Robot voice. Honest, give it a try.
![Become A Video Editing Guru With These Tips, Tweaks, And Tricks For iMovie ’11 [Feature] iMovieTraditional](https://www.cultofmac.com/wp-content/uploads/2012/06/iMovieTraditional.jpg)
