You can record your screen with audio (and a voiceover) on your iPhone to talk over your video. This functionality is built right into the iPhone. You don’t need to use a Mac or PC, or pay for an app to do it.
This can come in handy for making presentations or projects — and you don’t want to waste an hour or more editing a video yourself. You can also make a recording with your voiceover explaining how something works for helping someone out, testing an app, making a tutorial, recording your reaction to watching a video or more.
Here’s how to record your screen with audio — and add a voiceover — right from your iPhone.
How to record your screen with audio (and voiceover) on iPhone
iOS 11 added screen recording to the iPhone and iPad, allowing you to make videos of your device’s screen. You can use it to copy videos you can’t just download, record game play, show someone how to use an app and more. Personally, I use it most often to record bugs and crashes in the apps I use so I can submit bug reports.
But did you know that you can record a voiceover, too? It can take them to the next level.
Table of Contents:
- Add Screen Recording to Control Center
- Tap and hold the Screen Recording button
- Start and stop your recording
- More iPhone tips
Add Screen Recording to Control Center

Screenshot: D. Griffin Jones/Cult of Mac
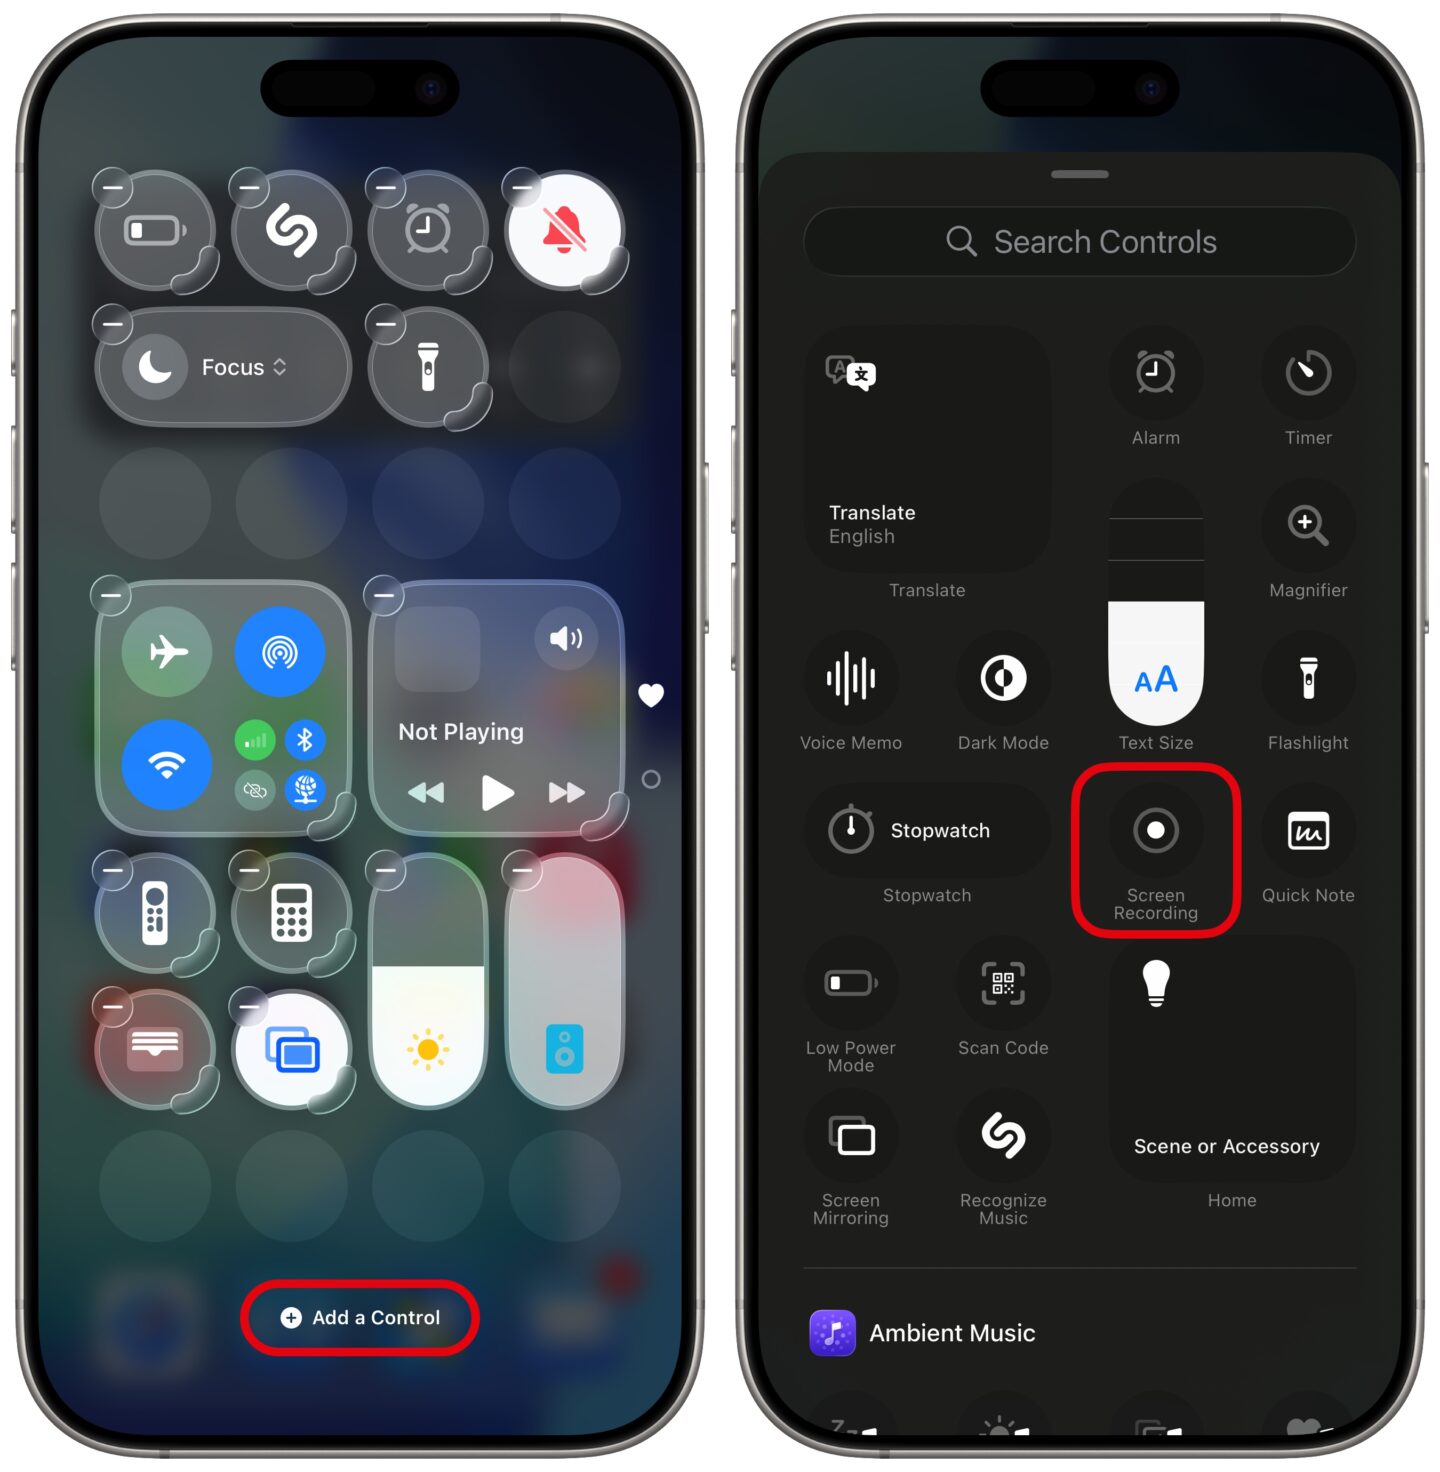
The only way to record your screen is to add a button for it in Control Center. Open Control Center by swiping down from the top right corner of your screen (or on an iPhone SE, the bottom edge of your screen).
If you don’t see a circular Record button, you can easily add one. Tap the + button in the upper left to begin editing, then tap Add a Control at the bottom. From the top section you see, tap Screen Recording to add the button in. You can drag it to the spot you want or resize it to make it bigger.
Tap and hold the Screen Recording button

Screenshot: D. Griffin Jones/Cult of Mac
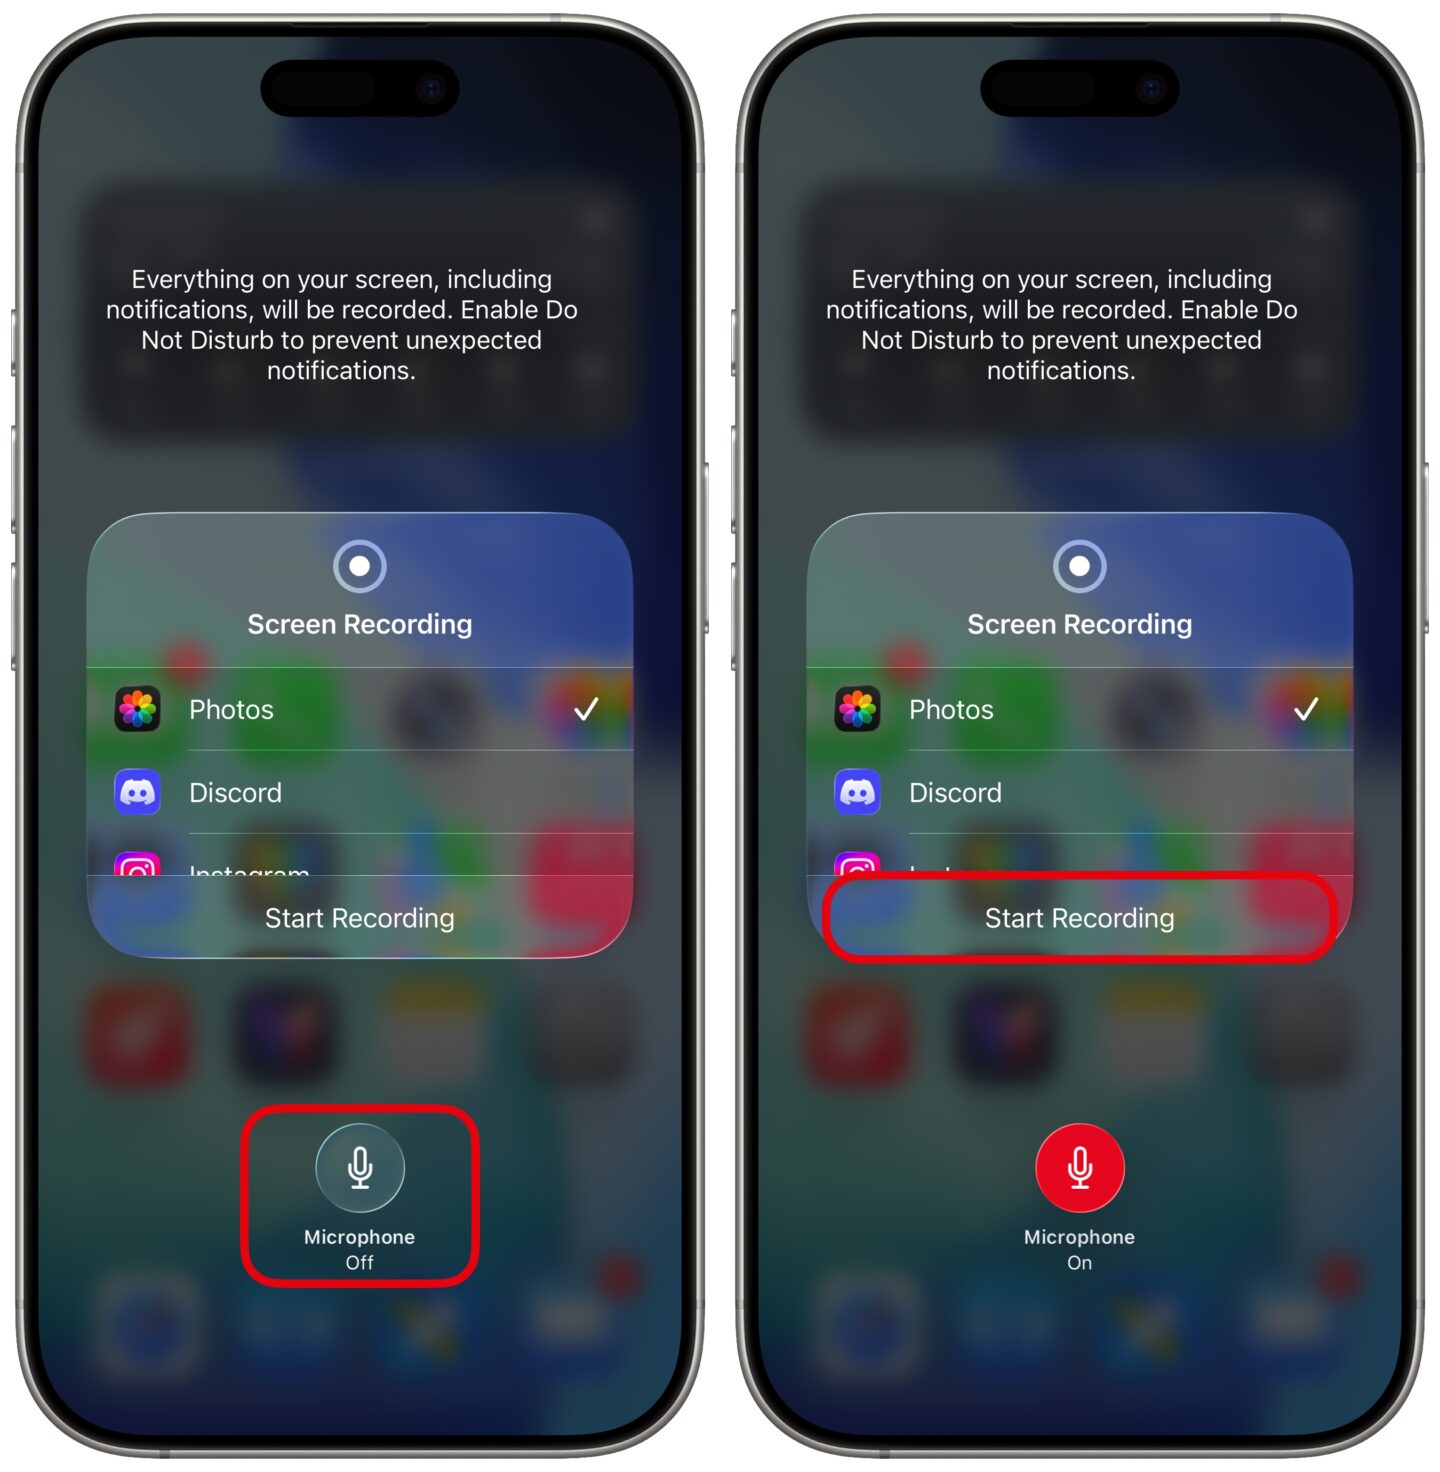
Instead of tapping the Record button, tap and hold it. You will see an option to turn on the microphone. Enable it to record yourself, too.
Your phone will combine your microphone with whatever is happening on screen. If you don’t have headphones connected while you’re recording, your phone will play audio out of the speakers quietly so that the noise doesn’t loop back into the microphone, but any sound will be at full volume in the final recording.
If it says “Microphone On” and you don’t want any voiceover, tap it again to disable the microphone.
Start and stop your recording
Select Photos from the list of apps and tap Start Recording. You’ll get a three-second countdown if you want to close Control Center first.
Stop recording by tapping the red button at the top of the screen. All of the audio your phone plays — from videos you watch, music you hear — will be saved in the recording. When it’s done processing, you’ll get a notification that it’s been added to your photo library.
More iPhone tips
- Standby turns your phone into a smart display when it’s sitting on your desk, your nightstand or the kitchen counter.
- Customize the Lock Screen with a bunch of widgets, aesthetics and styles. You have loads of fonts, colors, styles and themes available.
- Change out the Lock Screen buttons from the standard Flashlight and Camera to whatever you want. There’s a giant selection of buttons you can swap in their place.
- Create Focus modes to customize notification settings for different times of day, like work, vacation, driving, personal time and more.
- Reset your iPhone with your old passcode — for up to three days later — if you forget your new one.
- Customize the Action button to toggle the flashlight, open the camera, run a custom Shortcut and more.
- Hide and lock apps with Face ID (or Touch ID) so they can’t be opened (or seen on your phone) by anyone else.
We originally published this article on how to record your screen with audio and voiceover on April 18, 2022. We updated it with the latest information on October 1, 2025.


