The iPad’s main trick is that it disappears when you launch an app. Fire up a piano app, and your iPad becomes a piano. Launch YouTube and it turns into a TV for pacifying children. This is part of the magic of the iPad, but it’s not quite perfect. Kids can easily leave YouTube and start reading your sexts instead. And a musician might accidentally trigger a gesture while playing on those virtual piano keys, finding themselves back at the home screen in the middle of a performance.
What you need is kiosk mode, aka Guided Access. This locks the iPad into a single app, and disables the hardware buttons. And it’s equally good for keeping you in one app, or keeping people out of all the others.
Guided Access aka Kiosk Mode
The official name is Guided Access, but the alternate name — kiosk mode — is a better guide to what it actually does. Once enabled, Guided Access lets you triple-tap the top button on an iPad Pro (or the home button on older iPads), to lock the current app onto the screen.
This is handy on a kiosk, where you may leave an iPad running a presentation, unattended. Trade shows, store showrooms, museums, school projects — all of these are situations where locking an iPad into a single app are essential.
Lockdown
To this end, there is an option for a passcode in the Guided Access Settings.

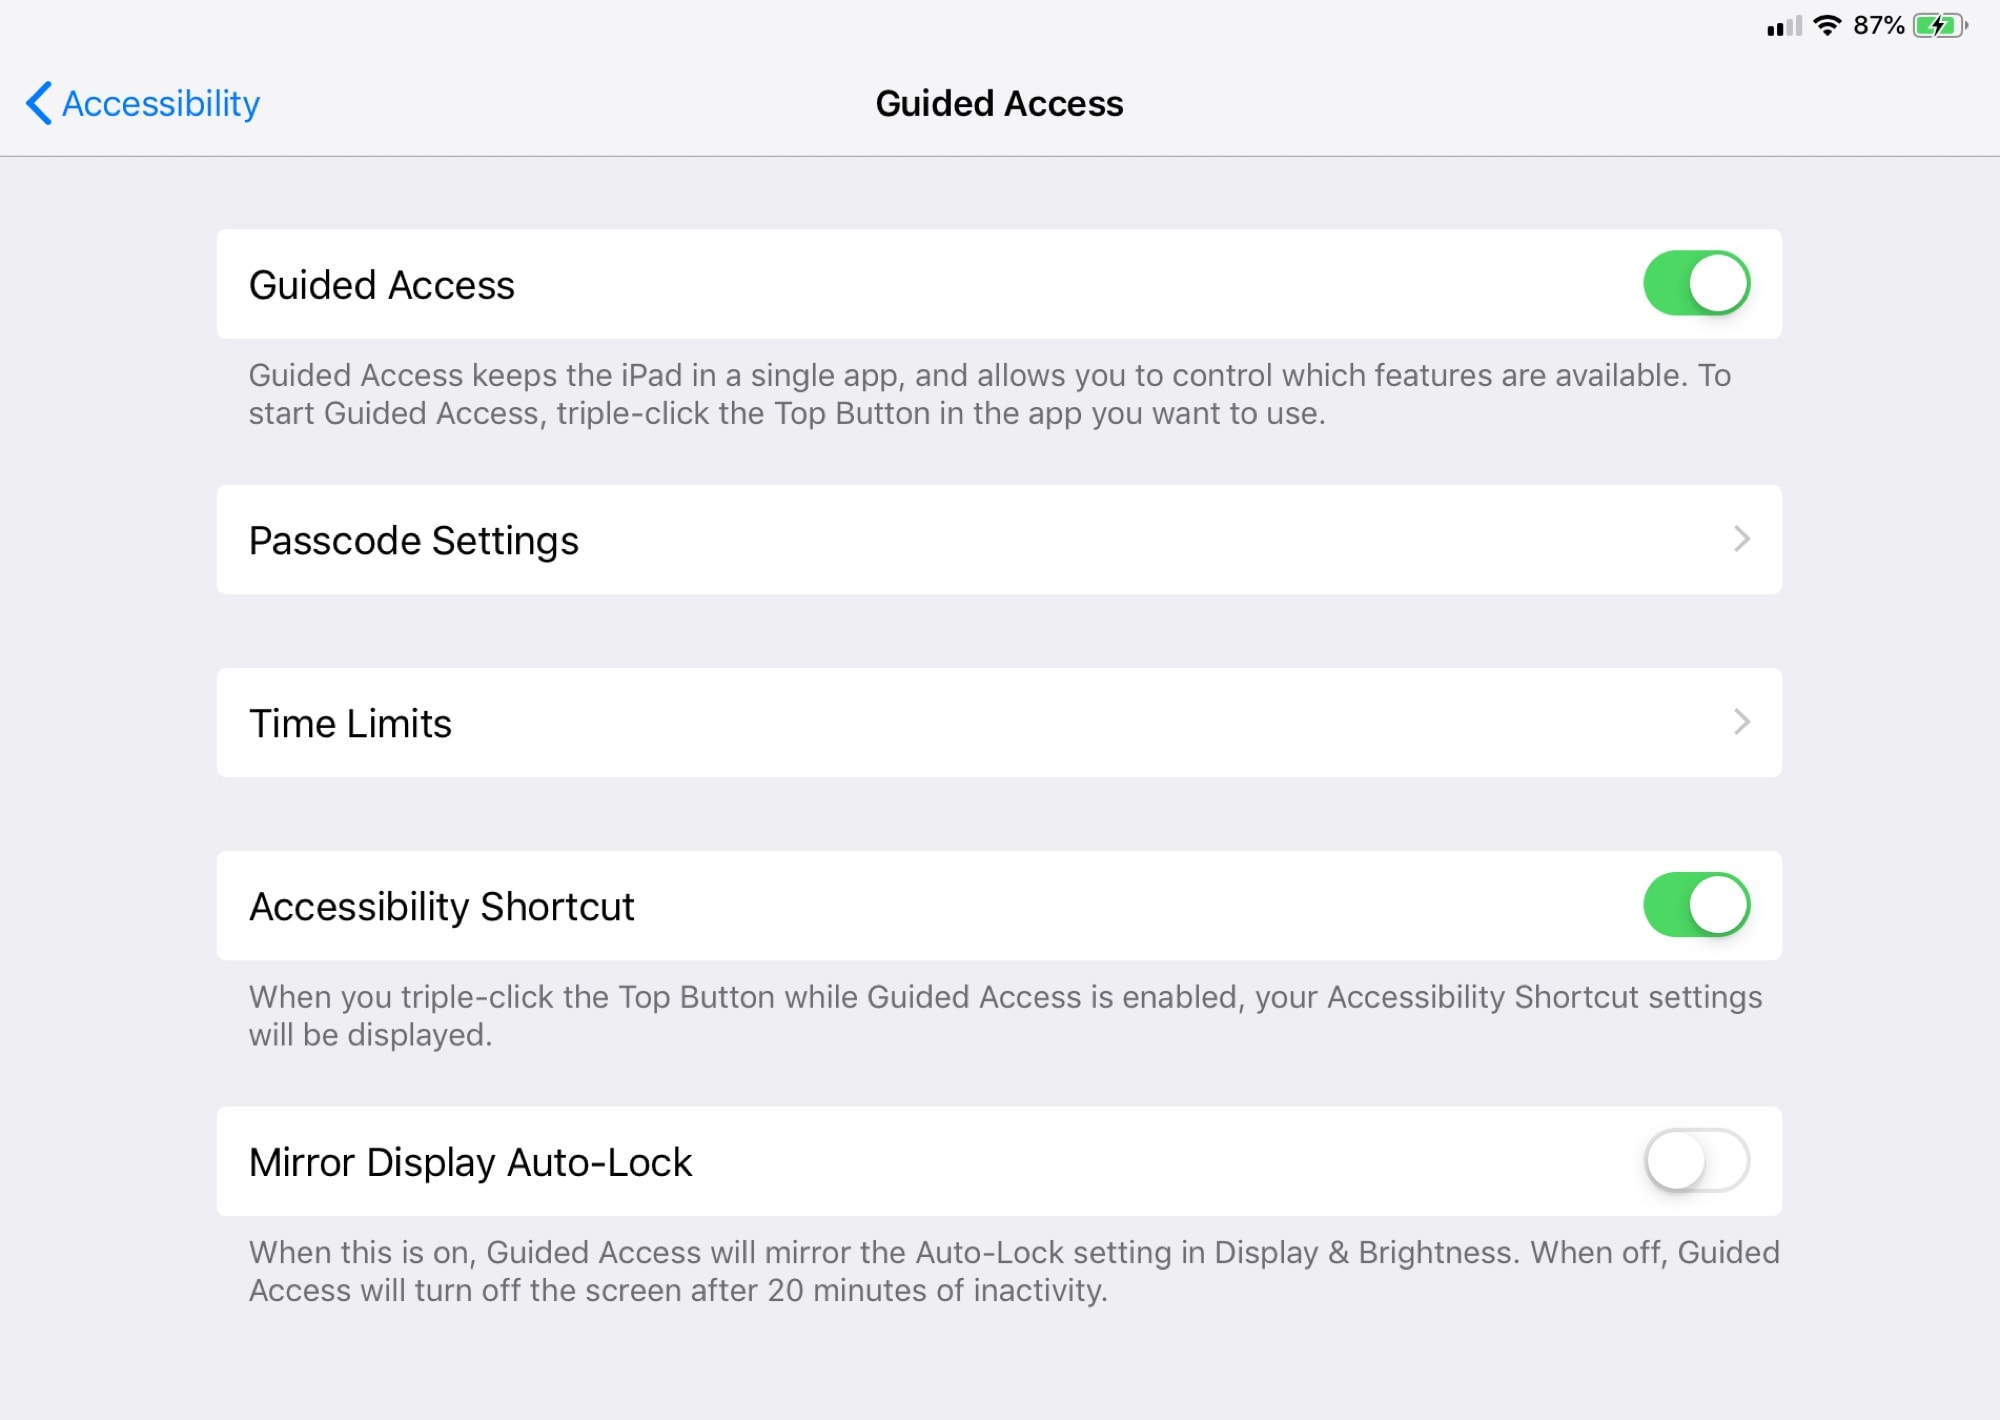
Find this in Settings > General > Accessibility > Guided Access. This is where you enable Guided Access, as well as configure the main settings. In here you can set a passcode, a time limit, and enable the triple-tap shortcut to activate the feature.
Using Guided Access

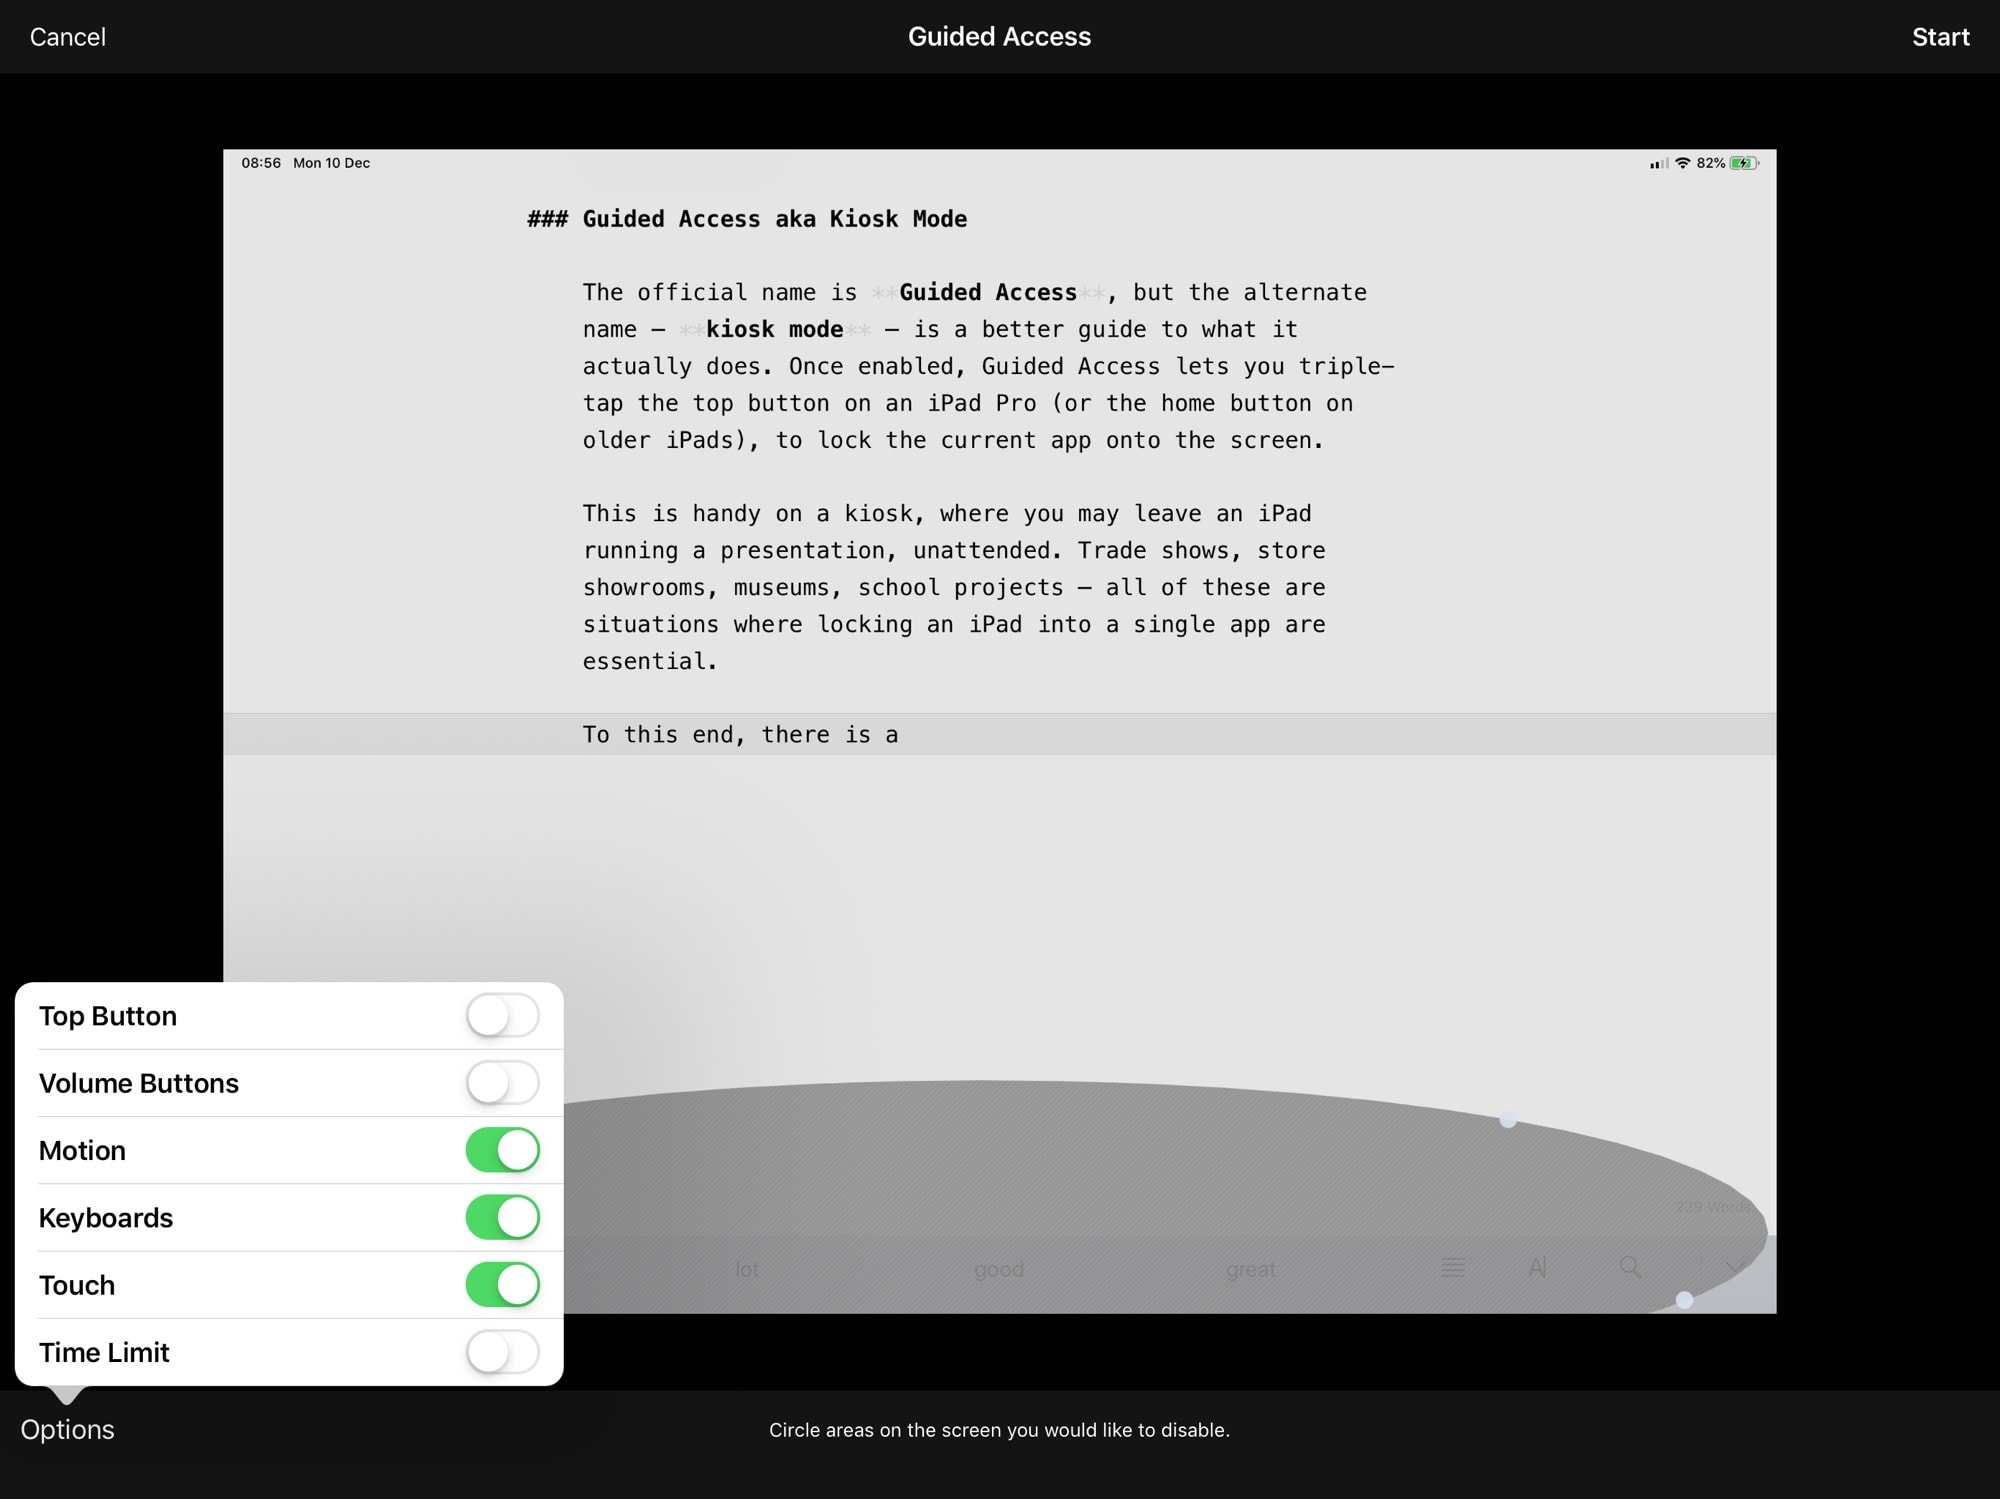
When you’re ready to lock an app, just launch that app, triple-tap the top bottom or home button, and choose Guided Access from the popover that appears. The first time you run it, you’ll see something like the screen above.
You can just hit Start, and you’re off (you’ll be prompted for a passcode the first time you do). In future, Guided access will just start when you activate it. To access the settings, you will have to triple click the top button again, tap the Guided Access popover again, and enter your passcode.
There are several options. The defaults lock you into a single app, as well as disabling the Dock, Control Center, Notification Center, and more. You can also enable or disable the keyboard, and even turn off touch altogether (good for slideshows).
Even neater, you can draw around interface elements to lock them. That can be used to disable features for other people, but is great for the performing musician, because you could disable the buttons that change settings, for example.
How to exit Guided Access
Leaving Guided Access is easy. Just triple-tap the same button as before, and then uncheck Guided Access in the popover. You’ll need to enter your passcode, and you’ll be back at the configuration screen. Then, just tap End to end the session.
Guided access is one of those accessibility features that ends up being useful for anyone. Try it next time you’re forced to let a child use your iPad. You may still have to swab the iPad down with disinfectant wipes afterwards, but at least they won’t have been able to read all your email.


