You almost certainly know the shortcuts for snapping quick screenshots on your Mac. It’s ⇧⌘3 to capture the entire screen, and ⇧⌘4 to get a crosshairs cursor to select a section of the screen.
Now, there’s a new screenshot shortcut in town: ⇧⌘5. And boy is this fella fancy. If this were a western movie, ⇧⌘5 would be the young upstart blowing into town with a couple of Uzis and a pair of Kevlar chaps1. Let’s check out Mojave screenshots.
Screenshots in macOS Mojave
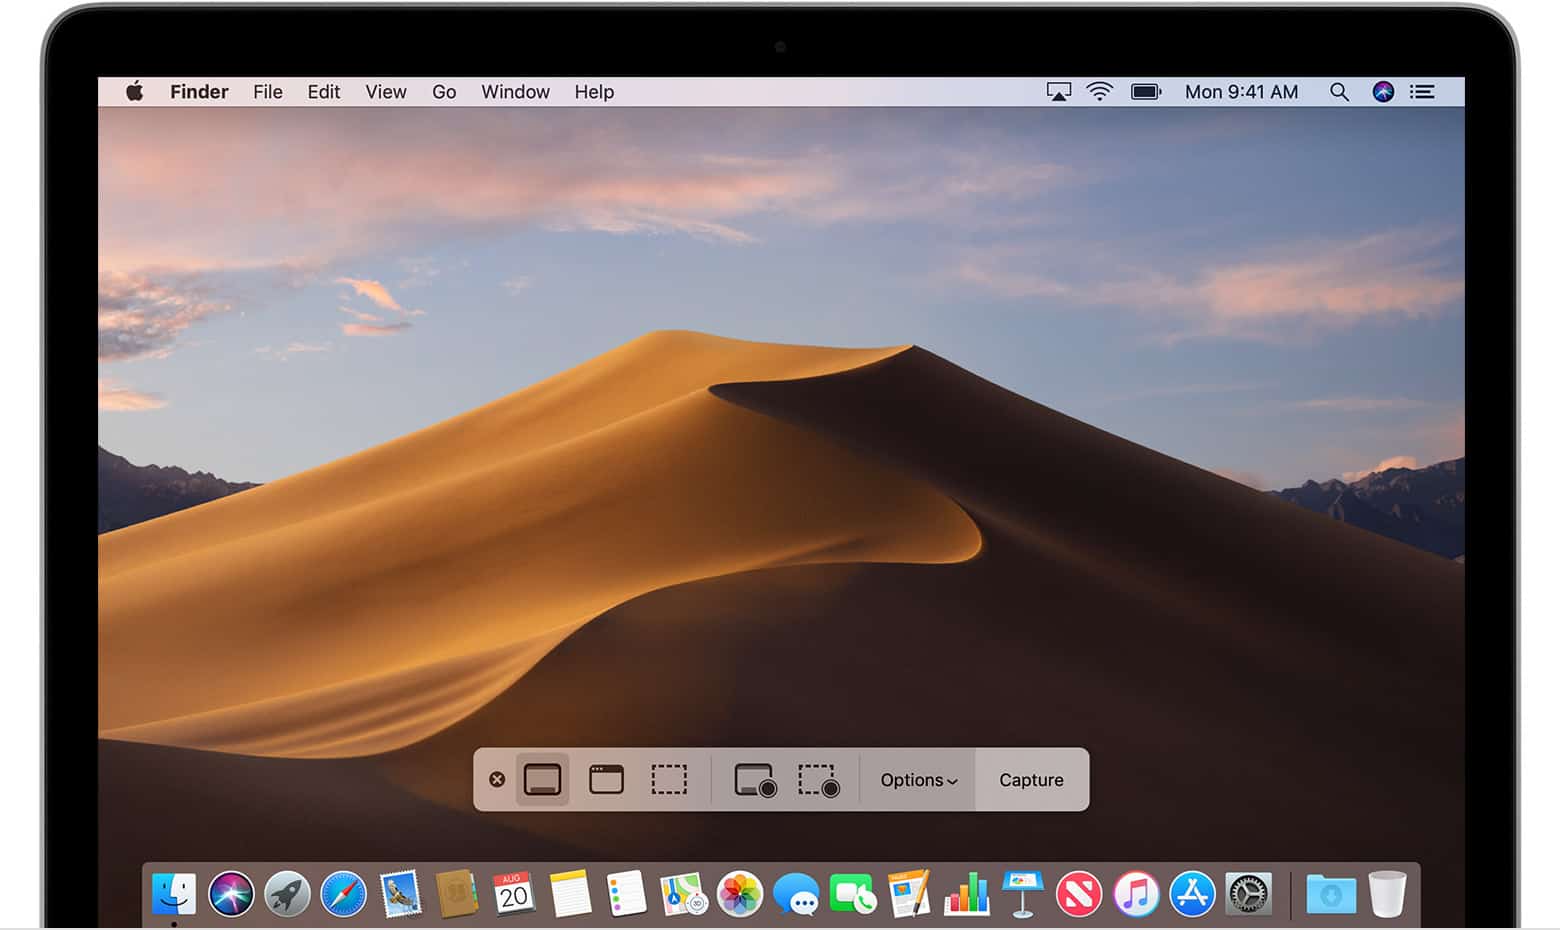
When you hit ⇧⌘5, a new panel pops up letting you take control of the screenshot process.

Photo: Apple
This control strip doesn’t really offer anything new — it just repackages the existing screenshot tools, as well as bringing in some features from the Grab and QuickTime apps which have existed on the Mac since forever. (Well, since 1995 according to Grab’s about screen.)
But we’re not here to talk about creaky old laudanum-addicted Grab, or that whiskey-addled has-been QuickTime. We’re here for the new screenshot hotshot, ⇧⌘5.
Here are the functions of those new control strip icons, from left to right:
- Whole screen capture, just like ⇧⌘3.
- Single-window capture, kinda like ⇧⌘4.
- Capture a selection, just like ⇧⌘4
- Full screen video capture
- Capture a video of a selected part of the screen.
Mark up Mac screenshots and share them

Photo: Apple
If you like the screenshot tool in iOS 11 and later, you’re going to love Mojave screenshots.
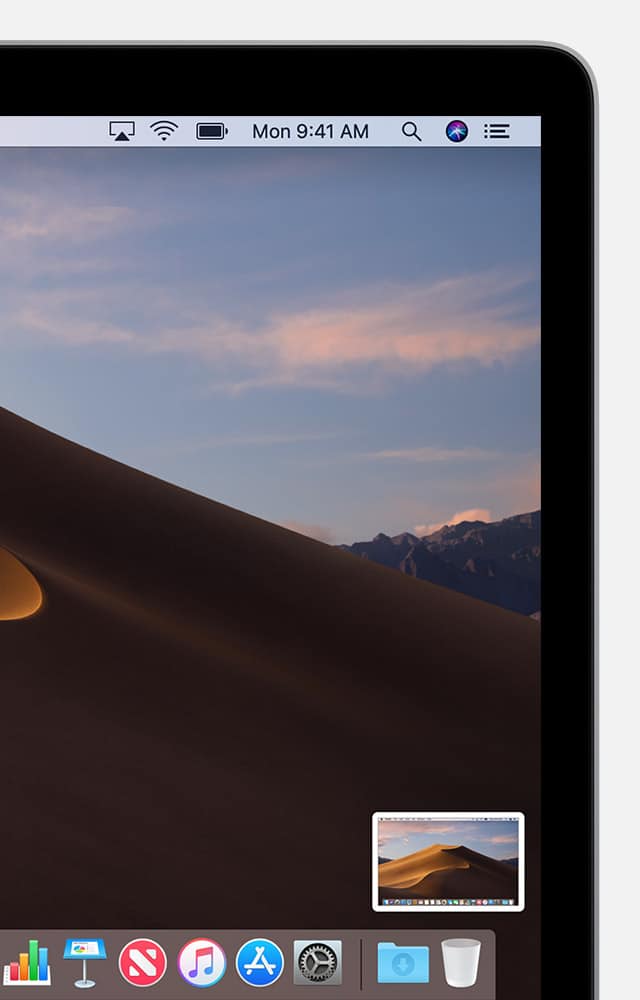
Just like on iOS, a newly captured screenshot shows up as a floating thumbnail in the corner of your Mac’s screen.
Click this, and you can quickly mark up the image using built-in tools.
The default save location for your screenshots is the desktop. Just like in iOS, though, you can drag this to any other location or drop it onto an app to open it. Or you can drag it to the trash.
Settings
In previous versions of macOS, you had to use arcane terminal commands to change things like the default screenshot location. In Mojave, you just have to hit ⇧⌘5, and then click the new Options button.
There you can:
- Pick a default screenshot save location, including Desktop, Documents or Clipboard.
- Delay screenshots with a timer, snapping the screenshot immediately (default) or after 5 or 10 seconds.
- Toggle the floating thumbnail on and off.
- Choose whether to use the default screenshot options or to remember your settings from last time.
- Choose whether to show the mouse pointer in your screenshot.
And remember, these new ⇧⌘5 shortcuts are all in addition to the old ones, which still work the same as before. If you want to change the screenshot file type from PNG to JPG, you still have to do it the old-fashioned way.
Bonus tip: Take Touch Bar screenshots
If you have a MacBook Pro with a Touch Bar, you can capture a screenshot of the Touch Bar by hitting ⇧⌘6. The screenshot will be saved to your desktop.
That’s it. Mojave is shaping up to be a really great update, making a lot of everyday tasks easier to do, without having to fire up any apps to do them.
- Yes, Kevlar chaps. I understand that the metaphor here is more important than the actual practicality of bulletproof chaps, which fail to protect … well … ↩


