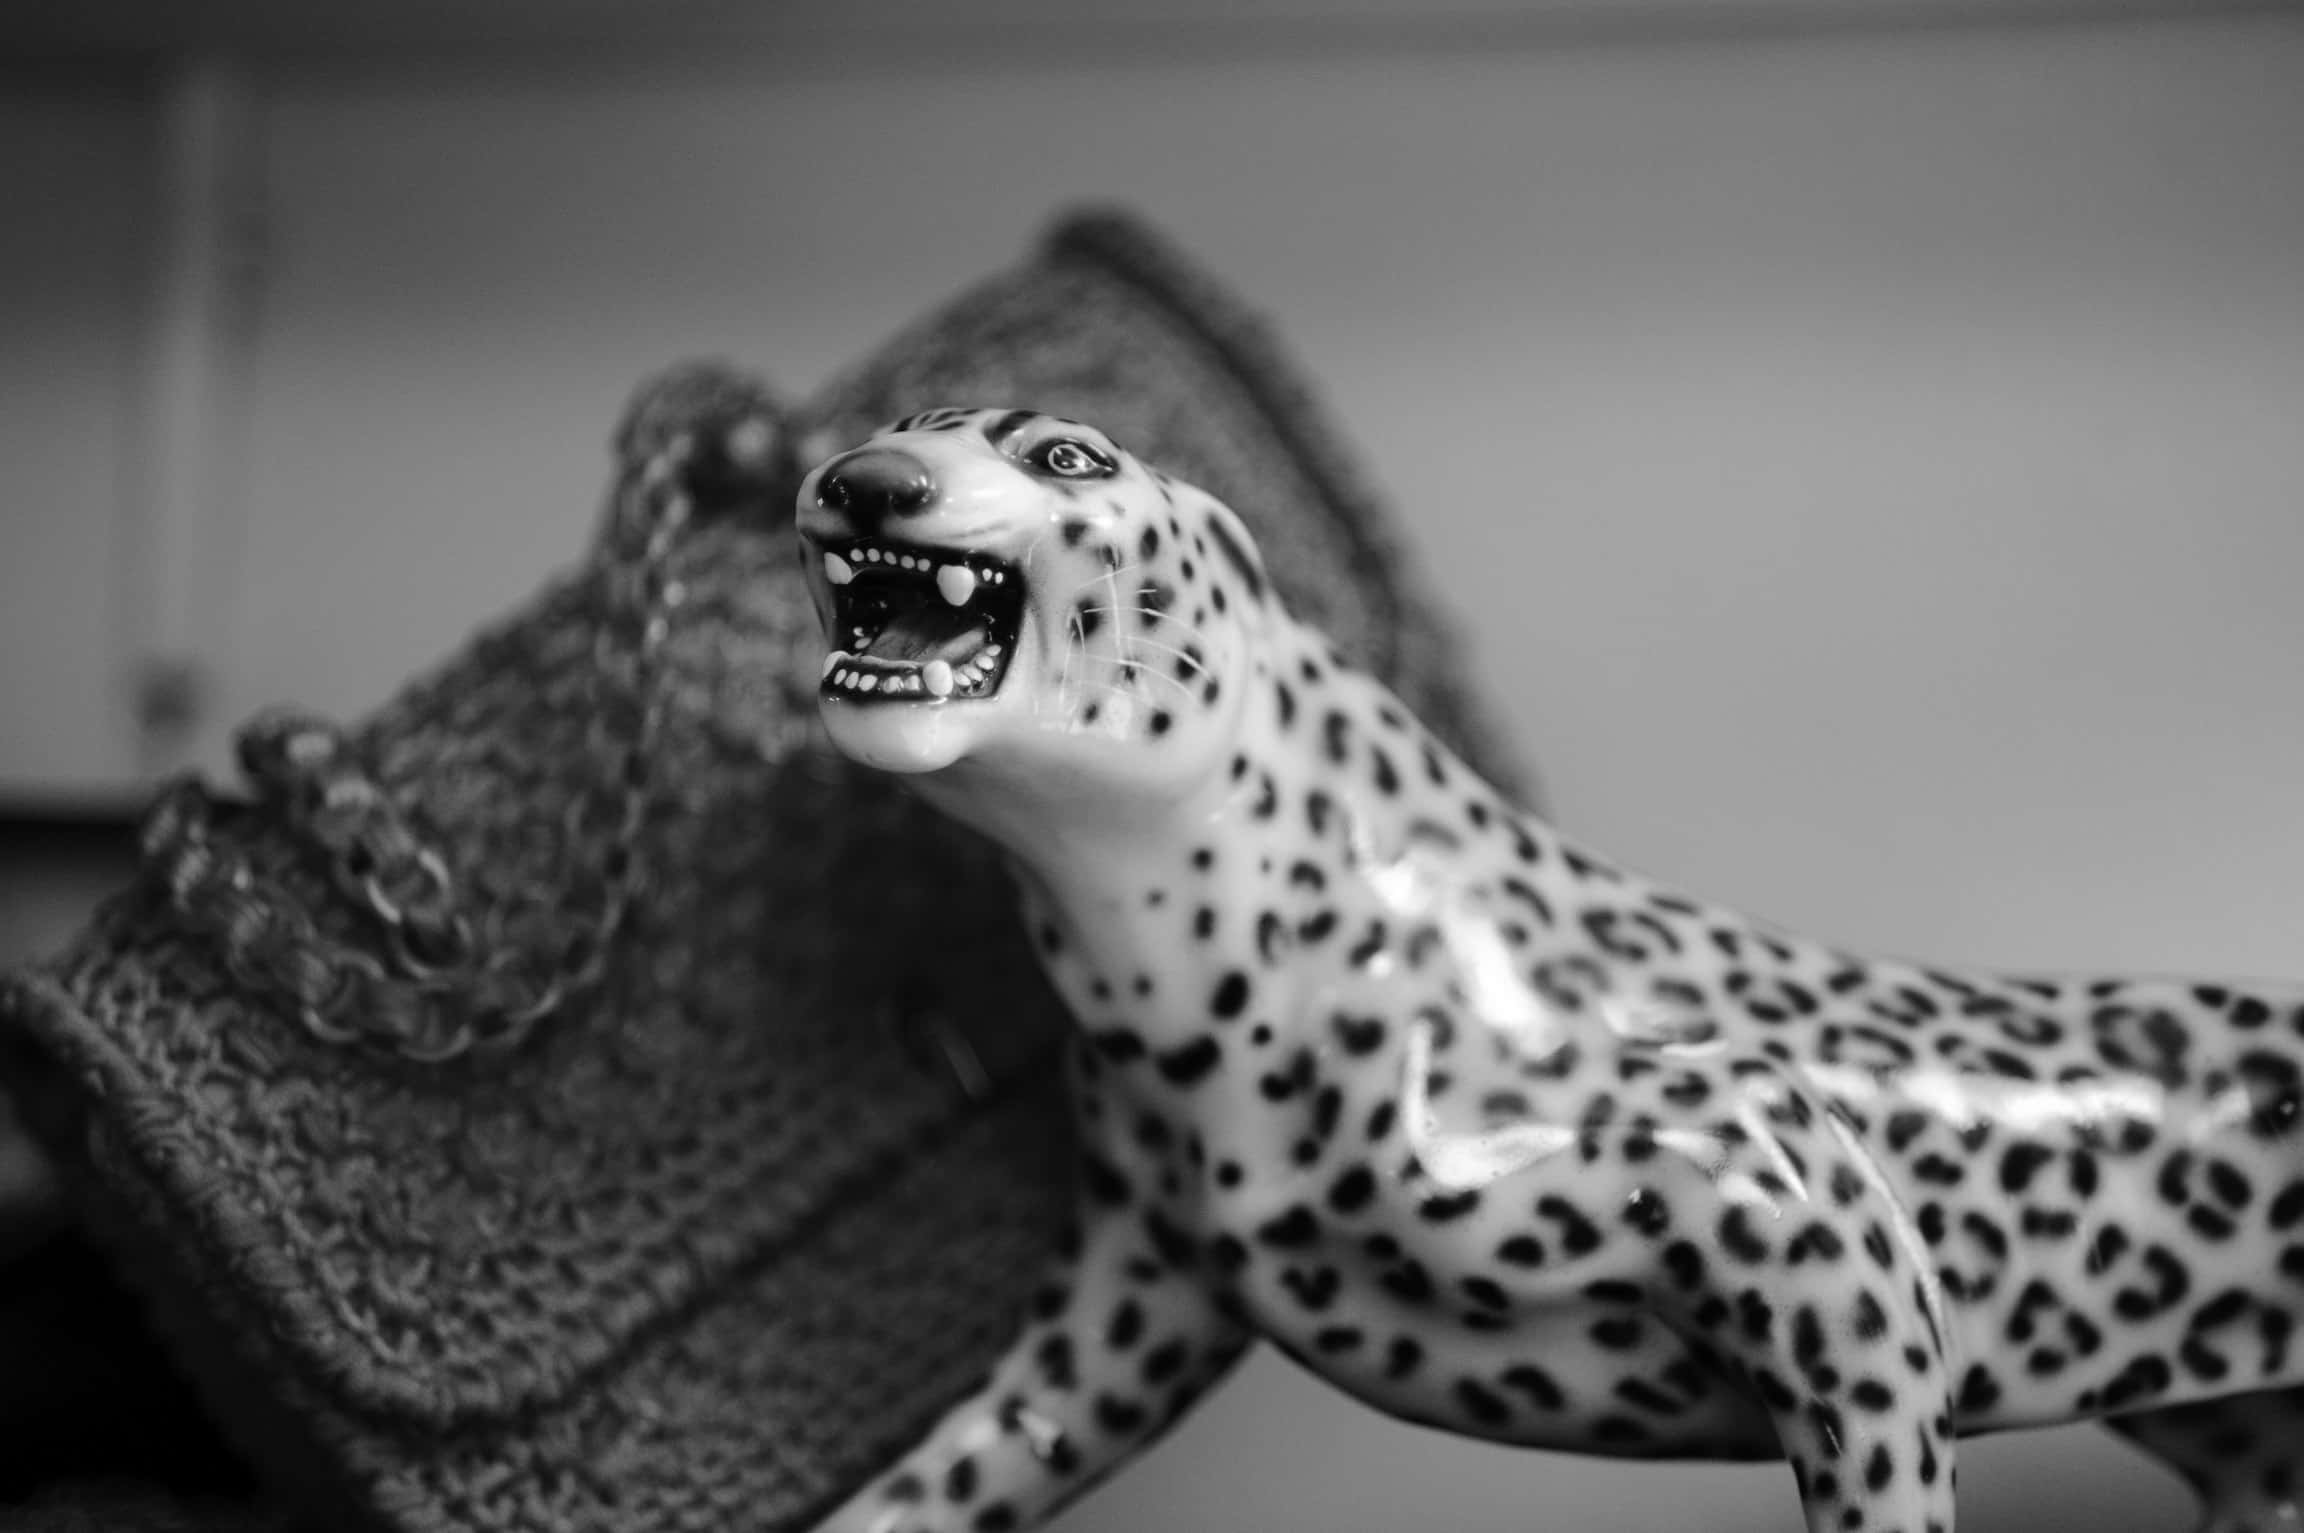
Often, our eye is drawn to something because of its color. But sometimes we’re attracted by a pattern, or perhaps color even detracts from an image (like a row of cars in front of a beatific white building). At those times, we should shoot black-and-white images, which emphasize pattern, texture and shape.
The iPhone — with its giant screen, its great camera and its huge library of photo apps — is fantastic for shooting B&W pictures. Let’s take a look at how to shoot amazing black-and-white photos with your iPhone.
Elements of a black-and-white photographs
The main elements in a B&W image are contrast (the difference in brightness between black and white) and brightness (the overall skew toward dark or light tones). You can tweak these as you take the photo, and adjust them afterward using almost any photo-editing app.
In the case of contrast, the adjustments are best done when editing. Brightness, however, is best handled while shooting. For instance, say you’re shooting a portrait of a black-skinned man. You could choose to shoot his face against a dark background, so that the overall image would be black, or almost black, with only the elements you choose — clothing, eyes, and perhaps a background object — showing up bright.
Another option would be to put the same subject in pale clothes, against a pale background. The overall image is then bright, with the subject in stark contrast. As you can see, brightness and contrast play against each other.
The third element in black-and-white photography is color. Yes, color. By manipulating the colors in the original color image, you can affect the brightness and contrast. This one is very cool, so we’ll look at it first.
Black-and-white photos are color photos underneath
You may notice that, when shooting in B&W, a scene that looks great in color will look flat in B&W. For instance, a bright red flower in front of a wall of green trees looks fantastic in color, but in B&W, the green trees and the red flowers become the same shade of middle gray. Film photographers used colored glass filters in front of the lens to adjust this. A red filter, for instance, would lighten the flower (letting through all its red light) while darkening the trees (blocking the green light).
The great thing about digital photography is that — unlike film photography — you can easily convert to B&W after you shoot. You can also switch your iPhone’s camera to B&W mode as you shoot, letting you see the live image in B&W — something that was impossible with film. This lets you easily try out color filters on your photo to see what works best.
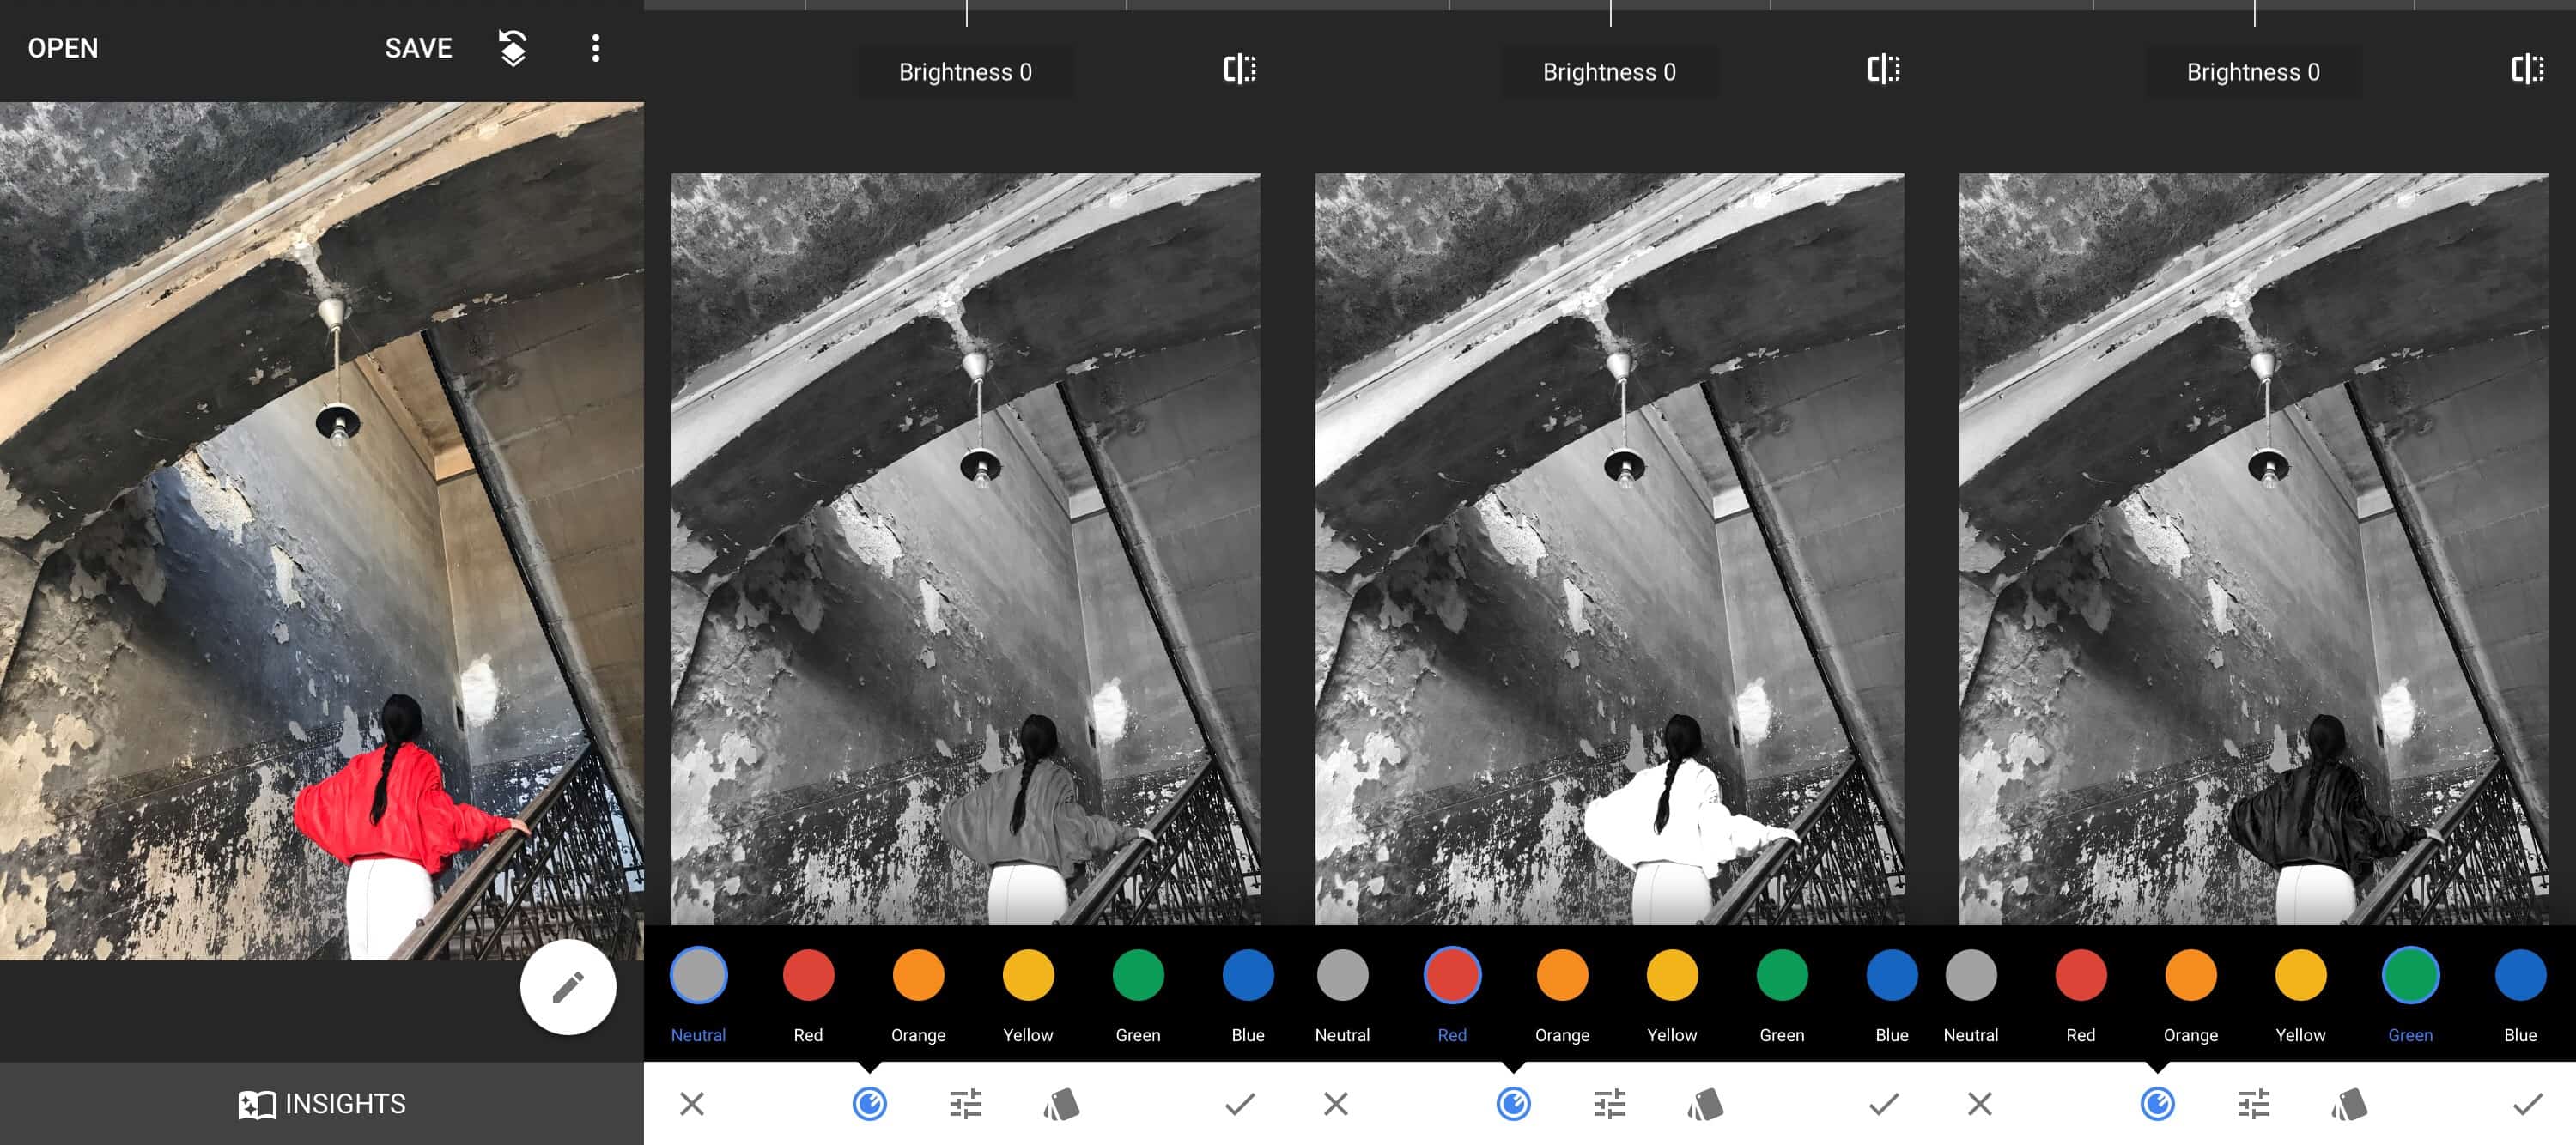
Photo: Charlie Sorrel/Cult of Mac
Using filters to make better B&W photos
This is a terrible image for B&W, because the original looks so great with the red jacket against the crumbling gray stone, but it shows what a huge difference a color filter can make to a B&W image. I used Google’s Snapseed app here. Snapseed’s B&W module can apply colored filters, which makes it the perfect choice for this trick.
On the left is the original image, followed by a neutral conversion to B&W. Then you see the image with red and green filters. The gray background remains almost unaffected, whereas the awesome 1980s red leather jacket turned from a middling gray (unfiltered) to black (red filter), and white (green filter).
The general rule is that a filter darkens its own color, and lightens others. You can use filters in surprising ways. For instance, portrait photographers might use a green filter to lighten red blemishes on a subject’s face, making their zits disappear, all without touching Photoshop.
Play with different colored filters to see what you like. But more importantly, you should keep a filter’s effect in mind when looking at subjects to photograph. What looks very dull in color might be amazing in B&W, and vice versa.
Contrast
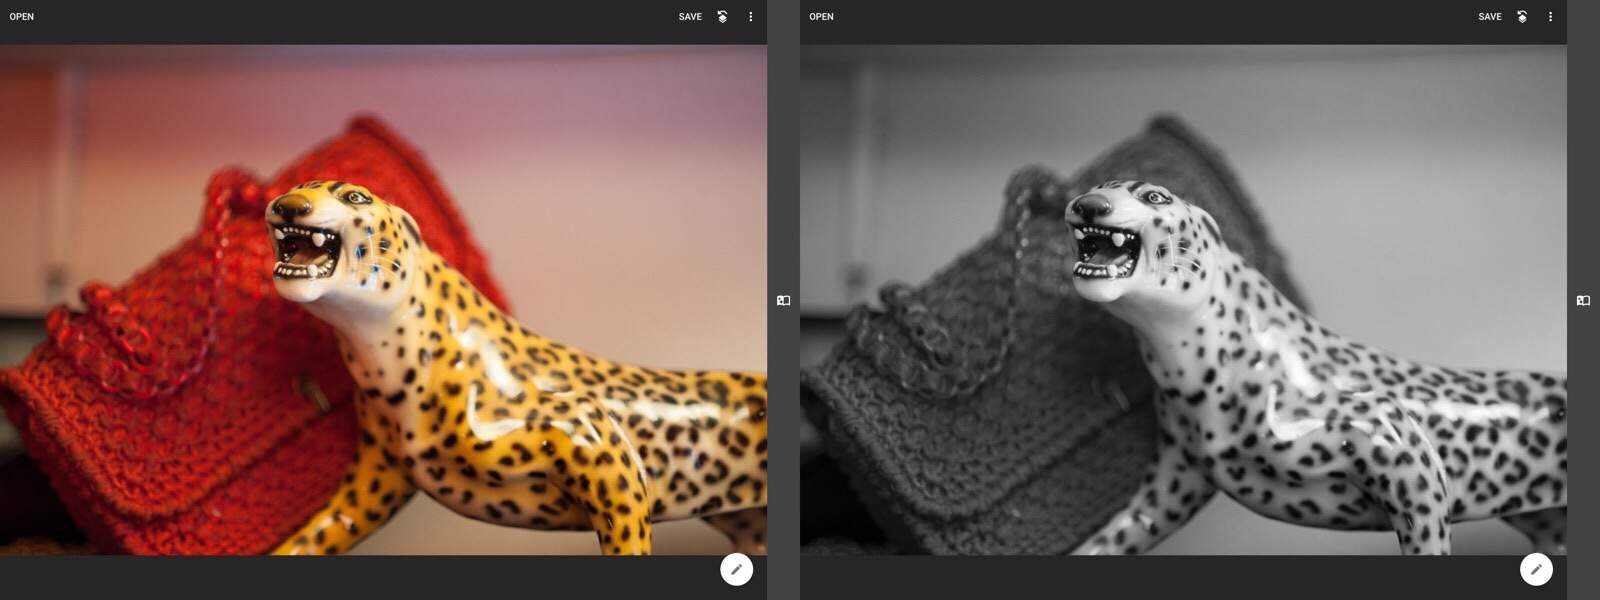
Photo: Charlie Sorrel/Cult of Mac
B&W lets you do things with your image that would look terrible in color. For instance, you can increase the contrast of a B&W image to pump the blacks and the whites, removing the in-between grays. This makes for a high-impact, graphic image. Try this in color, and you get a mess — it just looks ugly. The easiest way to tweak the contrast is to look for the slider in your editing app that adjusts it.
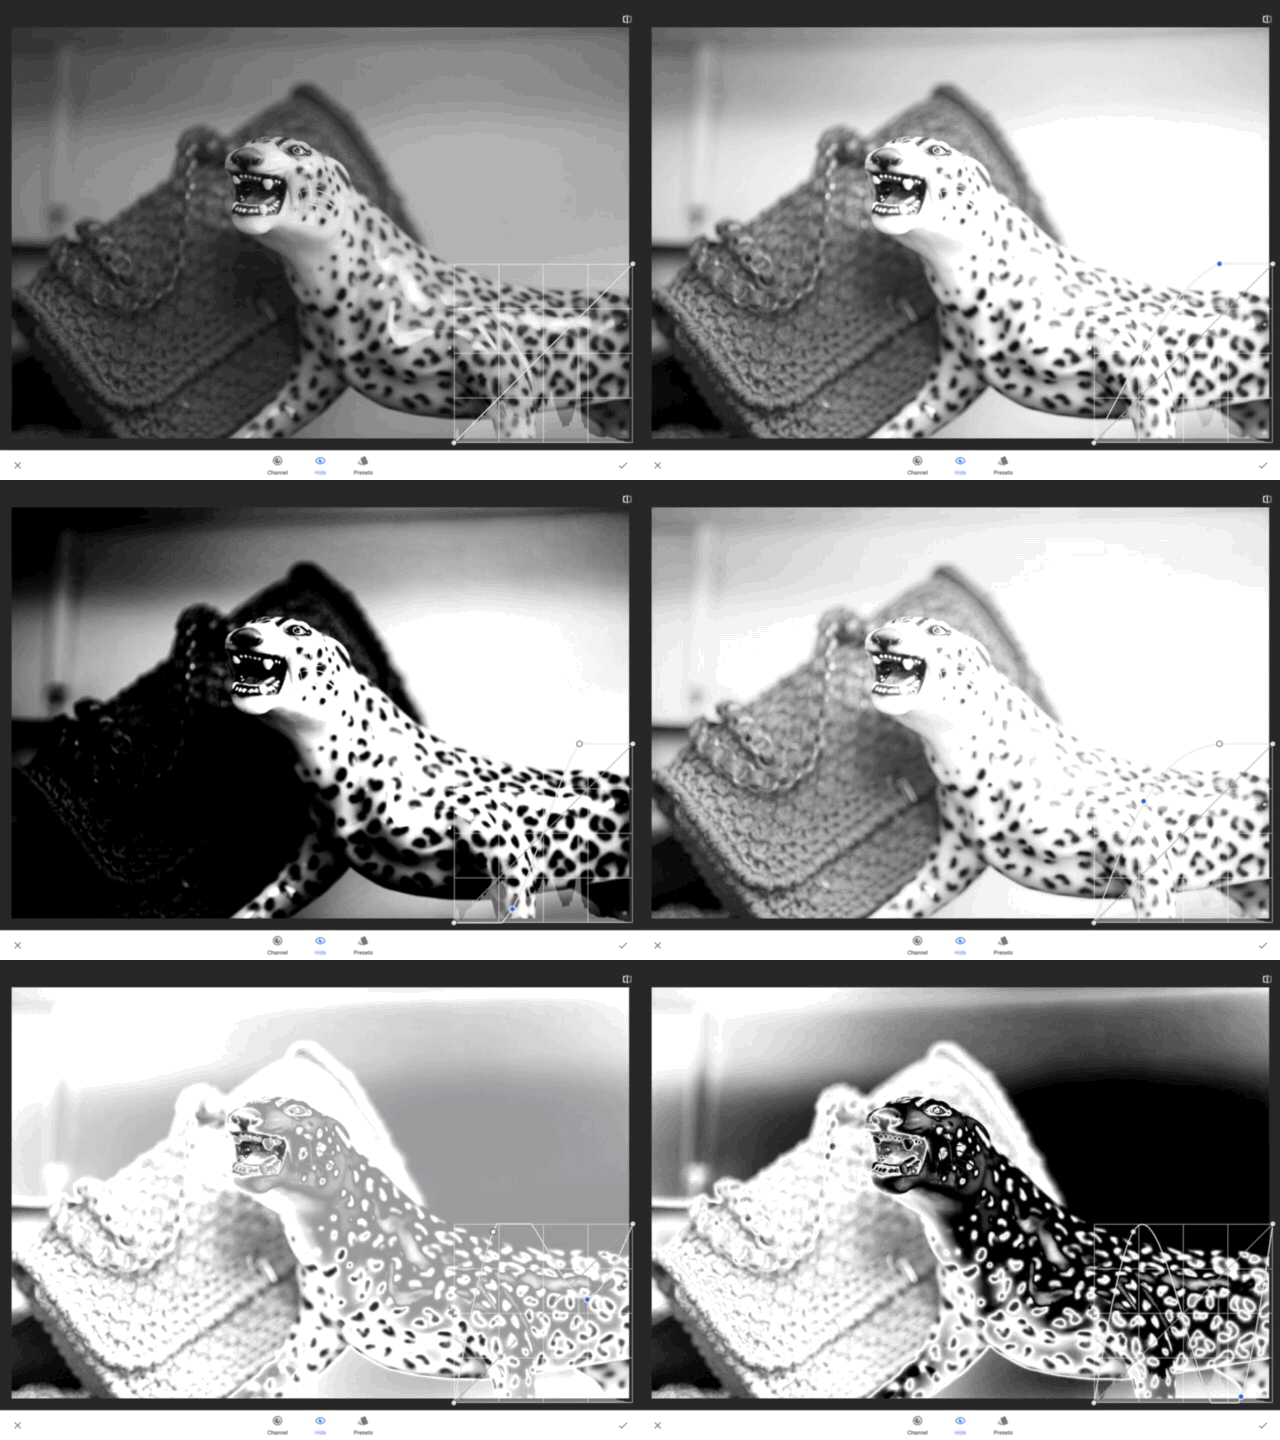
For finer control, look for the Curves tool, which shows the levels of light and dark on a curve that you can grab and move. It’s easier than it sounds:
As you can see, the Curves tool is super-powerful. The box works like this: On the left are the blacks in the image. On the right are the whites. Up means lighter, down means darker. So, if you grab the curve at top right (the brightest whites) and drag it straight down, those bright whites darken. In this way, you can flip the image inside-out, turning black to white and vice-versa. Curves is just about the best way to fine-tune the contrast and brightness of an image. It takes a bit of practice, but as you can see in the GIF, it’s simple to use.
Snapseed (and other apps) also let you apply curves to one color at a time (red, green, blue), which effectively lets you fine-tune the colored filters we saw above before converting to B&W. That’s beyond the scope of this article, but you might like to take a look at it in the future.
Brightness in B&W photos
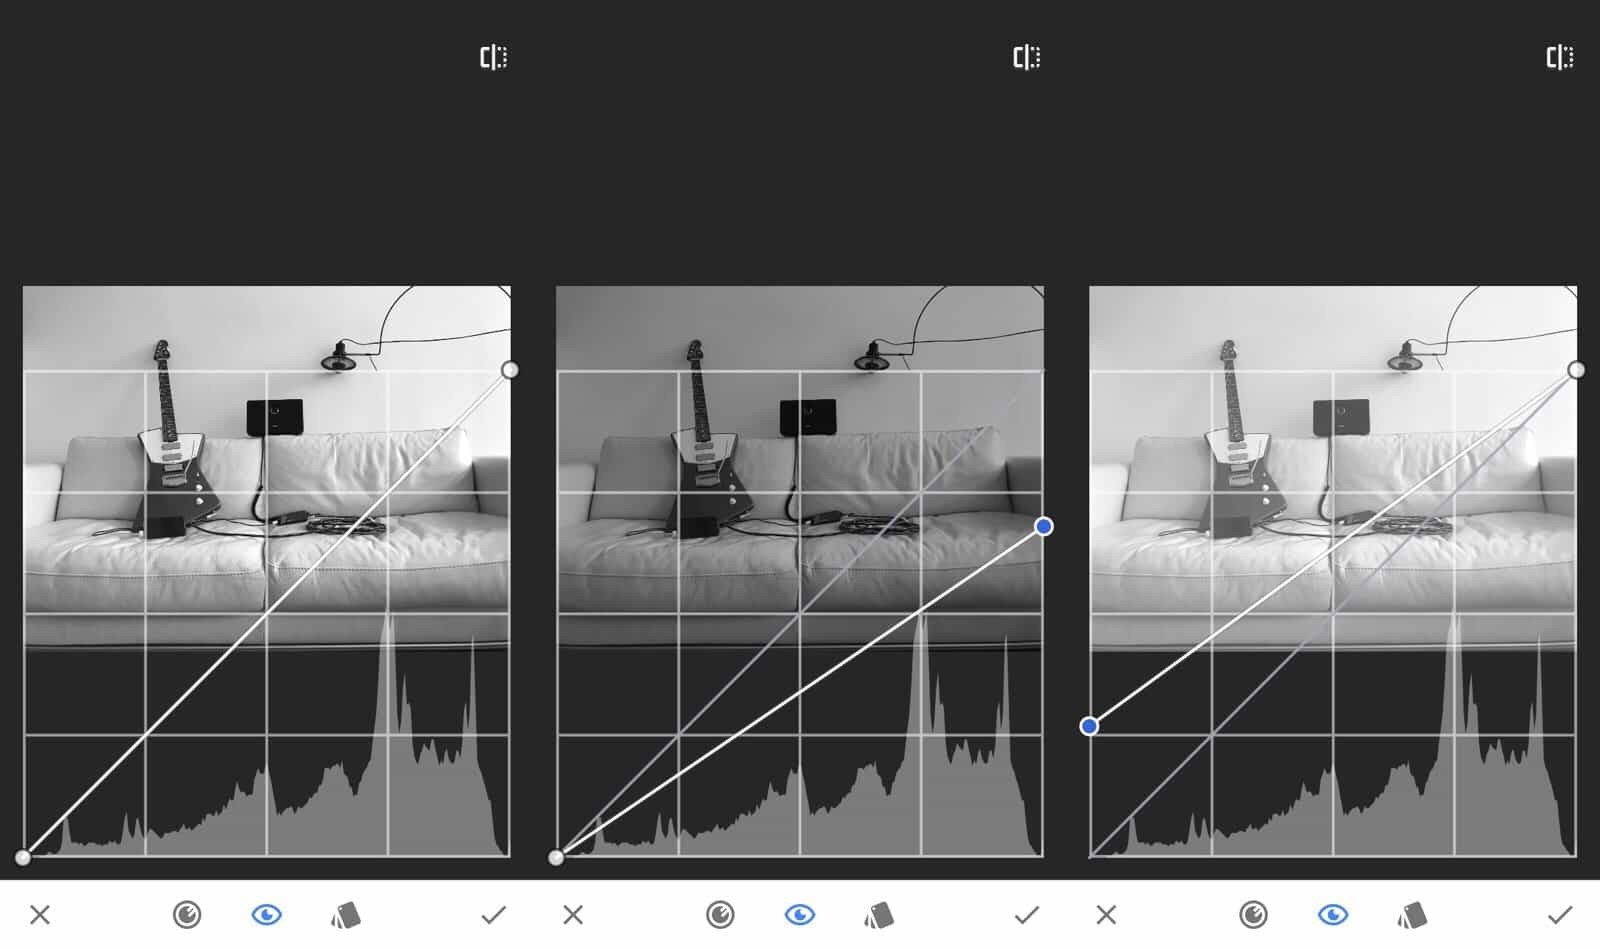
Photo: Charlie Sorrel/Cult of Mac
There isn’t much to say about brightness that has’t been covered above, other than one important rule of thumb: Your photo should contain at least a spot of pure black, and a spot of pure white.
Take a look at the picture above. I deliberately adjusted the curves to eliminate pure white and pure black. Do you see how dull the image looks, even though the scene itself is full of contrast? If you were to print these images on paper with a black or a white border, they’d look even worse, as you’d then have a reference point for the dull lack of black or white. Compare those versions to the version below, where I have tweaked the curves to include both pure black and white, as well as to boost the contrast slightly.
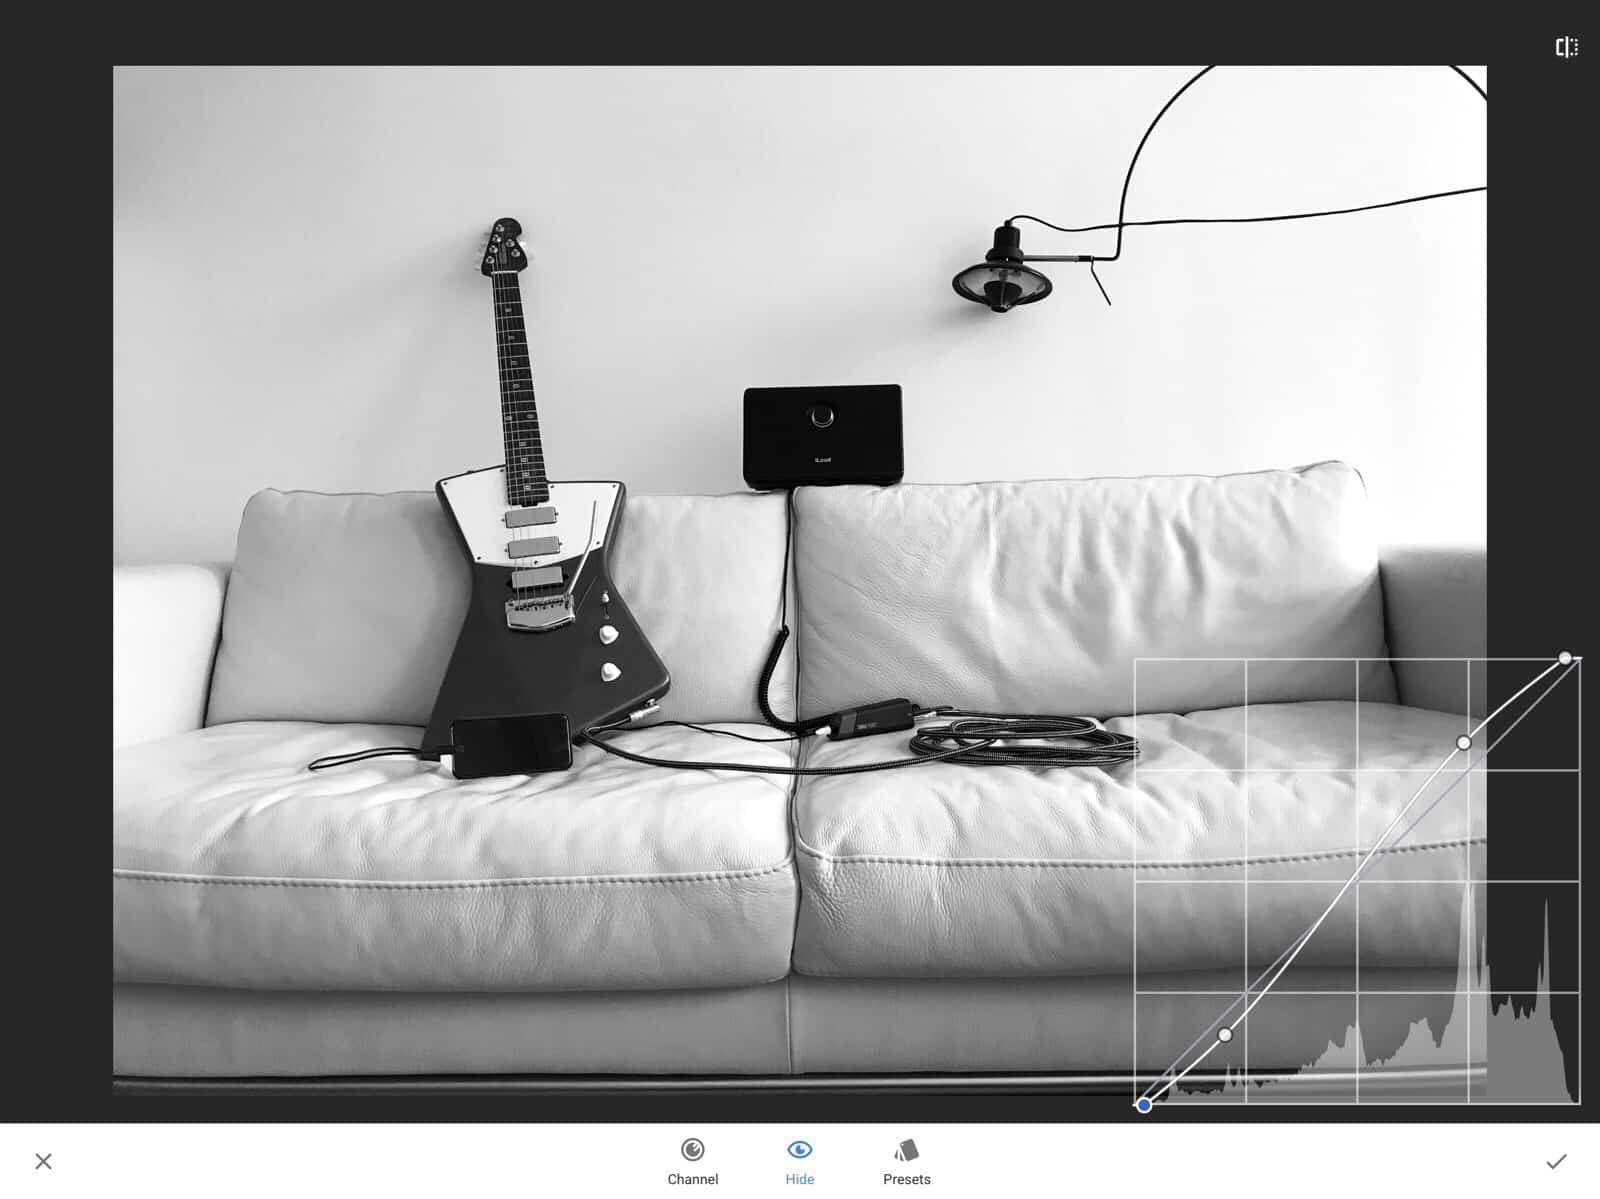
Photo: Charlie Sorrel/Cult of Mac
Fans of the VSCO photo app might disagree here. Part of VSCO’s signature look is to eliminate the pure black from photos, giving them that faded, retro feel. That might look neat today, but in the future you’ll look back on this folly with regret. All your photos will look like they suffer from the same problem. Like tobacco-grad and starburst filters in the 1980s, VSCO’s faded look will only bring you shame in the future.
Great apps to shoot and edit your B&W photos
The best app for shooting B&W is probably the iPhone’s built-in Camera app. It can be switched to B&W mode so you can easily visualize the scene as you shoot. Plus, the iPhone’s filters are non-destructive. That is, they can be removed at any time in the future, which means you can shoot in B&W, but switch back to color for editing in another app.
The Photos and Camera apps bring a lot of great built-in tools, but they hide a lot of the mechanics of what they do. This means they’re good for casual users, and for professionals who know exactly how all this stuff works. For intermediate photographers, all the clever automation makes it hard to learn what’s happening.
I like Google’s Snapseed. This free app mixes clever automatic tricks with basic image manipulation in a way that’s easy to use for anyone. I have far more powerful apps on my iPad and iPhone, but I go to Snapseed 99 percent of the time.
In reality, though, you can use any app for B&W photography, as long as it has the following features:
- Curves, for contrast.
- Color filters that can be applied to B&W images.
And that’s about it. Most apps also offer brightness, contrast and other great B&W tools, but if you have colored filters and curves you can do almost everything. Just pick one that works well for you. Starting with Snapseed, obviously.
The secret to great black-and-white photos
There’s a lot more to B&W photography, but these are the general principles that inform the rest. The iPhone is a fantastic tool for B&W, because it combines a very good camera with a big screen and a host of apps to edit your images.
Really, though, like all photography, the secret is in your own eye. Try to look at the world with a monochrome eye and you’ll spot pictures that could only work in B&W. Once you have that, the rest is easy.
