You can split up a big purchase across four smaller payments using Apple Pay Later. Unlike other similar services like Klarna, Afterpay and Affirm, there’s no interest — you pay the exact same amount of money as if you were purchasing at once.
Payments are expected every two weeks, matching the most common paycheck schedule in the United States. It’s easy to use and transparent about what you’ll pay when; it couldn’t be more straightforward.
How to use Apple Pay Later
Apple Pay Later is still a prerelease feature, so you may or may not be able to use it. Even after you update to iOS 16.4 or install iOS 17, you still may not have it enabled. The only way to find out is to check. To do this, start the Apple Pay process and see if Pay Later is an option.
1. Pick Apple Pay during checkout

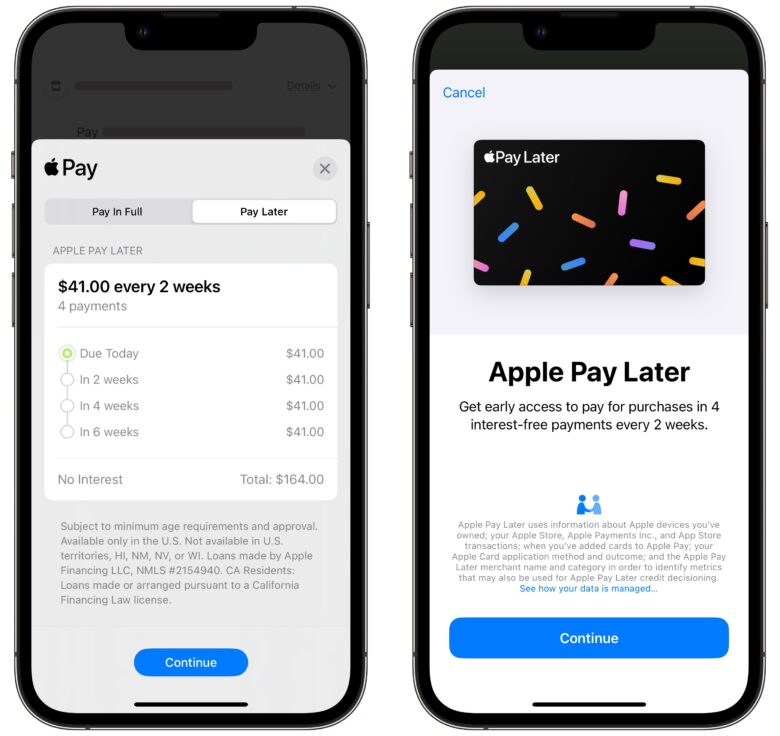
Screenshot: D. Griffin Jones/Cult of Mac
When you’re checking out online or confirming a payment in an app, make sure to pick Apple Pay. On the Apple Pay panel that slides up from the bottom, switch to the Pay Later tab.
2. Set up Apple Pay Later

Screenshot: D. Griffin Jones/Cult of Mac
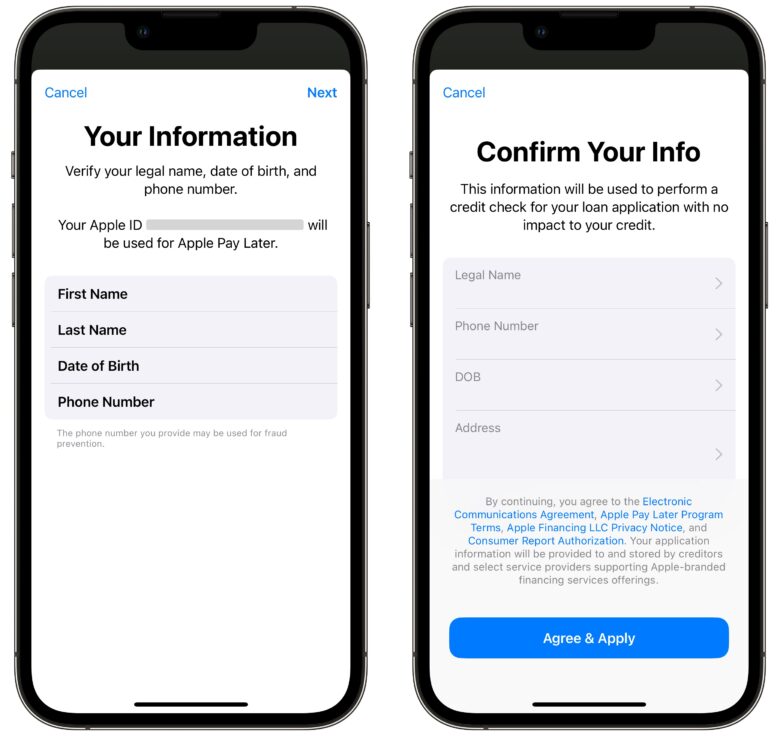
If this is your first time using it, you’ll need to confirm some personal information first. Enter your name, date of birth, phone number and address.
After you review it and tap Agree & Apply, it will work to confirm your application. (This doesn’t affect your credit score.) According to Bloomberg, it uses this information to look up your spending history at Apple and whether you’ve previously applied for the Apple Card.
3. Confirm schedule and payment

Screenshot: D. Griffin Jones/Cult of Mac
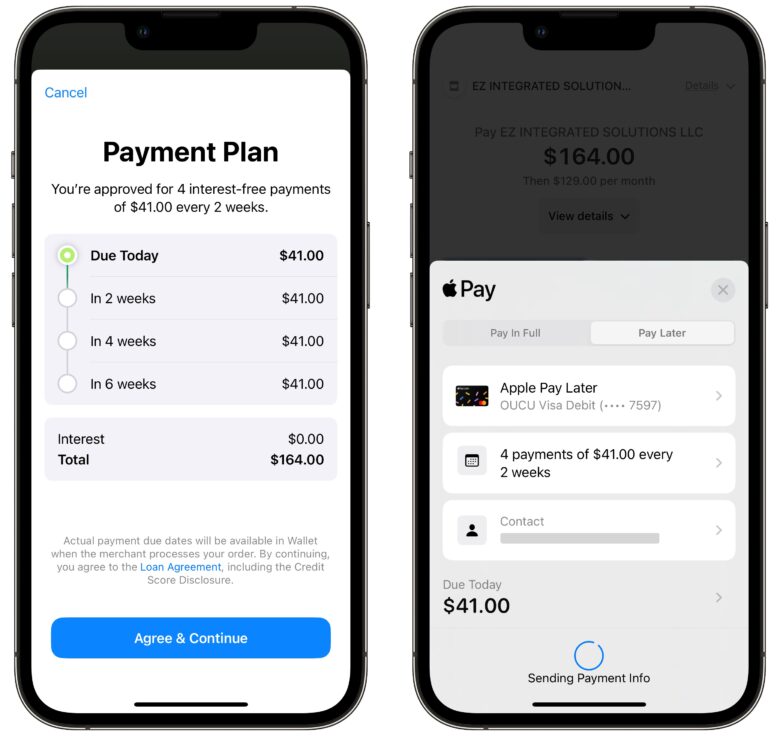
The next screen will show you the payment schedule and amounts. Tap Agree & Continue.
Next, pick your method of payment from cards you have in Apple Pay.
Finally, confirm the payment using Face ID or Touch ID.
Only one-time payments
If you try to use it for a recurring charge like a bill, you’ll get a notification that the payment didn’t go through. You can only use Apple Pay Later for one-time purchases.
After setting it up initially, it really couldn’t be easier choosing to pay later rather than up front with just a tap.
I question what Apple intends to get out of this feature — offering loans without making any money on interest — but perhaps it’s a loss leader to get people closer to applying for the Apple Card and other Apple services.


