If you’re a stuck-at-home musician, or just someone who would like to learn to make music with their Mac, then maybe you’ve just downloaded the generous, lockdown-era, three-month free trial of Ableton Live. And if you’re a GarageBand (or Logic Pro X) user, you may be feeling a little lost.
Fear not. I did the same thing last year. At first I was overwhelmed just trying to do basic stuff, like routing my guitar into Ableton or trying to work out why the app offers at least three record buttons.
So, as a relatively fresh Ableton user, I thought I’d make a list of handy tips for new users coming from Apple’s music apps.
The Session View/Clip View
Ableton Live’s most distinguishing features is its Session View, or clip view. Instead of having a timeline made up of horizontal tracks, like GarageBand and pretty much every other digital audio workstation software, Live uses clips. (Live also has a regular timeline, called the Arrangement View, which works how you’d expect.)
In this view, each column is an instrument — a drum kit, a synth, a sampler or a track for recording vocals, etc. In that column are little cells. You record short (or long) clips into these cells. On a piano track, you will record MIDI notes. On an audio track, you might record several guitar riffs or chord progressions.
Tapping a cell will play it. But here’s the smart part: Ableton synchronizes the launch of these clips to the track. That means that no matter what (or when) you tap, the clips always will be in time with each other. A horizontal row of clips is a “scene,” which can be launched with one tap.
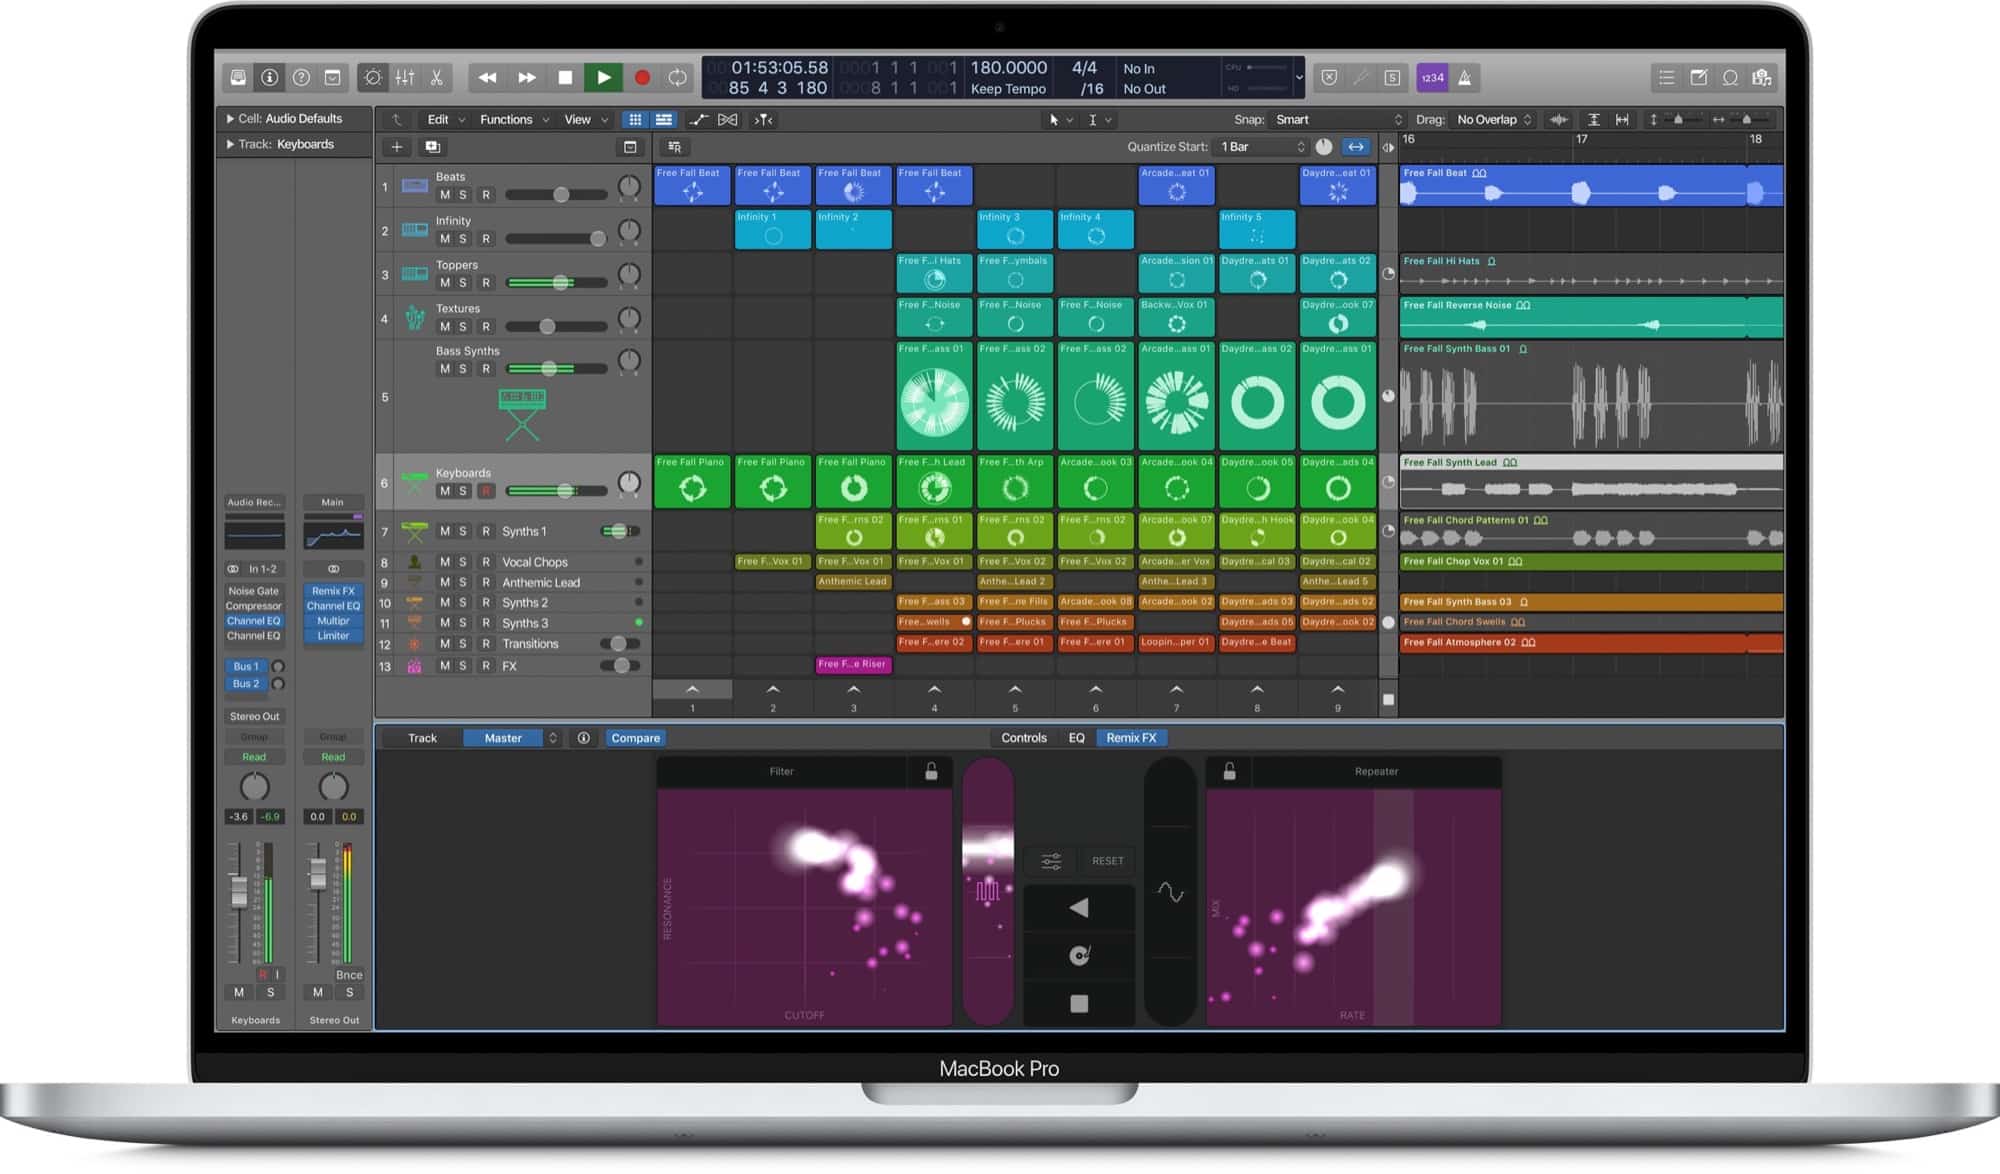
Photo: Apple
GarageBand’s Live Loops are based on Live’s Session View, but are not nearly as powerful. The upcoming version of Logic Pro X, however, might be a serious rival.
Session View vs. Arrangement View
Ableton Live’s Session View and Arrangement View are independent, but linked. Say you put a drum kit on track 1, in either view. That drum kit also appears as track 1 in the other view. But, only one can play at a time. Here’s an example to show how this works.

Photo: Cult of Mac
Say you have created a bunch of awesome clips in the Session View. If you then click the Arrangement Record button while jamming on these clips, your jam will be recorded onto the Arrangement View. Then, you switch to the Arrangement View, press the play button on the track you just recorded (see screenshot above), and it takes over. Now, when you play your song, that newly recorded track will play, and your clips will be muted.
One more example to make it clear how useful this could be. Imagine you have a clip containing a few bars of a drum beat, and another one with a chord progression. These clips will loop forever in Session View while you improvise on your guitar, and record it into a new track in the Arrangement View.
Essential shortcuts: The tab key switches between the two views. Plus, you can drag and drop clips between them.
Three record buttons?
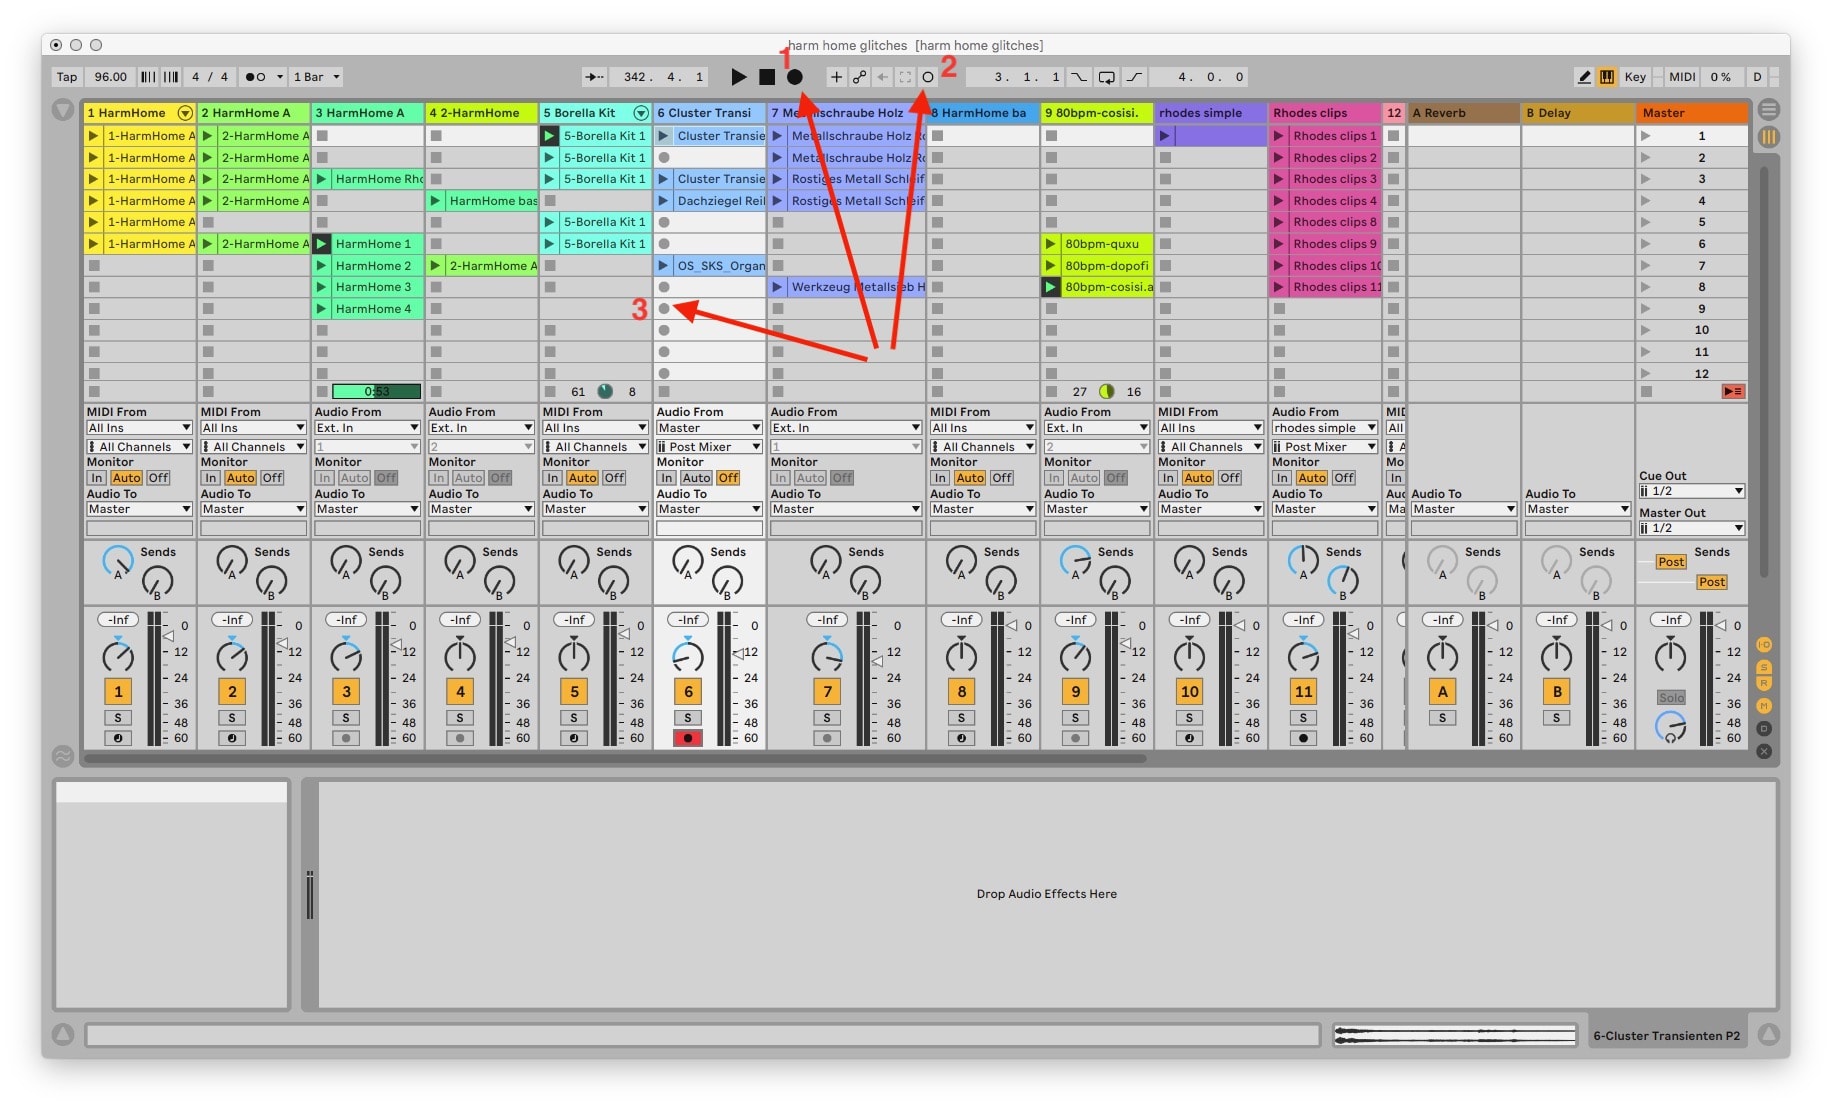
Photo: Cult of Mac
This part really confused me. Why does Ableton Live offer so many record buttons? In the screenshot above, the record buttons do the following:
- Arrangement Record button. This records whatever you do as a “traditional” audio or MIDI track in Live’s Arrangement View, as mentioned above.
- The Session Record button governs what happens when recording into a clip in Session View. Click it to toggle between erasing and recording over what’s already there, or overdubbing (adding notes) to a MIDI pattern. If you have armed several tracks in a scene for recording, they will all start recording together.
- Record Button. Click this to record into a clip. Recording will start at the beginning of the next bar, in time with the music.
The markers and keyboard navigation
In Logic and GarageBand, the left and right arrow keys move the selection to the next clip of music. Then, you can perform other actions. This happens independent of the playhead.
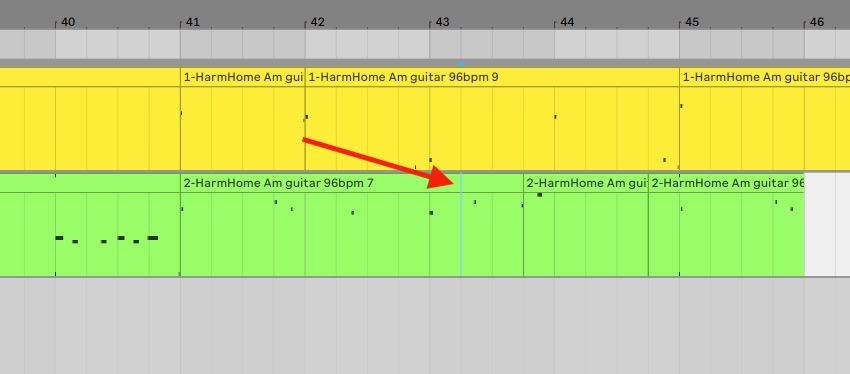
Photo: Cult of Mac
The arrow keys work differently in Ableton Live. In Session View, they skip between columns, or tracks. And in Arrangement View, they move a marker (which is pale blue, and hard to see). This marker acts as the playhead (hit the Space key, and playback will begin from that marker). But it also acts like the text cursor in a text-editing app. You can hit split (⌘-E) to split a clip, but you can also hold the Shift key, and then use the arrow keys to expand the selection. It’s just like selecting and moving text.
You should play around with it, because the fundamental concept is different from Logic and GarageBand. In Apple’s apps, the keyboard acts on chunks of audio, as if they were words in a text document. In Live, it ignores the chunks, and lets you make arbitrary selections — like manipulating at the letter level in text.
Inputs, outputs and FX are easy in Ableton Live
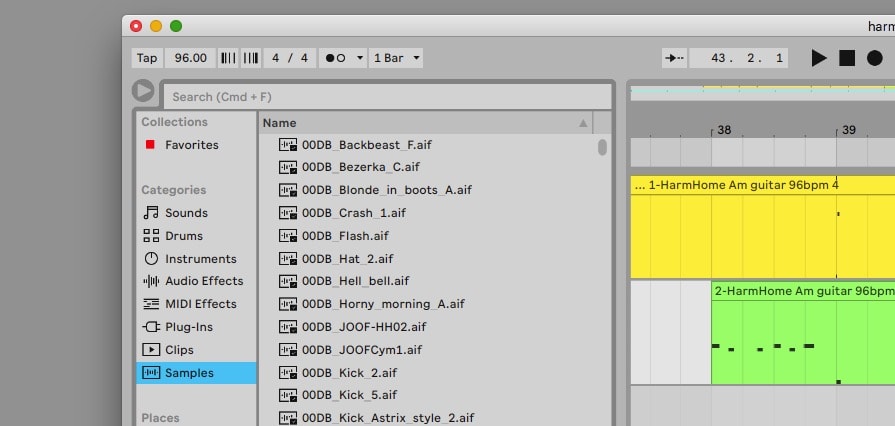
Photo: Cult of Mac
Finally, for this list, I’ve grouped inputs, outputs and effects together. This may be my favorite part. To add a software instrument or effect in Ableton Live, just find it in the browser view on the right, and drag it onto a track. That’s it. It’s absurdly easy. No menu-digging or fine mouse work to add effects and edit them afterward. Also, all the effects are arrayed into a handy, accessible row at the bottom of the screen, instead of being hidden in a pop-open menu.
You can also option-drag any effect or instrument between tracks to duplicate it.
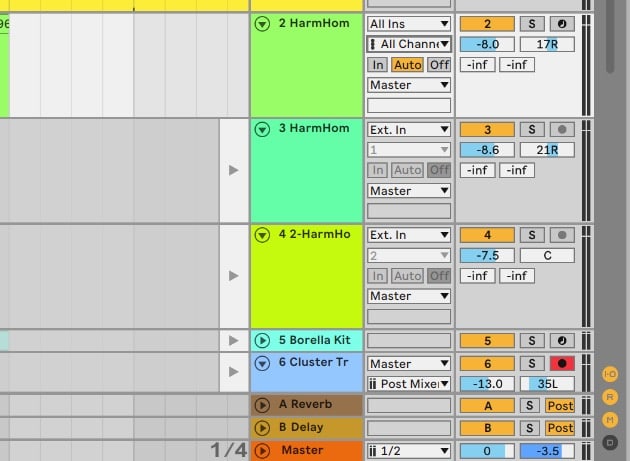
Photo: Cult of Mac
Ableton Live’s Input selection is also easy, and is pretty much the same as in Logic. Just click on the Audio From or MIDI From boxes in the mixer. Yes, MIDI From. You can send MIDI from anywhere into a Live track. On Logic, you have to open up a super-nerdy editing section called the Environment, and build a map of your MIDI routes to do this.
In Live, you can have a piano keyboard routed to a synth track, and a hardware drum pad routed to the drums. In Logic, all MIDI inputs are routed to the current track. It’s absurd.
One other amazing feature is that you can select the audio output of any other track as an input. This opens up resampling as an option, where you record the audio from a track and further manipulate it.
Switching from GarageBand to Ableton Live: Take your time
I didn’t really get the hang of Ableton Live until I created a new song in it. That forced me to learn how it all works. But, even though Live is very deep, it’s also very approachable. If you think something can be done, then just try it. It usually works.
The other thing to remember is that Live is called Live for a reason. It’s just as much a tool for live performance as it is for recording and arranging. Logic Pro X may offer better samples and software instruments, and amazing tools for surgically correcting recordings. But for quickly generating ideas, without the app getting in the way, Live is unrivaled. And right now, both are free to test for three whole months. Check them out.
