You’ve always been able to crop photos on your iPhone and iPad. It’s easy to “zoom” into your images, cutting out cruft and distraction at the edges of the frame to focus on what’s important. But now, in iOS 13 and iPadOS, you can do more than crop and chop. Now you also can skew images — aka correct perspective errors — all inside the Photos app’s edit mode.
You can do all kinds of things with this new Photos tool. If you snapped a picture of a painting in the gallery, and didn’t hold your iPhone parallel to the wall, you can fix that. Or you can get more radical, perhaps by “fixing” an image of a skyscraper to stop it from disappearing to a point in the distance. The good news is that these perspective tools are fun and easy to use. Let’s check them out.
Skewed and twisted
Imagine that you are holding a printed photo in front of you. If you tip the top edge away from you, you’re skewing the image. Likewise, you might push the left edge away, and bring the right edge closer. On a paper photo, it’s hard to see the effect of this, but you are essentially changing the geometry of the image. Do this with pixels, and the effect is way easier to see, because you’re not actually tipping, skewing or spinning the surface. Here’s an example:
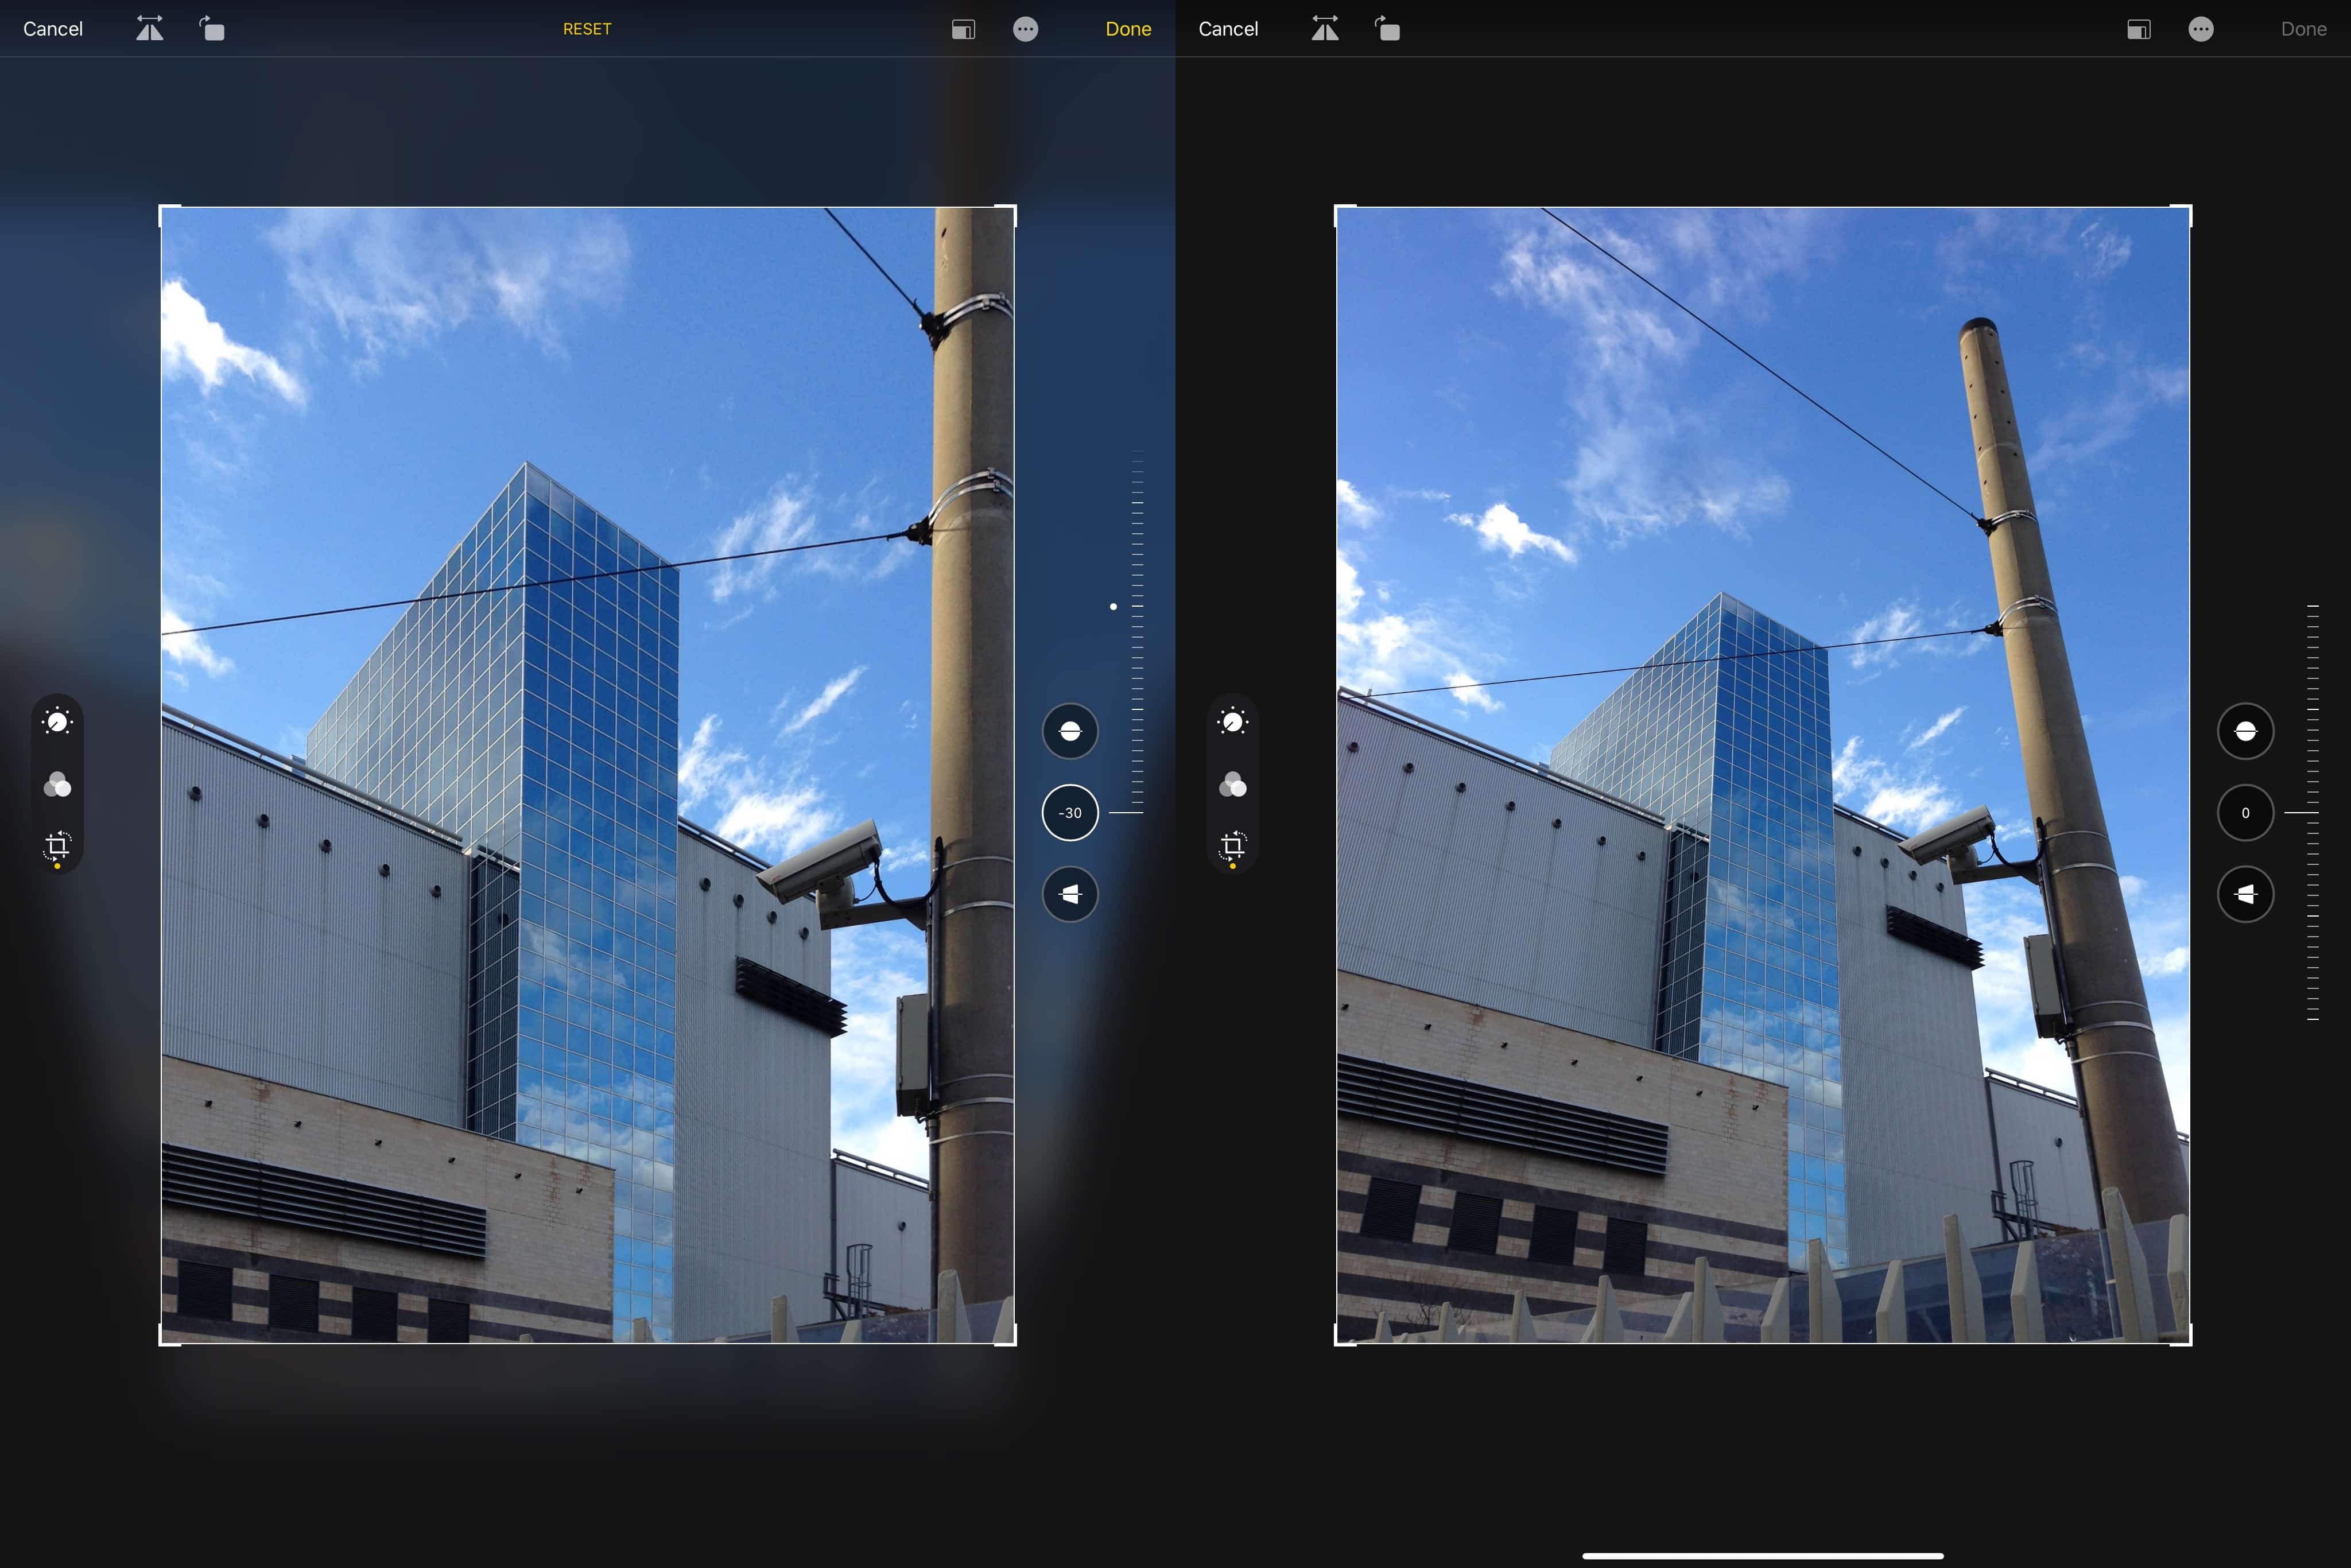
Photo: Charlie Sorrel/Cult of Mac
As you can see, skewing the image changes its perspective entirely. You can use this to correct an error in framing, or to achieve a more radical special effect.
Converging verticals, and railways lines
When you take a photograph of anything that includes parallel lines — a building, a road, anything — those lines will only stay parallel if they are in the same plane as the camera’s sensor. Here’s an example to clarify. If you stand in front of a tall building, and point your camera straight at it so that the camera and the front face of the building are themselves parallel, then the building will appear flat and square.
But as soon as you tilt the camera back to capture the top of that tall building, everything changes. The rectangular building turns into a trapezoid. This is called “converging verticals,” and it’s easy to see why. The vertical lines in the image converge toward the “vanishing point.” With a wide lens, like the ones used in phone cameras, the effect becomes even more exaggerated.
The old, pre-digital way to get around this was to use a special moving lens that would slide upward to capture the top of the building, without having to tilt the camera back. The new way is to use a slider in an app. Oddly, converging verticals are often seen as a photographic misstep, whereas converging horizontals — like railway lines or roads disappearing into the distance — are seen as valid compositional tricks.
How to correct perspective in the iPhone’s Photos app
In iOS 13, the iPhone’s Photos app added two perspective-correcting skew tools to the crop tool. To access it, just open a photo, and tap the edit button. Then, choose the crop/rotate tool, which is the square with curved arrows at its corners.
Here, you can see the two perspective-correction tools: vertical and horizontal. The vertical tool works for things like buildings and railway lines.The horizontal tool works to correct things like paintings on walls (where you stood slightly off to one side, perhaps).
These tools are powerful, but best used for subtle corrections. It’s not that the tools themselves aren’t up to the job. The problem is that radically correcting perspective ends up cutting out a lot of the image. Look at this:
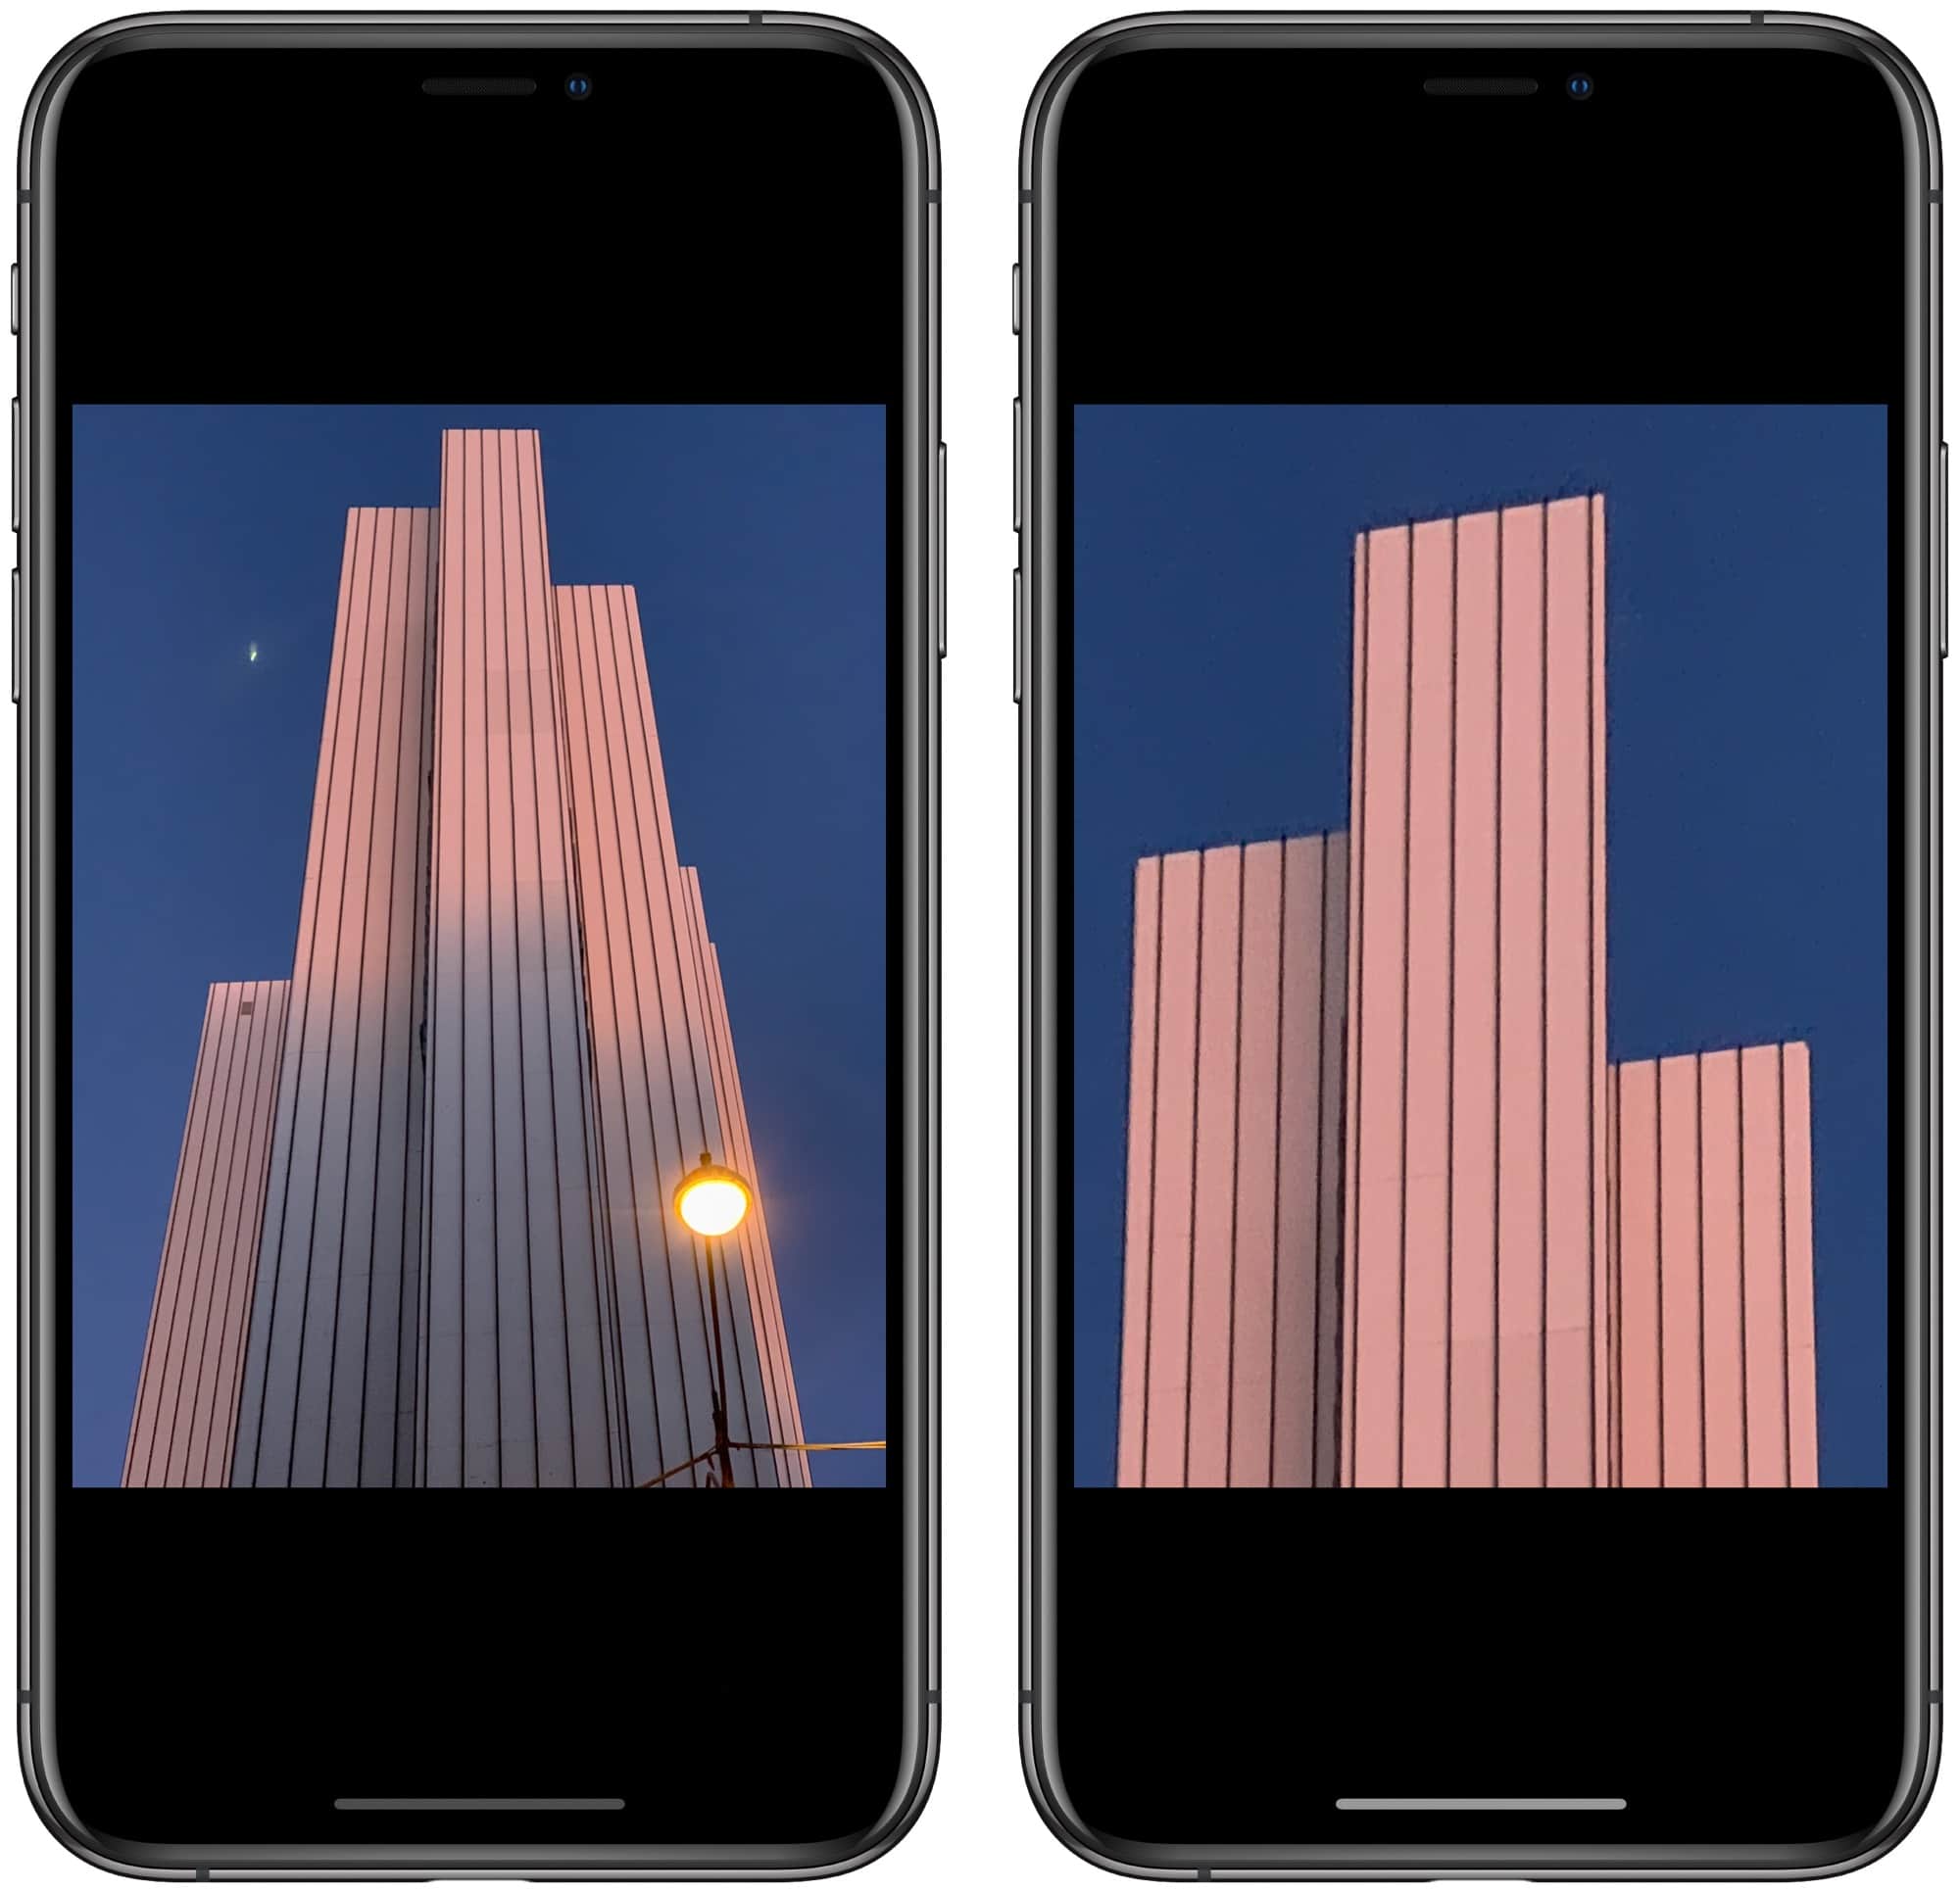
Photo: Charlie Sorrel/Cult of Mac
Compare that to this more subtle fix:
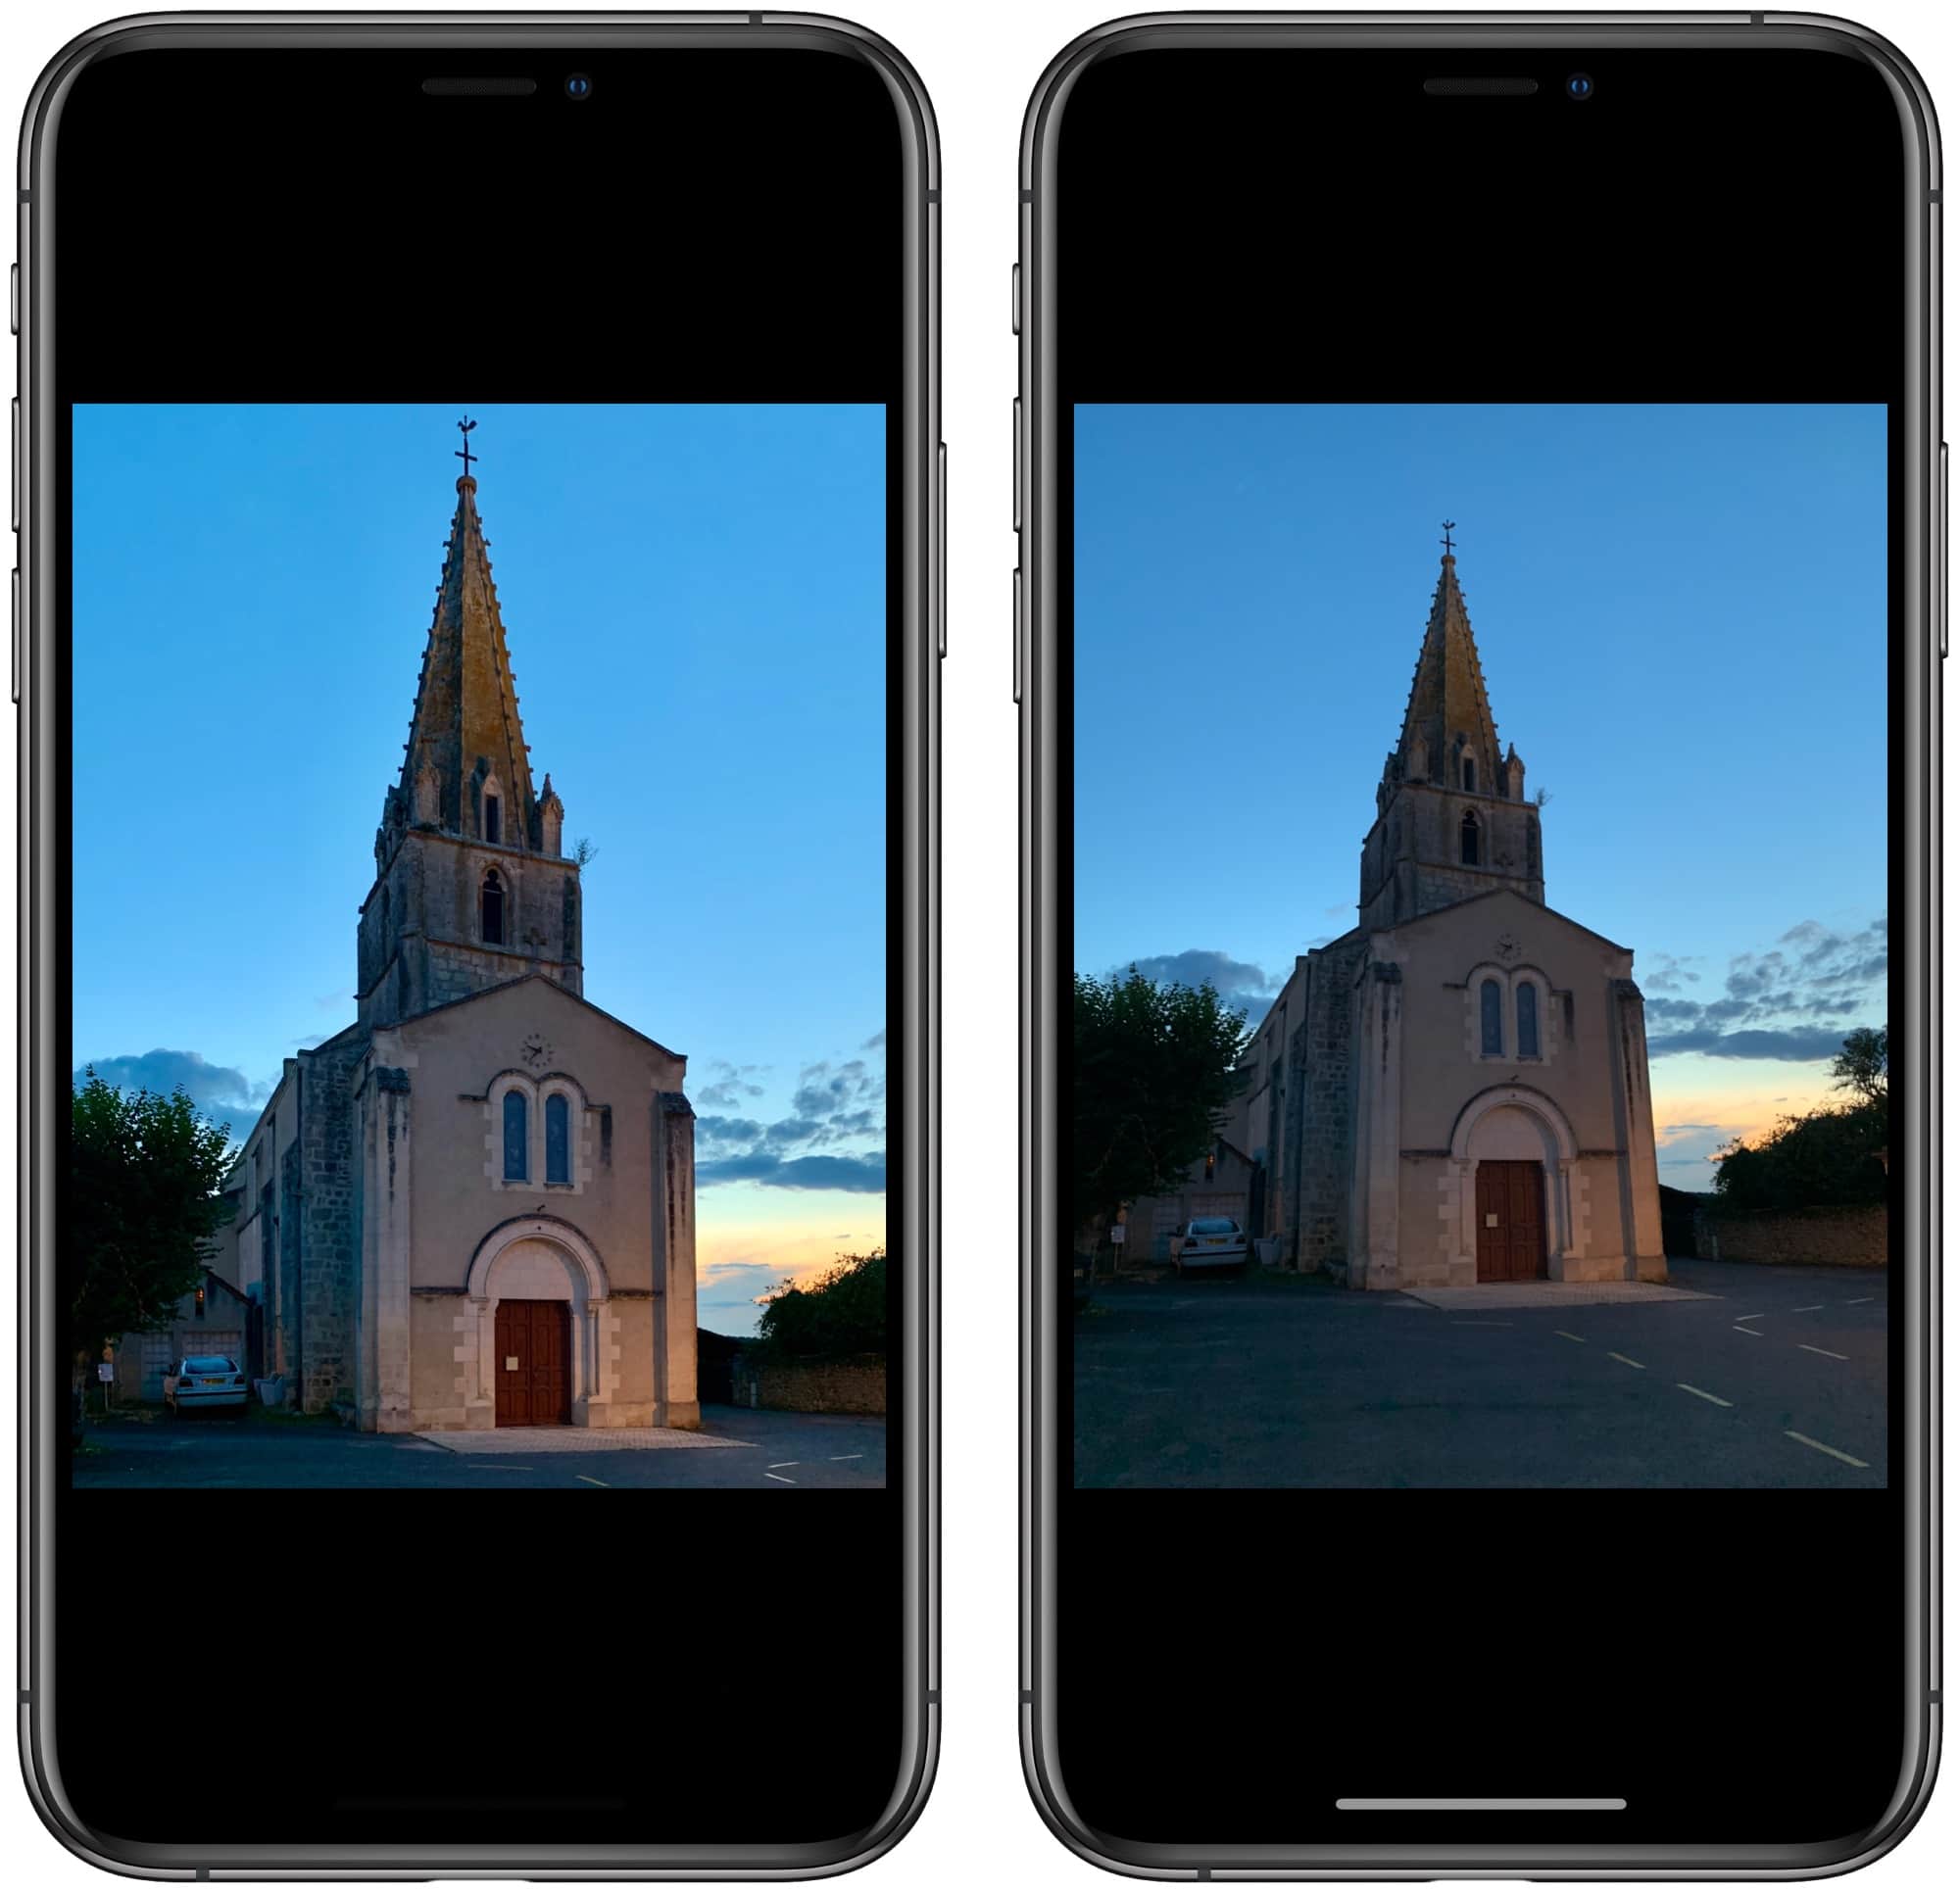
Photo: Charlie Sorrel/Cult of Mac
Fix up poorly framed pictures
It’s not just all buildings and landscapes, either. You can also fix up framing errors, and make it look like you were standing straight in front of your subject when you took the shot. Here’s an example of careful correction, which required a bit of back-and-forth between the rotate and horizontal perspective tools:
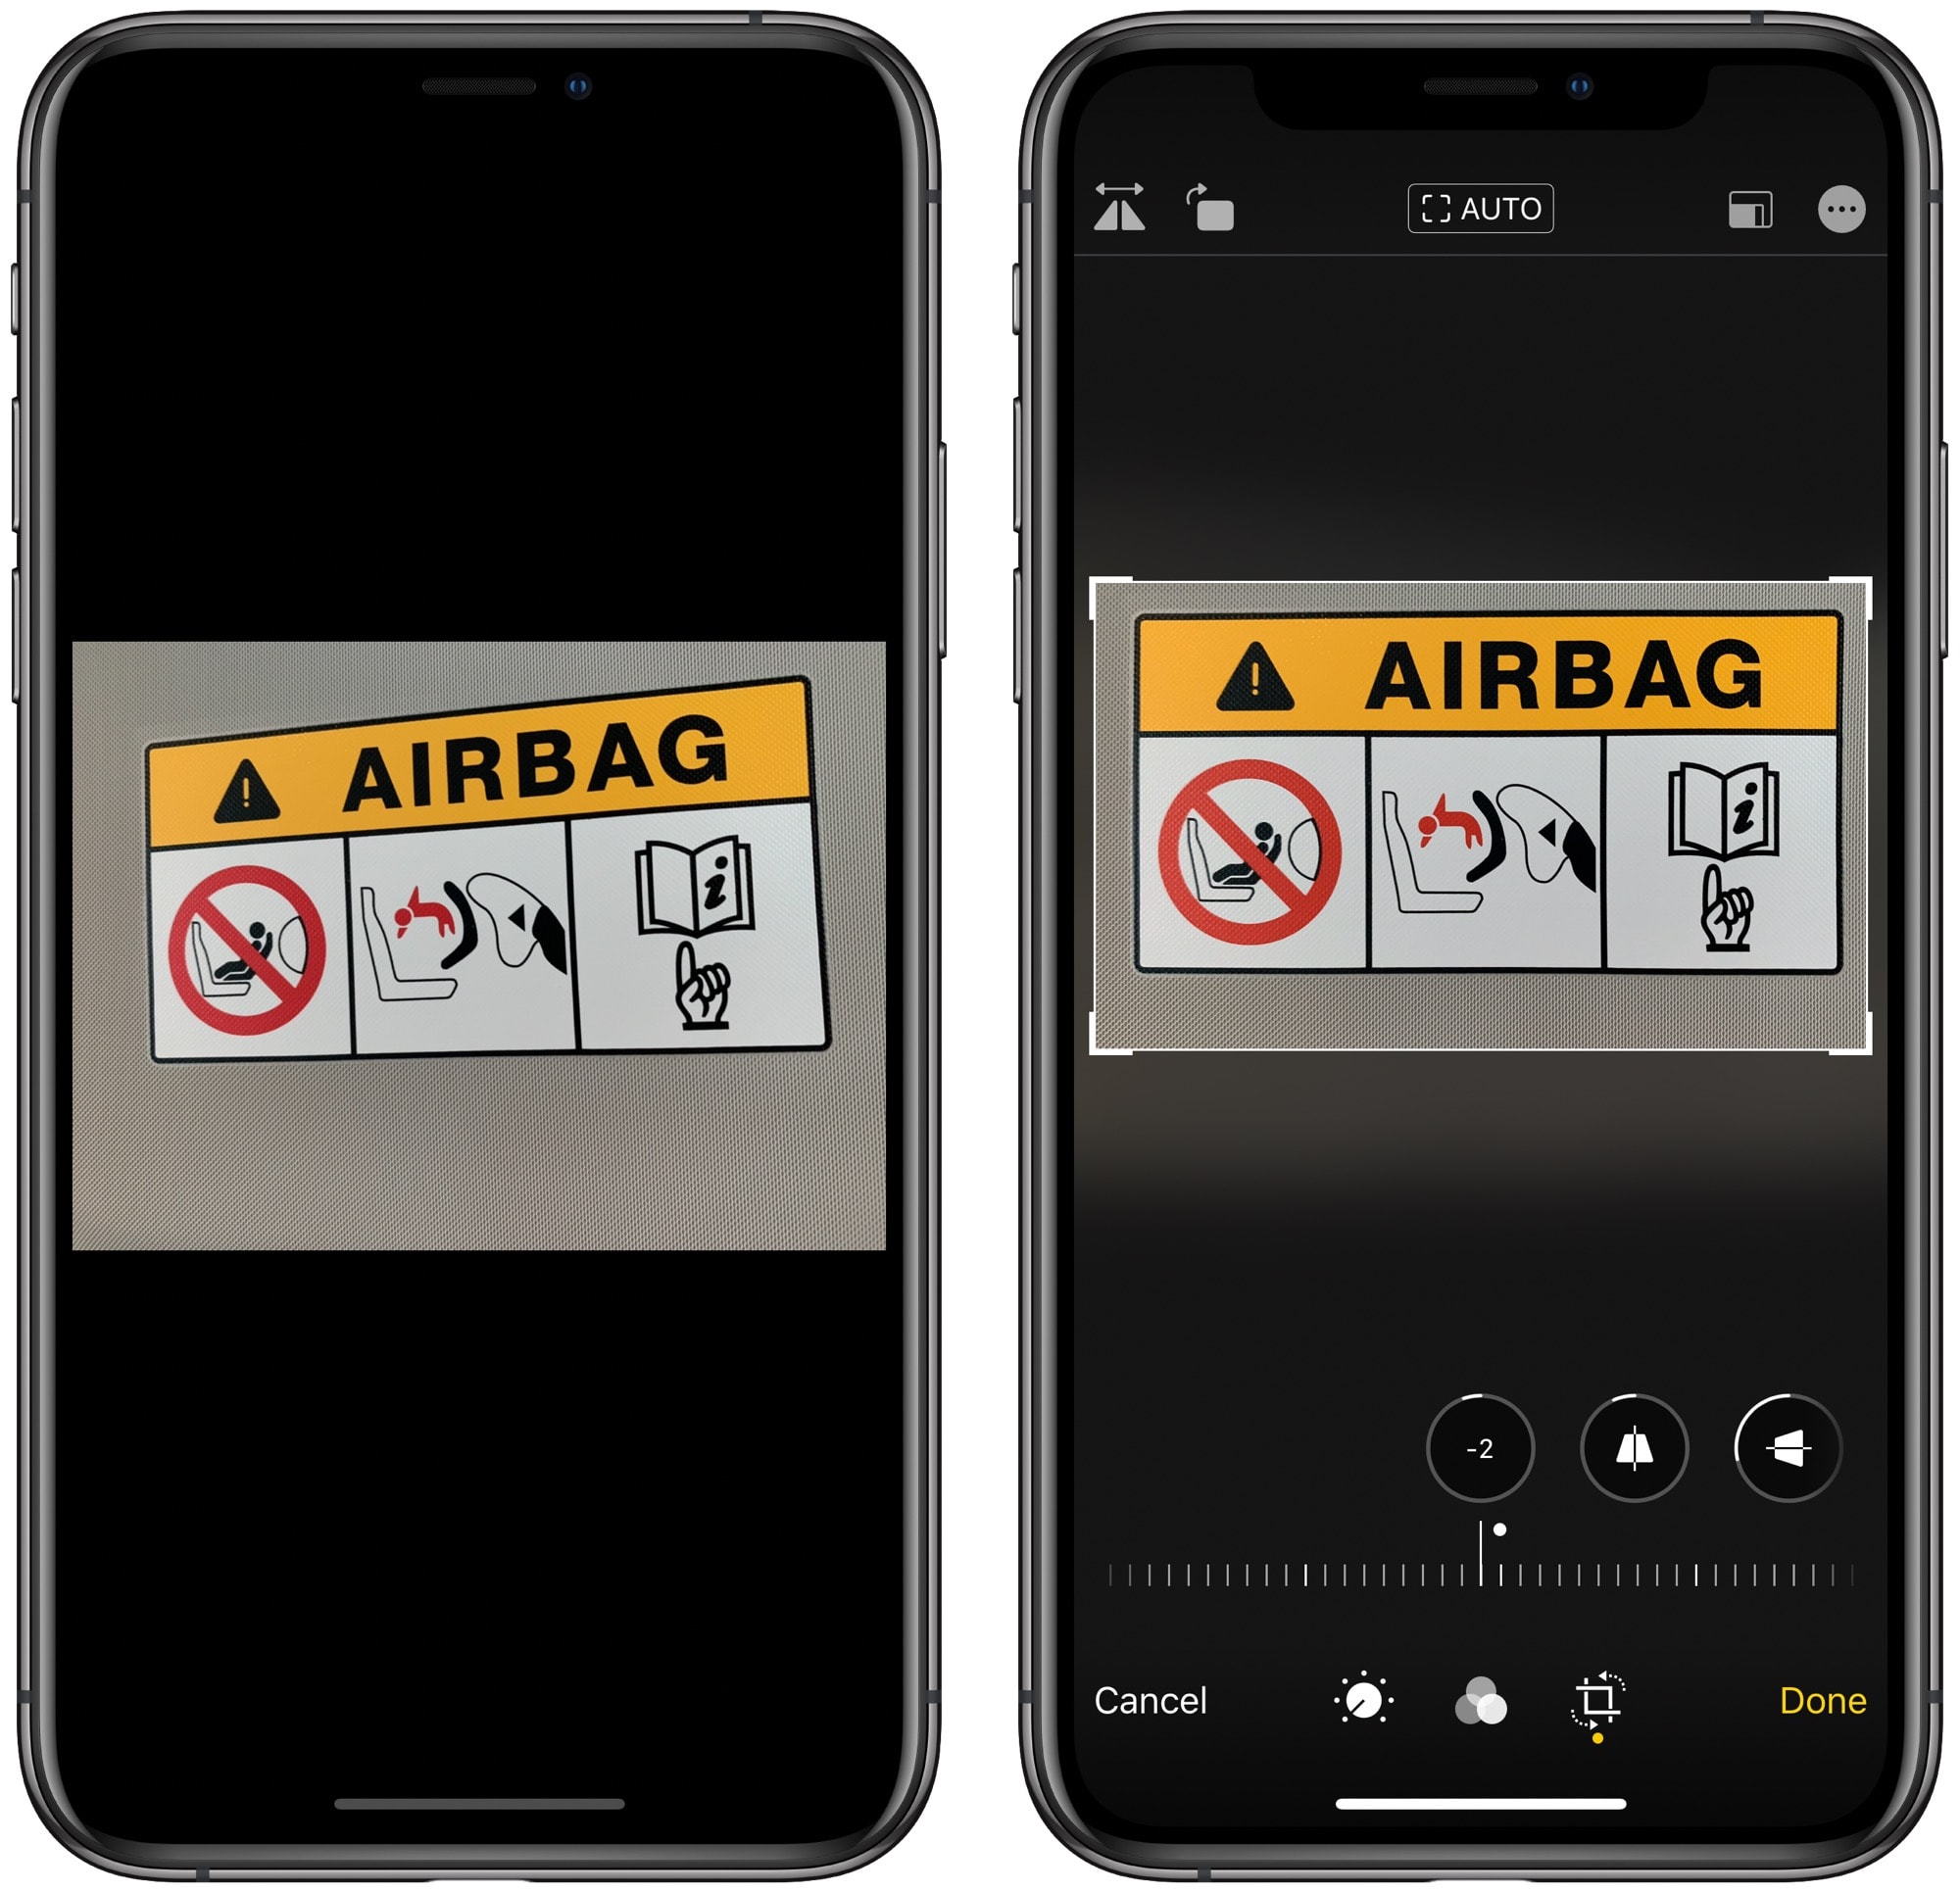
Photo: Cult of Mac
It’s also worth trying the Auto button in the crop section, as it can often make a pretty good guess at what’s needed.
More advanced photo tools
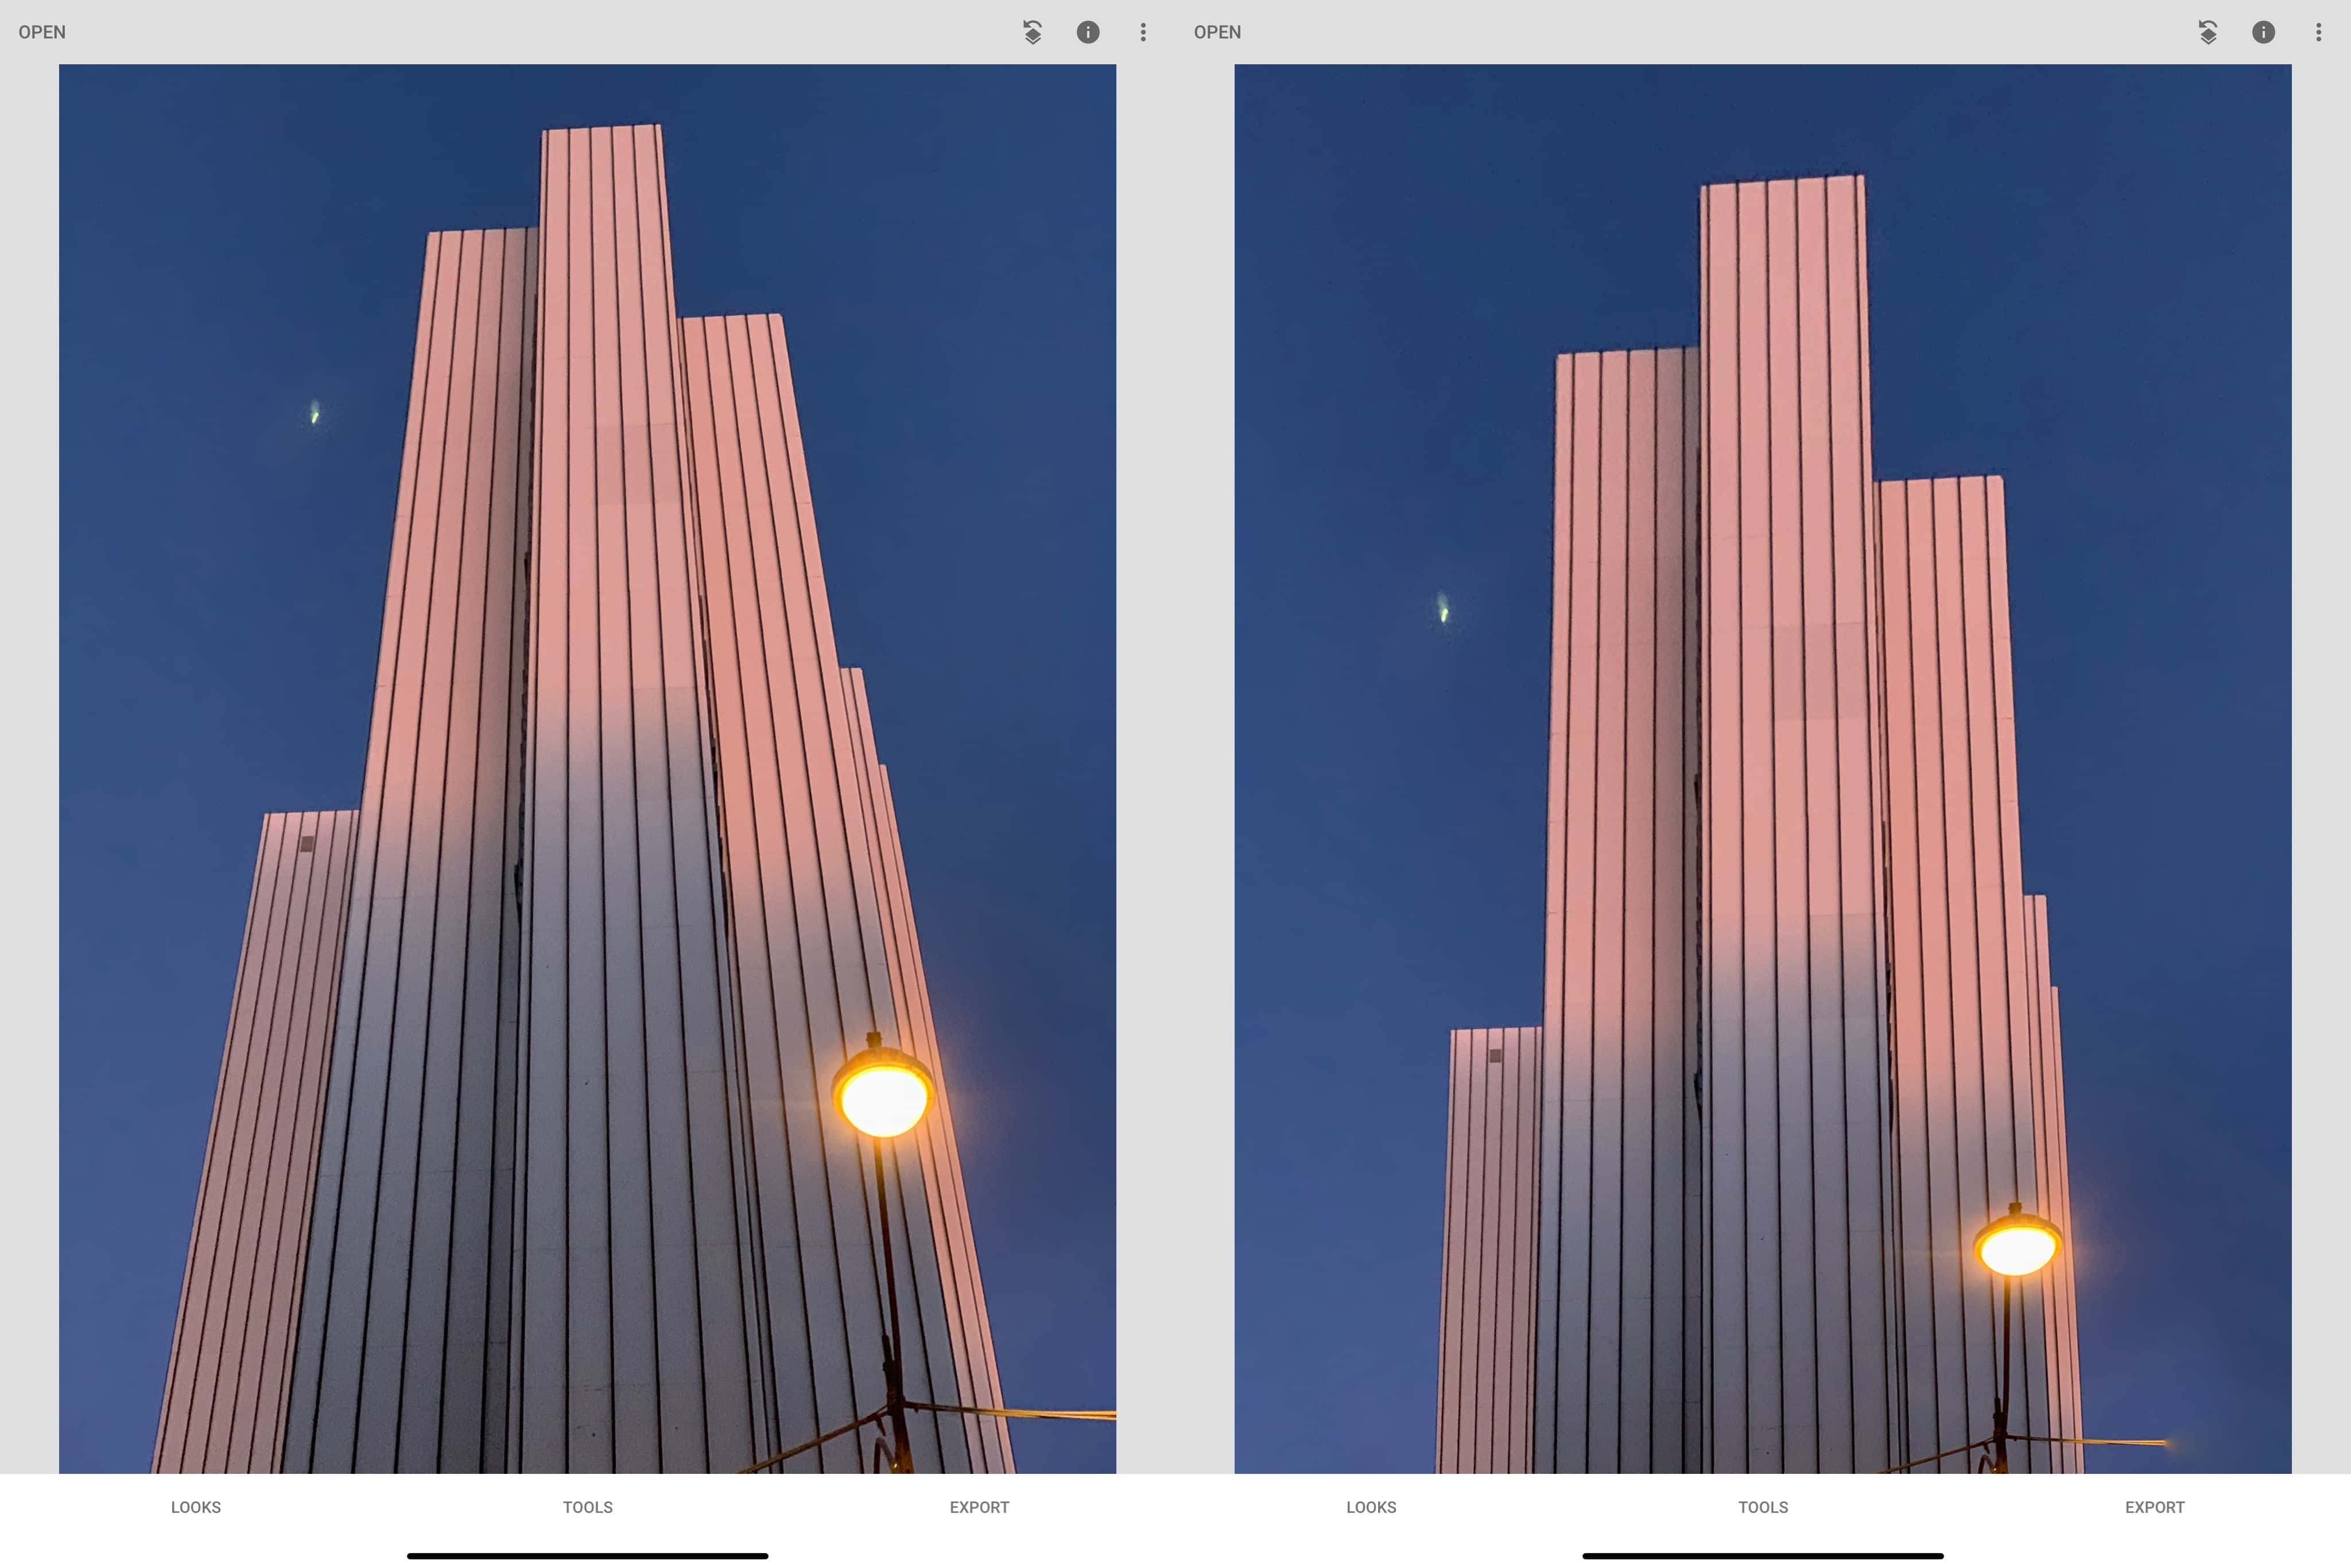
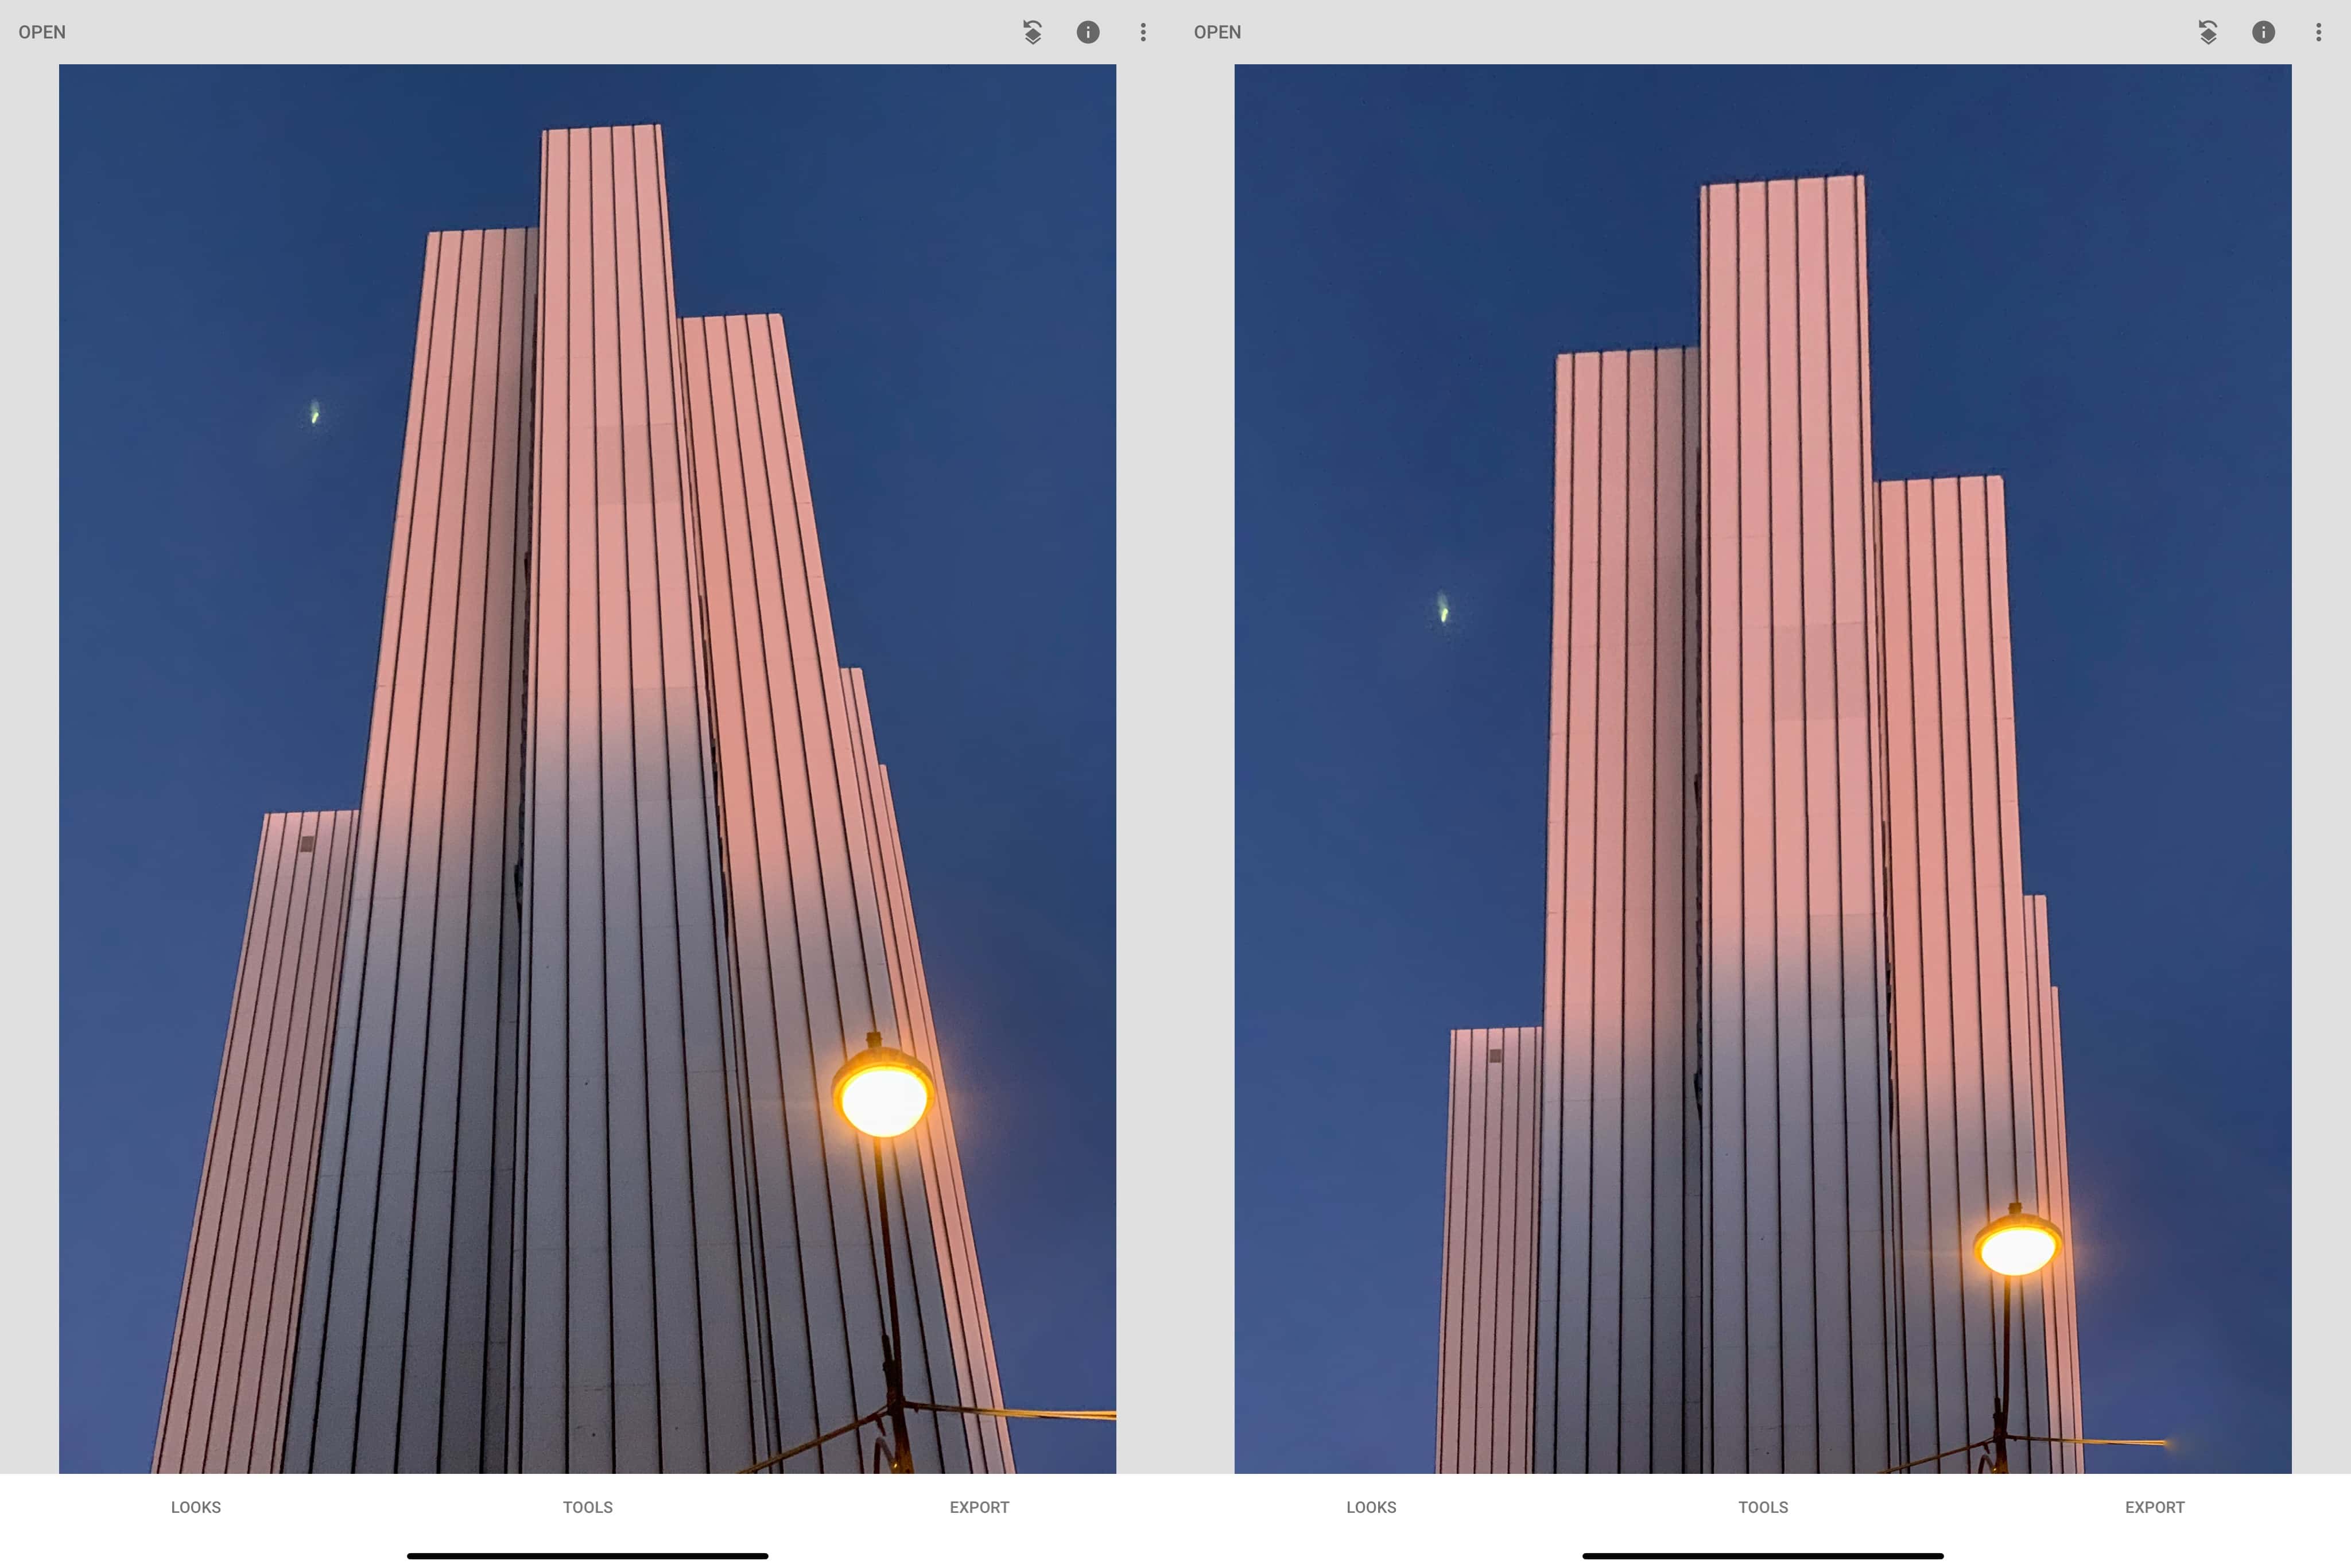
Photo: Charlie Sorrel/Cult of Mac
Now that perspective edits are built into the Photos app, third-party perspective-correction apps might seem a little pointless. But some of them offer more powerful tools. For instance, Google’s Snapseed can fill in the gaps left by these corrections, resulting in a much less radical crop, as seen above. But for most purposes, you can rely on the Photos app’s powerful built-in tools.
