In part one of this series, we saw how to record remote podcasts using only iOS. It requires using your iPhone to place the FaceTime or Skype call, but you end up with a great result. That post covered the setup. Today, we’ll see how the recording and editing parts work, using AUM and Ferrite on the iPad.
The setup: a summary
If you haven’t read part one of this guide, it boils do to this: Becasue there are no VOIP apps that support iOS’ inter-app audio routing standards, there’s no way to place a video or audio call on an iPad, and record it at the same time. Instead, we place the call on another device (an iPhone or and old, spare iPad), and run a cable from its headphone jack into our audio “mixer.”
From there, we have two audio sources: The piped-in audio from FaceTime/Skype, and the high-quality audio from our microphone, which is plugged into our iPad using the above-mentioned USB audio interface.
This setup is a “double-ender.” The other participants in the podcast all record their own audio locally, on their own devices, and send that to you afterwards for assembly. And that’s what we’ll talk about today.
The apps
There are many amazing audio-recording apps on iOS. You can use Apple’s free GarageBand, for example. I use AUM, from Kymatica, which is an audio mixer app with super powers. Whichever app you chose, you want to have control over the quality settings of the recorded audio. You want to record in lossless audio format like WAV or AIFF, not a “lossy” format like MP3 or AAC.
Why such high quality, when the resulting podcast will be a low-quality, mono MP3? Because if you start with the best possible quality, it’s a lot easier to fix any problems with the audio, and to massage it into a nice, clean audio track before you squeeze it into an MP3.
The other app I use is Ferrite Recording Studio, which is an iOS app built just for recording and editing podcasts and other spoken-word audio (radio shows, and so on). You can actually record into Ferrite if you like, but I prefer the extra control I get from AUM.
I’ll get to the Ferrite editing process in part three of this series, but for now, you can grab the app and play around. It’s perfectly usable in its free form, with an in-app purchase for the pro features.
AUM – Audio Mixer
Price: $18.99
Download: AUM – Audio Mixer from the App Store (iOS)
Ferrite Recording Studio
Price: Free
Download: Ferrite Recording Studio from the App Store (iOS)
Recording a podcast with AUM
AUM is an iOS app for routing and recording audio. I use is mostly for making music. You can host various music apps inside AUM (drum machines, synths, and so on), as well as piping in live audio from any available input. All these sources get their own channel, with a level slider, and lots of other options.
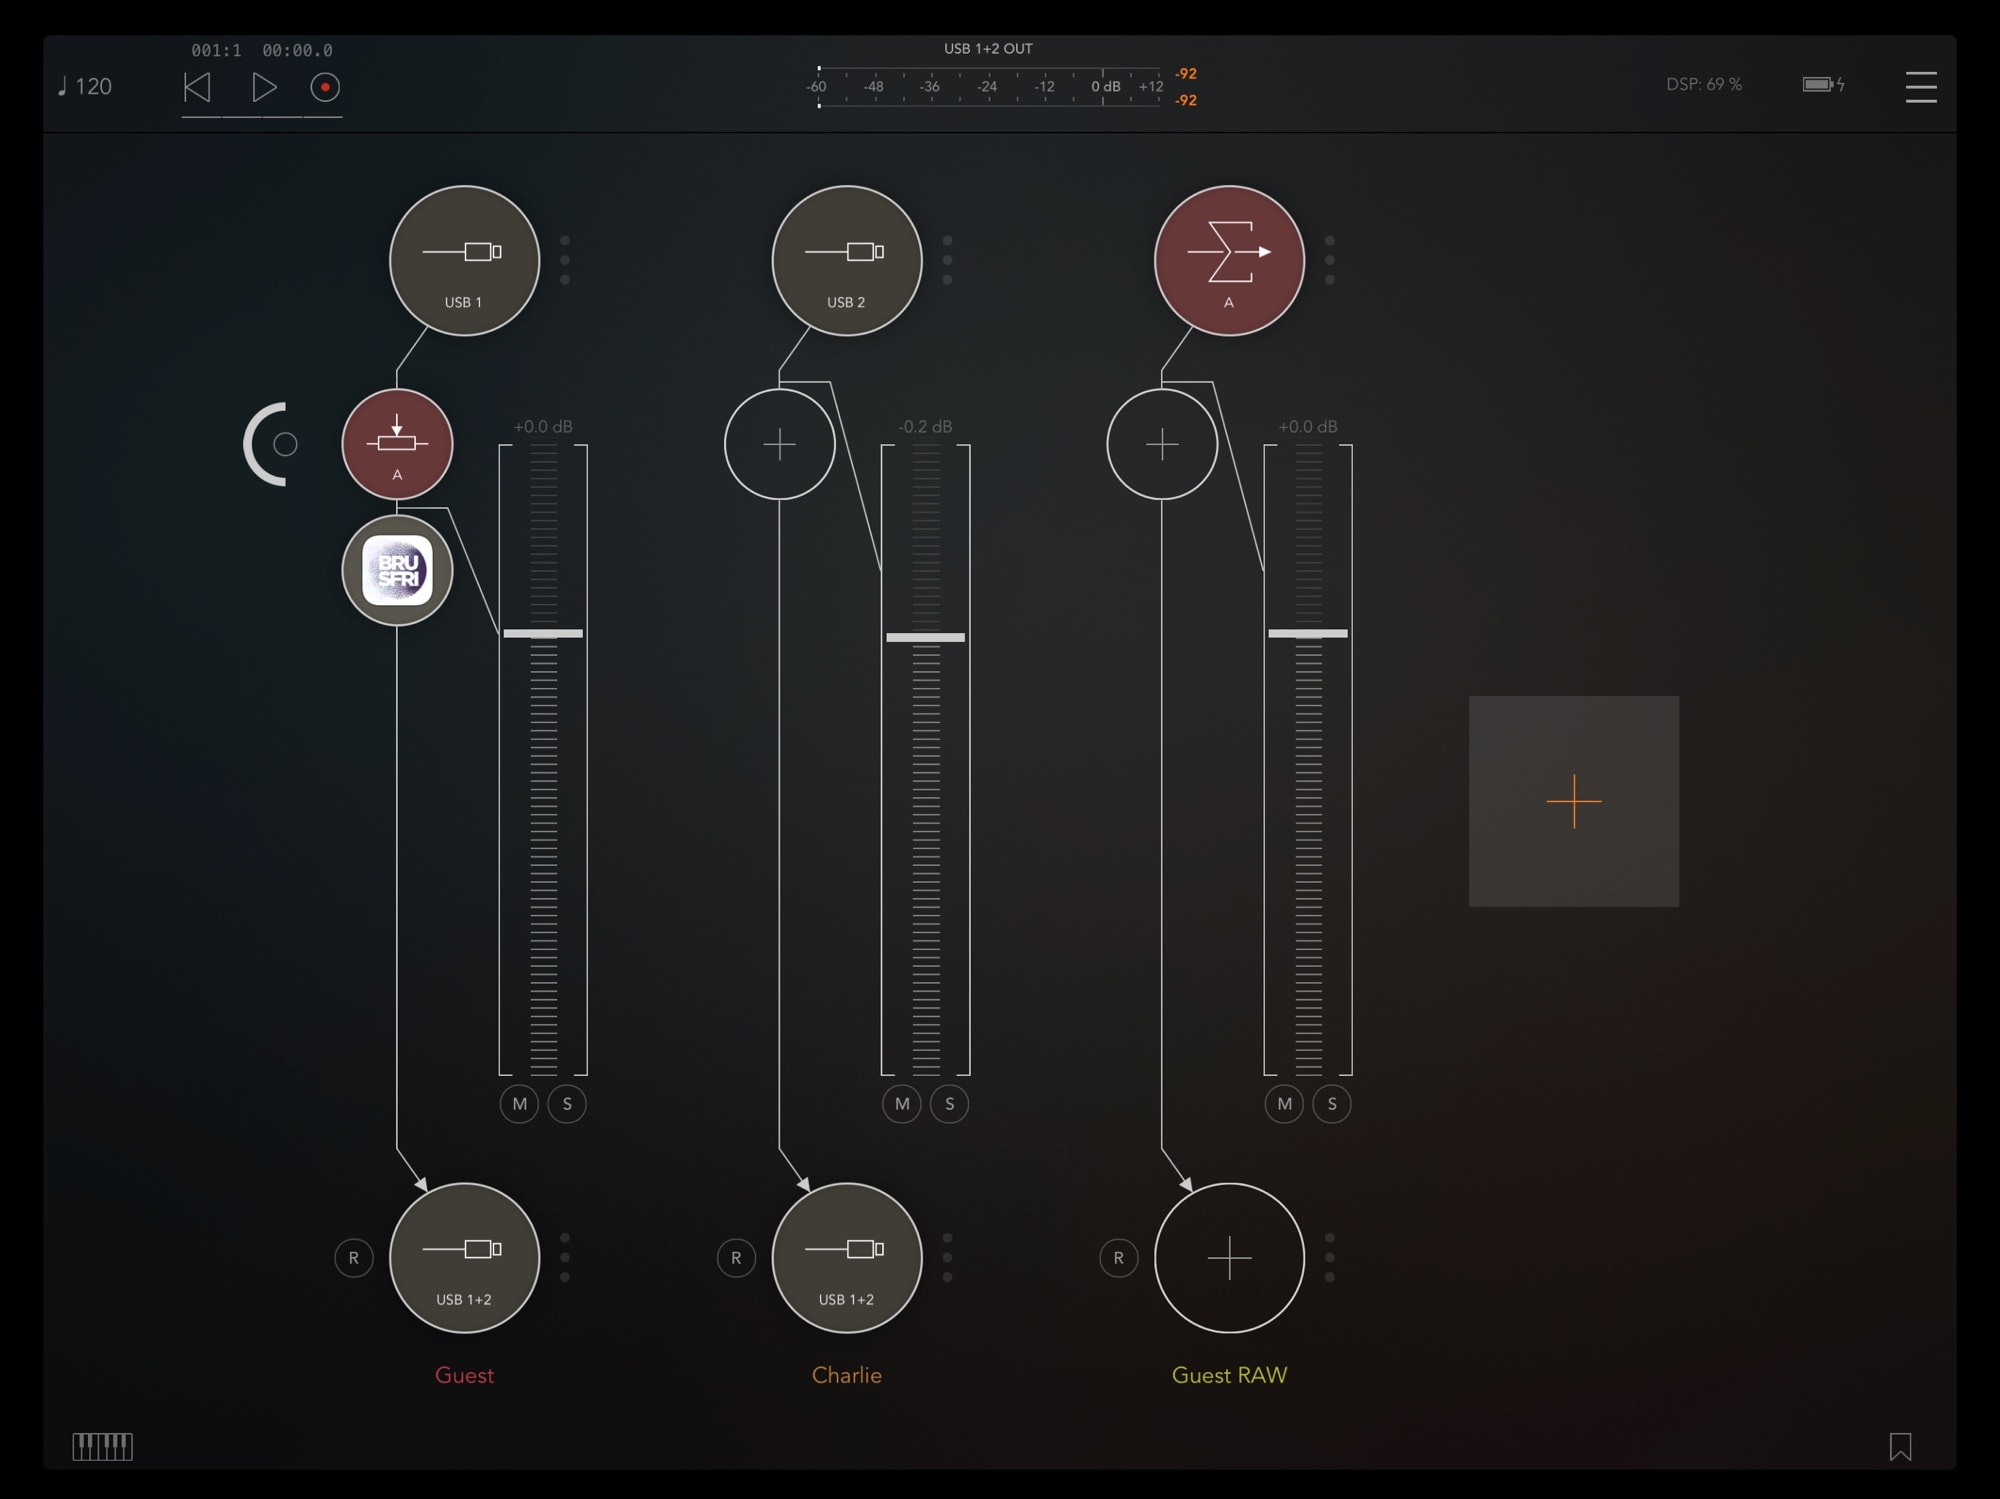
For this setup, we’re keeping things simple, though. We can clean up the audio later. The idea now is to grab the best raw audio we can to make that task easier. Here’s my AUM setup:

Photo: Cult of Mac
I have this saved as a preset in AUM, so I can just load it with a single tap when it’s time to record a new episode of our podcast, The Uncanny Alley.
Channels and effects
As you can see, there are three channels. One is for my local audio, and one is for the guest audio (piped in from FaceTime, over a cable from the iPhone’s headphone jack). Keeping the audio on separate tracks makes it easy to process them separately, and also to do edit problems like when guest talk over each other. You can easily delete one person’s audio, or if its an interesting interruption, move it to after the other person has spoken.

Photo: Cult of Mac
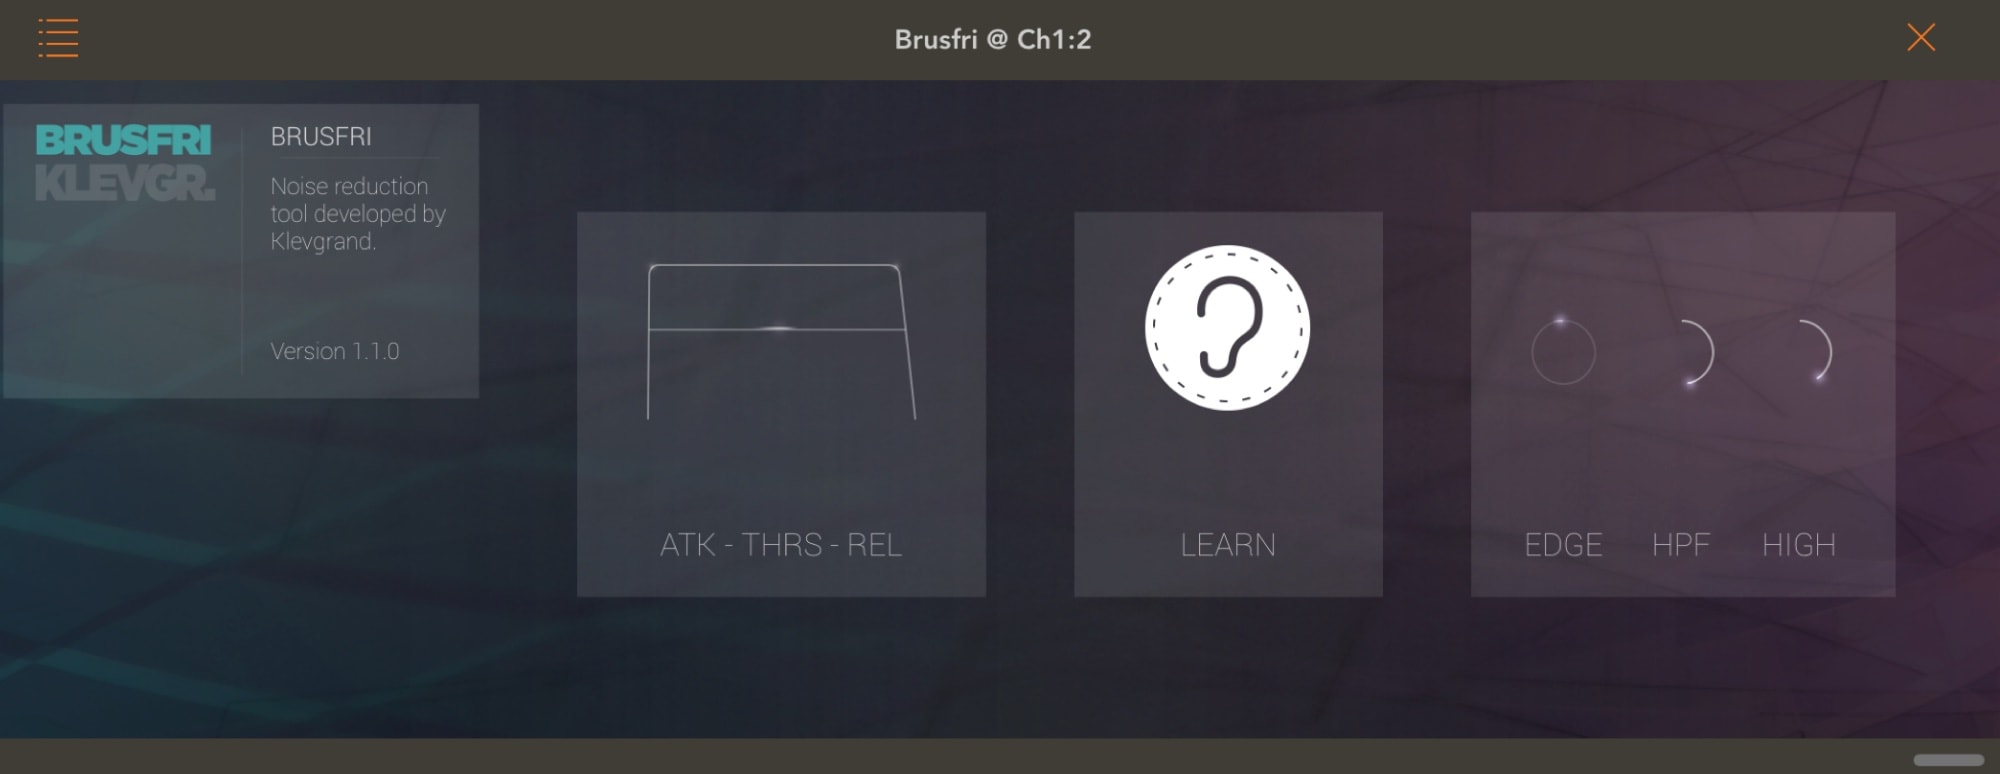
What’s that third channel for, you might be asking? Well, sometimes the incoming FaceTime call might not sound so good. It may be hissy, or have a lot of background noise because it’s coming from the guest’s iPhone mic instead of their good mic (which — hopefully — they’re recording from). In this case, you can use AUM to add an in-line Audio Unit (AUv3) effect to cut out that noise. I use BrusFri from Klevgrand, or you can use AUM’s built-in EQ tools.
Either way, I’m using AUM’s clever routing options to send the incoming audio to another channel before I process it. That way, I can listen to the processed audio on the call, and record the unprocessed audio. This may seem redundant, as the guests will be seeing their own high-quality, locally-recorded, artisanal free-range audio in later, but it never hurts to have a backup.
Also, because Ferrite can host AUv3 effects, you can just use Brusfri on that later if it’s still needed.
Brusfri
Price: $14.99
Download: Brusfri from the App Store (iOS)
Audio settings
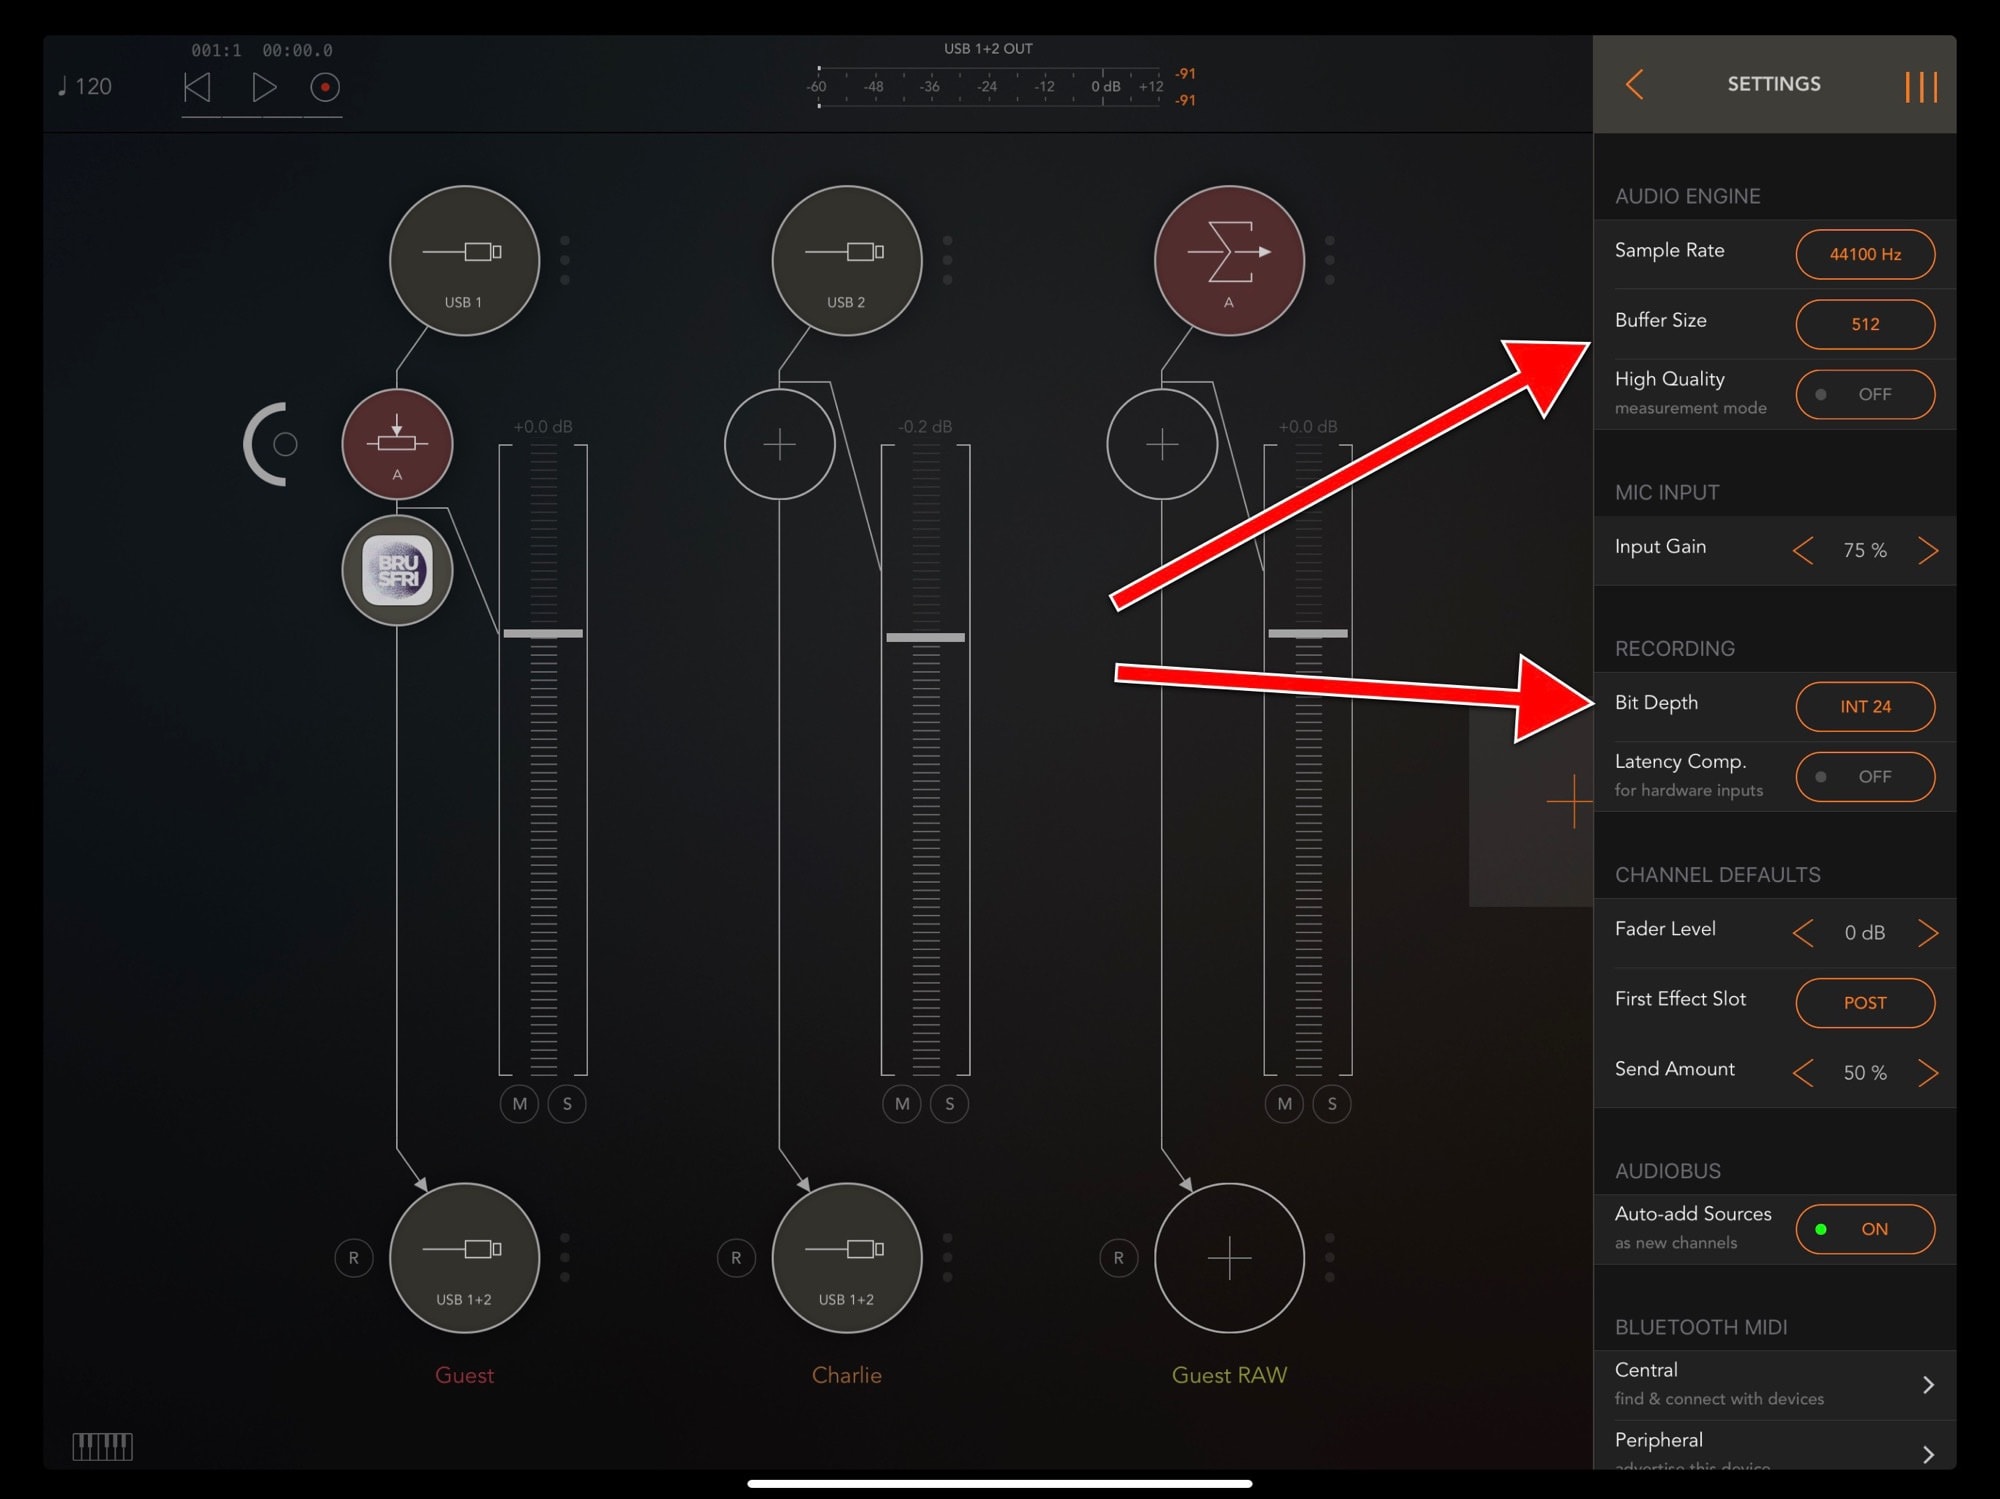
 My AUM audio settings for podcast recording.
There are plenty of ways to set your audio, but this one works for me. I leave the sample rate and that kind of business at the default settings, but I do change the Buffer Size to 512, and the Bit Depth to 24-bit. The bit depth setting increases the quality of the recording, which is probably redundant in the case of podcasts, but offers one big advantage: It makes getting rid of noise much easier. It also increases the size of the resulting audio file, which may be a concern. On the other hand, you can always convert it to 16-bit for archiving, or delete the source files altogether once the podcast is published.
Buffer size is more important. Set this high. A small buffer is needed when you are recording something and listening to it at the same time using the iPad. For instance, if you play an electric guitar into your iPad, add effects, and then listen to the result as you play, then you want as small a buffer as possible, to reduce any delay (called latency). Otherwise, it won’t feel like the sound is connected to your playing. Unfortunately, a small buffer also taxes the iPad’s CPU, and can even cause crackles and stuttering.
For podcasts, we are monitoring all the audio direct from the USB-C audio interface, so we don’t care about latency. Our audio dozens’t have to pass through the iPad’s circuits and software before we hear it, so we can set a nice big buffer, and let the iPad relax.
The recording
To record the audio, just tap the R-in-a-circle button at the bottom of each channel you want to record. Then, tap the record button at the top left of AUM’s screen. That’s it. You are now recording. Recording continues even if you switch to another app, and the recordings are saved locally on your iPad, inside the AudioShare folder. You may want to download AUM’s sister app, AudioShare, to do some extra work on the files.
One important tip. Get your podcast guest to clap into their mic. That sound will show up on both your recording, and on their recording, as a spike in the audio waveform. Using this, you can easily line up their recording with yours, so all the tracks are in sync. It’s basic, but it totally works.
AudioShare
Price: $3.99
Download: AudioShare from the App Store (iOS)
Normalizing
Now, the final step before editing in Ferrite (which we’ll read about in part three): Normalizing. The easiest way to explain it is to see the before and after shots:

Photo: Cult of Mac

Photo: Cult of Mac
The recorded audio is fairly quiet. With my setup, if I crank the input gain, I get a louder signal, but also louder noise. This level works just great. However, my Uncanny Alley podcast partner Andrea always records his audio too hot, which means that matching the levels is harder.
To fix this, I normalize my audio. Effectively, normalizing just takes the loudest parts of the audio and stretches them out to hit the top and bottom of the graph. That is, it makes the loud parts as loud as possible, and the rest fits in to that. This is why I record in 24-bit, because that means there’s more info in the smaller audio waveform.
I’m no expert in the deeps ins-and-outs of digital audio, but I have learned enough to make great recordings, and this method works well for me. If you have any tips, and/or corrections, let me know via Twitter or Micro.blog.
Editing
The next step is editing, which can be as easy as combining the tracks into one mono MP3, or as complex as removing coughs, rearranging sections, and adding chapters. All of this is easy in Ferrite, which is — as far as I know — the best podcast editing app on any platform. We’ll see how to do all of this in part three of this series.


