OK, so no 2021 award for Most Fastidious Cable Management, mentioned in this article’s headline, exists — at least not around here. But if it did, we might hand it to the person behind today’s setup.
It centers on a 2020 13-inch MacBook Pro and a 32-inch LG 4K display. And it keeps cable clutter to an extreme minimum.
This post contains affiliate links. Cult of Mac may earn a commission when you use our links to buy items.
First, the setup itself
Redditor freediverx01 takes eradicating cable clutter seriously. In his post, “Cable management,” you can see how it’s done, as we describe and show below. For other great examples of award-worthy cable management, see the related posts at the bottom.
Freediver’s MacBook Pro rocks 16GB of RAM, a 1TB solid state drive and a 2.0 GHz Intel Core i5 4-Core processor (10th Gen). He bought it a few months before the M1 MacBook Air came out, desperately wanting to replace his 2013 MacBook Pro. Though he described himself as having some “M1 FOMO right now” (fear of missing out), he expects to keep his MBP for at least a couple of years.
With the laptop he runs an LG 32BL95U-W 4K monitor that he “researched the hell out of” before buying to ensure it would look great. It manages 3840 X 2160 pixel resolution, 450 nits of brightness and 138 pixels per inch on a 32-inch screen (considered good for Mac use because it’s similar to Apple non-Retina display PPIs). The monitor includes speakers and HDMI and DisplayPort connections. He mounted the display on an Ergotron LX Monitor Arm.
He’s also got an 11-inch iPad Pro with keyboard, a Magic Keyboard and a Magic Trackpad.
Cable management: Sometimes it’s about the desk
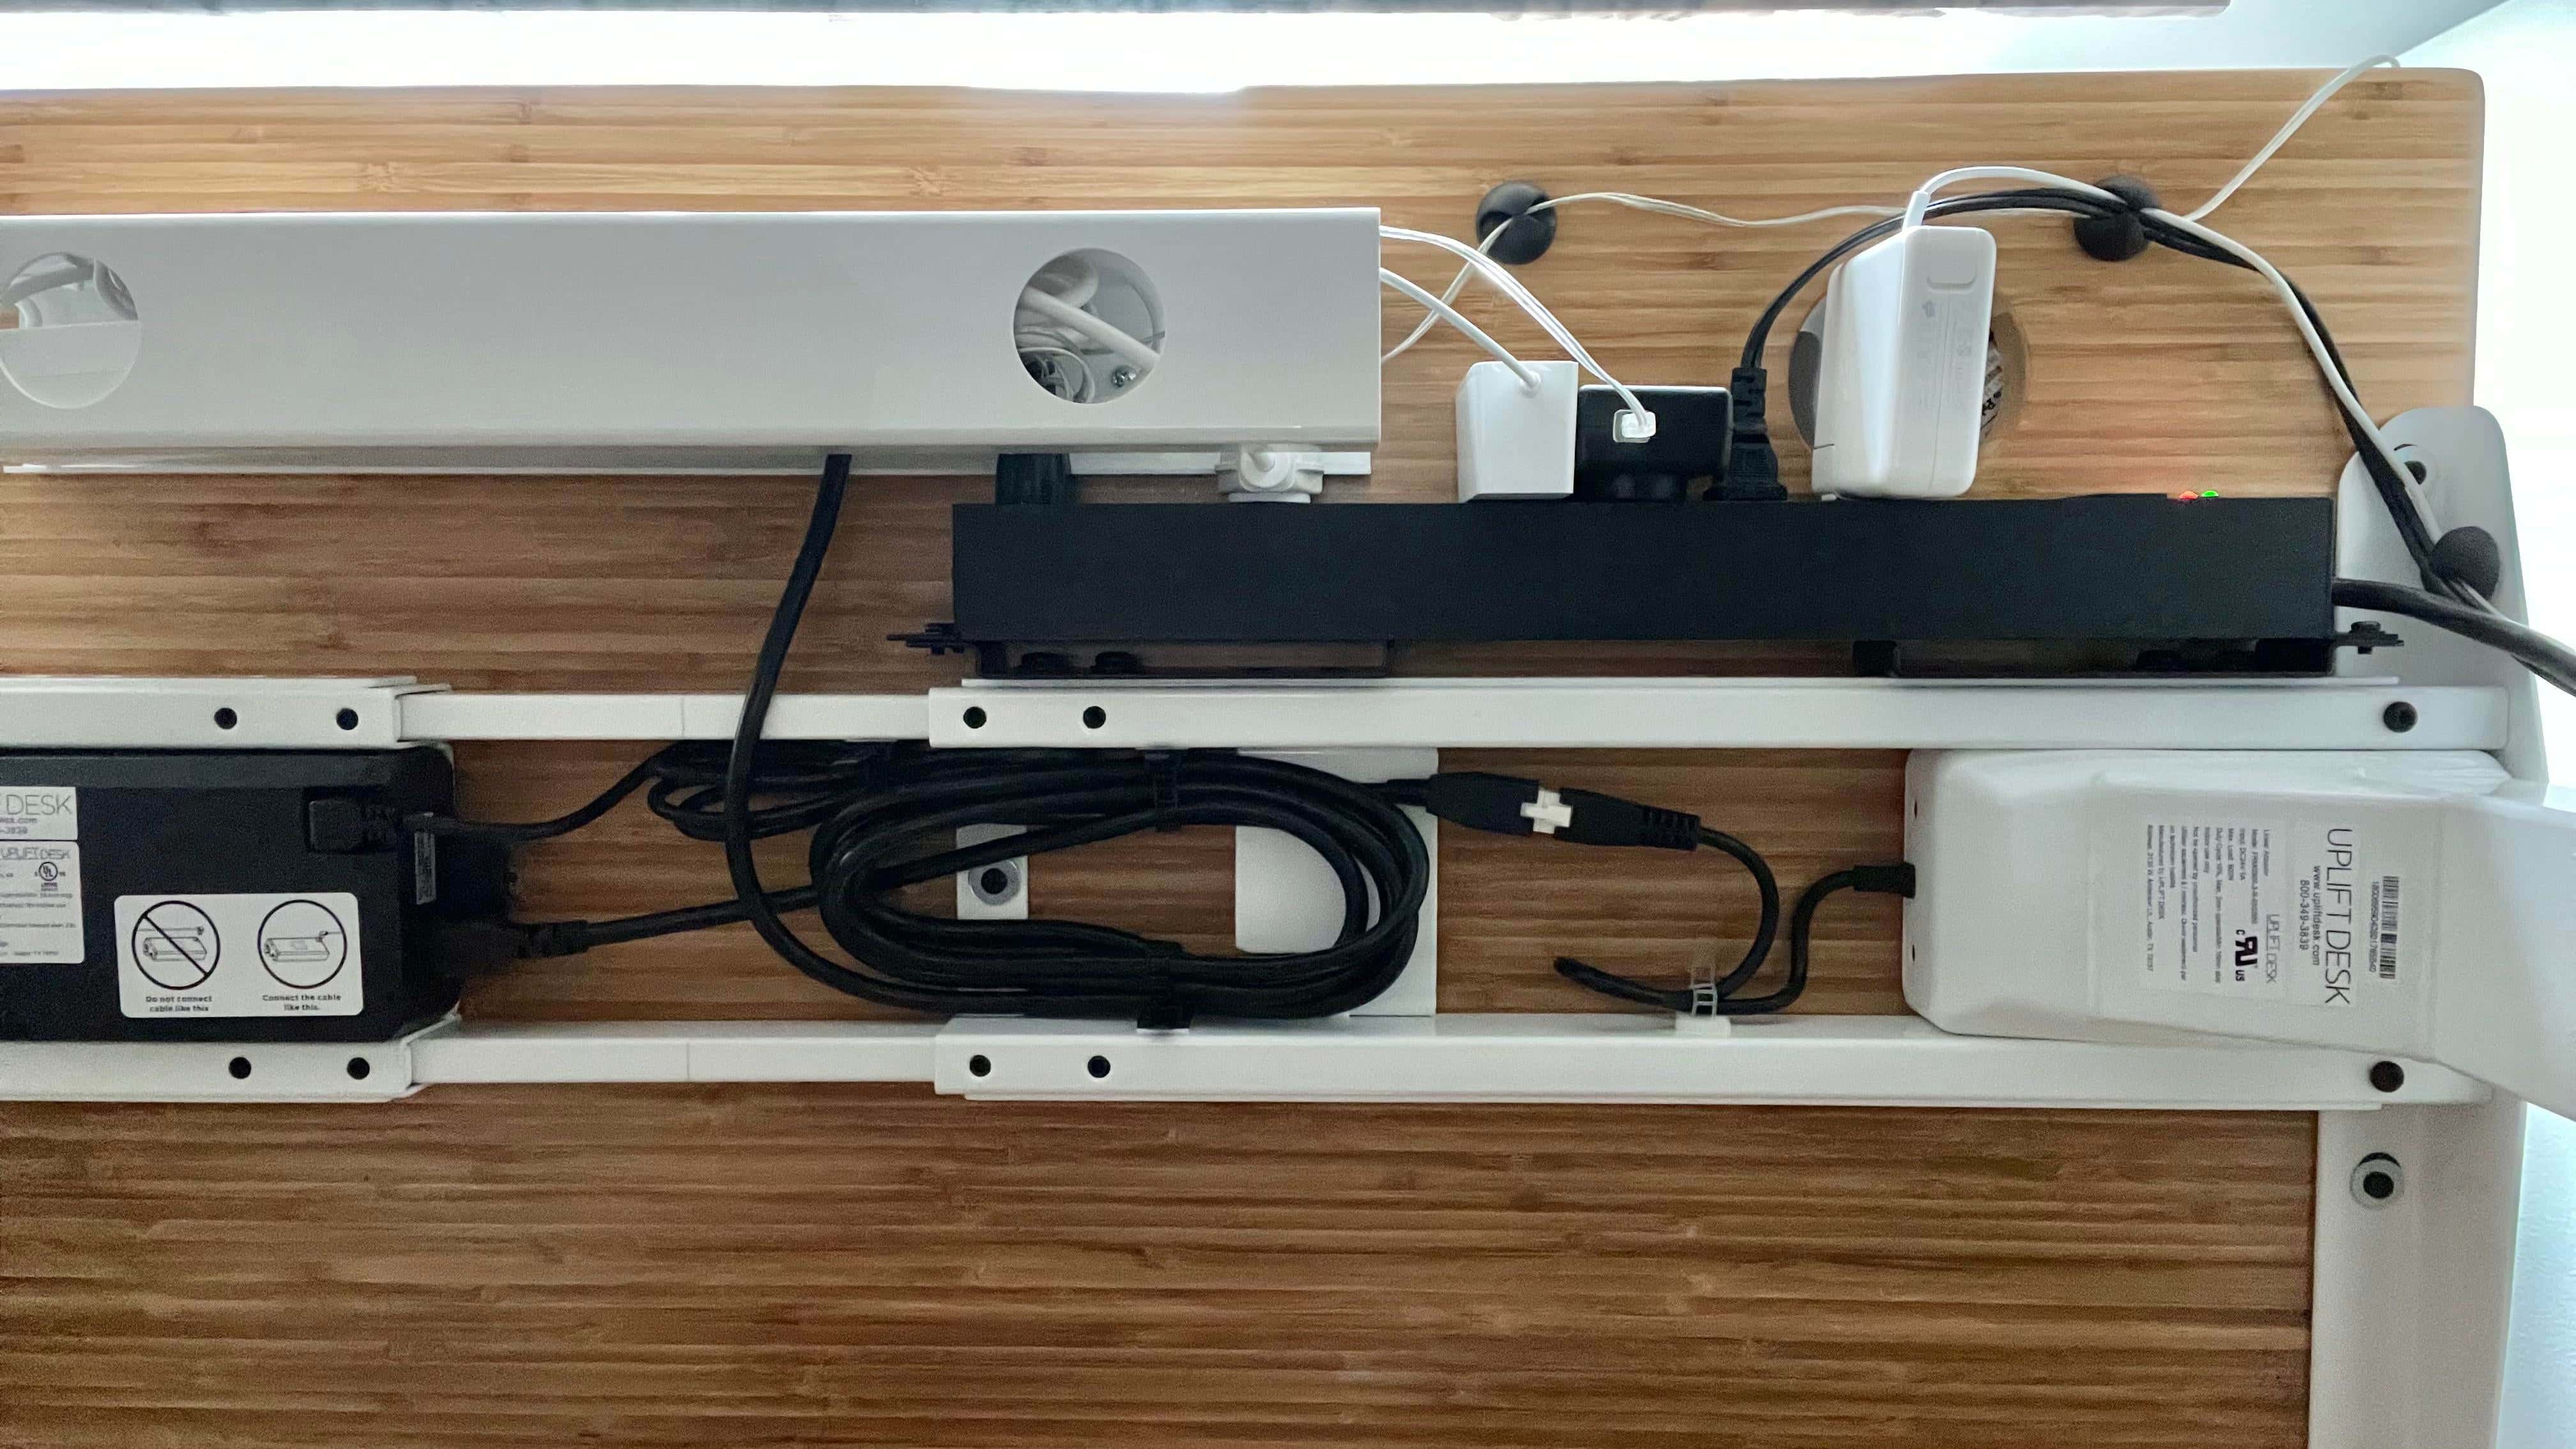
Freediver gives a lot of credit for his setup’s clean look to his Uplift standing desk and its cable management kit. It’s a 48 x 30-inch desk with a bamboo top.
“New Uplift standing desk came with some good cable management accessories,” he said. “Paired my 13-inch MacBook Pro with an LG 32-inch 4K Thunderbolt 3 display, so only requires a single Thunderbolt cable to connect/disconnect the laptop.
“There’s a limit on the length of the Thunderbolt 3 cable, so it took some trial and error to position the laptop and the cable just right to minimize slack while also ensuring the laptop doesn’t get knocked to the floor when I adjust the desk height.”
That said, his end result took a lot of fine tuning. He assembled everything in one day, but then spent weeks placing everything just so and working on cable-routing.
But no desk is perfect

Photo: free diverx01@Reddit.com
“Needless to day, Uplift provides no instructions to help you figure out the cable routing,” he said.
Free driver described “one of the biggest pains in the ass” as Uplift’s “very long, thick, and stiff power cord from the power strip” attached to the underside of the desk. It did not fit in the wire-management tray, already in use to hide the monitor’s power brick and cable. And it did not fit in the space between the braces between the two legs, a space occupied by the desk’s own power supply, motor and related wiring.
Snakes under a desk
But he found a way. And note the colorful snake description.
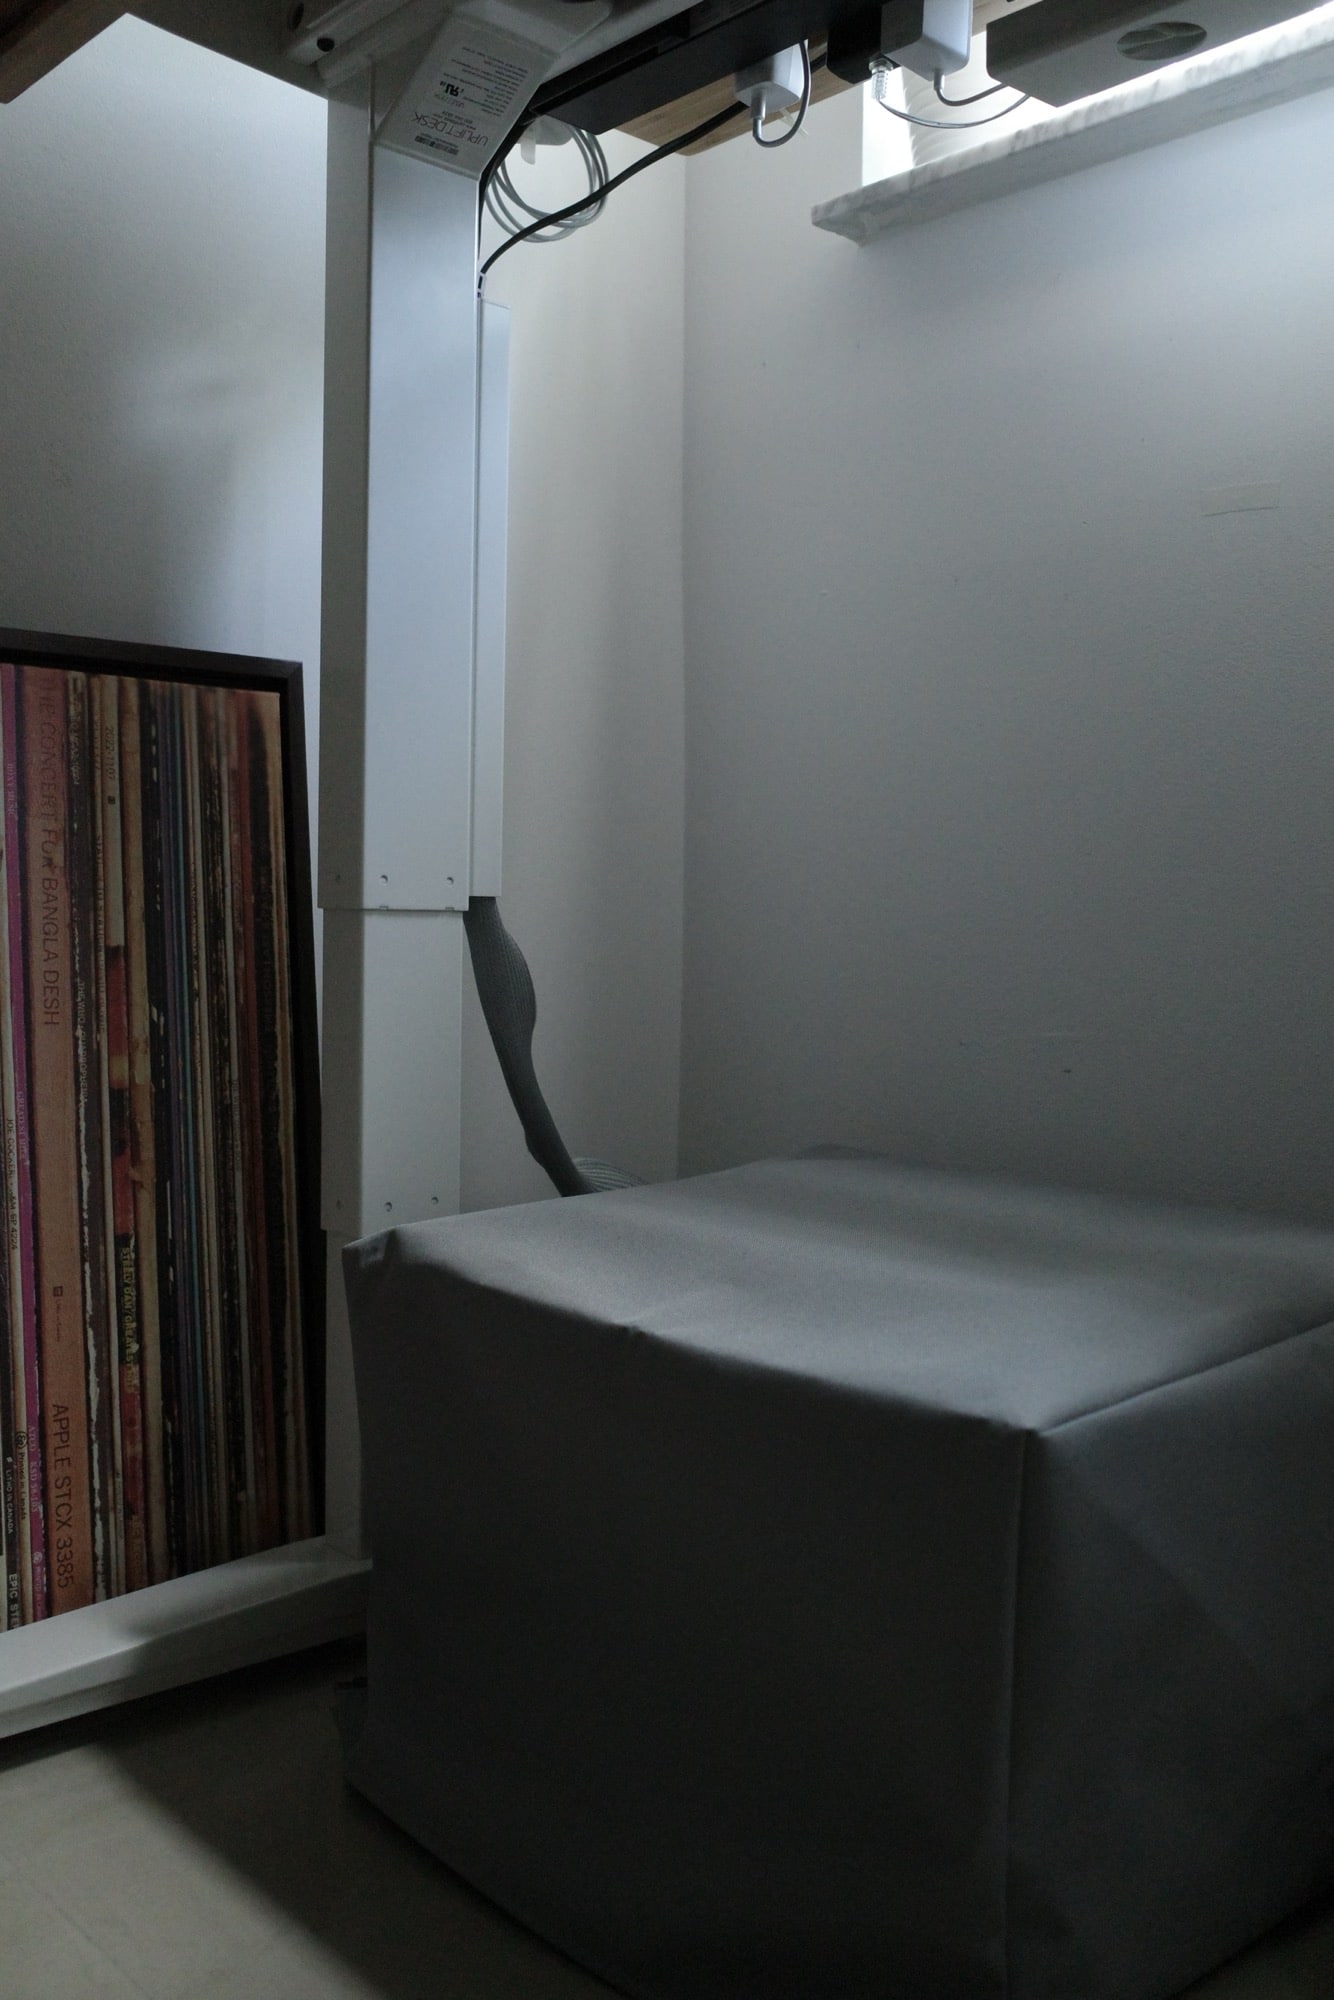
“Eventually I decided to route it down the magnetic cable channel attached to one of the desk’s legs,” he said. “Then I tidied up what remained of the cable at the floor level by clumping it together with my printer’s power cable and stuffing everything into a zippered cable sleeve — a process that felt like shoving a garter snake down the throat of a boa constrictor. That bundle is now mostly hidden behind my printer, except for the portion climbing up one of the desk’s legs.”

Photo: freediverx01@Reddit.com
How long did it take overall?
As mentioned, most of the work takes one day or so. But then the adjustments drag on. Freediver does such a good job of describing his process, we’ll let you read it in his own words (subheadings added):
Unpack it and lay it out (and watch the instructional video)
The desk can theoretically be assembled in seven minutes, but that’s unrealistic for most people assembling one for the first time at home. Realistically it takes maybe hour or so, with few interruptions and including the time required to unpack it from the shipping containers and laying out a space for assembly. I recommend watching Uplift’s assembly video on YouTube for reference before actually working on it (printed instructions are included). I did this by myself, but it would be faster and easier with two people (it’s fairly heavy).
Getting it just right takes time
What’s more difficult is figuring out how you want to organize and secure all the power adapters and wiring for your computer, monitor, and any other accessories. The time and effort required will depend on what devices you have and how much time and effort you’re willing to dedicate to “getting it just right”. I’d suggest laying all devices on the desk first and playing with the wiring to find the most efficient routing, before actually beginning to secure any of it with fasteners.
I had the basic desk set up in a couple of hours, with interruptions. But after that, I frequently made changes here and there over a period of weeks to minimize any loose wiring, find the right location to place my MacBook, and deal with wiring and power adapters that couldn’t be mounted or secured underneath the desk (main power strip cable and printer cable, mainly.)
Monitor and computer placement
I also spent some time and effort figuring out whether to mount the monitor on the left or right. Would’ve preferred on the left, but that would have required placing the desk lamp on the right which wouldn’t have looked as good, since the desk is located against a wall on the left.
I originally planned to have the MacBook standing vertically somewhere on my desk, but ultimately decided to place it on the window sill behind my desk, both to maximize available desk space and also to allow me to route the Thunderbolt cable along the monitor arm so it wouldn’t always dangle distractingly right underneath the display. I love the illusion of the display floating above the desktop. There’s still a little slack on this cable, but that’s necessary to allow the desk to be raised or lowered as needed without requiring me to move the MacBook.
As far as making adjustments, most of the wiring is held in place with adjustable fasteners so I could remove and replace accessories and wires as needed without disrupting everything else. I avoided bundling different cables together as this would have made such adjustments far more troublesome.
In case you’re interested, the wallpaper on the monitor is here and the wallpaper on the iPad Pro is here.
Shop these items now:
- 13-inch 2020 MacBook Pro (Intel Core i5)
- 11-inch iPad Pro
- LG 32BL95U-W monitor
- Ergotron LX Monitor Arm
- Magic Keyboard
- Magic Trackpad
- Uplift standing desk with bamboo desktop
If you would like to see your setup featured on Cult of Mac, send some high-res pictures to info+setups@cultofmac.com. Please provide a detailed list of your equipment. Tell us what you like or dislike about your setup, and fill us in on any special touches or challenges.
![And the 2021 award for Most Fastidious Cable Management goes to … [Setups] The Uplift standing desk and its accessories helped a lot with reducing cable clutter.](https://www.cultofmac.com/wp-content/uploads/2021/12/75n04pj7eb681-1536x910.jpg)

