Creating a killer app isn’t the only way to make an honest buck in the Apple ecosystem. You can publish an ebook quickly and easily on Apple Books.
It’s a straightforward way to sell your ideas, and doesn’t require any coding. In fact, the only software you need is probably installed on your Mac already: Pages. You still need to do the heavy lifting when it comes to the writing. But publishing an ebook using Pages takes very little effort. And the ebooks you create support a surprising amount of functionality.
This guide will show you how to publish an ebook to Apple Books using Pages.
Why you probably shouldn’t develop an app
Occasionally, a smash-hit indie app like Flappy Bird comes along and very publicly earns its developer a fortune. But if you dream of getting rich with your app idea, maybe you should think again. For every success, there are thousands of failures. And the costs of building and maintaining an app can prove eye-watering.
Instead of building an app, have you considered creating an ebook? Ebooks might not support all the functionality of an app, but they can do far more than simply presenting text on a page. Apple Books supports gorgeous layouts, high-res photography, audio and even video.
It’s an easy-to-use platform that can connect you with the entire world of readers. And, just as with an app, you can make real money if your ebook takes off.
Everyone has an ebook in them
Naturally, to sell an ebook, you need content that people will want to buy. But as the old saying goes, everyone has a book in them. Whether it’s work-related or a just hobby, there’s probably a topic you’re uniquely placed to write about.
Does the world need to know your secret cupcake recipe? Or maybe, like me, you have a manuscript for a novel lurking in your attic. Time to dust it off and share it with the world. (I’ve literally just published my own novel on Apple Books.)
Apple Books makes it easy for anyone to publish an ebook. You don’t need an agent or a fancy publisher. Anyone can do it. And, thanks to Pages, it couldn’t be simpler.
How to publish your ebook from Pages
When Apple Books first launched, you had to use a special app called iBooks Author to create and publish books. This has now been scrapped in favor of something simpler. You just upload documents directly from Pages, Cupertino’s free word-processing app for Mac, iPad and iPhone. Which means you can create and sell ebooks straight from your phone! Here’s a step-by-step guide.
1. Format the book
If you’ve already written your book in Pages, you’re halfway there. There are just a few things you need to do to make sure your book is ready for publication.
The instructions and screenshots that follow are based on Pages on the Mac. The iPad and iPhone versions are similar, but some buttons and menus are in different places, so you might need to hunt around.
Use Paragraph Styles, not the font menu
When you’re feeling lazy, it’s tempting to format the text in your document by just clicking on the Font and Size menus. Don’t! You might get away with that for something short like a letter. But do it for a long document like a book, and you’re in for a world of pain.
Instead, you should use the Paragraph Styles menu. Pages offers predefined styles that are ideal for a book: Title, Subtitle, Heading 1, 2 & 3, and Body. Select all the body copy of your book and apply the Body style. For chapter headings, use Heading 1. For subheads, you can use Heading 2 or Heading 3. And use Title and Subtitle for the name of your book, right at the start.
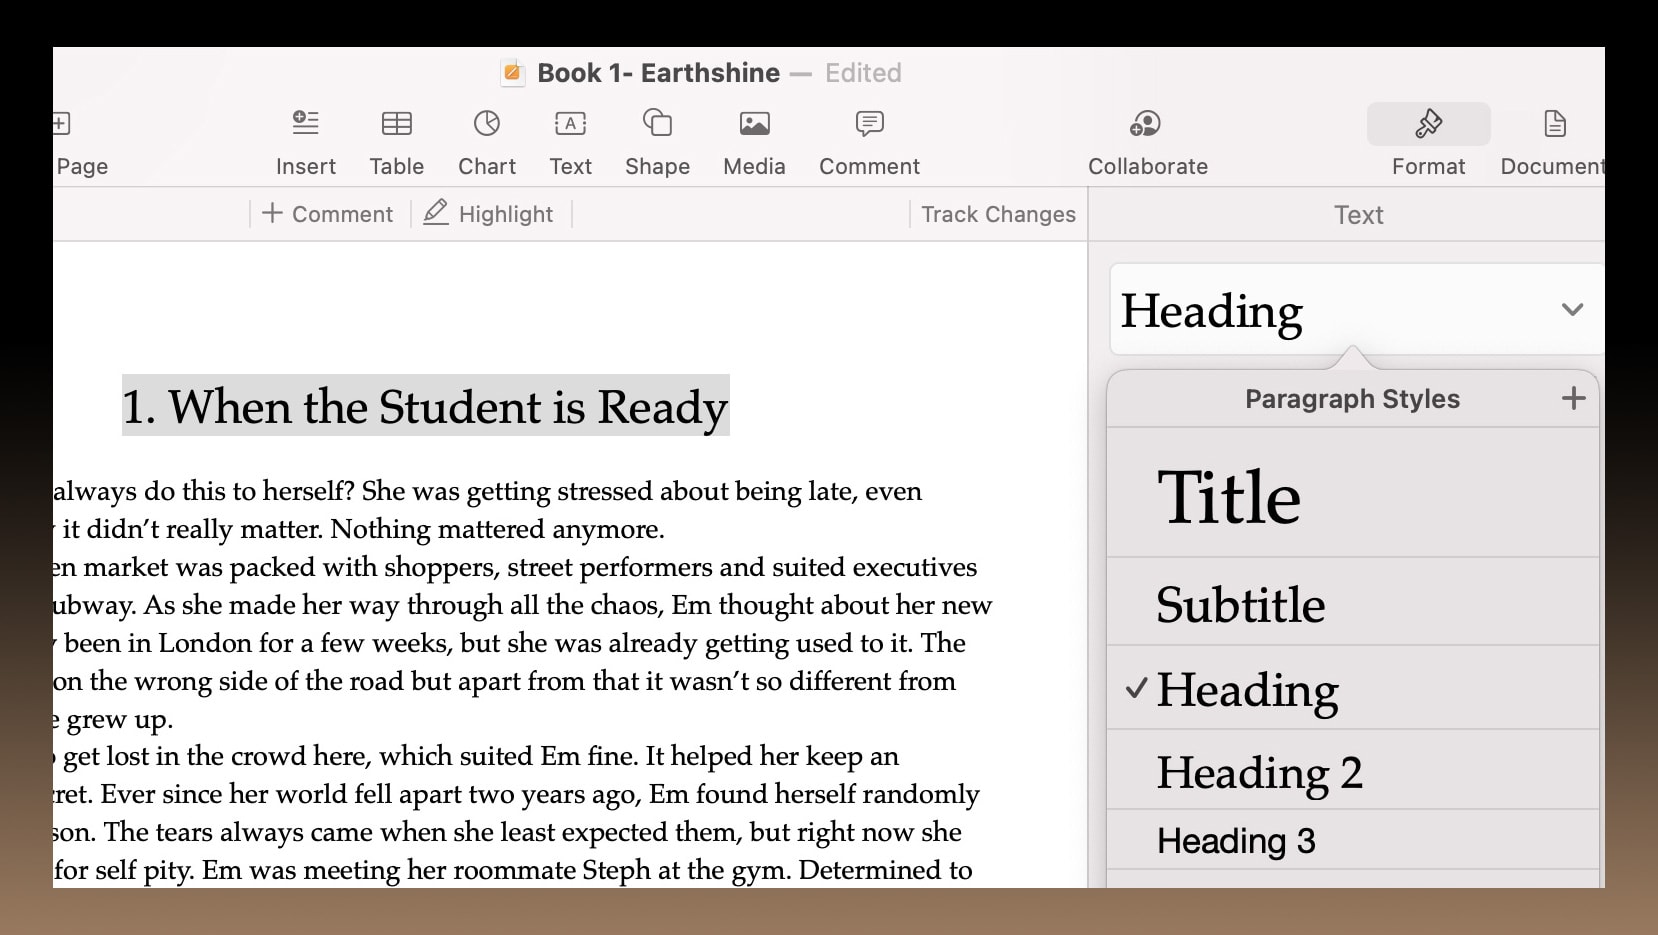
Photo: Graham Bower/Cult of Mac
Customize your Paragraph Styles
Don’t worry if you don’t like the look of the default Paragraph Styles. Changing them is easy. Just highlight some text from the style you want to change, pick the font, text size and line spacing you want, and an Update button appears next to the style in the Paragraph Styles menu. Click on this, and your entire document will be magically updated. Everywhere you used this style will get the new look.
You can use any fonts you want, and Pages lets you embed them in your ebook. That means they should display correctly on someone else’s device even if they don’t have that font installed. However, if you choose a special font that doesn’t come preinstalled, you might need to license it. So it’s probably best to stick to the basic fonts.
My personal favorite for readable ebook copy is Palatino 11pt with 1.1 line spacing.
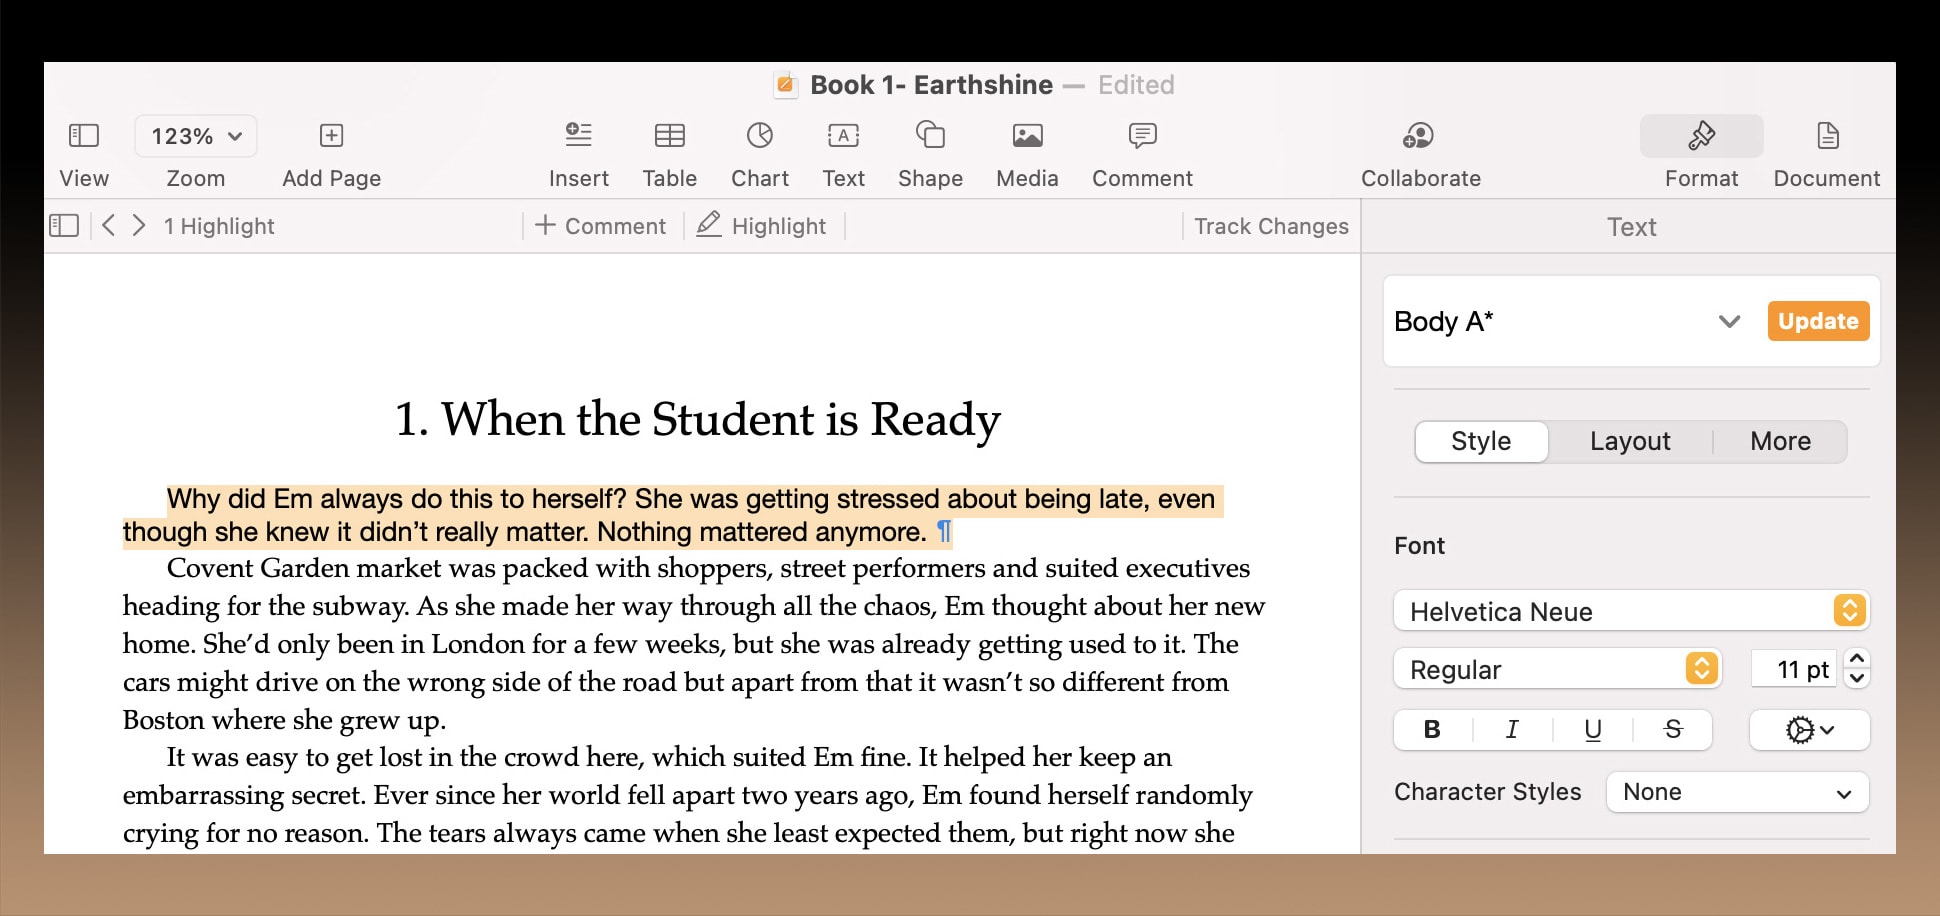
Photo: Graham Bower/Cult of Mac
Create your table of contents automatically
In Apple Books, the table of contents is accessed via a button top-left. It’s an important feature, because it lets the reader easily switch between chapters.
The good news is, if you followed the instructions above and applied Paragraph Styles to your document correctly, your work is already done. Just click on the View button in the Toolbar and select Table of Contents. A sidebar appears that lists your chapters and subheads. You can modify which headings appear by clicking the Edit button. If some chapters don’t show up, go back and make sure you’ve used the correct Paragraph Style for them.
In addition to the menu, a lot of ebooks include a contents page at the start of the book. This is easy to add. Just position the cursor where you want to insert the contents, then click on the Insert menu and select Table of Contents > Document. You’ll notice this includes page numbers, but these get stripped out when you export as an ebook, because page numbers vary in ebook readers. Instead, each chapter heading will link to the chapter.
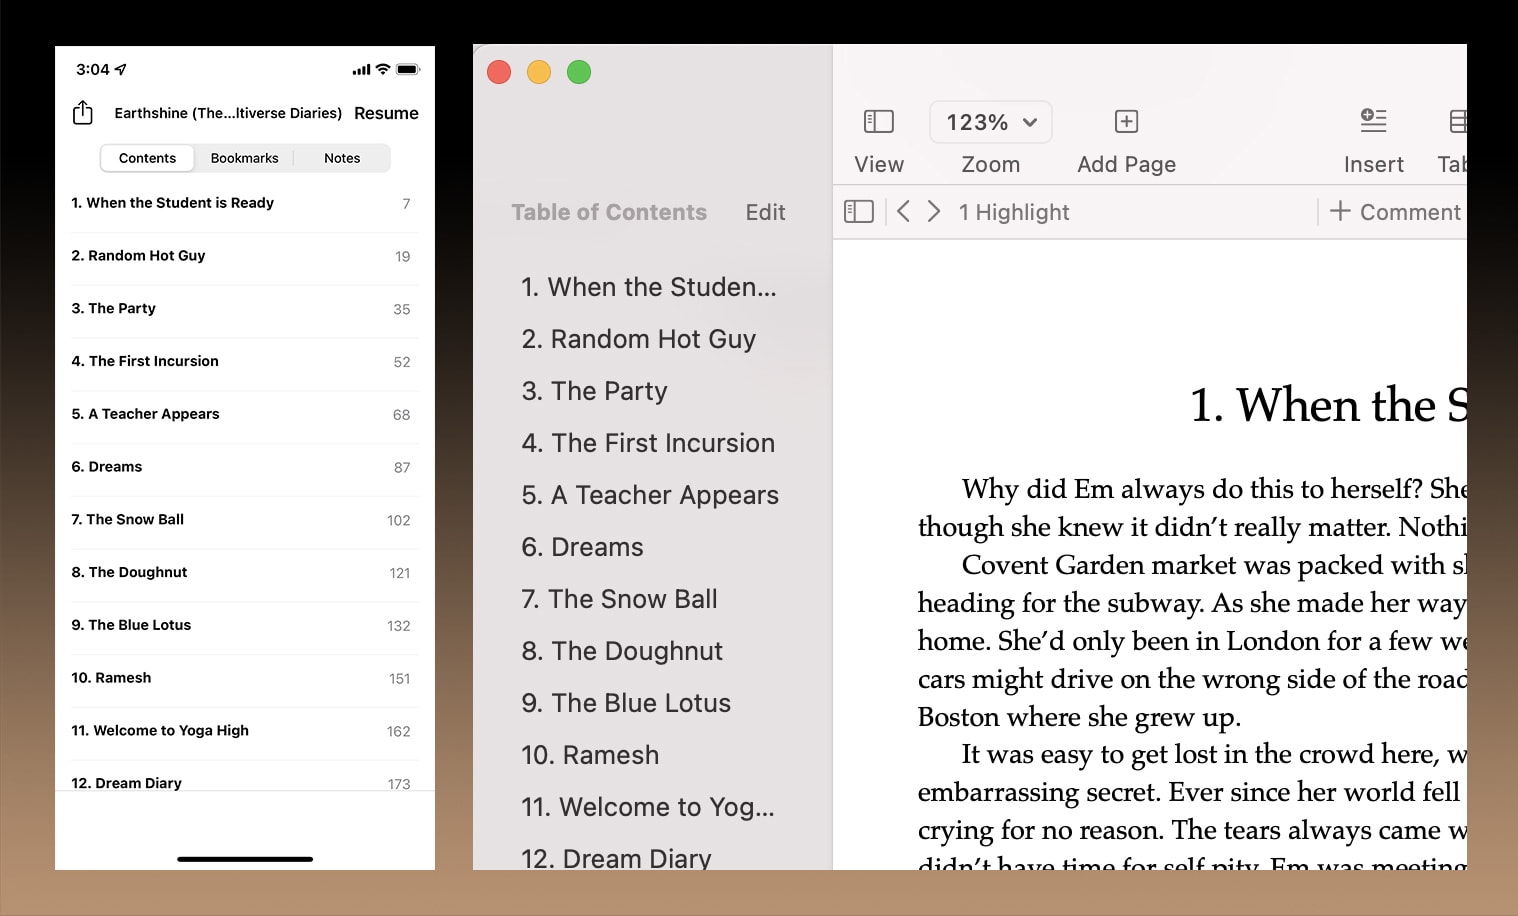
Photo: Graham Bower/Cult of Mac
Why Front Matter and Back Matter matters
An ebook is like a sandwich. The meat is in the middle with a slice of bread at either end. But in this case, the bread is the Front Matter and Back Matter.
Front Matter is publishing jargon for all the stuff that usually goes in a book before you get to the good stuff: title page, copyright info, contents, dedications, etc. Check out a few books on the Book Store to get a feel for what you should include.
Back Matter, as the name implies, is all the stuff that goes at the end: usually appendix, glossary, bibliography, acknowledgments and an “about the author” blurb. It’s a good idea to include links to any other books you have on Apple Books, plus links to your website and social media.
Pro tip: Use transparent PNGs to make your graphics look great in Dark Mode
All Apple devices support Dark Mode these days. And Apple Books goes a step further, offering a gray and cream background color, in addition to black and white. That means if you upload graphics as images and they’re viewed on a dark background, they might appear to have a white rectangle around them, which is one of my pet peeves. It’s surprising how many professionally produced books have this problem.
The solution is transparent PNGs. If you create your graphics in Photoshop, save them by going to Export > Export As. Select Format: PNG and make sure the Transparent box is checked. Remember that black on black won’t show, and nor will white on white. So if you have a black line-art graphic, the solution is to put is on a white background with a white border. Like the example below. You can see this graphic in action if you download the free sample of my book on the Book Store. Try changing the background color to see how it adapts.
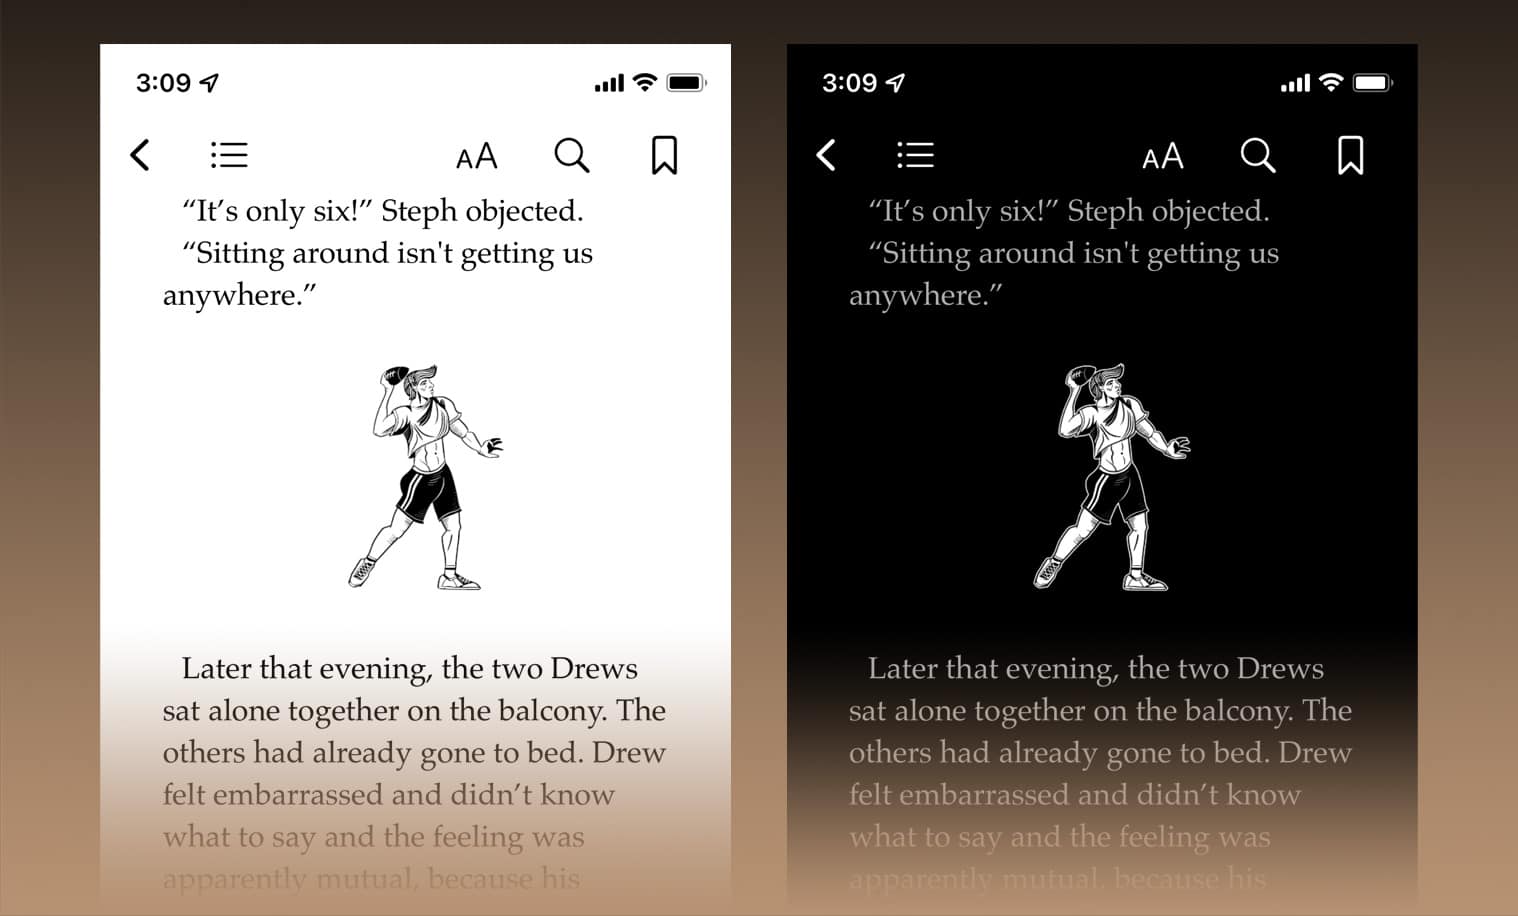
Photo: Graham Bower/Cult of Mac
Preview your book before you publish
The appearance of an ebook varies depending on the device you’re using. Screen size, operating system, fonts and user settings can all alter how it appears. So you should check your ebook first before you upload it.
To do this, go to File > Export To > EPUB…. There are some details to fill in, including the book’s title, and you can upload a cover image if you wish, although that’s not so important at this stage.
The main thing is to choose between a Reflowable Layout (suitable for most books) or a Fixed Layout, if you’ve used a fancy template or come up with your own custom design.
Save the EPUB file to your desktop and then double-click on it to open it in Apple Books on your Mac. Go through all the pages to make sure the formatting looks good. Try changing the background color and font size, too. The book should sync automatically to all your devices, so be sure to check it on your iPhone and iPad as well if you have them.
Go back and make changes if you need to. Once it all looks good, you’re ready to publish.
2. Set up iTunes Connect
Before you upload your ebook, you first need to get set up on iTunes Connect, the web portal Apple provides for uploading books, music, movies and apps. To do this, you’ll need an Apple ID. If you plan to charge money for your books, you’ll need to make sure the Apple ID is registered in the country where you’ll be paying tax.
If necessary, you can create a new Apple ID here. You need to register a credit card with a new account for it to become valid, but you don’t need to spend anything with it. You can add your credit card via the Mac App Store app. Under the Store menu, select Log In. (Log out and then log in with your new account if necessary.)
Once you have your Apple ID, you need to use it to log in via this special landing page to register as an Apple Books publisher.
You’ll be asked to specify if you’re an individual or an organization. This is important not just because of how you will appear in the Book Store, but also because of the tax information you will need to provide. If you choose Organization, you have to provide a U.S. EIN (Employer Identification Number), even if your organization is not located in the United States. As an individual, you’ll have to supply a TIN (Taxpayer Indentification Number) if you’re in the United States. For those outside the United States, you’ll need to fill out an IRS form (W-8BEN), which is relatively straightforward and can be completed online as part of the signup process.
Finally, you’ll need to provide Apple with your bank account details, so the company can pay you.
3. Prepare your metadata
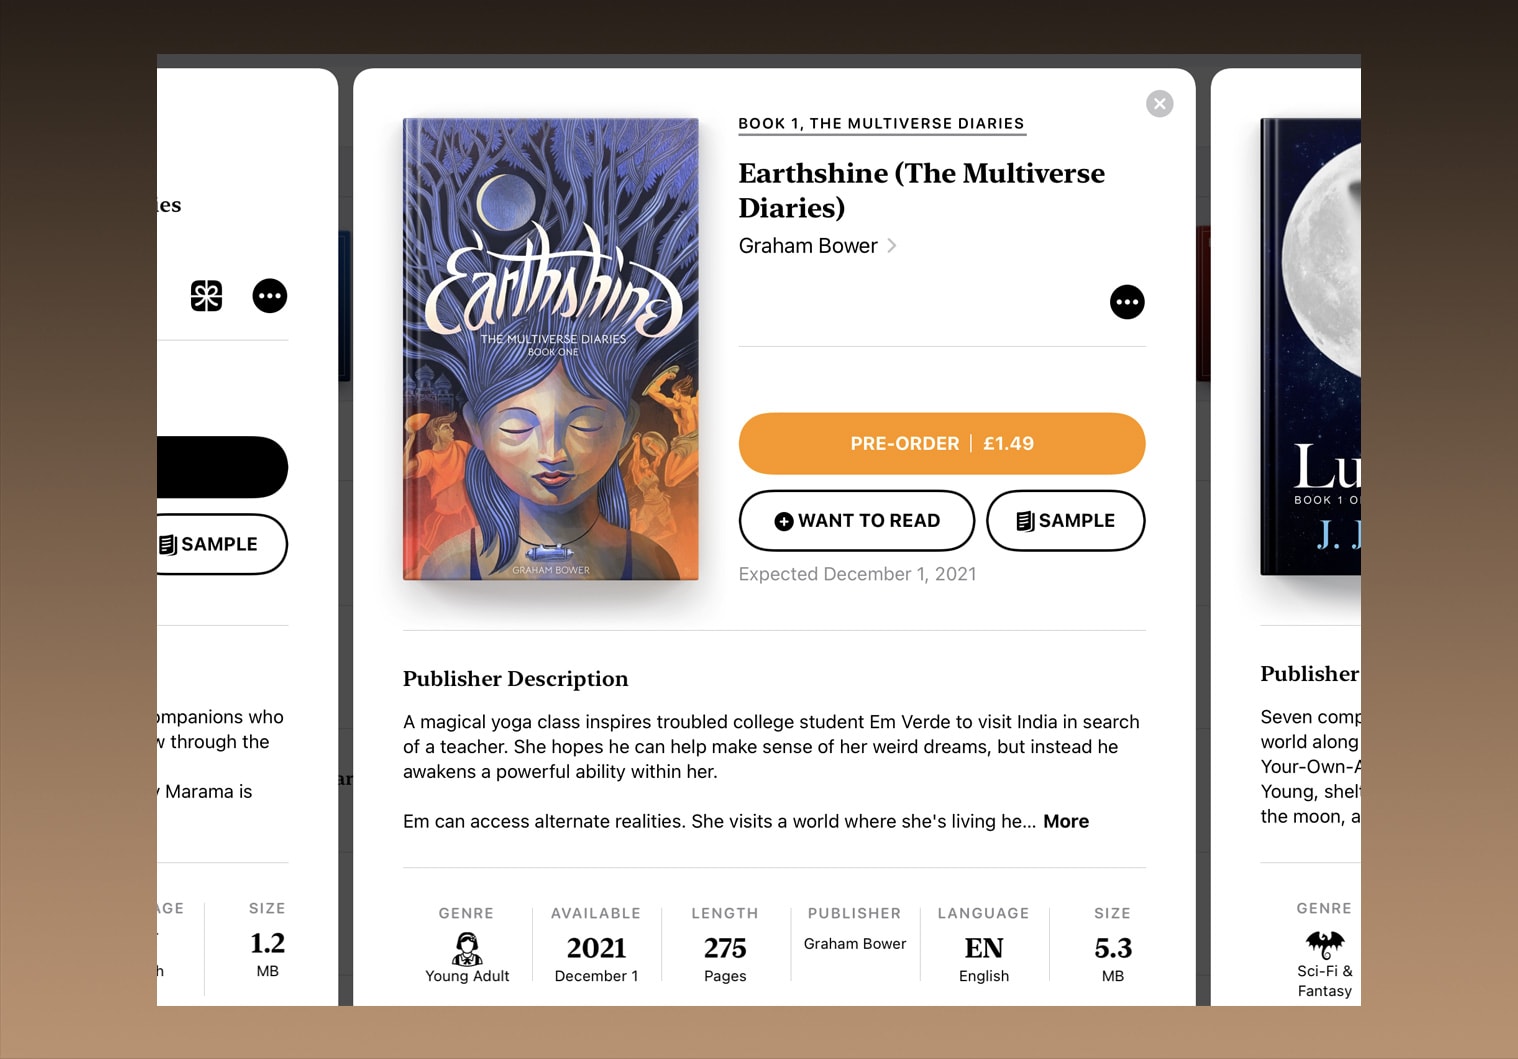
Photo: Graham Bower/Cult of Mac
Metadata appears on the product page for your book in the Apple Books store. It tells potential readers what your book is about, so it’s crucial to get it right.
You’ll be asked to provide metadata when you upload your book, so it’s a good idea to prepare it in advance, rather than trying to figure it all out as you fill in the form. The metadata you’ll need is as follows:
- Cover: This should be an eye-catching image, featuring the title and author in text that is large enough to be legible when the cover appears in small thumbnail sizes on the store. (Need some help with the visuals? Apple provides tips for creating great ebook covers.)
- Title (and optional subtitle): This should be distinctive and clearly describe what the book is about. For nonfiction books especially, it’s a good idea to make sure the most important keywords are include in the title to maximize its chance of showing up in relevant search results.
- Description: This is a few paragraphs that describe what your book is about, like the blurb you see on the back cover of print books. After the cover and title, it’s the most important marketing tool you have to appeal to prospective readers. Take your time to get it right. (Check out Apple’s tips for writing great ebook descriptions for key pointers.)
4. Upload the book
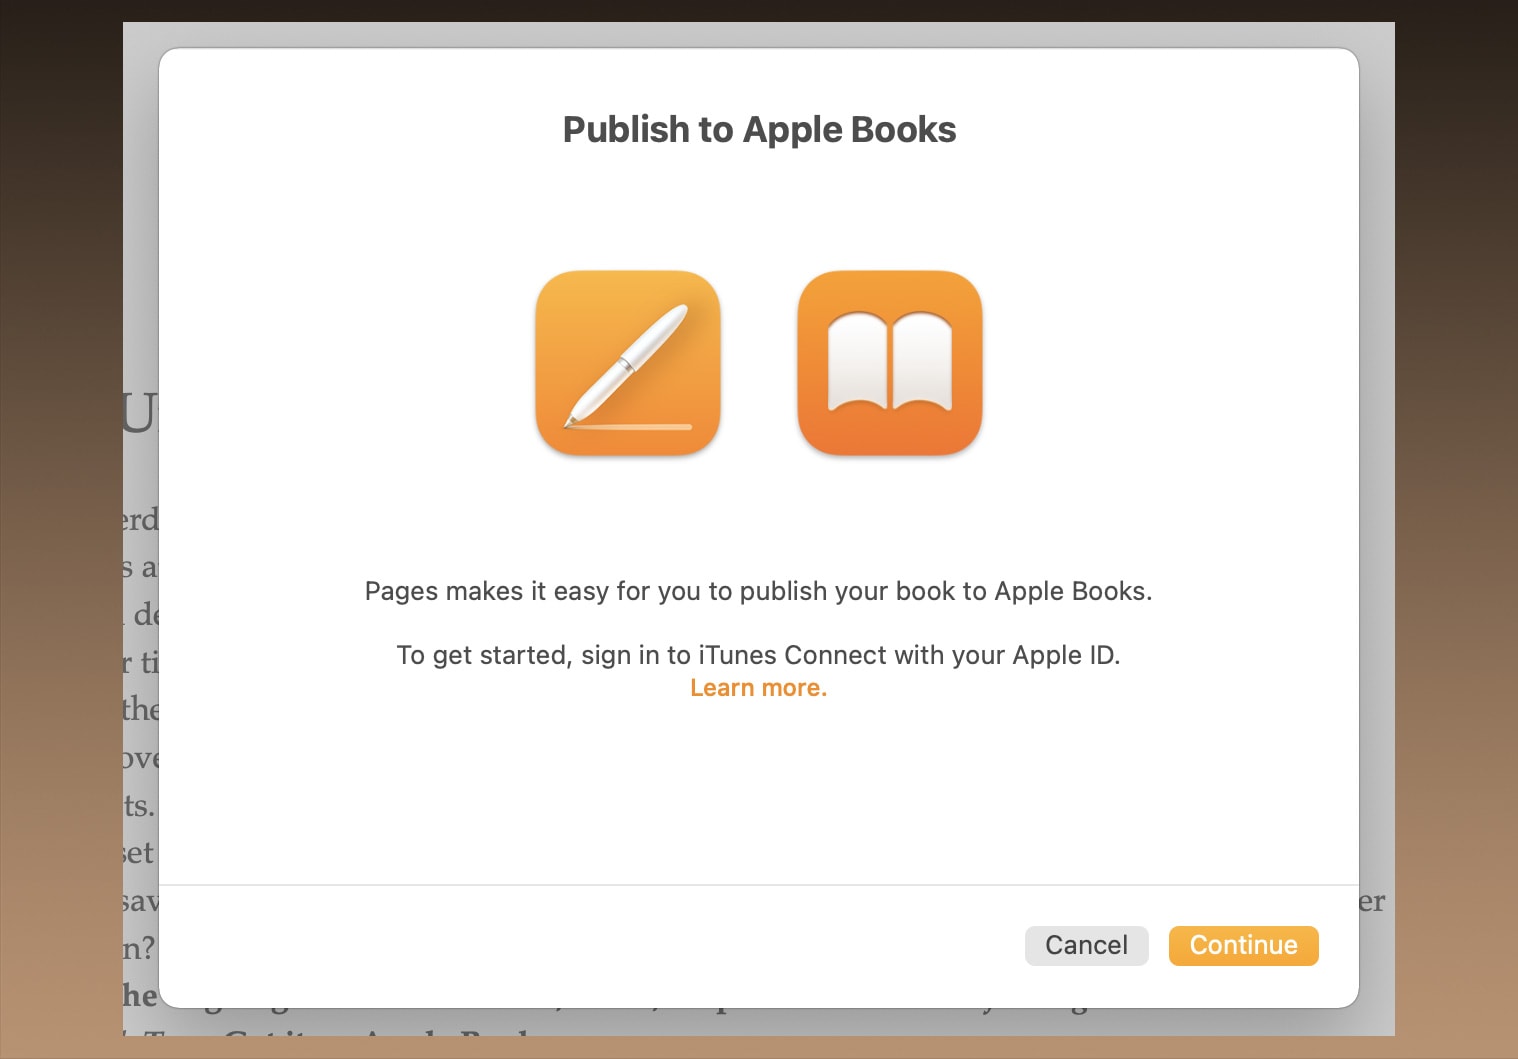
Photo: Graham Bower/Cult of Mac
When you’ve got your metadata complete, you’re ready to upload your book. In Pages, click on the File menu and select Export To Apple Books…. You’ll be asked to log in, so make sure you use the Apple ID you just associated with your iTunes Connect account.
You’ll need to specify again if your book is Reflowable or Fixed Layout (see above). On the Provide Book Information screen, you’ll need to scroll down to see all the questions.
Note that the Original Publication Date should be the date you plan for your book to go on sale, not when you are uploading it. And it’s a good idea to set this a month or more into the future, to give yourself some time to build hype around the launch and get some advance reviews.
Next, you’ll be asked to enter all your metadata. At this stage, you’re given the option to include an International Standard Book Number, or ISBN. This is required for print books, but is not strictly necessary for ebooks. It can make your book look more professional and help with tracking sales. If you want to include an ISBN, you can purchase one from Bowker in the United States or Nielsen in the United Kingdom.
Once all the metadata is entered, you’ll be given the opportunity to preview your ebook in Apple Books one last time to make sure it uploaded correctly.
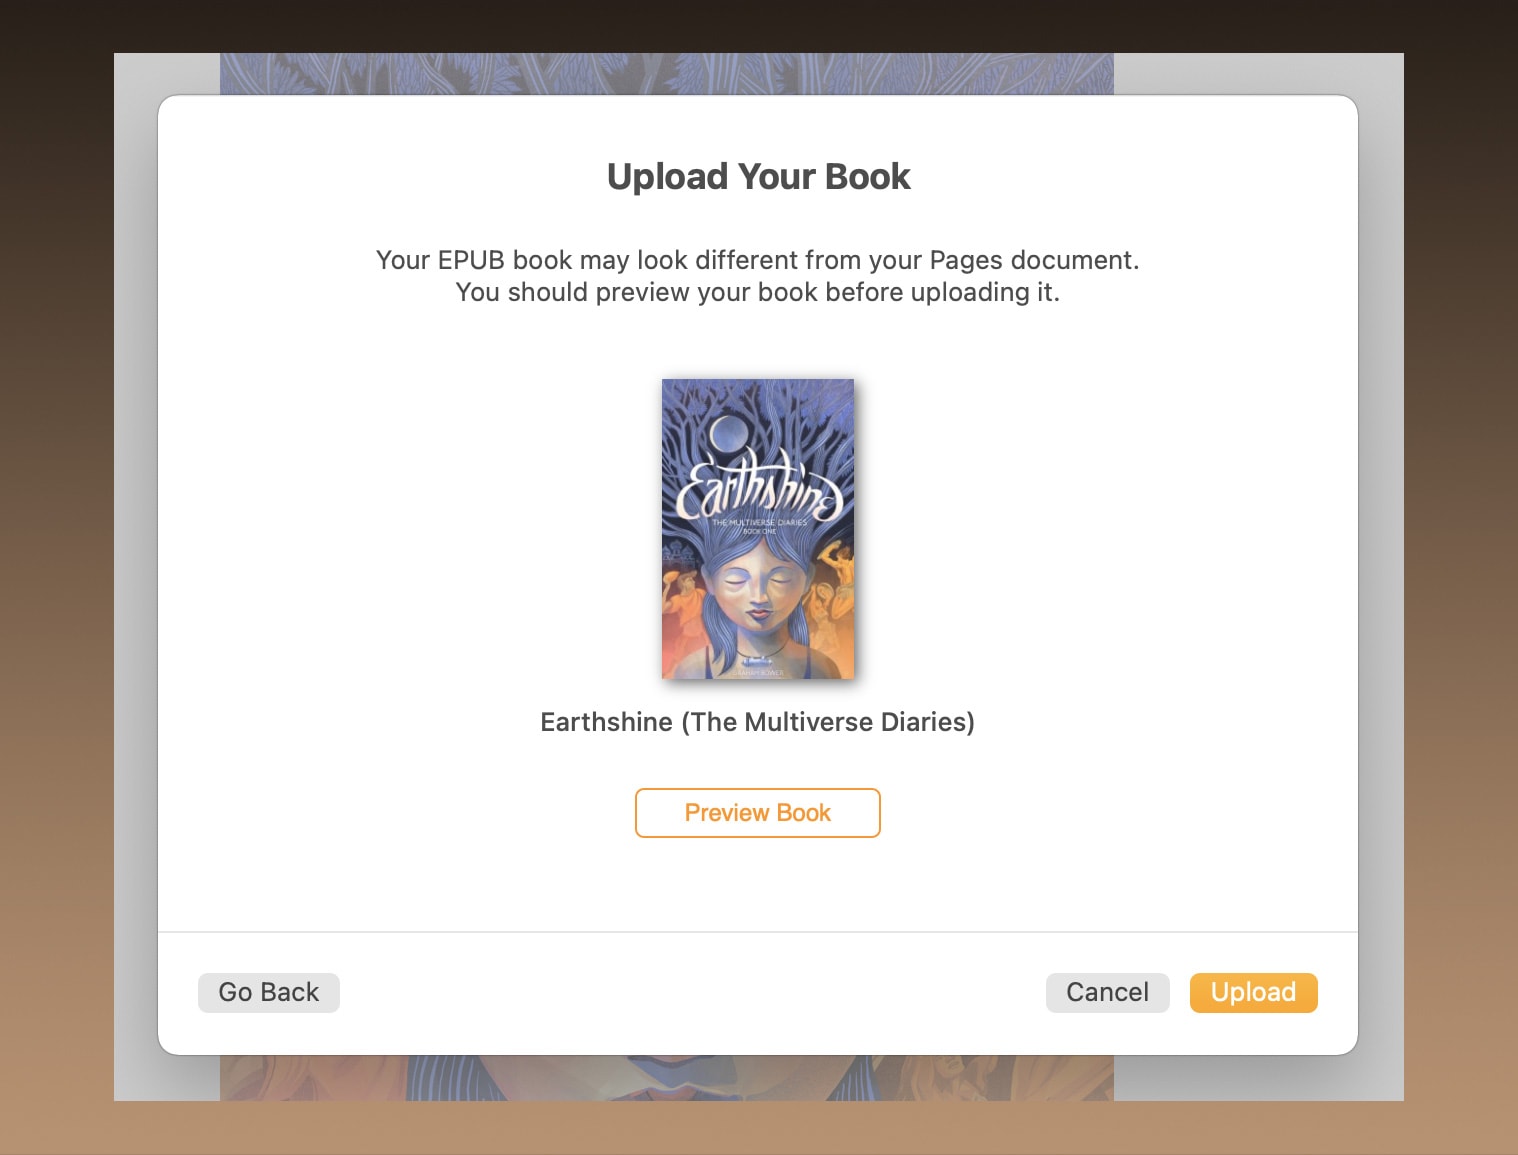
Photo: Graham Bower/Cult of Mac
4. Regions and pricing
One your book is uploaded, the final step is to return to iTunes Connect and decide where you want to sell it and how much for. Click on My Books, then click on the book you just uploaded. (If it’s not there yet, just wait a few minutes for it to show up.)
You should check that the metadata uploaded correctly. Some of it you can amend in iTunes Connect. For the fields you can’t change there, you’ll need to go back through the whole upload process in Pages again. (If you do that, be sure to select “This is an update to a previously submitted book.”)
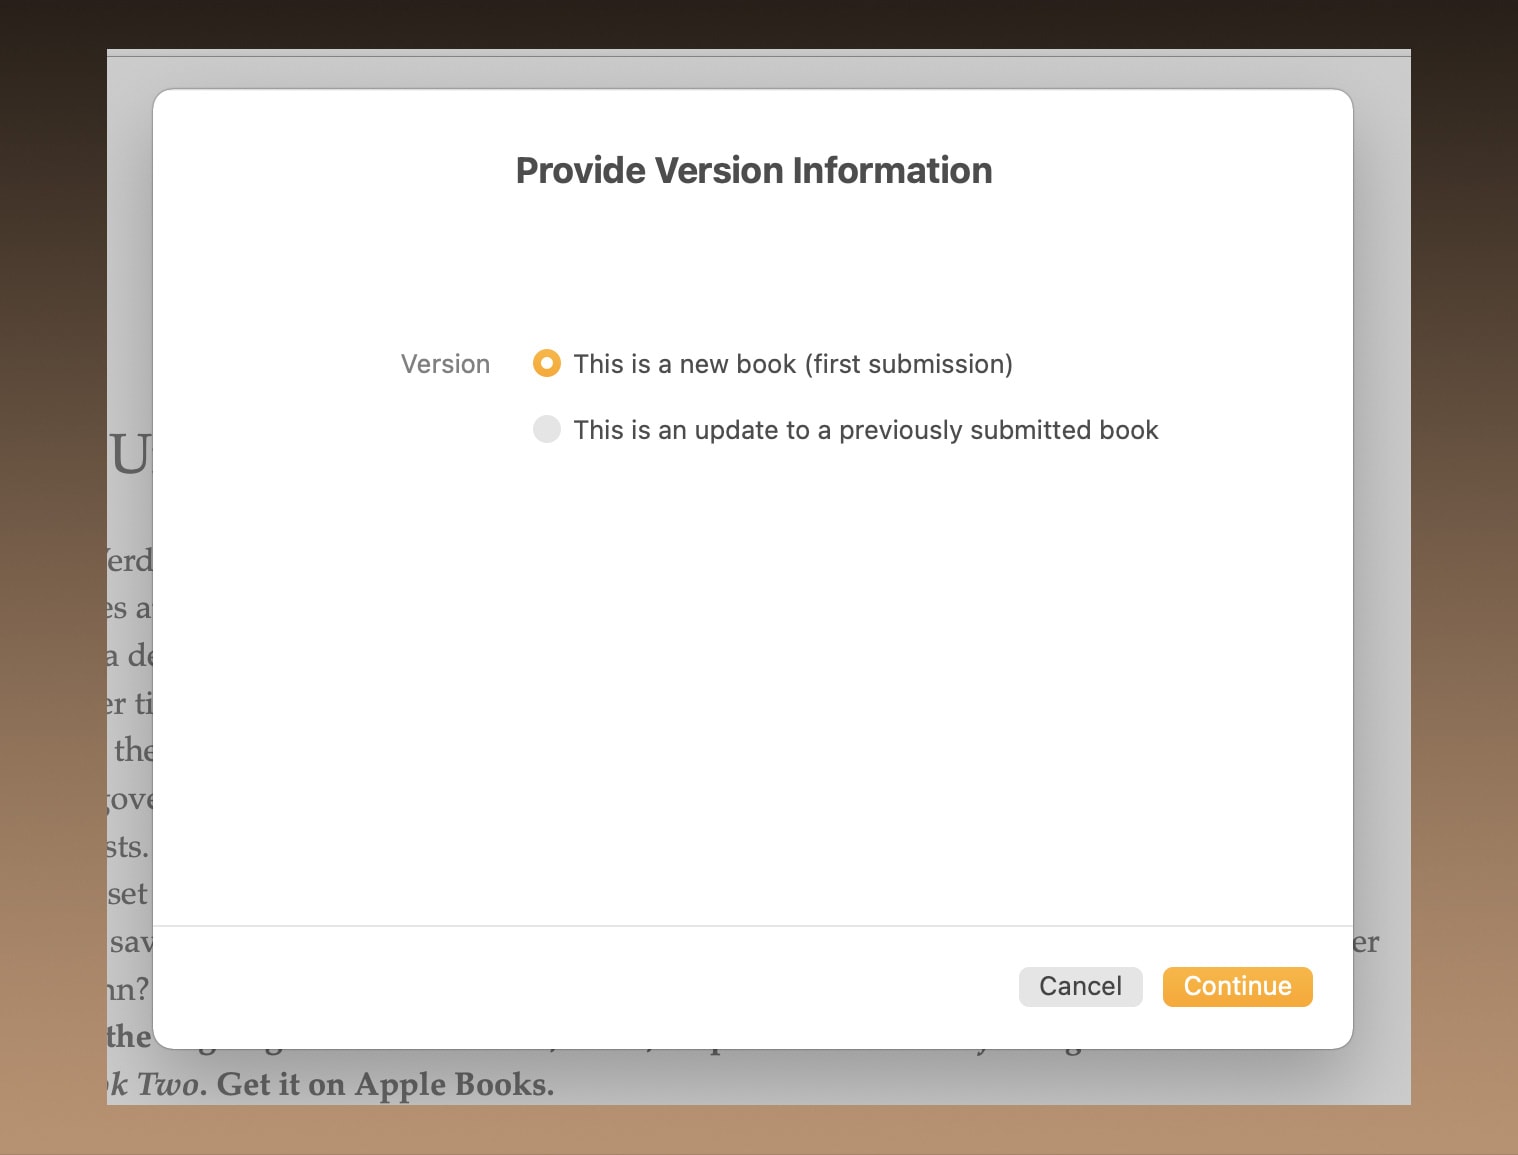
Photo: Graham Bower/Cult of Mac
The final step is to click on Regions and Pricing and decide how much you want to charge. Pick a base currency, and prices for other regions are suggested automatically. You have the option to alter them individually or decide not to sell the book in some regions.
Here you also can pick when the book will become available. Set a future date if you want a preorder period. During the preorder period, you can give prospective readers the option to download a sample. This is automatically generated by Apple and includes the first few pages of your book. Alternatively, you can upload your own sample.
Now, you just have to wait for the little light to turn green next to your book in iTunes Connect to indicate it has been approved by Apple. Then your product page will automatically appear in Apple Books.
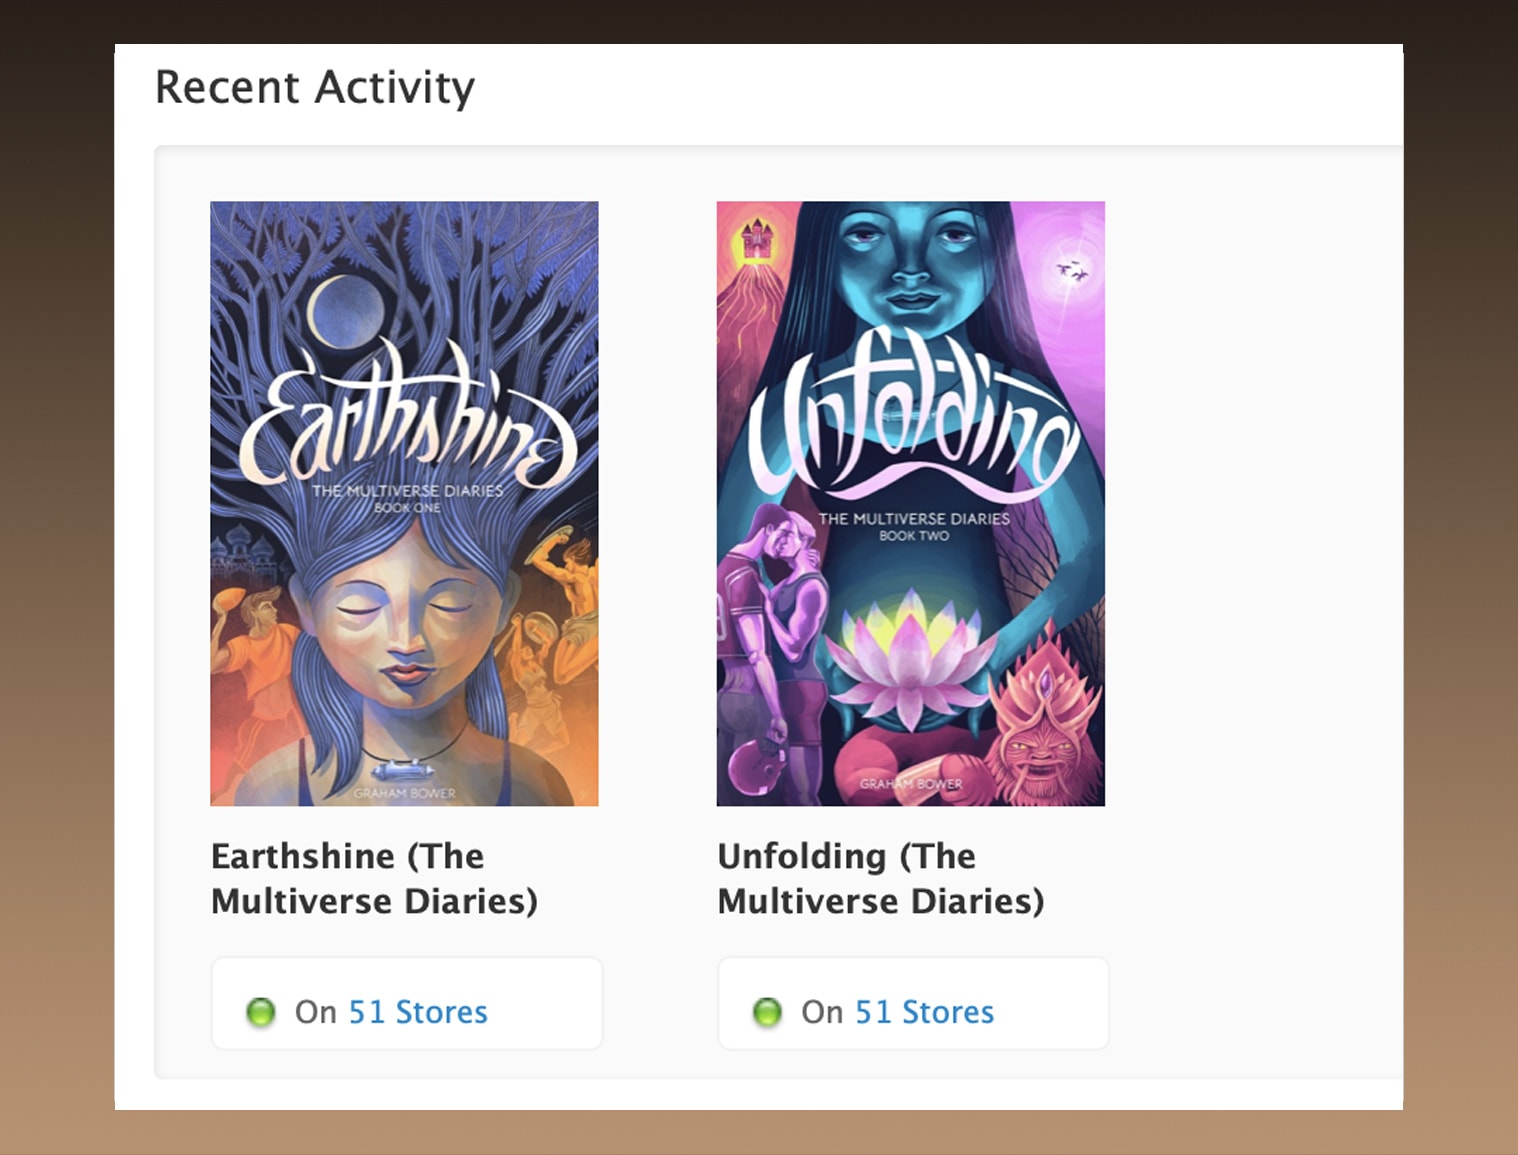
Photo: Graham Bower/Cult of Mac
Sit back and let the money (hopefully) roll in
Publishing an ebook to Apple Books is surprisingly easy. But, of course, that was never the hardest part. First you need to come up with a great idea and actually write the thing. And even once it’s uploaded, your work isn’t over. Next you need to market the book or no one will find it. The Apple Books for Authors microsite provides some great marketing tips, and you’ll find more here.
Writing, publishing and marketing your own ebook is certainly a lot of work. But if your dream is to become a published writer, maybe the time has come to make that dream a reality.
Check out my book, Earthshine (The Multiverse Diaries #1), on Apple Books. I used it for all the screenshot examples above.
