Apple’s Mail app has gotten pretty good. And one of its best features is mail swipe gestures: being able to swipe an email in your message list and quickly delete, archive, move, or flag that message, and lots more besides.
With gestures, you can speed through your inbox, deleting the cruft, archiving boss mails, and filing messages, all with single swipes. It makes dealing with mail easy, if not actually fun.
The default swipes gestures are fine, but you can customize them to do exactly what you want. Let’s see how.
How to use mail gestures
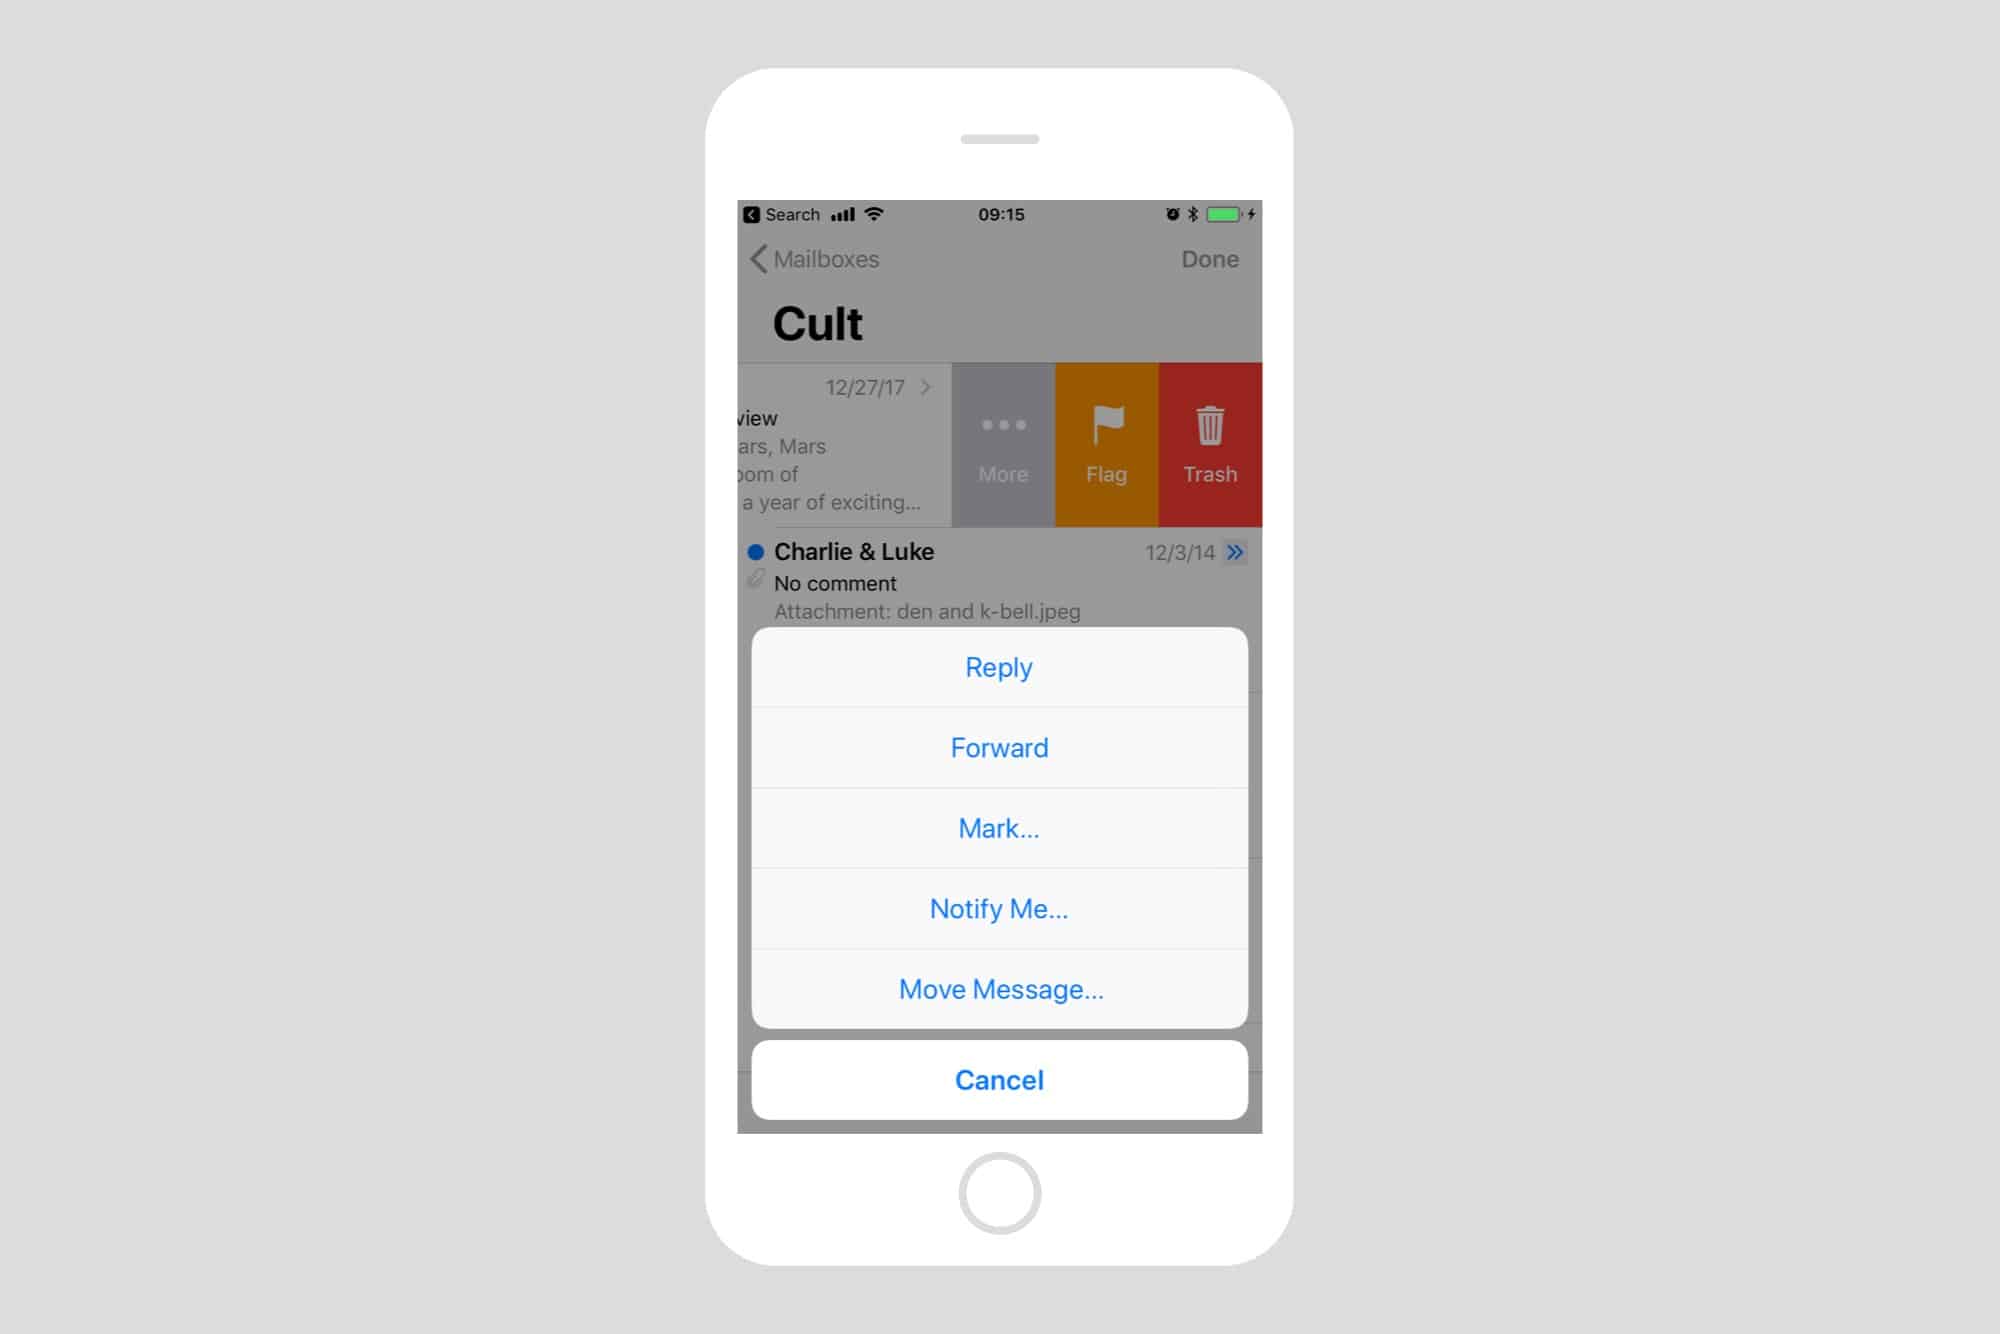
Photo: Cult of Mac
Mail gestures work in the message list. If you’re in your Inbox (or any other mailbox), and you see a list of messages, then you’re in the right place. Just swipe left or right on a message to activate gestures. The message moves to reveal a button (or buttons) underneath. Just tap one of those buttons to perform and action.
There’s also a power shortcut. If you keep swiping, then the revealed action will be carried out without having to tap on it. For instance, if you swipe right, you will (probably) reveal the Archive button. Keep swiping, and the message will be swiped off the edge of the screen, into your Archive.
Swipe left, or swipe right?
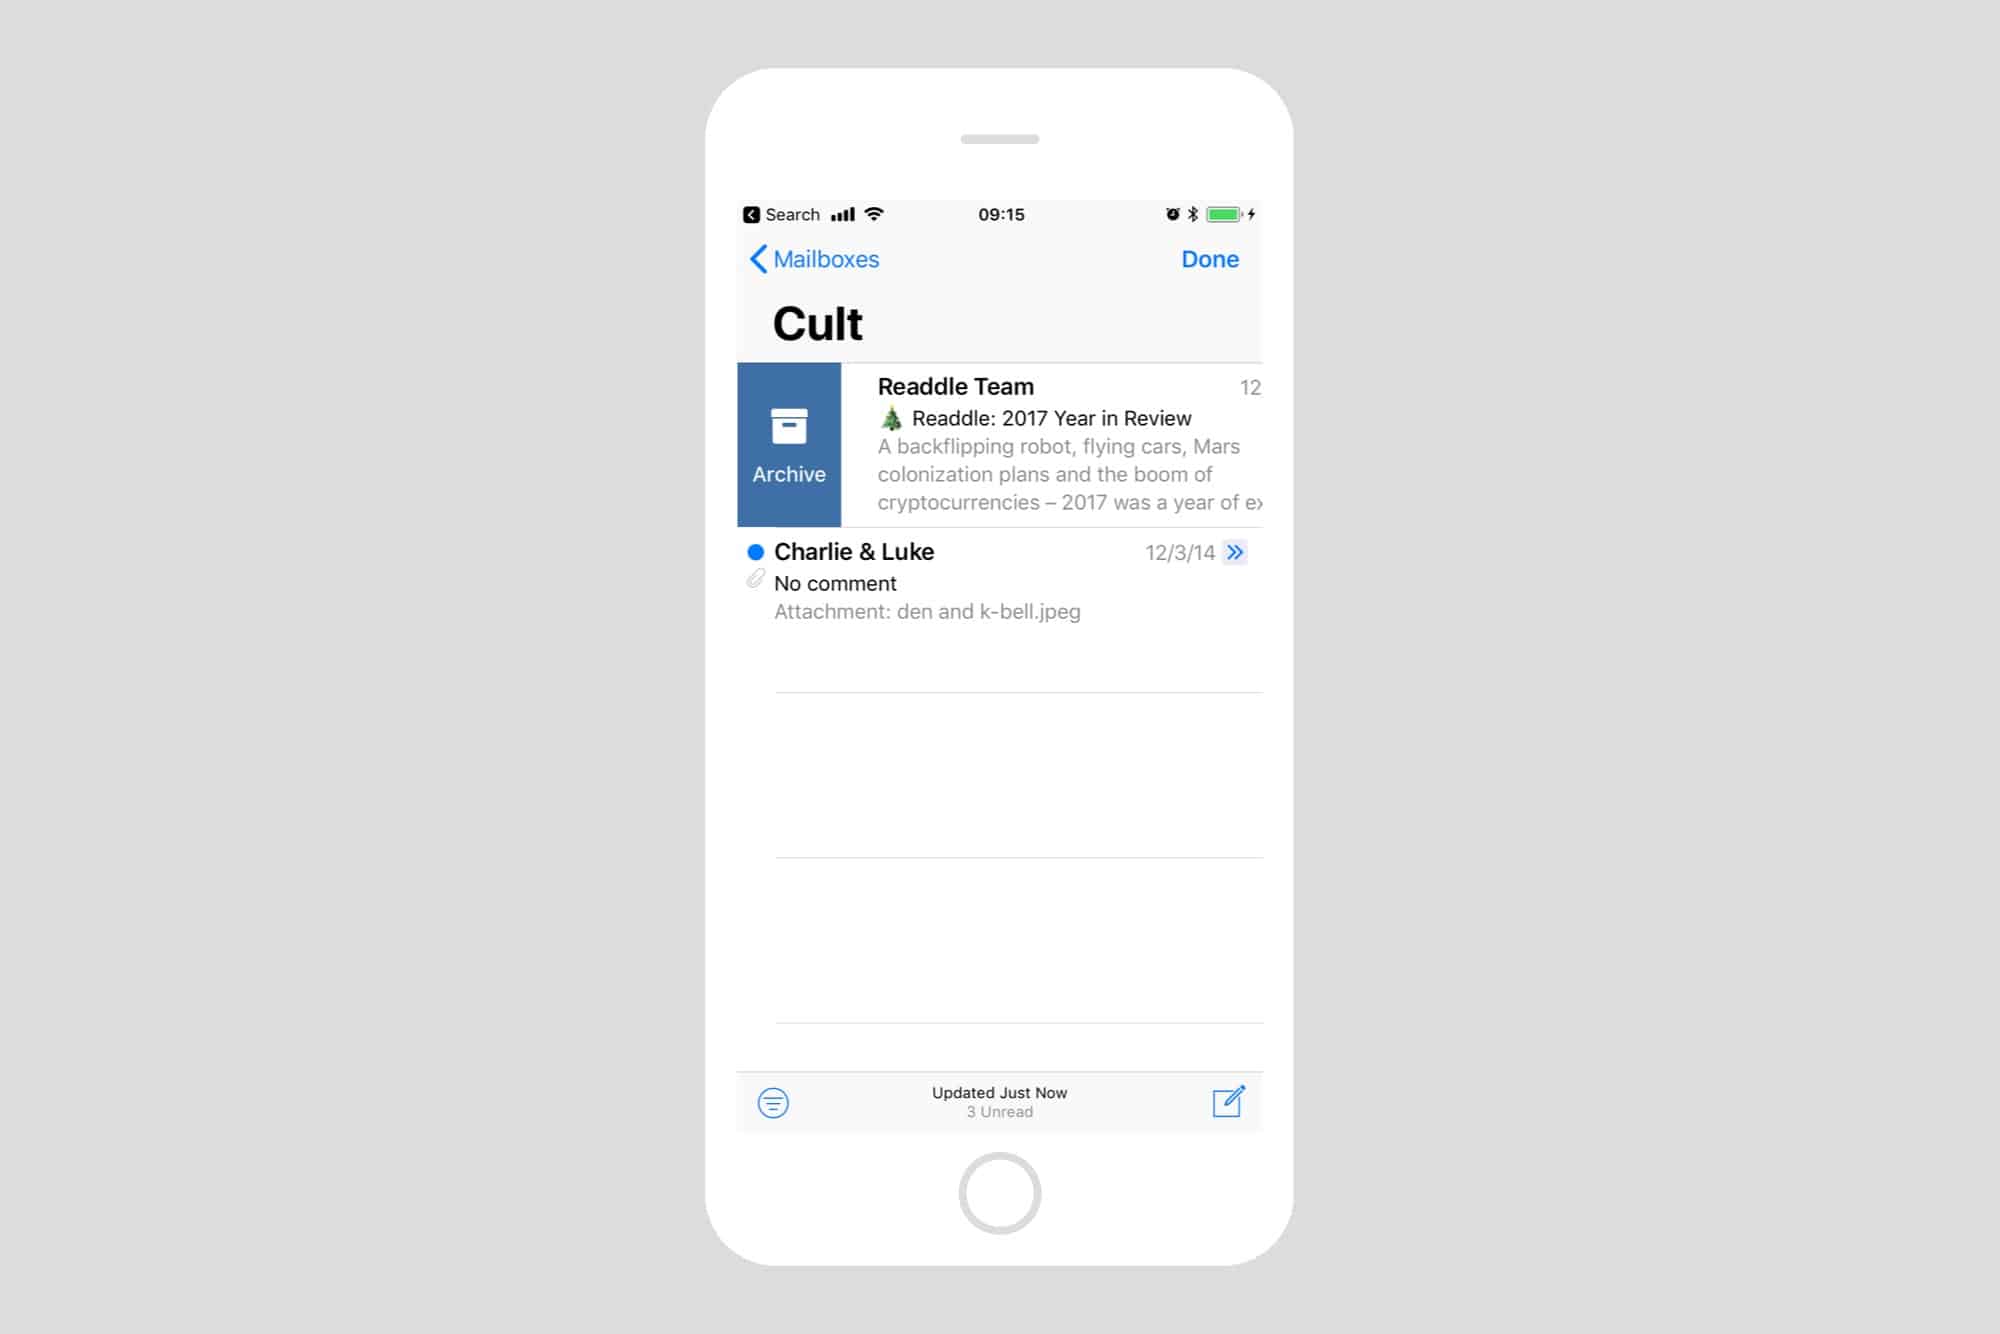
Left and right swipes aren’t equal in Mail. Swiping right brings up one single action, whereas swiping left reveals three buttons. This cannot be changed. With this in mind, it makes sense to assign the swipe-right button to an action that needs no further button presses.
For example: If you assign swipe right to Archive, then you can archive a message with a single sweep of the finger. If you set swipe right to Move, then swiping all the way left will not move the message. It will just bring up a list of destination email folders, and you’ll have to tap to select one. So, it’s a bit of a waste to use up the power slot this way.
Let’s take a look at how to customize the swipe actions.
How to customize swipe actions in iOS Mail
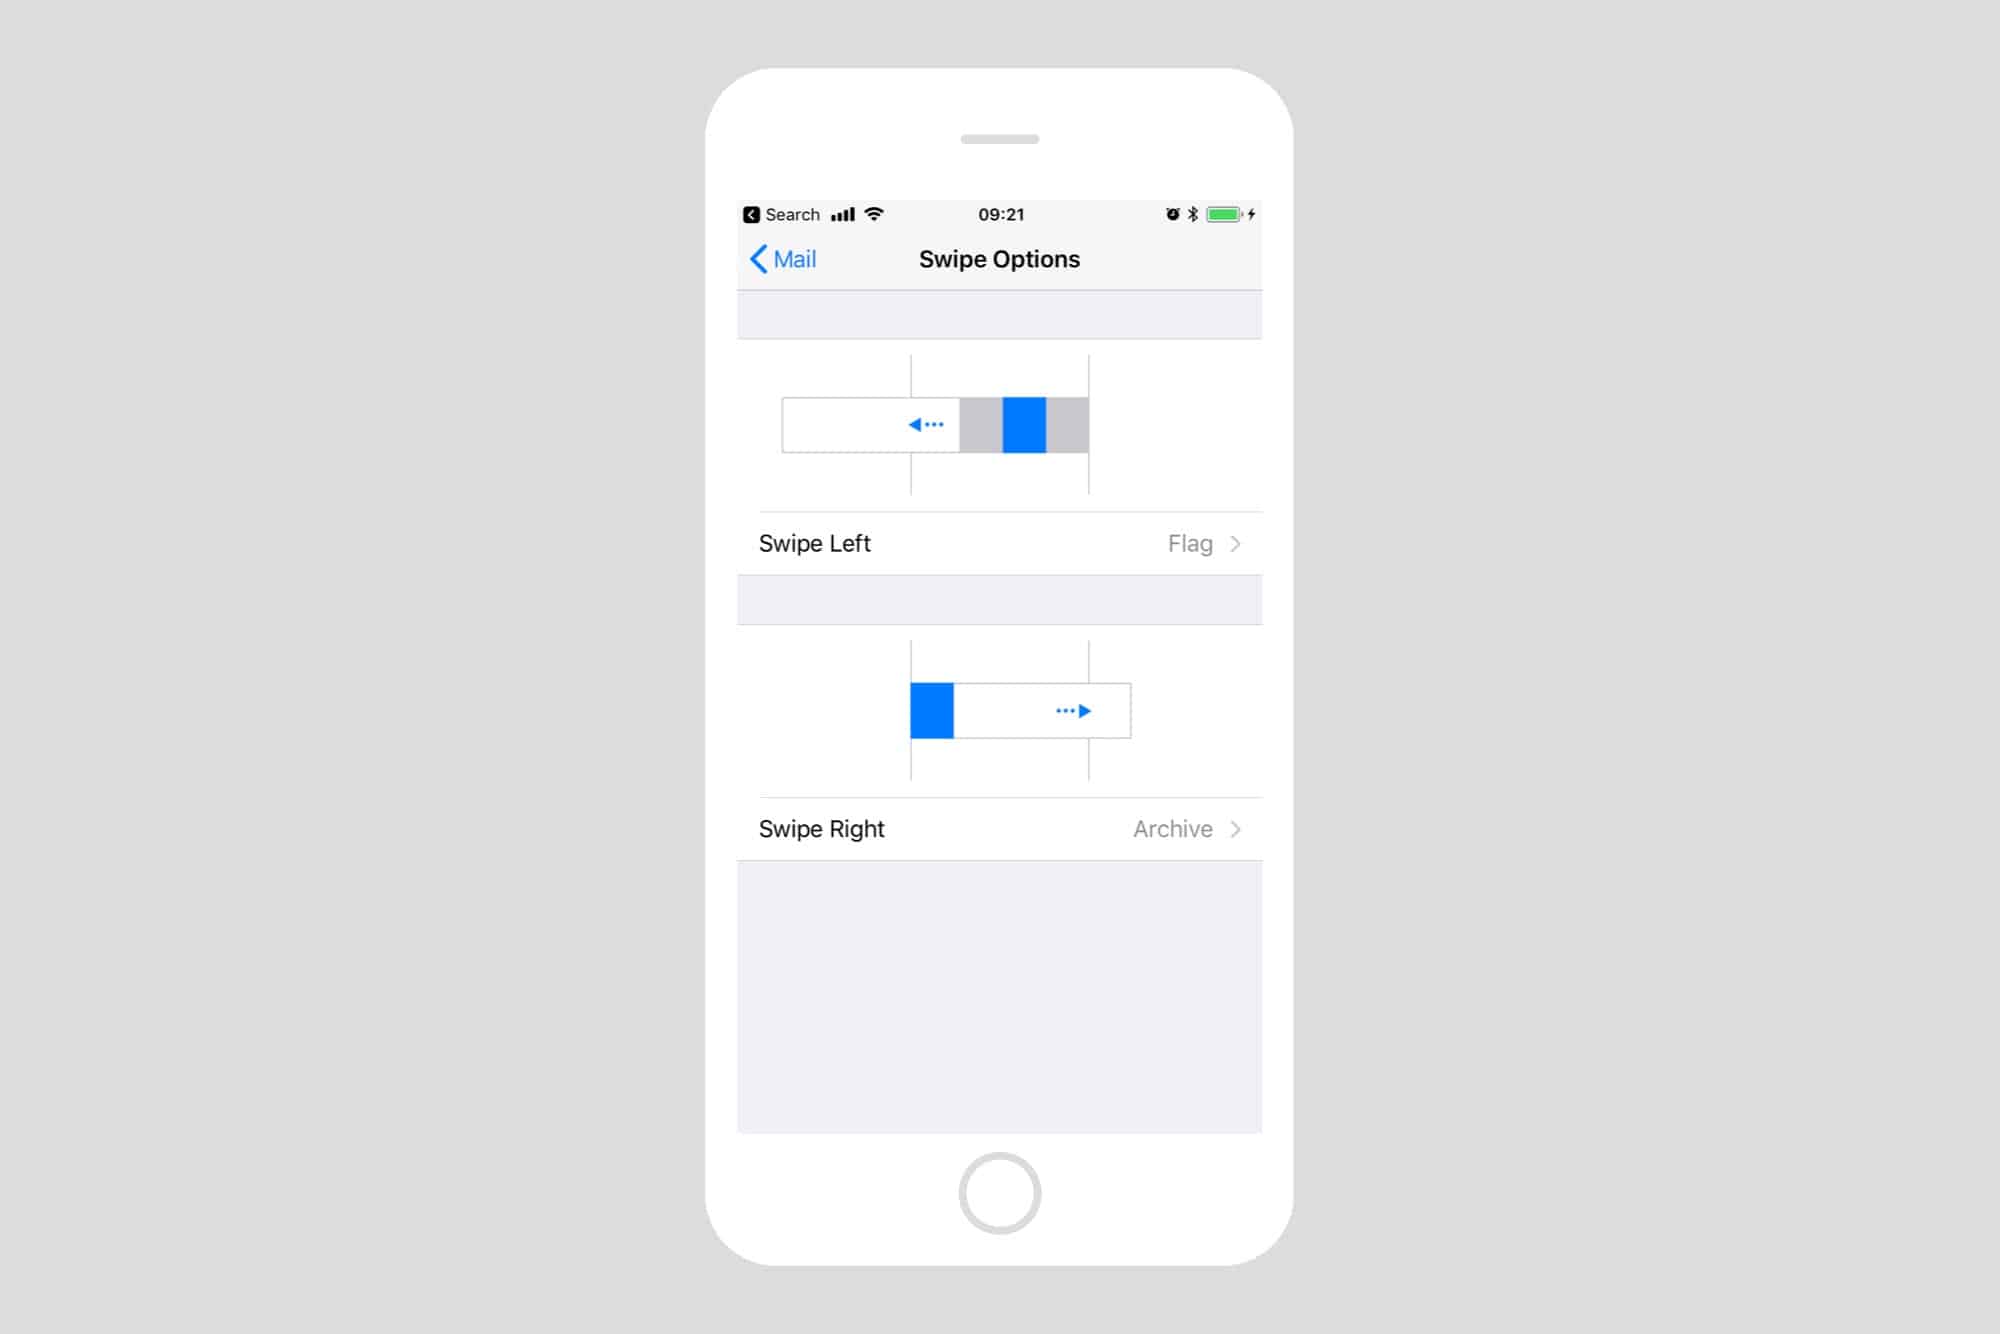
Photo: Cult of Mac
To customize the swipe gestures, head to Settings > Mail > Swipe Options. Here you’ll see options for left and right swipes. These are your choices:
- Mark…
- Flag
- Move Message…
- Mark as Un/Read
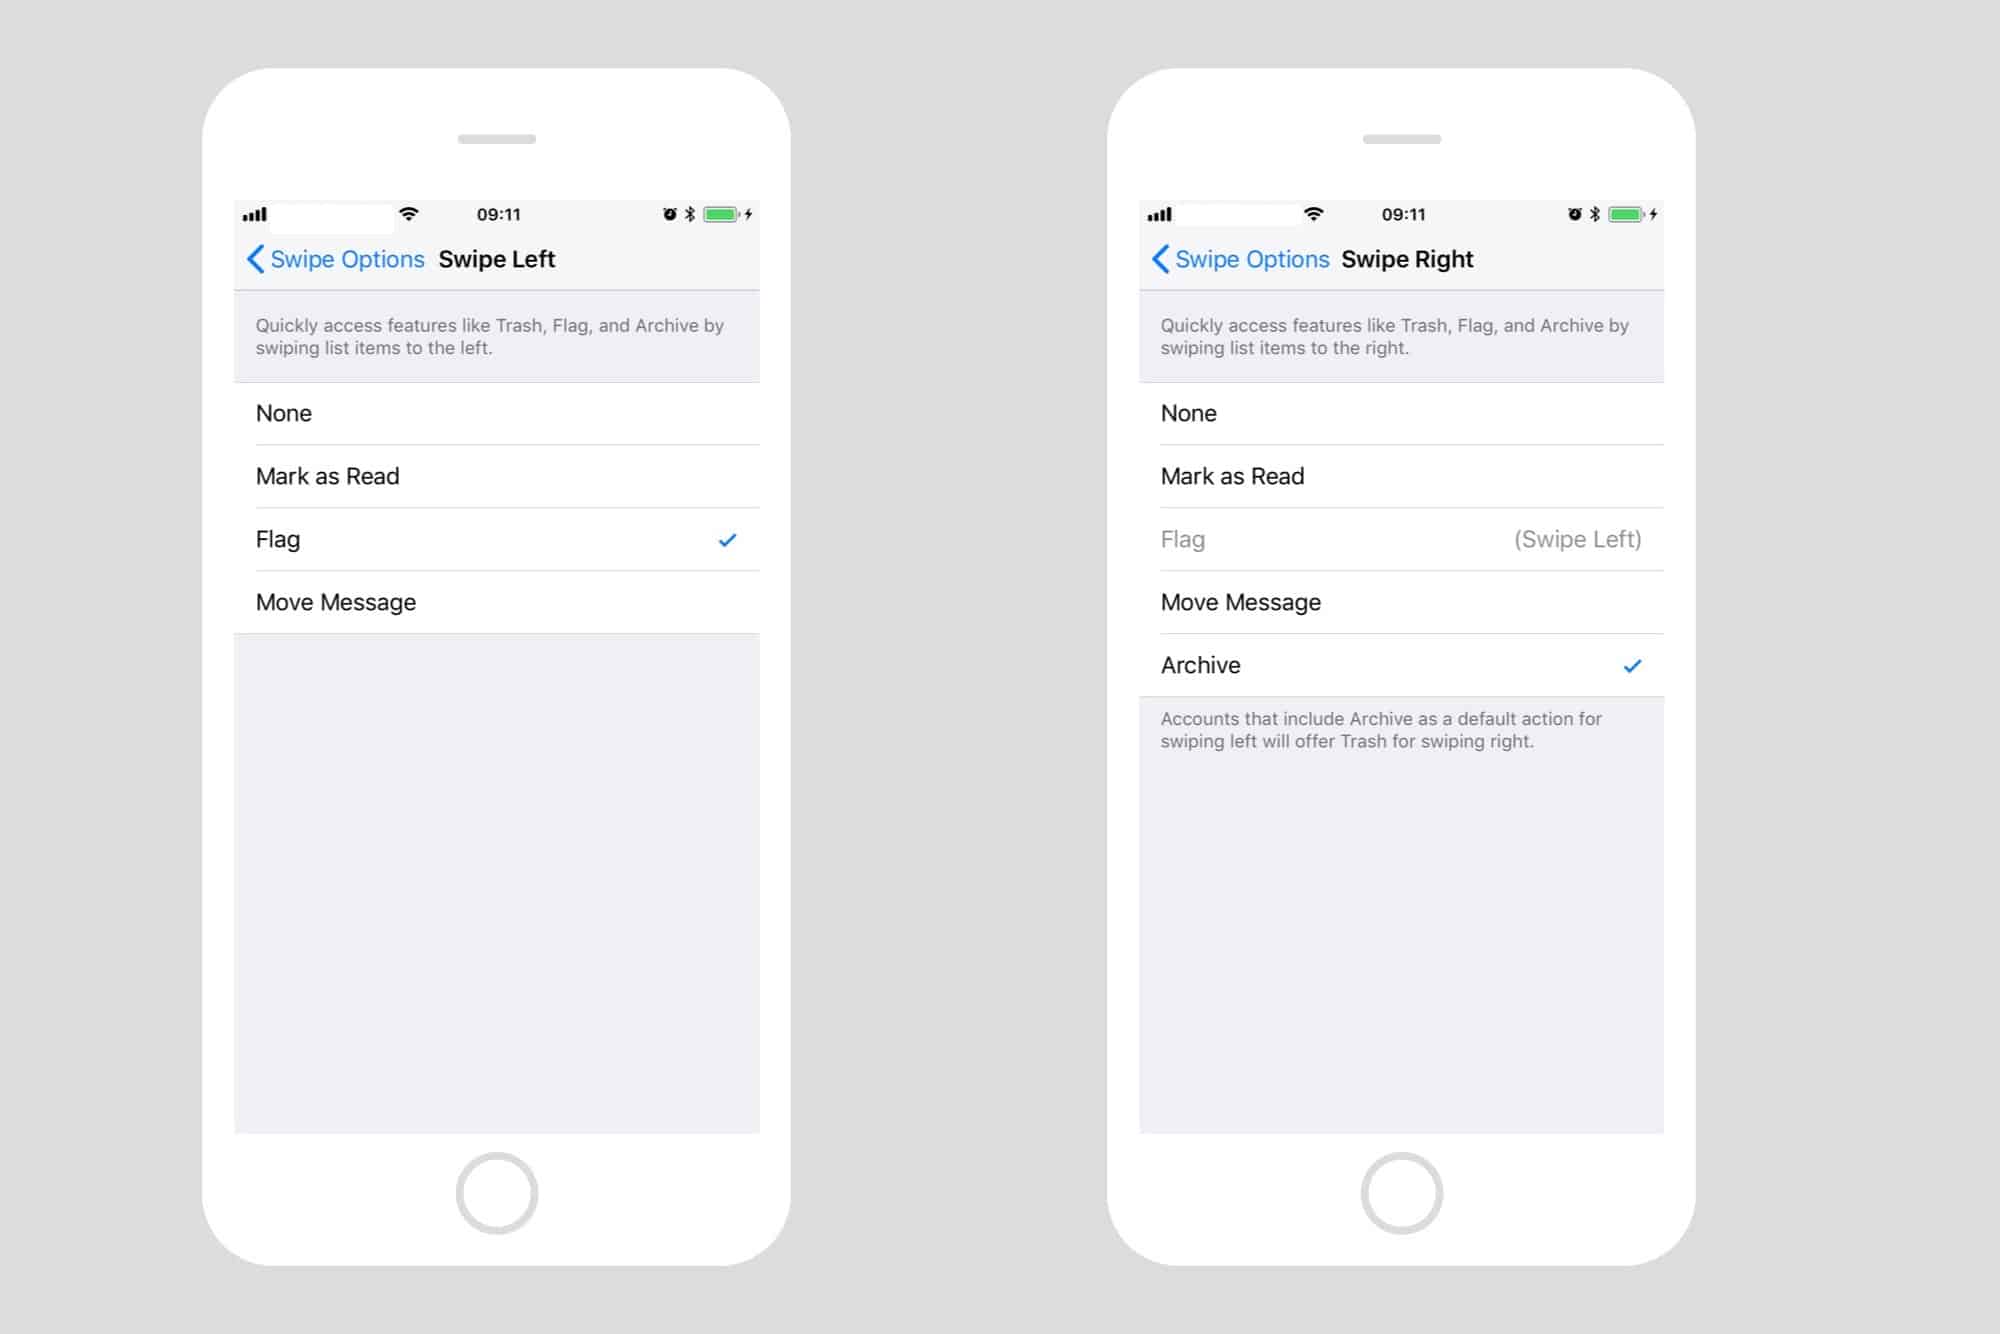 Here are your options.
Just go ahead and set them how you like. You can only set one option for each swipe direction, and iOS automatically fills in the two spare slots for the swipe left gesture. For instance, if you set Archive for swipe right, then one of the swipe left options will automatically be set to Delete.
Worth the trouble
The interactive nature of these options is a little confusing, but it’s straightforward in the end. If you’re setting this up on an iPad, then you can float the Mail app over the Settings app using Slide Over, and test your changes as you make them. I have mine set to Archive with a swipe right, and Mark Unread with swipe left. Those are my most used actions, so it makes sense to have them easily available.
It would be nice if Apple would make these options less confusing, and perhaps more customizable (setting a favorite folder for the Move action, for instance), but it’s worth persevering until you’re happy with your swipe options. It really does make processing your email way easier, and much faster.
