When you need to move files quickly between two Apple devices, AirDrop is an incredibly useful tool. It started out as a Mac-to-Mac thing, and then iPhone-to-iPhone, but with iOS 8 and OS X Yosemite, AirDrop becomes even more powerful: Now you can share files from Mac to iPhone (or iPad) and vice versa.
Here’s how.

Enable AirDrop in your devices
First, make sure you’re running iOS 8 and OS X Yosemite if you want to send files back and forth between your Mac and iOS devices. Otherwise, you won’t get the new cross-platform capability.
You’ll also need a compatible iOS device. Only iPhone 5 or later, iPad 4th generation and up, iPad mini, or the 5th generation iPod touch can do AirDrop.
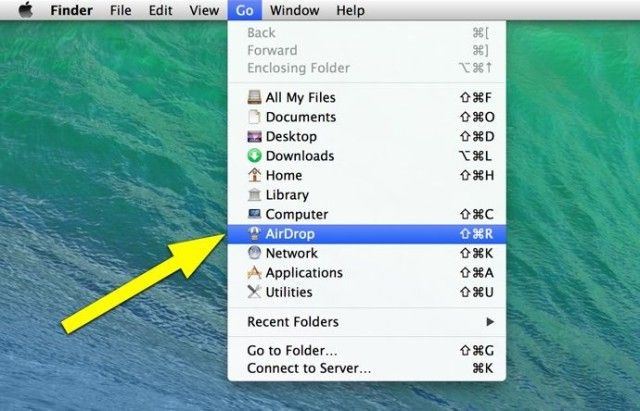
To make AirDrop work in OS X, all you need to do is click on the AirDrop icon in the Finder, or select AirDrop from the Finder’s Go menu. You’ll see your MacBook’s user icon in the lower part of the window. When another user enables AirDrop on their Mac (on the same network as you), their user icon will appear at the top.
To move files to the other user, simply drag the files to their user icon in the AirDrop window. They’ll need to approve the file transfer — as soon as they do, your file will start to move to their machine.
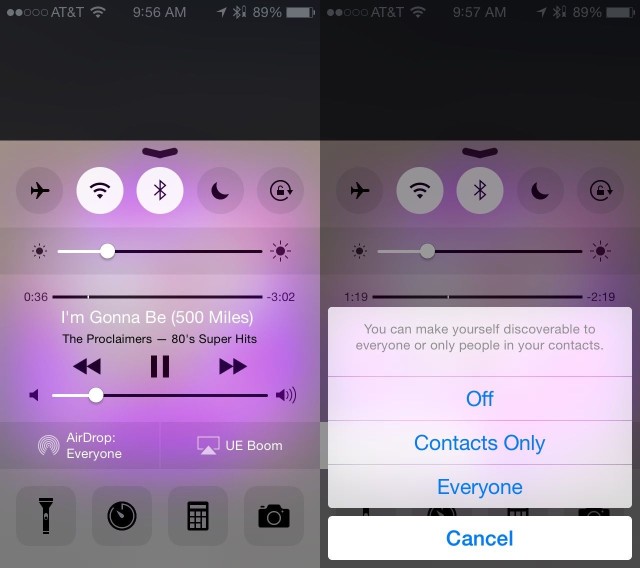
To get started in iOS 8, swipe up from the Home or lock screen to activate Control Center. Tap on AirDrop and then choose Off, Contacts Only or Everyone to decide who can see your availability when trying to share files via this system.
How to share stuff
To share from your iOS 8 device, you’ll need to be in an app that supports AirDrop. You can share stuff from apps like Photos, Safari and Contacts — I was even able to use AirDrop to send Notes to my MacBook Pro. All you do is tap the Share button in any of those apps, and see if there’s an AirDrop option. You’ll either see a generic AirDrop icon, meaning that no one is in range of your iOS device, or you’ll see the user picture and name of people around you with iOS 8 or OS X Yosemite AirDrop sharing enabled.
In the Photos app, for example, you can share more than one photo at a time. You can select more than one and then hit the Share button, or you can share from a single photo or video and subsequently choose more to send with a tap on the thumbnails that appear above the AirDrop sharing option.
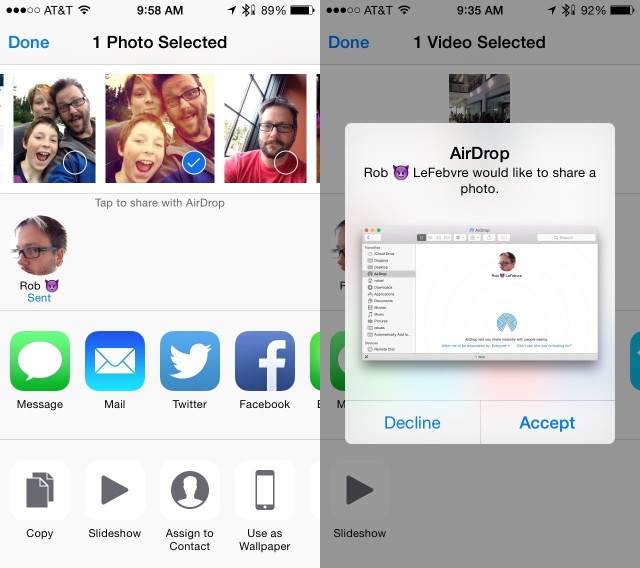
Once you’ve selected the files from your iOS device, tap on the icon of the person you’re sharing with. If you’re sending to a Mac, make sure the Mac has an AirDrop window open in the Finder. It doesn’t need to be active or in front, but it does need to be open. If sending to another iOS device, be sure the receiving iPad or iPhone has AirDrop enabled and it’s set to Everyone or Contacts Only (if you’re a contact).
Once you tap, your iOS screen will show that it’s Waiting, Sending and then Sent. A little blue progress line will go around in a circle outside the person’s AirDrop icon as well.

Incoming!
On the receiving Mac side, you’ll see a notification pop up. Mine even makes a little beeping sound to let me know I’m getting a file.
On the iOS side, the receiving user will need to Accept or Decline the file you’re sending. The file you send will open in the app that file type is associated with. In other words, if you send a photo, it will open in Photos; send a website, it will open in Safari.
It’s all very simple, which is Apple’s whole point here — why spend all your time configuring networking settings when you can just tap and send a file?
