Musicians who can’t read sheet music play by ear. What about a photographer who doesn’t fully understand the science behind imaging software?
That’s me and I’d call myself a fiddler. When it comes to toning an image in Adobe Photoshop, I don’t analyze the spikes on a histogram or adjust pixel color values. I fiddle with a picture until it looks right.
Macphun seems to design photo imaging programs with my brain in mind. Its newest app, an all-in-one program called Luminar lets photographers of all levels quickly improve the look of a photograph without even knowing how certain tools work.
Drag an image over the Luminar icon and fiddle away with a series of slider bars to adjust things like brightness or select a preset look to give a photo a style that looks like it took hours to achieve.
While a beginner can easily start toning and stylizing photos with a simple click or two, Luminar also has the sophistication and power professional photographers come to expect from software like Photoshop and Lightroom.

Photo: David Pierini/Cult of Mac
Macphun has been creating imaging software since 2008 and has a number of individual programs to deal with specific areas of photo finishing – like toning in black and white or for high dynamic range – and certain challenges, like removing digital noise from photos shot in low light or eliminating objects in a frame.
The number of Macphun software users is more than 35 million and made only for Mac users.
Macphun’s designers are definitely inspired by Apple’s insistence on simplicity and intuitive user interfaces. Each Macphun program, including Luminar, achieve both.

Photo: David Pierini/Cult of Mac
Luminar has more than 35 customs filters with built-in visual tips to help users improve the look of a picture, 50 one-click presets, selective masking tools to edit portions of a frame, noise reduction, and object removal tools, batch processing, and RAW file support (read about the latest Luminar software update here).
Luminar has the muscle to be the only photo editing app you need, but can also be used alongside Apple Photos, Photoshop, Lightroom, and Aperture. New MacBook Pro users will be able to access many of Luminar’s features on the Touch Bar.
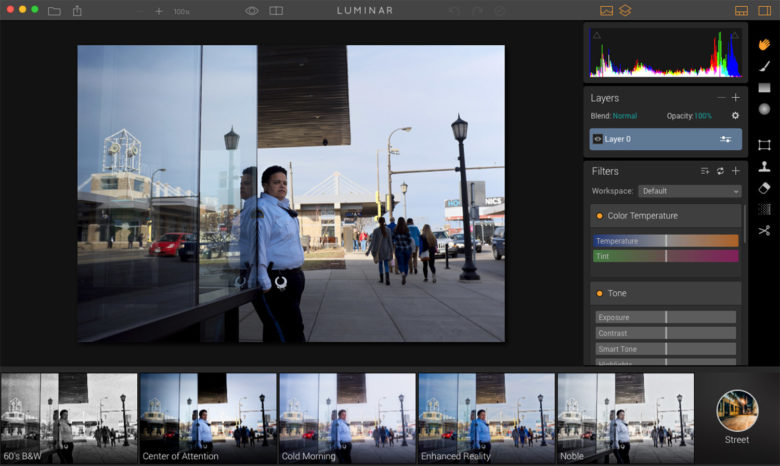
There are helpful video tutorials on the website from pros who use it, but there is no need to guess where to begin. Once the photo is in Luminar, it appears in the center of a screen that has controls for exposure, contrast, color temperature, saturation, vibrancy and the like on the right.
Don’t really understand those qualities? Just use the slider bar to see what each tool does to your photo.
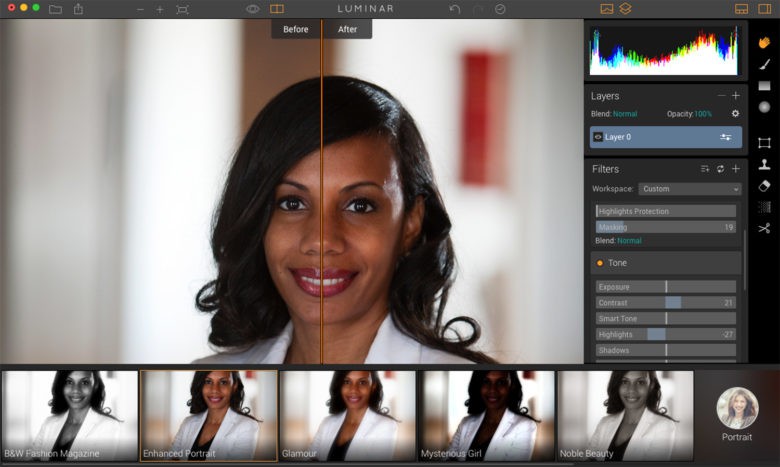
But likely, a beginner may be tempted first by the bar that runs along the bottom, showing different versions of the photo. One may have darker shadows or warmer highlights or a clear boost in the vibrancy of colors. You don’t have to commit to the look 100 percent. Clicking on one particular look also brings up a slider bar that lets you dial back the intensity of the filter.
A click on a circular avatar to the right of those images will bring up specific presets for portraits, outdoor shots, travel and a category called dramatic.
The pictures in the gallery of variations change with each preset category and each look has a strange name – like Bloody Mary, Artistic Cooper Strong, Mysterious Girl and Dark Moon – similar to the filters on Instagram.

Photo: David Pieirini/Cult of Mac
Don’t get caught up trying to figure out why the filter has a certain name. Like Instagram, just click on it to see if you like how it makes your photo look.
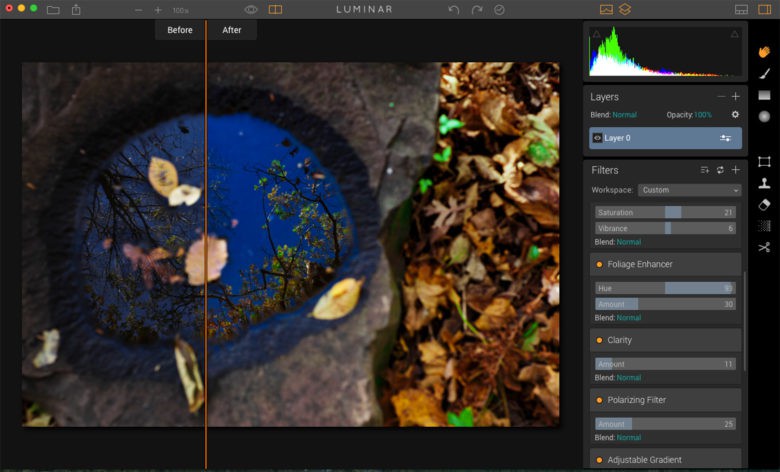
One tool I find very useful is called “Compare.” It draws a line down the center of your photo and lets you drag it back and forth to see the before and after looks.
The Compare tool was particularly illuminating to me because I put images previously worked on in Photoshop through Luminar to test it. In many cases, the line showed me the difference between dull and pop.
I am not advocating photographers skilled in Photoshop switch to Luminar. I think Photoshop is powerful and fantastic and I am envious of some of my friends who are true artists, both in-camera, and post-production, and understand how to use Photoshop to clarify their photographic vision.

Photo: David Pierini/Cult of Mac

Photo: David Pierini/Cult of Mac

Photo: David Pierini/Cult of Mac
To my surprise, the fiddling I’ve done in Luminar with those slider bars has made me a better technician in Photoshop. I like it as a companion to what I do with Photoshop.
It’s hard to explain, but I give Luminar credit for opening a part of my brain that struggled with Photoshop. I guess it’s like new math, a different approach to an equation to better understand the outcome.
![Photo app Luminar blends power and simplicity [Review] Luminar will help you replace the picture you took with the picture you saw.](https://www.cultofmac.com/wp-content/uploads/2016/12/Luminar001.jpg)

