Most of use just use the fonts that come supplied with the iOS apps we use every day. If you use Pages, you get a ton of built-in typeface options. But what if you use a notes app by a smaller developer that hasn’t licensed a bunch of fonts for their app? What if you have a favorite font, or even a font you designed yourself, that you want to use on your iPhone or iPad? Or maybe you opened up a Microsoft Word document in Pages and got the dreaded “missing font” warning?
Then there’s good news, because you can quite easily install fonts on your system, and they can be used by any app that supports them.
Fonts and iOS
On the Mac, we have the built-in Font Book app to manage fonts. In the olden days, we had apps like Suitcase that would enable and disable fonts on the fly as needed, in order to save your Mac’s precious resources. If you installed the wrong font, or a bad, corrupted font, your whole computer might stop working, or perhaps the menus on your Mac would turn to gibberish.
There’s none of that in iOS, and frankly, installing fonts is a bit of a kludge. but it works perfectly well. There are two ways to install a font on iOS. One is to install it “system-wide,” so that it can be used by any app on your device. The other is to install the font only in the app you’ll use it in. Clearly this latter option seems less flexible, but it might be a lot easier. Let’s check that one first, using the Ulysses, the best text editor on Mac and iOS.
How to install a font in Ulysses
This one is dead easy. Ulysses has support for loading custom fonts, so all you have to do is get that font onto your device, and then choose the Open in… option in the share sheet.
Step 1. Add a font to your device. Either download the font using Safari and save it onto the Files app, or drop it into Dropbox or an iCloud Drive folder on your Mac.
Step 2. Open the font in Ulysses. It’ll look like this:
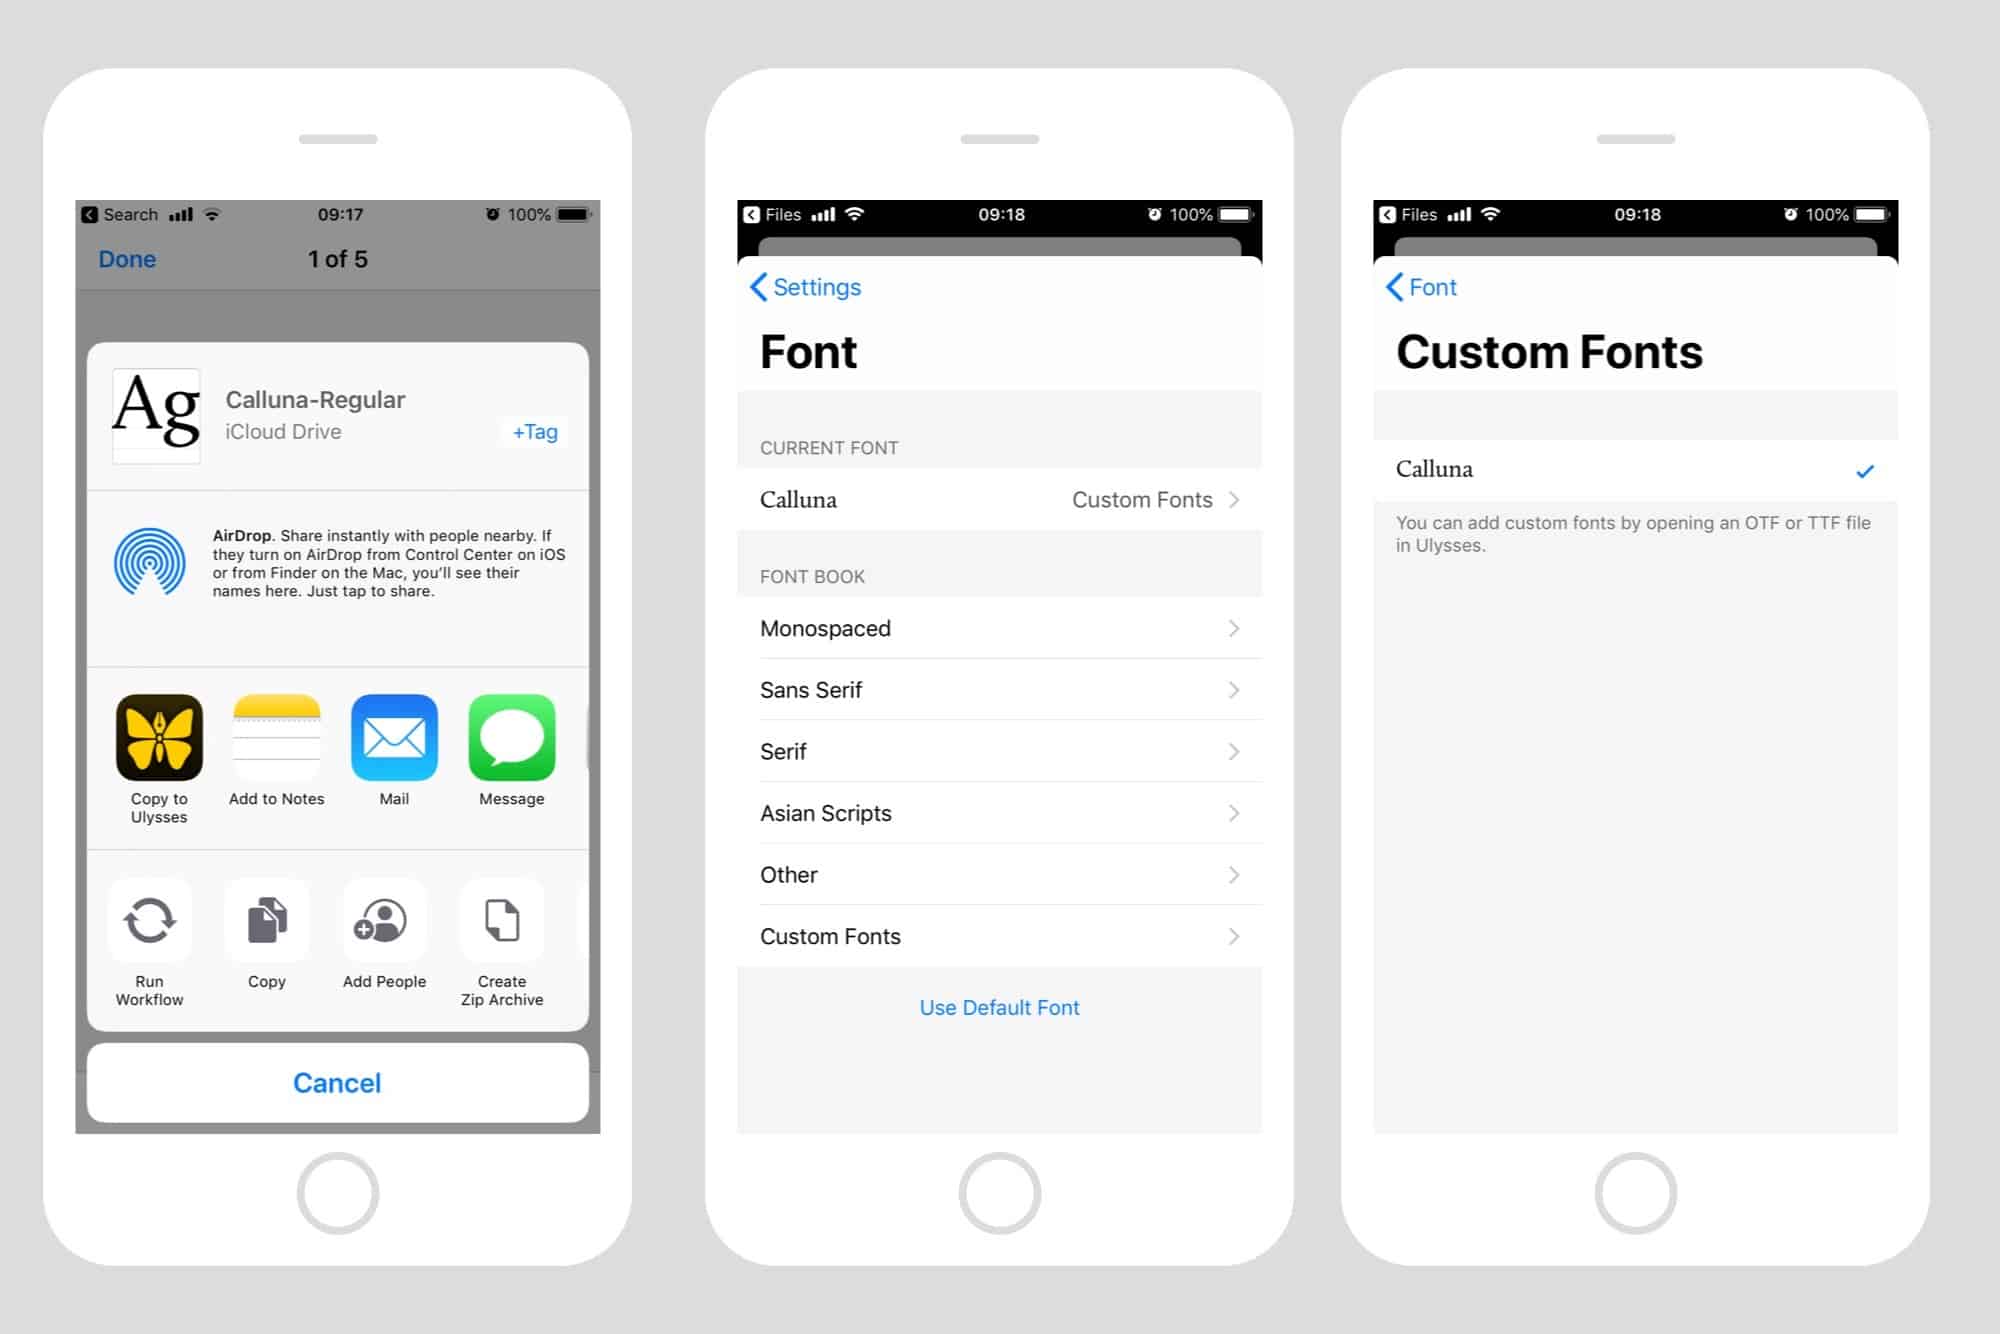
Photo: Cult of Mac
Step 3. Choose that font in Ulysses font picker. Any fonts you add to Ulysses will be automatically stored in the Custom Fonts section of the regular font picker, so you can choose them just like any other.
And that’s it. The advantage of doing it this way is that it’s easy, and you don’t need to use any extra apps. The downside is that the font is only available inside Ulysses, or whatever other app you find that allows installation of custom fonts.
How to install a font system wide in iOS
To install a font and make it available system-wide, along with all the built-in fonts, you have to create a “configuration profile,” just like you’d use if installing a VPN, or if you were testing a beta version of iOS on your device. You don’t have to create this yourself, though. Instead, you grab yourself a font management app from the App Store, and this does the hard work for you. Be aware, though, that you should trust the vendor of this app, because it is system profiles can change all kinds of settings on your device.
For demonstration purposes, I’m using free-to-download app called iFont, which costs $0.99 if you want to remove the super-annoying ads.
Installing a font on with iFont
iFont has lots of nice font-related features, including previews, the ability to import whole font families at once inside a zip archive, and more. But today we’re interested in installation.
To install a font with iFont, you open the app, and then switch to the Files browser. Or you can use the Open in… method direct from the File for Dropbox apps, just like with Ulysses. Then you just tap on the Install button next to the font, and follow along. There are several steps, but they all follow each other automatically, so all you have to do is tap some buttons, agree to some questions, and enter your password. See, I told you installing them into Ulysses was simpler.
Here are a few screenshots of the process:
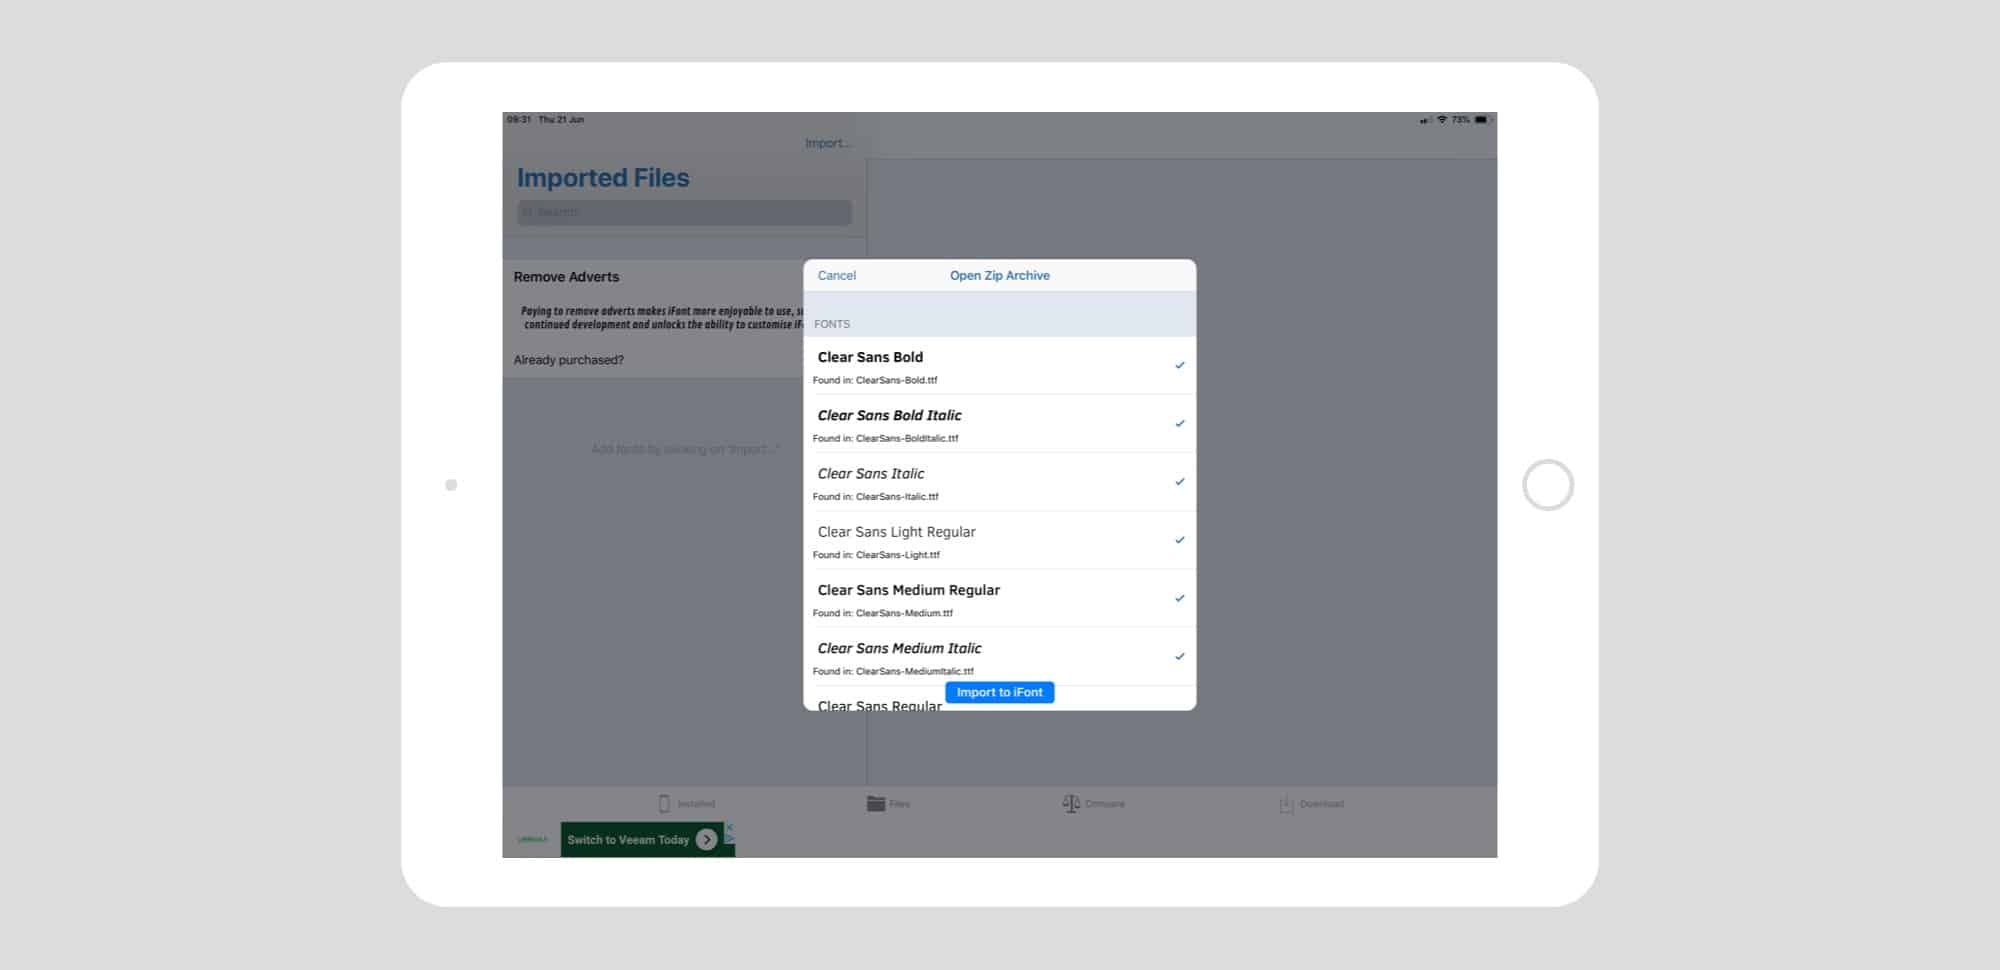
Photo: Cult of Mac

Photo: Cult of Mac
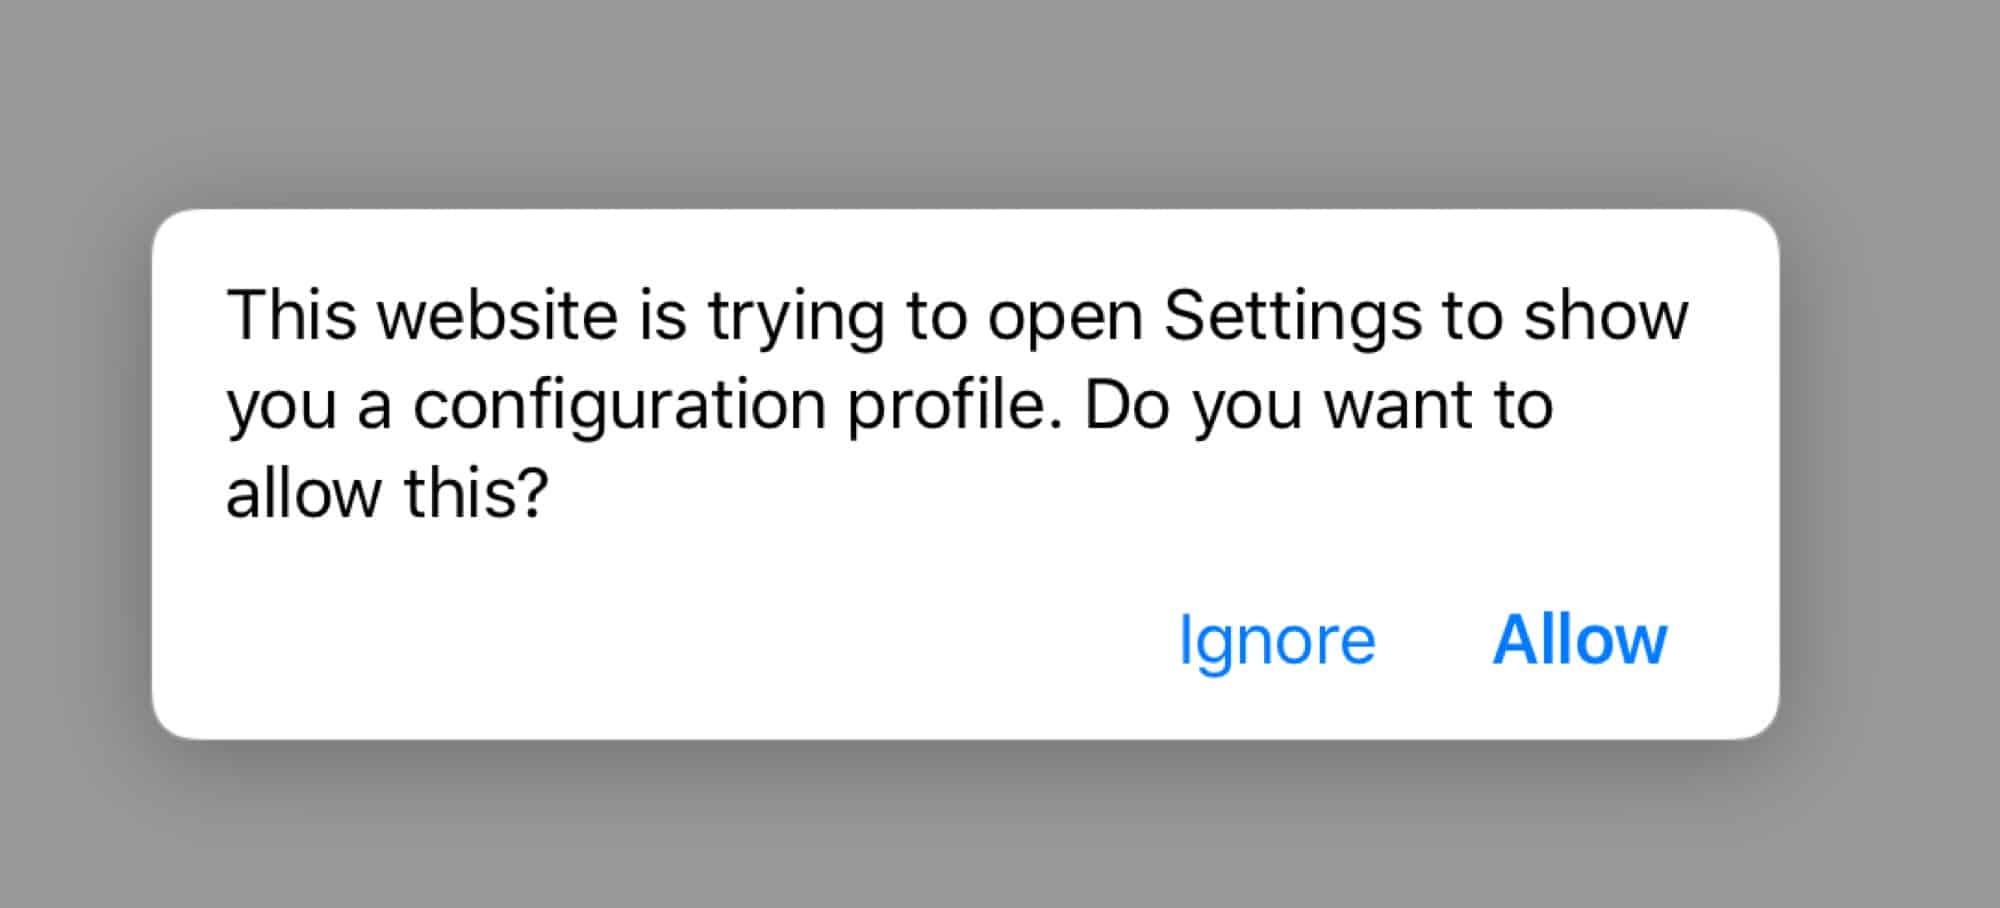
Photo: Cult of Mac

Photo: Cult of Mac
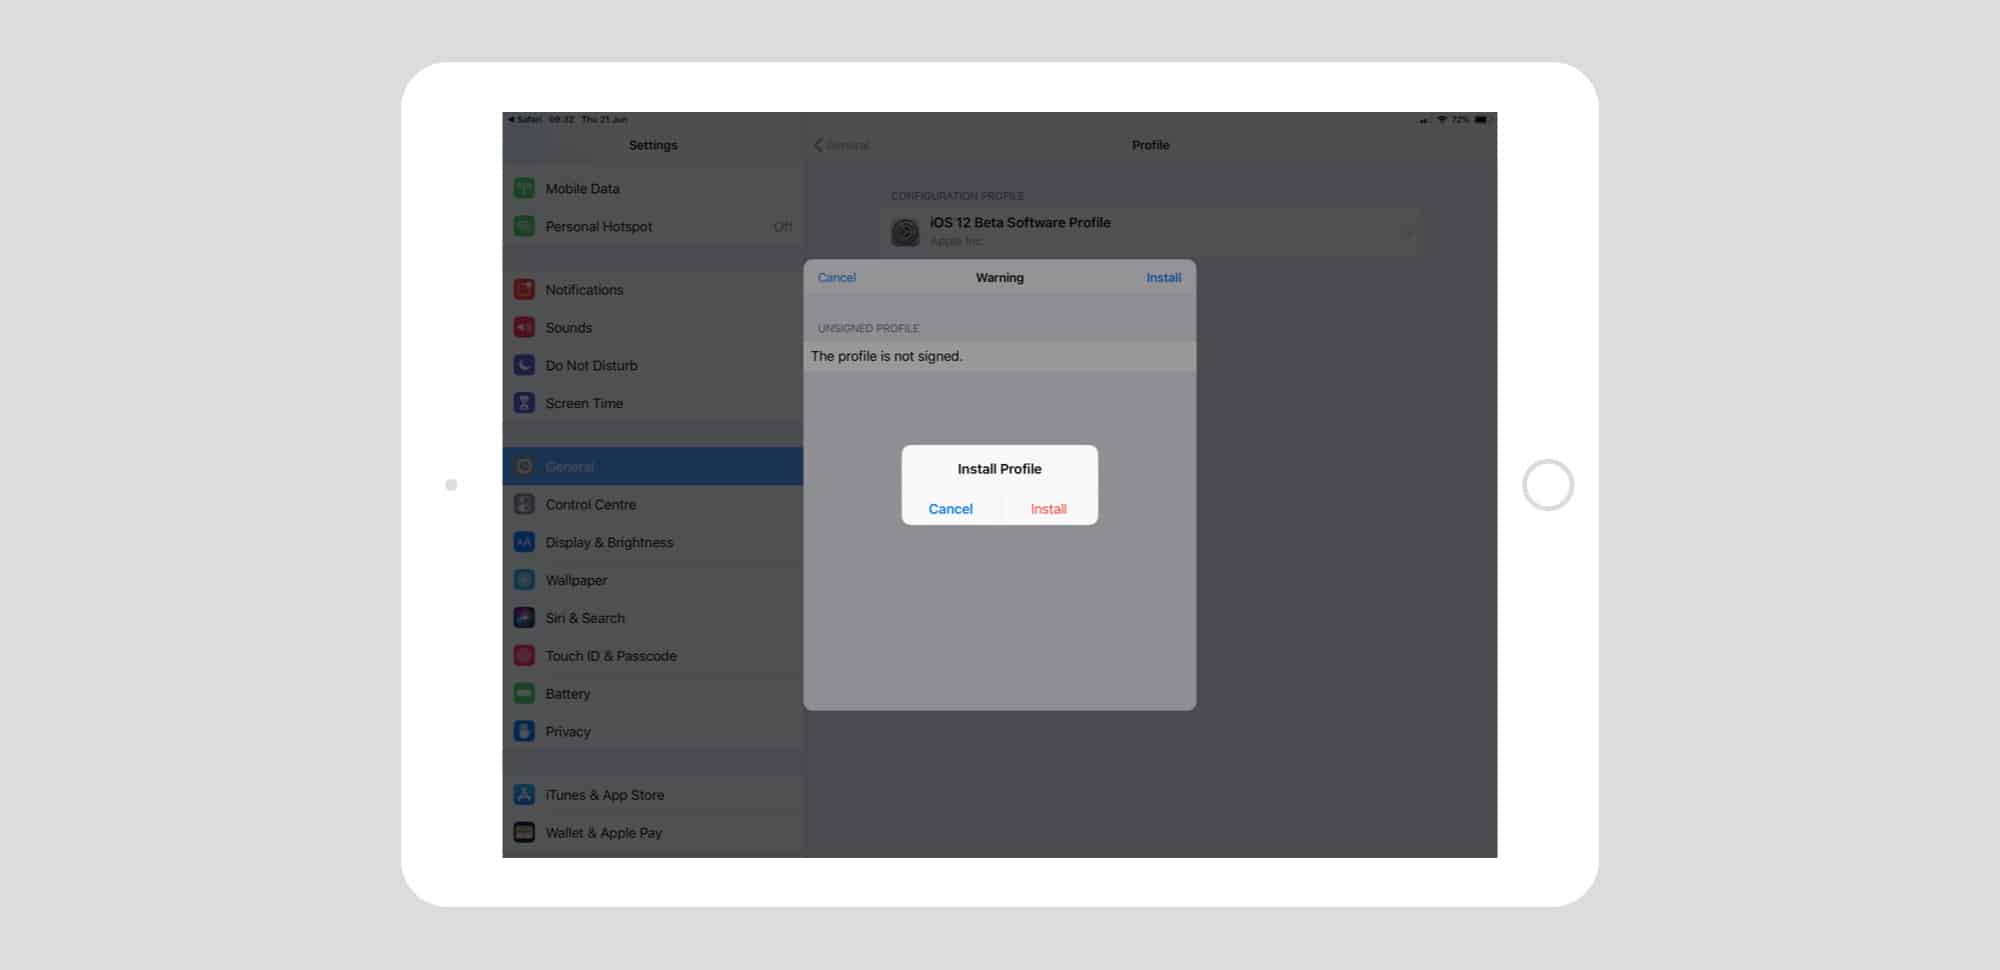
Photo: Cult of Mac
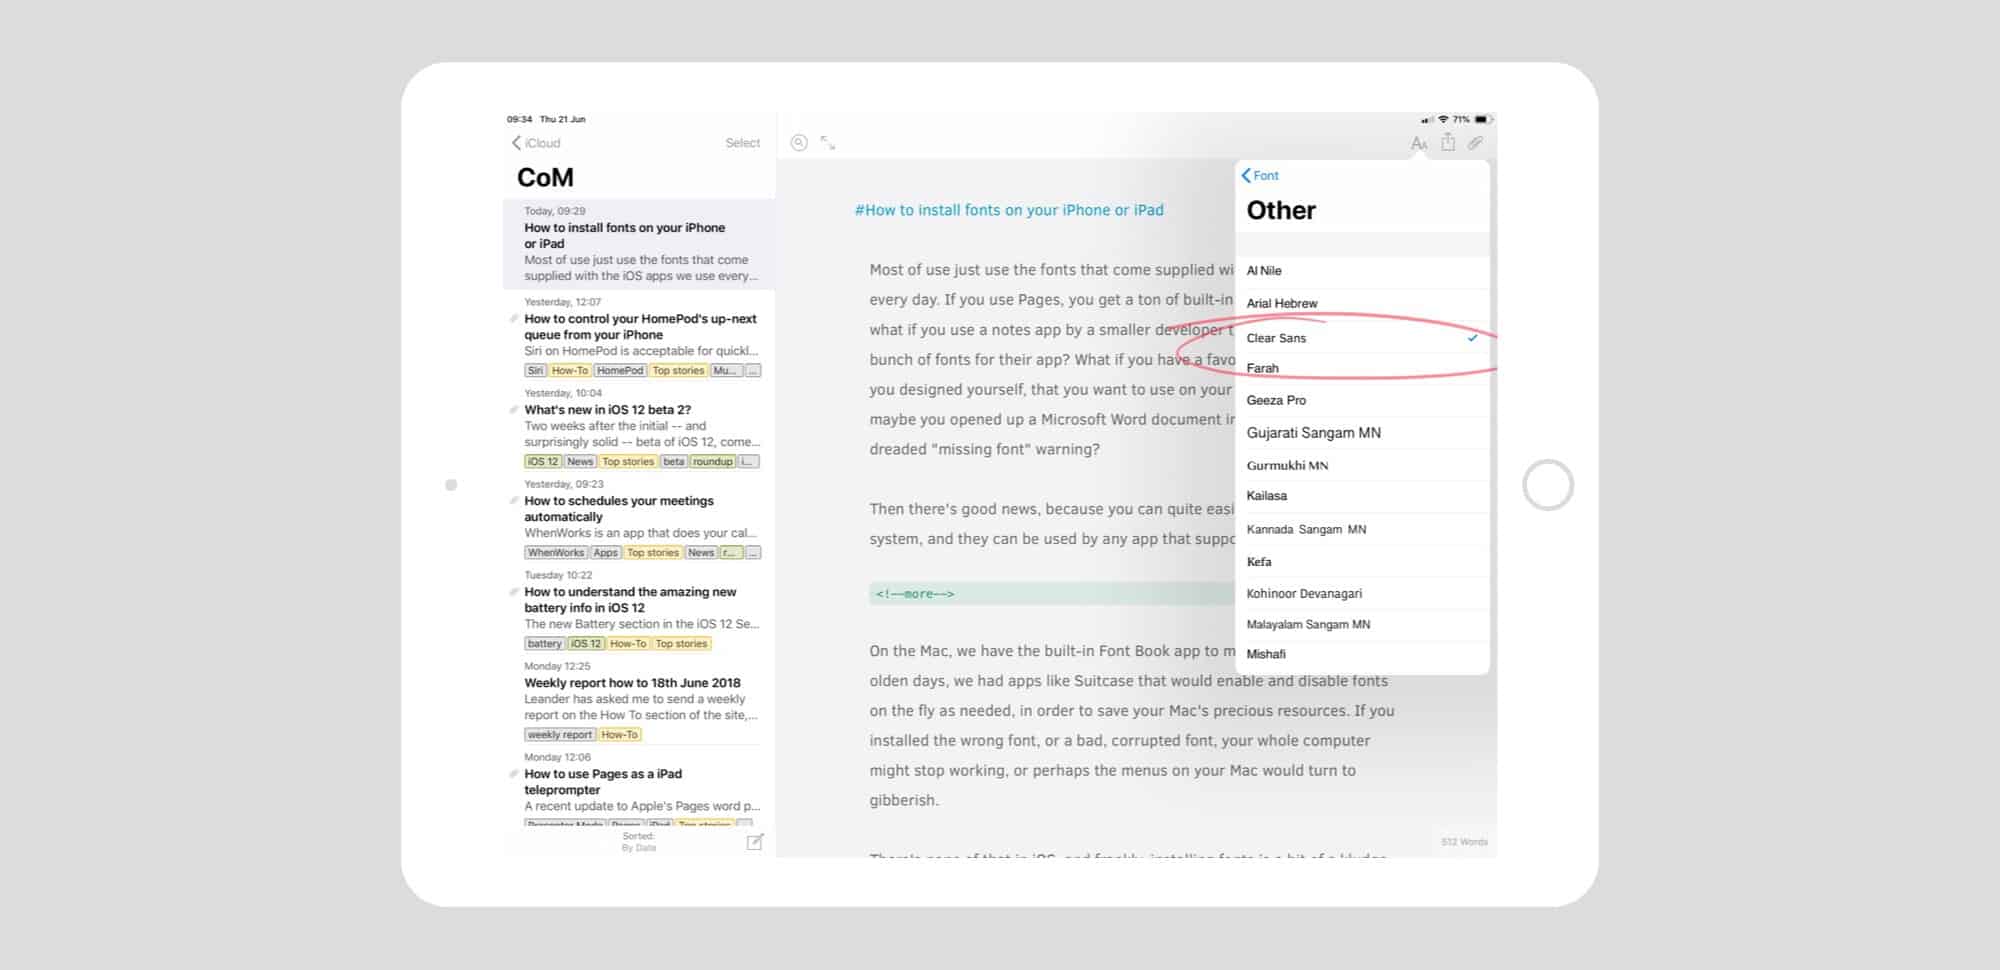
Photo: Cult of Mac
How to uninstall a font from your iPad or iPhone
After you’ve installed a font with iFont, or another app, you can use it in any app on your device, including Pages and the rest of the iWork suite. To remove a font, you just have to delete its configuration profile. This is done in the Settings app, under Settings>General>Profiles. Just tap the one you want to uninstall, and then tap Remove Profile to remove it. Enter your password and follow the prompts, and you’re done.
Installing fonts onto iOS is similar to installing them in the early days of Mac OS X. It’s risky, it’s a pain, and it leave a mess. But despite that, I’m glad it’s possible, because it also lets you do fancy design work if you want, or just to decorate your favorite text editor so you feel more at home.
