 One of my favorite features of the Google Maps app is its ability to save offline maps on iPhone. Whether you want map access regardless of cell reception or you’re traveling abroad and won’t have a data connection, Google Maps is king. Even better, it costs you absolutely nothing.
While I enjoy Apple Maps’ built-in integration as much as the next person, there’s no denying there are certain times when Google Maps just can’t be beat. For me, the two big ones are transit directions and offline maps.
Google Maps is absolutely free. If you don’t have it already, you can download it here:
- Google Maps – Free – Download
I frequently save offline maps on iPhone with Google Maps when I’m traveling to a new area I’m unsure of. Even if I have a foreign SIM in another country, subway tunnels and streets with abnormally tall buildings are often dead spots for cell service. Google Maps allows you to get driving directions and to view maps in detail that you’ve saved offline. For this reason, I download areas beforehand so I’m always covered. Here’s how:
How to save offline maps on iPhone with the Google Maps app
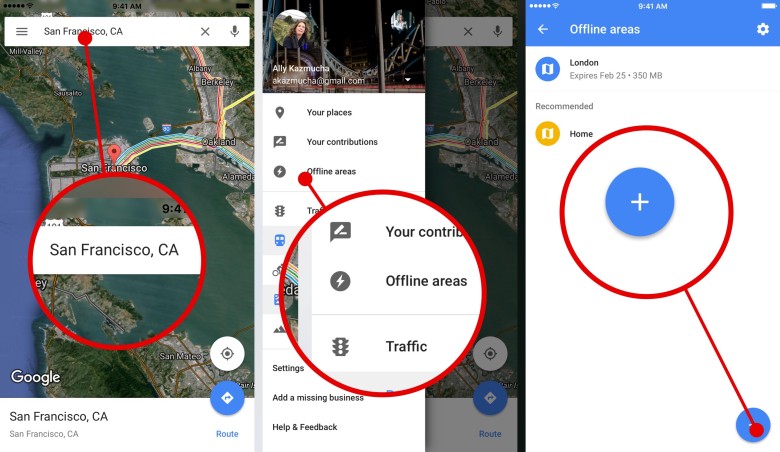
- Launch the Google Maps app and search for the area you want to save.
- Tap on the menu button and choose Offline areas.
- Tap on the plus button in the lower right corner.
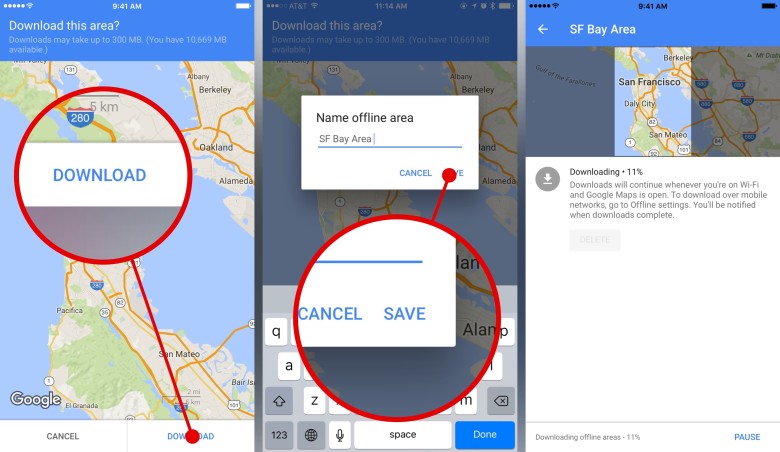
- Pinch and zoom the area to fine tune what you’d like to save. (Zooming in to only what you need will conserve how much storage space you’re using.)
- Tap on Download.
- In the popup menu, give your area a unique name and tap Save.

Photo: Ally Kazmucha/The App Factor

Photo: Ally Kazmucha/The App Factor
That’s it. Google Maps will save the area you have selected. You can use Google Maps in the areas you’ve saved in the following ways:
- Driving directions
- Search for points of interest, businesses, and locations in the downloaded area
- Zoom in and out for greater detail and to view points of interest in closer detail
Here’s what you can’t do with Google Maps offline:
- Walking directions
- Transit directions
Since it’s impossible to pull in road conditions, construction, and transit outages while offline, the above two features are not available for offline maps.
Even so, I’ve still found it useful for zooming in and finding the closest stations when I need transit, which in most cases, will be good enough for most people, at least until you can get cellular reception or get Wi-Fi access.
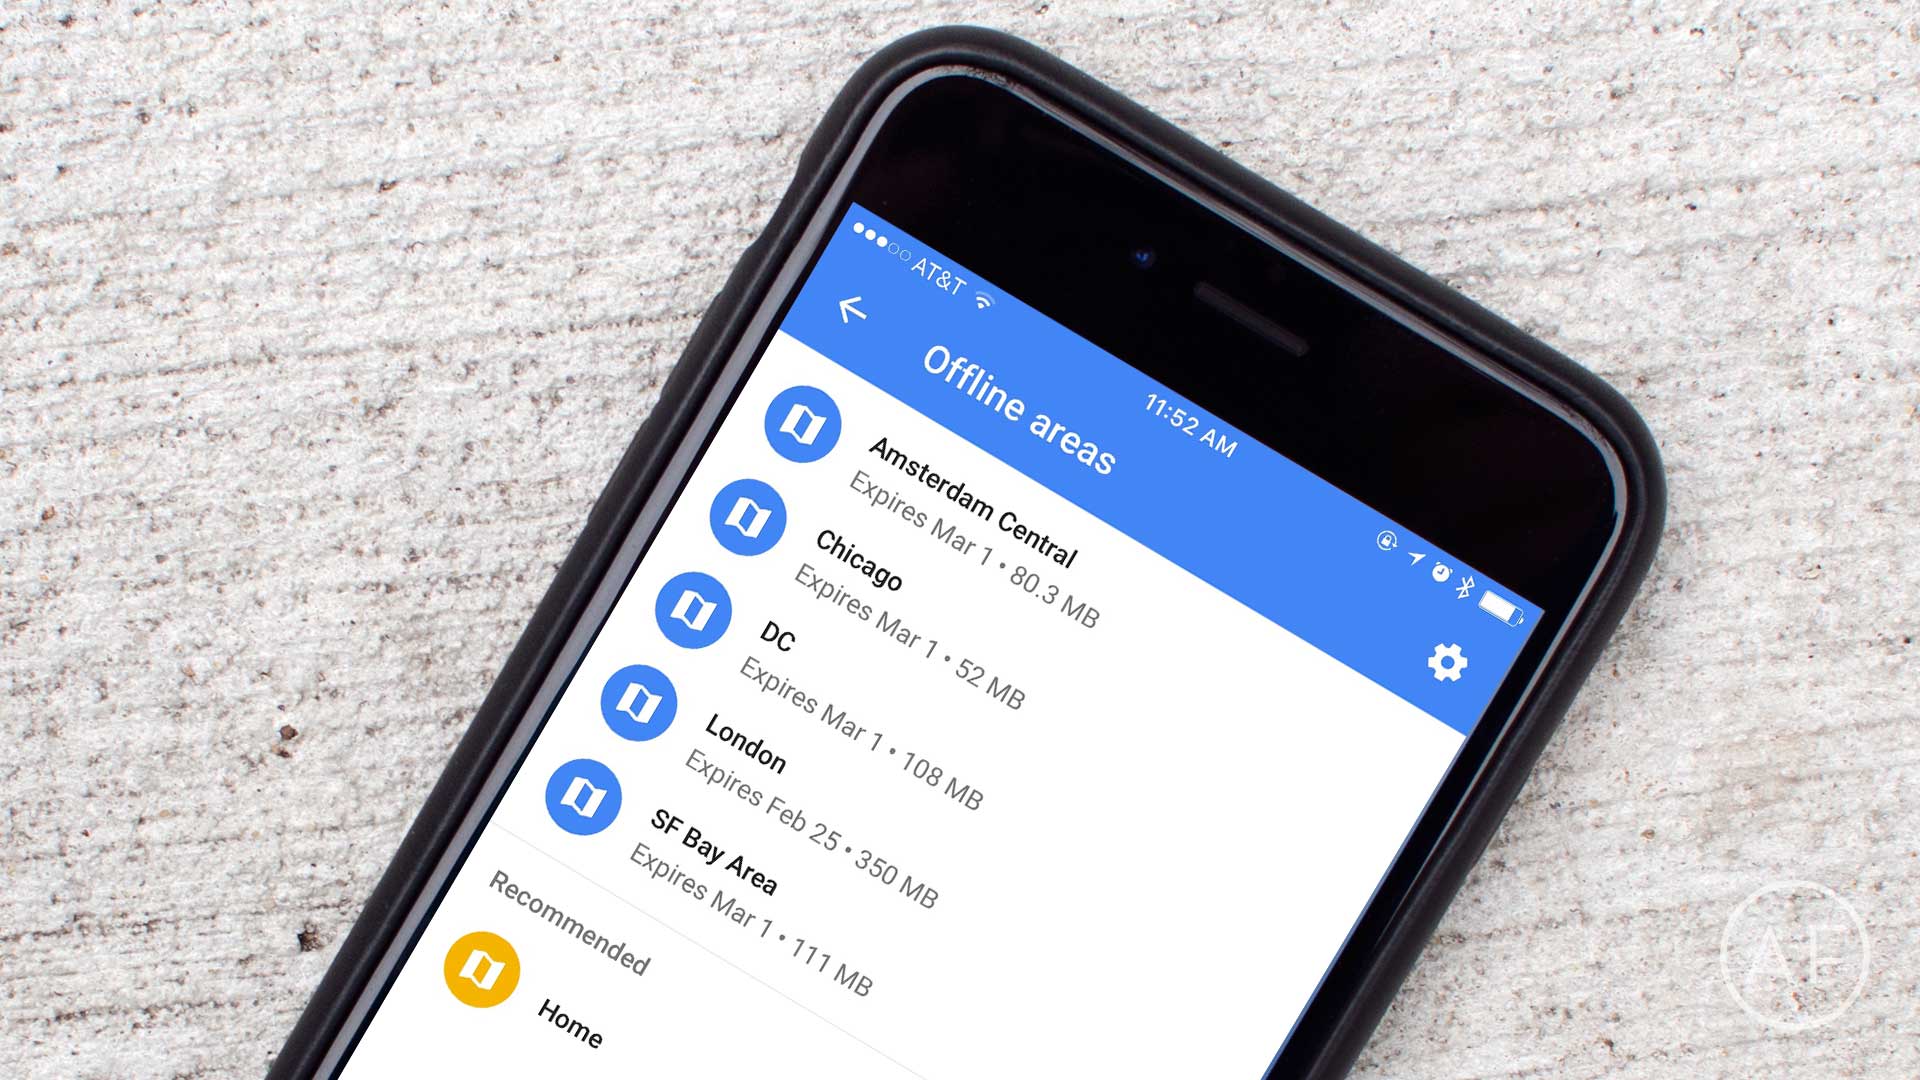
Google Maps saves offline maps for 30 days. After that they’ll automatically be deleted to save storage space on your iPhone. If you are traveling to the same place again, just be sure you re-download if it has been longer than 30 days. It’s also a good idea to update areas regularly and as often as you can. To update, just tap on the area you’ve saved and tap on the Update button. The selected area will update to include any changes since the last download.
This post was syndicated via The App Factor.


