My mission to build a powerful gaming Hackintosh for $650 — $50 less than Apple’s midrange Mac mini — is almost complete.
In Part 1 of this guide, I covered the components I purchased for my build and recommended extras and alternatives for those with different budgets.
In Part 2, I walked you through assembly of the screaming machine.
Now it’s time to install the software.
Believe it or not, building your Hackintosh is the easy bit; getting OS X to run on a machine it was never designed for is the real challenge.
But with time, patience and a little bit (OK, plenty) of frustration, you can make it happen.
Here’s how.
Before we dive into the installation guide, there are some things you need to know — particularly if this is your first attempt at a Hackintosh. Let’s go over some of them.
It can be tricky
As mentioned, installing OS X on unsupported hardware can be complicated. The actual setup itself isn’t too difficult, but once you have OS X installed, ensuring all of your components play along nicely is where the real headache lies.
If all the pieces you’ve thrown into your build are compatible with OS X, however, you shouldn’t have too many problems.
This isn’t the only way to install OS X
There are a number of ways to install OS X on a Hackintosh. I’ve tried three of them — Niresh, Unibeast and Clover — and the method I’ve chosen to cover in this guide (Clover) is the one I’ve had the most success with. Every component in my machine is recognized and working in OS X Yosemite, including sound, Wi-Fi and Ethernet.
However, the method I’ve chosen may not be the best one for your build. If you’ve chosen the same or similar components as me, I recommend trying this one first. But if you run into issues you cannot solve easily, you may wish to try Niresh or Unibeast instead.
Note: I had just as much success with Niresh as I did with Clover, but the downside to Niresh is that it isn’t currently compatible with Yosemite. If you choose that option, you’re stuck with OS X Mavericks for the time being. However, certain components don’t play nicely with Yosemite yet, so you might be better off with an older OS X release.
Everyone’s setup is different
In this guide, I’ve covered the steps you’ll need to follow to install OS X on your Hackintosh. Do note, however, that because everyone’s setup is different, making OS X work with your components may require different tweaks and some extra work. I’ve explained this in the post-installation sections below, which will also help you find the files and information you need to make Yosemite play nicely with the hardware you’re using.
There are some things you will need
Before you proceed, there are some things you’re going to need to set up OS X on your Hackintosh. These include:
- A Mac (a virtual machine running OS X on a Windows PC will do).
- A copy of OS X Yosemite downloaded from the Mac App Store.
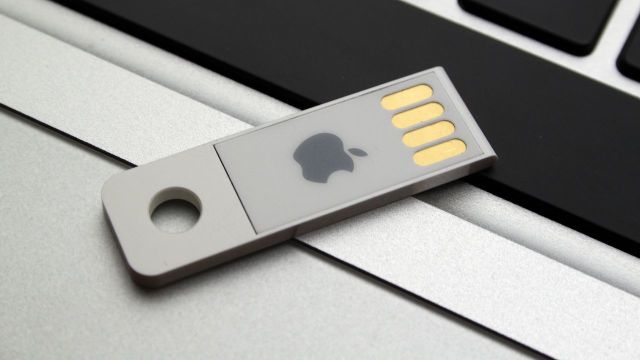
- A USB flash drive with at least 8GB of storage space (you’ll need to format your flash drive, which will remove everything on it. Ensure anything you wish to keep is backed up before proceeding).
- A clean hard drive or SSD for OS X (You’ll need to format your drive during the setup process, too, so if you already have Windows or another OS installed, you’re going to lose it).
Once you have all of those things ready to go, it’s time to install OS X.

Creating your installation drive
- Plug your USB thumb drive into your Mac, then open up Disk Utility.
- Select the flash drive, then click the “Partition” tab.
- Click “Current” and then select “1 Partition.”
- Click “Options…” and ensure “GUID Partition Table” is selected.
- Name your flash drive “USB” and ensure “Mac OS Extended (Journaled)” is the chosen format.
- Click “Apply” and then “Partition.”
Your flash drive is now erased and ready for OS X. The following steps will transfer the OS X Yosemite installer that you’ve already downloaded from the Mac App Store onto it.
- Open up Terminal on your Mac.
- Enter the following command and then hit return:
sudo /Applications/Install\ OS\ X\ Yosemite.app/Contents/Resources/createinstallmedia –volume /Volumes/USB –applicationpath /Applications/Install\ OS\ X\ Yosemite.app –no interaction
- Enter your system password when Terminal prompts you to do so. Then hit return.
Because the OS X Yosemite installer is a fairly big package, it could take more than 30 minutes for this process to finish. When it’s done, Terminal will tell you the process is complete, and your USB flash drive will have been renamed “Install OS X Yosemite.”
Clover
Now you can use Clover to modify the Yosemite package on your flash drive so that it’ll play nicely with your Hackintosh.
- Download Clover for Mac.
- Open the Clover installer and click “Continue” until you get to “Select a Destination.”
- Select the USB flash drive named “Install OS X Yosemite” and click “Continue” again.
- Click the “Customize” button at the bottom of the Clover install window. Here’s where you’ll modify the Clover installation so it’s compatible with your machine and its components. The two screenshots below display the most common settings for UEFI-capable motherboards and BIOS-only systems. If you’re unsure which boxes to tick, stick with those shown below. If you find something isn’t working when you get into OS X, you can always fix that later.

Common Clover settings for UEFI-compatible (left) and BIOS-only motherboards. Screenshots: TonyMacx86 - Once you’ve selected your installation options, click “Install.”
A few more changes need to be made to the Clover installation before it’s ready for your Hackintosh. Use Finder to navigate to the “EFI” partition of your USB thumb drive, then find the “Clover” folder inside “EFI.” Now follow the steps below.
- Replace the “config.plist” file with this one.
Note: If you know what you’re doing, you can create your own config file specifically for your system. If this is your first Hackintosh build and you’re unsure, use the minimal config I’ve linked to above, which should get your system up and running and allow you to troubleshoot any incompatibilities once you’re inside OS X. - Go into the “kexts” folder and create a new folder named “10.10.”
- Inside “10.10,” add the “FakeSMC.kext,” “NullCPUPowerManagement.kext” and an Ethernet kext compatible with your setup — all of which can be downloaded from TonyMacx86.
- Go back to the “Clover” folder, then enter the “drivers64UEFI” folder.
- Delete “VBoxHfs-64.efi” and replace it with “HFSPlus.efi.”
Your USB flash drive is finally done, and you’re almost ready to install OS X Yosemite on your Hackintosh — but first, you need to prepare your BIOS.
Prepare your BIOS
Turn on your Hackintosh and enter the BIOS before it gets a chance to boot into anything, then follow the steps below.
Bear in mind that every motherboard is different, and that it’s impossible for us to provide specific instructions for each one. If you’re unsure how to do any of the following things inside your BIOS, consult your motherboard’s manual or search for help on Google.
- Load “Optimized Defaults.”
- Enter your CPU settings and disable “VT-d” if your CPU supports this option.
- Disable “CFG-Lock.”
Note: This step is important, and if it isn’t followed, it can prevent the OS X installer from booting properly. If you do not have this option in your BIOS settings, ensure your BIOS firmware is up-to-date and flash the latest firmware if necessary. - Ensure “Secure Boot Mode” is disabled.
- Change your boot list so your system boots into your USB flash drive before anything else.
- Save your changes and restart.
Installing OS X Yosemite

Photo: Apple
Now it’s time for the exciting bit — installing OS X on your Hackintosh for the first time. If your machine has booted from your USB drive correctly, you should see the Clover boot menu after performing the steps above. You can now select “Boot OS X Install from Install OS X Yosemite.”
Your Hackintosh will now enter the OS X installer (if it doesn’t, see the Troubleshooting section at the bottom of this guide). You’ll no doubt be familiar with the installer if you’ve used Macs before. Don’t rush through it just yet, however, because like everything else concerning a Hackintosh, it’s not that simple — there are some things we need to do first.
- Once inside the OS X installer, click on the “Utilities” menu and then select “Disk Utility.”
- Click the hard drive or SSD you’re going to be using for OS X.
Note: You’re about to format this drive, so double-check you have selected the right one before proceeding. If you have more than one hard drive in your machine, you could wipe a drive you don’t want to wipe. - Click the “Partition” tab.
- Click “Current” and then select “1 Partition.”
- Click “Options…” and ensure “GUID Partition Table” is selected.
- Name your drive “Mac” and ensure “Mac OS Extended (Journaled)” is the chosen format.
- Click “Apply” and then click “Partition.”
- Close Disk Utility.
You can now proceed with the OS X installer, ensuring you choose the drive you just formatted during setup. Once OS X is installed, your machine will restart and you’ll return to the Clover boot menu. Select “Boot OS X Install from Install OS X Yosemite.”
The system will create your recovery partition and complete the installation process, then restart a second time. This time, select the “Mac” drive at the Clover boot menu. Providing nothing went wrong, your system should boot into its fresh OS X Yosemite install for the first time.
Post-installation
You’re not out of the woods just yet. You may have already noticed that certain things like sound or Wi-Fi are not working; to ensure that all your components play nicely with OS X, there are some more things you need to do. The post-installation process will differ depending on your machine — different setups with different components will require different tweaks. But there are a few things every Hackintosh requires after OS X is installed.
First, you need to reformat your system’s EFI partition to FAT32 from HFS by following the steps below.
- Open Terminal.
- Enter the following command and then hit return:
diskutil list
- Identify your system’s EFI partition, which will appear under “IDENTIFIER.” Once you have it, enter the following command into Terminal, ensuring you change the disk identifier to fit your setup before hitting return:
sudo newfs_msdos -v EFI -F 32 /dev/rdisk0s1
That was pretty easy, right? Now you need to set up your EFI partition again using Clover. You can transfer the Clover app from your other Mac if you do not yet have an Internet connection, but if you’re using Ethernet, it’s usually easier to just redownload it to your Hackintosh.
Once you have the Clover installer, you’re going to need to return to the Clover section above and follow exactly the same steps as before. Use the same settings in Clover this time around, and make exactly the same changes inside the same folders once the Clover installation process is completed.
If your sound isn’t working, or you added things like a Wi-Fi adapter to your Hackintosh build, you’re going to need to enable those inside OS X by installing the necessary kernel extensions (kexts). The easiest way to find these is by typing the name of your component into Google, following by “Hackintosh kext.”
For example, I installed a TP-Link Wi-Fi adapter in my Hackintosh, so I searched “TP-Link TL-WN851ND Hackintosh kext” to find the file I needed. Providing you used Macintosh-compatible components as explained in Part 1 of this guide, it shouldn’t be too difficult to track down the kexts you need.
Once you have those kexts, you can use a program like Kext Utility or Kext Wizard (both free) to properly install them. After restarting your Hackintosh with your fingers firmly crossed, your components should be working.
Troubleshooting
If, after following all the steps above, you have a working Hackintosh with no issues whatsoever, you’re incredibly lucky. Most people will run into problems somewhere along the line — that’s to be expected when you install OS X on a machine it wasn’t designed for — and usually those problems are with third-party components that don’t want to work, or with booting into OS X.
Boot issues
If you’re having issues with the latter, it means OS X doesn’t like your hardware for whatever reason. But don’t panic: There are all kinds of “boot flags” you can use to work around this. See TonyMacx86’s helpful article on the many boot flags you can use and which ones you may need to try to overcome different problems.
Component troubles
If you’re having problems with third-party components, such as a graphics card or networking adapter, you probably haven’t installed your kexts correctly, or you’ve installed the wrong ones. First, double-check that you have the right kexts , then reinstall them using one of the programs I mentioned above.
If the problems persist, consult one of the many Hackintosh forums for help. If you’ve used a common component, chances are someone else has already got it working inside a Mac, and they’ll have tips or workarounds that can help. I’ve mentioned TonyMacx86 a number of times throughout this guide — it’s one of the most useful sites for Hackintosh users — but there are others.
If all else fails, you may choose to return the component that won’t work (if you recently purchased it) and exchange it for an alternative proven to work well with OS X.
iCloud and the Mac App Store
A common problem with Hackintoshes is that they cannot connect to iCloud or the Mac App Store, because Apple’s servers will not authorize them. In most cases, there are fixes for this issue. The problem usually occurs when you’re using a Wi-Fi connection, so switching to Ethernet can fix it. If that doesn’t work, you can follow this guide.


