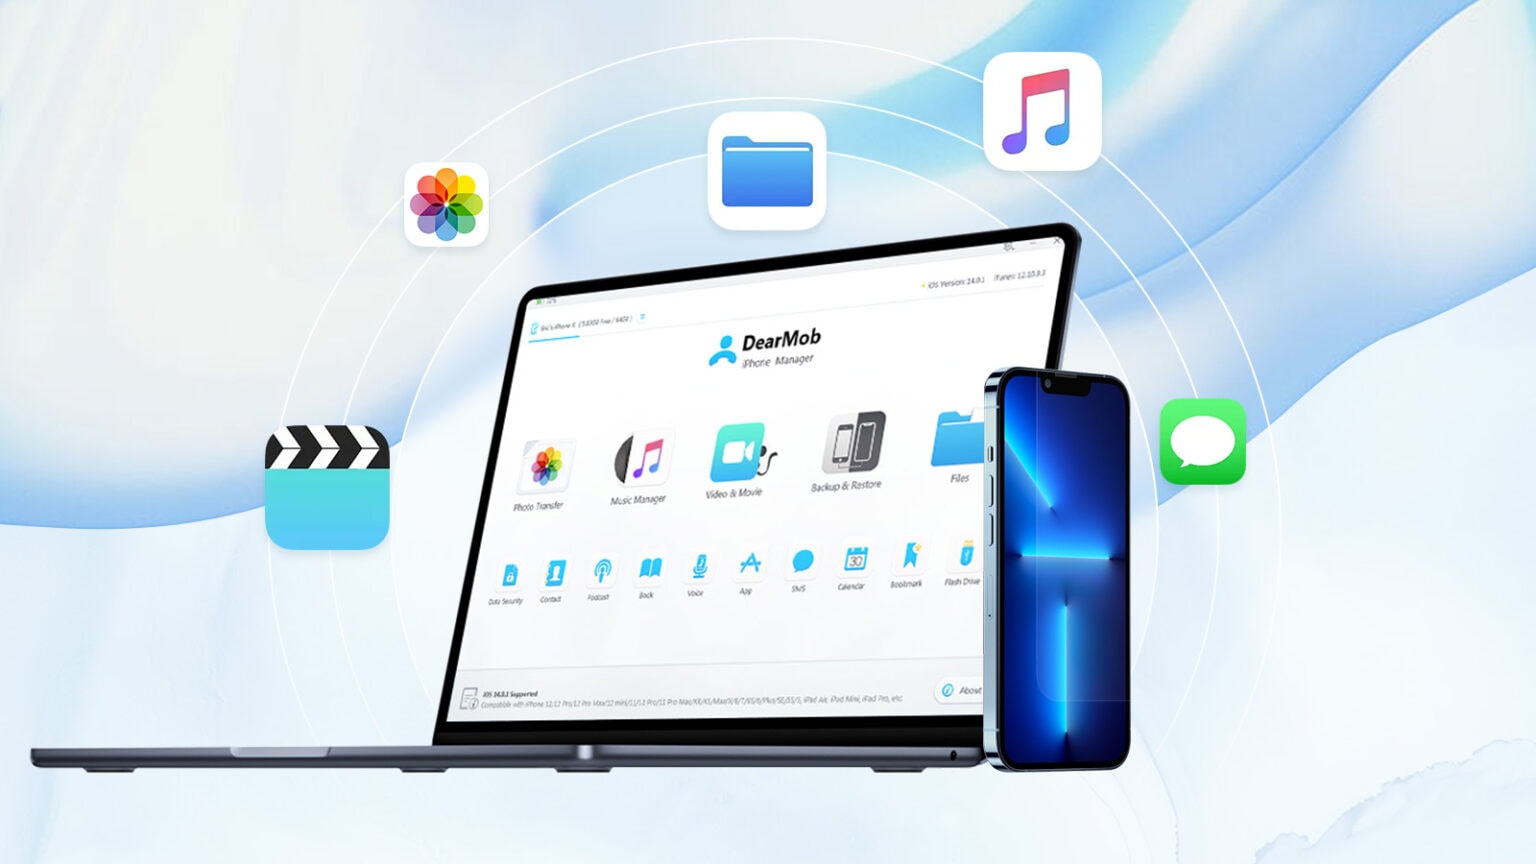
This post on transferring files between iPhone and Mac is brought to you by Digiarty Software.
Transferring things like documents and photos between your Mac and iPhone can be tricky, especially when file sizes get large. Here are the top five ways to transfer files from Mac to iPhone and back again.
How to transfer files between iPhone and Mac with DearMob iPhone Manager
Best for: Effortlessly transferring files between iPhone and Mac of any sort for free; bulk file transfers and iPhone backups with ultra flexibility.
Designed to be an all-in-one solution for iOS content management, DearMob iPhone Manager allows you to transfer files between your iPhone and Mac effortlessly. You can batch transfer or selectively backup zillions of 4K photos, GIFs, videos, movies, data, etc., and transfer them to your new iPhone 14. Better yet, the tool can compress large videos stored on your Mac to save iOS space storage, and convert videos to an iOS-supported format to easily open and play on your iPhone. In addition, GPU acceleration expedites large file transfer speeds of up to 60Mb/s, with no data loss. You can even get a holiday discount on DearMob iPhone Manager.
- Two-way transfer of videos, images, files, audio, contacts, etc., between iPhone and Mac; no file size limit.
- Military-grade encryption to protect private content while transferring.
- Organize, edit, and view every bit of data saved on your iPhone and Mac for easy transfers.
- Cloud-based USB to back up and store every data and file on your iOS devices.
1. Transfer files from iPhone to Mac

Screenshot: Digiarty Software
Step 1. Download DearMob iPhone Manager for free to your Mac, and connect your iPhone to the computer. Both Wi-Fi and wired connections are supported; switch modes as you wish.
Step 2. In the dashboard, go to the section based on the type of files to be transferred. You can also use the Backup feature to transfer all your files from iPhone to Mac.
Take photos for example:
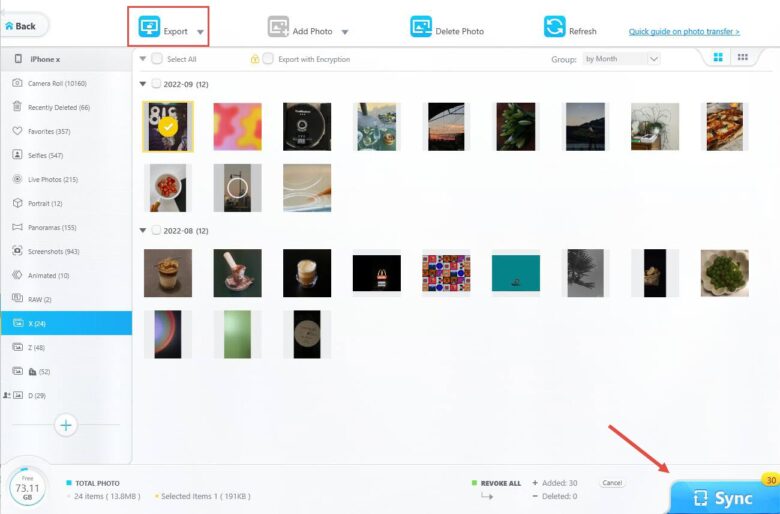
Tap on Photo Transfer, then select the photos you wish to transfer to your Mac.
Step 3. Click on Export, and in the drop-down menu, choose direct Export or Export HEIC or JPG to transfer the photo files from iPhone to Mac.
Screenshot: Digiarty Software
2. Transfer files from Mac to iPhone
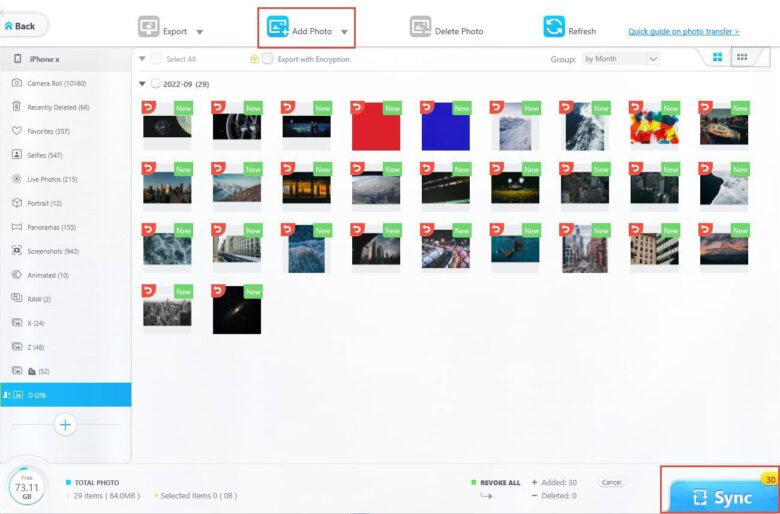
As above, download DearMob for free onto your Mac, connect your iPhone, and go to the desired section to import and transfer your files from Mac to iPhone. Again, let’s take photo transfers as an example.
Screenshot: Digiarty Software
Step 1. In the Photo Transfer panel, drag and drop the target photos from your Mac to the DearMob window.
Step 2. Hit Sync to transfer files from your Mac to your iPhone.
Transfer files between iPhone and Mac via AirDrop
Best for: Transferring a small number of files between iPhone and Mac.
AirDrop allows you to transfer files of any sort between nearby iOS devices or Mac computers. There is no limit on the size of the file that AirDrop can transfer, making it good for large file transfers between iPhone and Mac.
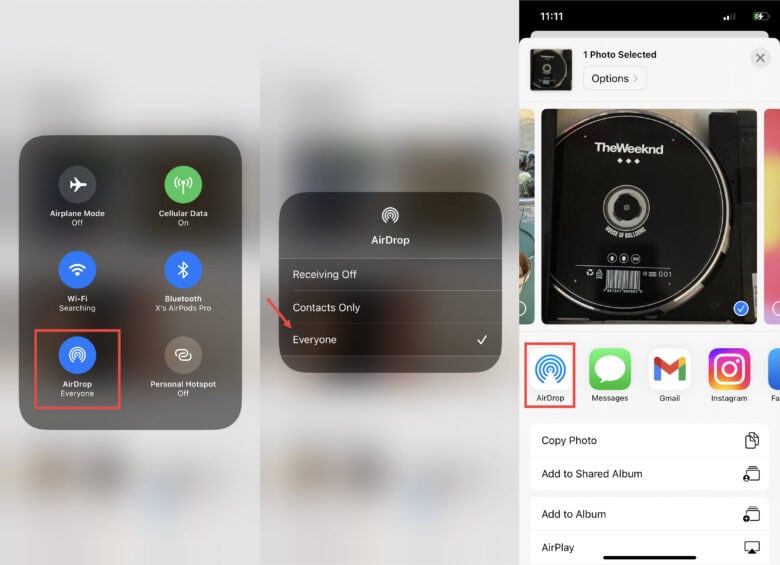
Before entering the following steps, make sure both your iPhone and Mac are powered up and nearby, and check if Wi-Fi, Bluetooth, and AirDrop functions are turned on for both devices.
1. Transfer files from an iPhone to Mac
Screenshot: Digiarty Software
Step 1. Choose an item on your iPhone. Tap on the Share button > AirDrop.
Step 2. In the list of available devices that pops up, choose the Mac icon and the file will start transferring from your iPhone to your Mac.
2. Transfer files from a Mac to iPhone
Step 1. Likewise, right-click on the item you wish to transfer > Share > AirDrop.
Step 2. Then, when the AirDop interface pops up, choose the target iPhone from the list to send the file from your Mac.
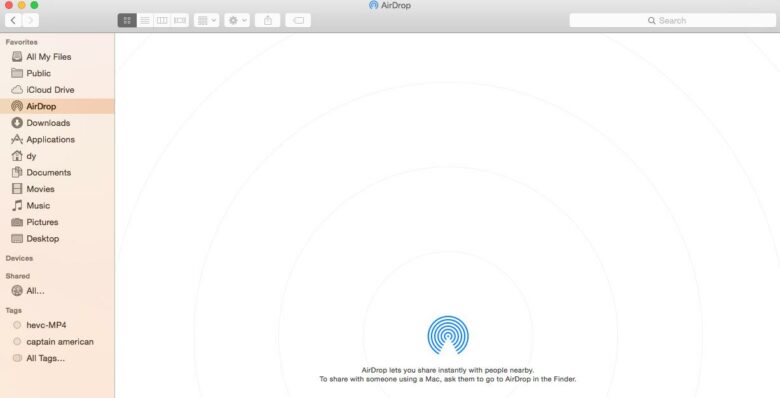
Screenshot: Digiarty Software
Transfer files between iPhone and Mac via Google Drive
Best for: Transferring files of limited size between iPhone and Mac over the internet.
The rise of cloud storage platforms like Google Drive, Dropbox, etc. is another option for transferring files from Mac to iPhone or back again, especially if you are constantly on the move. All you need is to upload the files to the service from your iPhone or Mac and access them from another device with the same account. But note: these services come with limited free storage, and a subscription fee is often required if you go over the free storage cap.
The following demonstration is based on Google Drive, but is similar for a lot of cloud storage services.
Transfer files from Mac to iPhone or iPhone to Mac
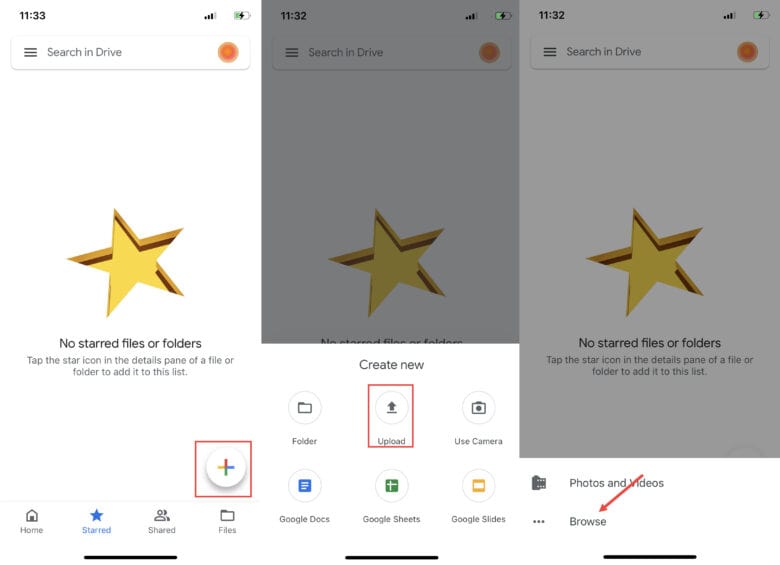
Screenshot: Digiarty Software
Step 1. Log onto Google Drive on your iPhone or Mac, and hit Plus > Upload to upload the files you want to copy to another device.
Step 2. Open Google Drive on another device, and log in with the same Google account to access and download the files to complete the transfer.
Transfer files between iPhone and Mac via iCloud Drive
Best for: Transferring files under 5GB between iPhone and Mac.
Apple’s online storage service, iCloud Drive, allows you to store any kind of file in the Drive and access it on any iPhone, Mac, iPad, etc., making it easy for Apple users to transfer files between iPhone and Mac. But note that each account has 5GB of free storage, and a monthly fee is required for additional storage tiers of 50GB, 200GB, or 2TB.
Make sure to turn on iCloud Drive on both iPhone and Mac before transferring:
1) For iPhone: Go to Settings > Apple ID name > iCloud and turn on iCloud Drive.
2) For Mac: Apple menu > System Preferences > iCloud and select iCloud Drive.
1. Transferring files from an iPhone to Mac
Step 1. On your iPhone, find the file you wish to send to Mac, and tap on Share > Save to Files > iCloud Drive.
Step 2. In the iCloud Drive menu, find the folder to store the file, and click on Save.
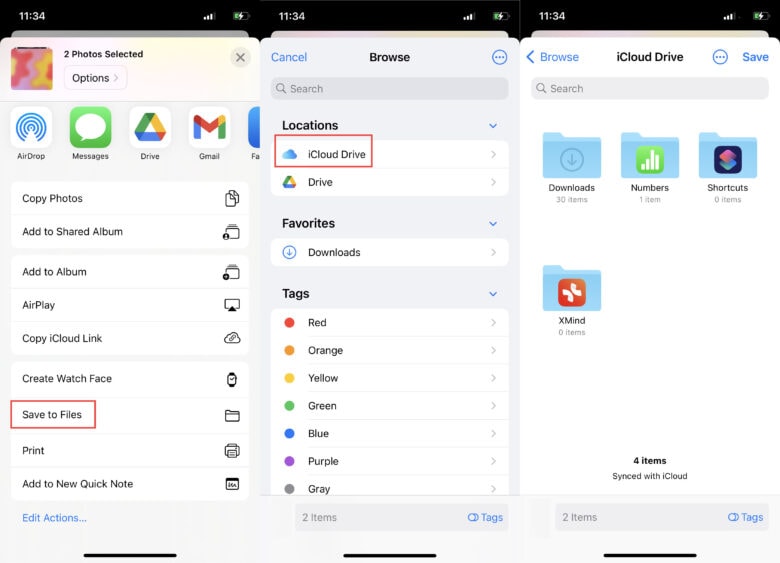
Screenshot: Digiarty Software
Step 3. Then go to your Mac computer > Finder > iCloud Drive, and open the targeted folder to access the file you just uploaded.
2. Transferring files from a Mac to iPhone
Step 1. Drag and Drop the file that you wish to transfer to iCloud Drive on Mac.
Step 2. Open the Files app on your iPhone > iCloud Drive; click the three-dot button on the right > Select to select the file you uploaded from your Mac.
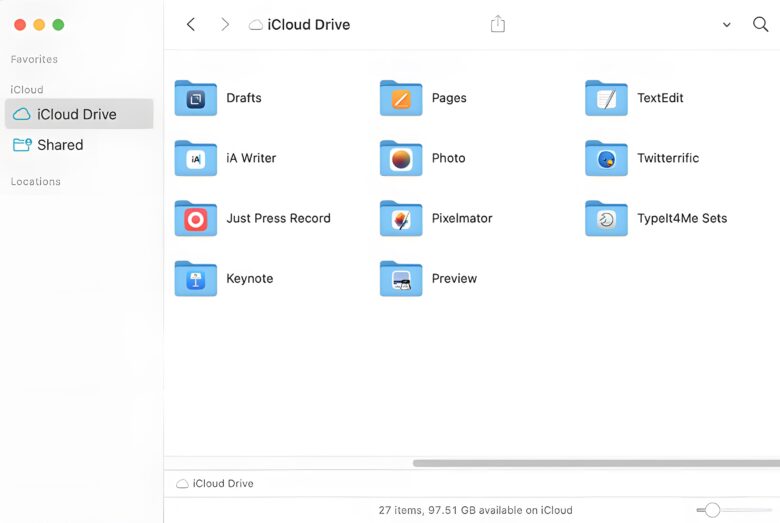
Screenshot: Digiarty Software
Step 3. Tap the Share button and save the file to your iPhone device.
Transfer files between iPhone and Mac via email
Best for: Transferring basic items like documents or files that are small in size.
Email is a good way to transfer individual files between iPhone and Mac. But keep in mind there are often size limitations depending on the email provider you use.
Transfer files from iPhone to Mac or Mac to iPhone
Step 1. Locate the file you wish to send on iPhone or Mac, tap on Share, and select either the default mail service or the email app that you commonly use. Fill out the details to send the email to yourself.
Step 2. Open the Email app on another device, and find the email message you just sent. Download to save the attachment.
Bottom line
It’s easy to transfer files between iPhone and Mac, and you have several options depending on the file (or files). For those who are after a well-designed iOS transfer tool for easy backup, bulk-transferring photos, videos and audio files — without any restriction and a lot of flexibility — check out DearMob iPhone Manager, an essential app for every iOS and Mac user.
