Notification Center, introduced with OS X 10.8 Mountain Lion, has quickly become an integral part of the Mac OS experience, replacing third-party apps like Growl and the like with a built-in system for notifying you of system and other events on your Mac.
Let’s take a look, then, at five tips and tricks to help you get the most out of your use of Notification Center, including getting rid of it all together, if that’s your thing.
Switch Out The Menu Bar Icon For Something Cooler
With the abundance of icons in the upper right corner of the Mac OS X screen, it could be time for a change. If you’re tired of the same old Notification Center icon–the one that looks like a bullet list–this tip’s for you.
To start, open your main system Library folder. You can use the Go To Folder menu in the Go menu in the Finder. Or you can hit Command-Shift-G to bring up the same Go To Folder field. However you choose to do so, type or paste in this path: /System/Library/CoreServices/ and then scroll down to Notification Center. Right click on it and select Show Package Contents.
Open the Contents folder, then the Resources folder. Find menuitemNormal.tiff and copy it. Click out to your Desktop folder and paste it as a backup. You can Option-Click and drag it out to the desktop, or just hit Command-C and Command-V like you would any other file or text you want to copy and paste.
Now, either open the TIFF file and modify it in any image editor, or create your own 54 X 44 pixel image to suit your whimsy. I grabbed a picture of the 1Up mushroom off of Google images, and resized it in Preview to 54 X 44, with a resolution of 72 pixels per inch.
Now, head back to the package contents folder and delete the menuitemNormal.tiff file. Save this new file in the same place, renaming it menuitemNormal.tiff. If you need to make it a TIFF file, use Preview or just rename in the finder. You’ll need to enter your administrative password for each step, when deleting, moving, or renaming the file.
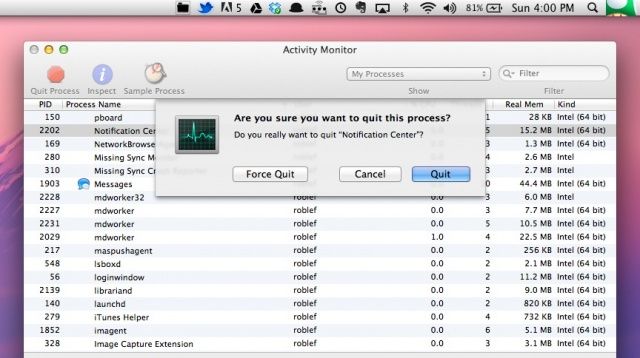
Now relaunch the Notification Center process. Open your Utilities folder and find Activity Monitor. Launch this app and find the Notification Center process in the list. Click to select it, then click on the Quit Process icon (it looks like a stop sign) in the upper left. The process will quit and restart, adding your image to the top corner of your screen.
If you want to reset the icon back to the default, simply do the steps again, but this time, put the original file you copied and pasted to your desktop in the Resources folder for Notification Center. Kill the process in Activity Monitor, and you’ll be all set.
Thanks for the tip, Mithilesh!
Only See Certain Types Of Calendar Events
In OS X Mountain Lion, you can set a Calendar notification for a repeating event on your iPhone, then get that notification on your Mac. Heck, you can even set a Calendar event on your Mac and get it when you’re out and about with your iPhone or iPad. It’s all a part of Apple’s iCloud integration, and it works pretty well, most days.
But what if you really don’t want to be notified of a certain type of event when you’re on your Mac? With OS X Mountain Lion, at least, you have a few more options for notifications that come from Calendar. Check it out.
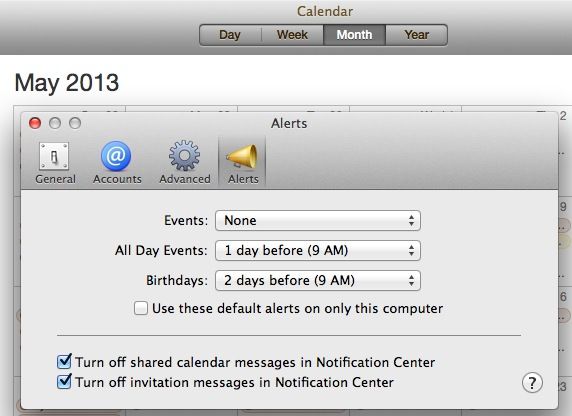
Launch Calendar from your Mac’s dock, Applications folder, or wherever else you’ve placed it. Once it’s open, go ahead and click on the Calendar menu. Select Preferences from there, and then click on the Alerts button in the upper right–the one that looks like one of those old-fashioned cheerleader megaphones.
Click on the menu next to Events to set the way your Mac will notify you when a generic Event is scheduled. Then click on the menu by All Day Events, to set a different notification interval, or even no notifications at all. You can also set the default notification for the Birthdays calendar, which is a handy way to make sure you never forget that special someone’s annual celebration again.
At the bottom, you can Turn off shared calendar messages as well as invitation messages in Notification Center, to even further customize your Notification Center experience. Woo hoo!
Close the Preferences window, and quit out of Calendar. Now your Mac will notify you using Notification Center the way you want it to, rather than the default way Apple set it up, which is how all computing should be done, really.
Via: MacLife
Get Twitter And Facebook To Work
As Twitter reduces broad spectrum support for third-party apps, you may be looking for a way around using special apps to send out a Tweet from your Mac. Or, maybe you want to just send out a quick Facebook status update about something, but want to avoid the hassle of launching Facebook.com in a browser. Either way, you can send out tweets and update Facebook from Notification Center, starting with OS X Mountain lion.
You will have to enable these services, though, to make it all work. Here’s how.
If you use Safari and Mountain Lion, you’ll get asked if you want to allow other applications on your Mac to use your Twitter account, at least the first time you visit Twitter.com.
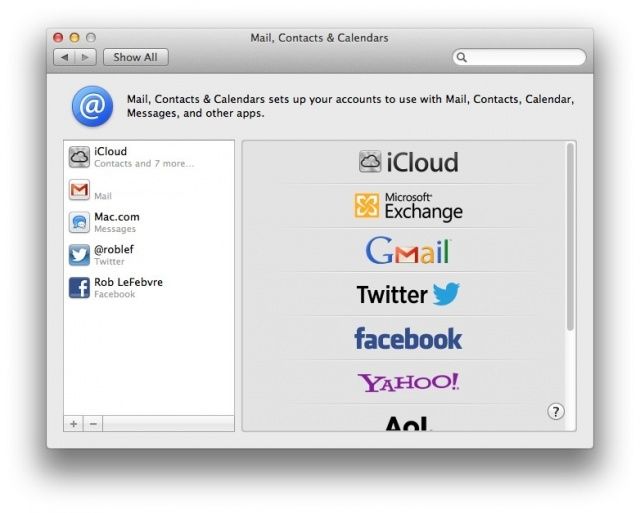
If you’re not a Safari user, or would rather not use it to log in to Twitter, simple head into your System Preferences, click on Mail, Contacts & Calendars and go to that preference pane. Click on the plus button in the lower left, and then the Twitter logo in the list to the right and enter your Twitter credentials, including your @ username for the service and your Twitter password.
Now drop into your Notification Center, either by clicking on the little icon in the upper right corner of your screen, or using a hot key shortcut. A Click to Tweet button should show up there, so you can send a quick tweet without having to launch a browser or use a specific app to do so. There’ll need to be at least one notification in there to see the Click to Tweet button, however, so don’t be alarmed if you don’t see it right away.
Do the same thing for Facebook, if you want to post to the ubiquitous social network right from your Mac. Click the plus button, click on Facebook, then enter your login info. A Click to Post will appear at the top of Notification Center, ready to go.
Via: Mac OS X Tips
Change Up The Default Basso Notification Sound
The default Notification Center sound, Basso, is not one that makes anyone super happy. It kind of sounds like a digital fart, to be honest. Why an operating system that’s had the ability to switch alert sounds since at least OS 7 doesn’t have that option here is beyond me, but luckily there’s a way to change it.
Let’s give it a try, shall we?
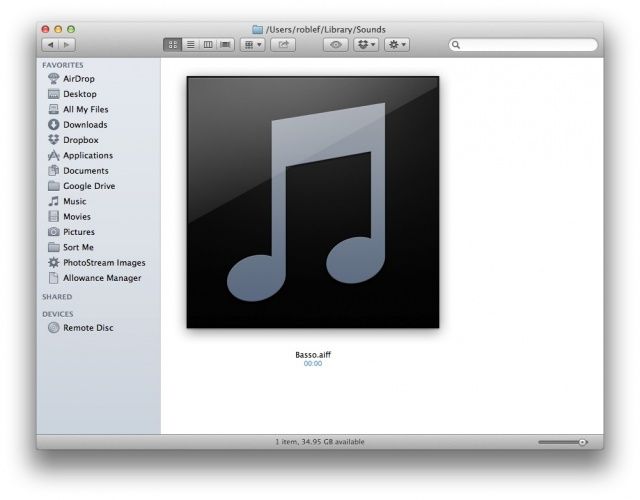
Head into your home folder to open the Library folder, then open Sounds (~/Library/Sounds). This isn’t the one in the main system folder, but the one in the Home folder. Create or steal your own short sound and make an AIFF out of it, using GarageBand, Audacity, Quicktime, or any number of Mac apps that can import and export audio. Export the file with the name Basso.aiff and put it into the ~/Library/Sounds folder. Best way to do that is to remove the original Basso.aiff file first, and then replace with the new sound, if it’s already in there. If not, you’re good to go.
Open Terminal and type or paste the following command, which will find the Notification Center process:
ps -ax | grep -i notification
Then, type killall NotificationCenter
To test your new sound, create a Reminder for a couple minutes out, and see if the notification sound is less farty. If you really want the Basso sound back, simply do these steps again but in reverse, moving the original Basso sound back into the ~/Library/Sounds folder.
Via: TUAW
Dump Notification Center Entirely From Your Mac
While I think I’m finally coming to terms with Notification Center, and it’s becoming a normal part of my daily work routine, there are some folks out there who may not like it at all.
For those people, here’s a pretty simple way to get rid of the Notification Center from your Mac, menu bar icon and all.
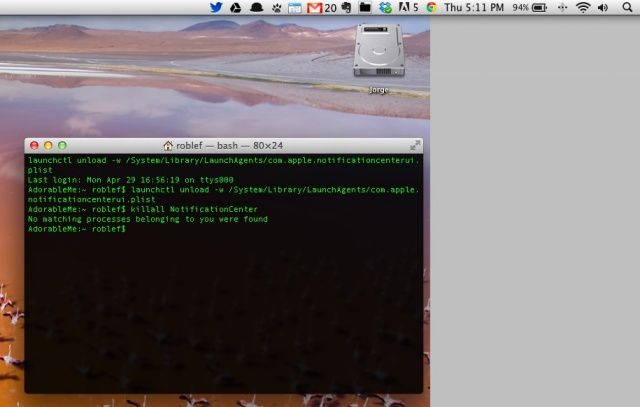
Launch Terminal from the Utilities folder, which is in the Applications folder. Once it’s open and ready, type or paste in the following command (be sure to copy the whole command, from launchctl to .plist):
launchctl unload -w /System/Library/LaunchAgents/com.apple.notificationcenterui.plist
This will get rid of Notification Center only for you as the current user; it does not need admin access. You may or may not need type or paste the following to kill and restart the Notification Center process:
killall NotificationCenter
Go ahead and quit Terminal app, and the Notification Center icon should be gone from the menu bar. To put it back together, open Terminal app one more time, and type or paste the following:
launchctl load -w /System/Library/LaunchAgents/com.apple.notificationcenterui.plist
On my Macbook Air, running 10.8.3, I didn’t need to re-launch Notification center, but if you do, get into your System folder, then open the Library folder, then open the CoreServices folder (or hit Command-Shift-G and type in /System/Library/CoreServices/ to get there super fast). Find Notification Center in there and double click to launch it again.
Source: OS X Daily
![Mastering Notification Center On Your Mac [Feature] My desktop is rarely this clean.](https://www.cultofmac.com/wp-content/uploads/2013/05/notificationcenter_hero1.jpg)
