Now that we’ve got all the parts for our Hackintosh, it’s time to put them all together. This is the really fun part of this project: You’re turning processors and chips and motherboards into a working computer that’s going to do all kinds of things for you.
You’ll get an incredible sense of satisfaction at the end — especially if you’re building a computer for the first time.
In this piece, I’ll walk you through the building process from start to finish.
Building a computer is actually a pretty simple process — much simpler than most people realize. So long as you’re careful with the components and you make sure you’re installing them in the right places, there’s little chance anything will go wrong.
Here are a few things to bear in mind before proceeding:
- Many of your components will include installation guides, and you should always read these first before seeking advice elsewhere.
- Take the proper precautions before handling computer components. Do not build your machine on a static surface — like the carpet — because static electricity can damage expensive parts.
- There are many ways to build a computer. You don’t have to put yours together the same way I did, or in the same order. There are hundreds of YouTube videos that you can consult for additional directions.
Fans
If you’ve purchased additional fans for your system, these need to be installed first, because it can be very tricky to get them into the case once the motherboard and other components are in place. Simply use the screws that came with them to secure them to your case, ensuring they’re situated correctly (depending on whether you want them to suck air in or throw it out).
Motherboard
I like to prepare the motherboard before it goes into the case. Handling a motherboard can be a little daunting if you’ve never done it before, but you’ll be surprised how robust these things are. Just try not to touch the circuits and you’ll be fine.
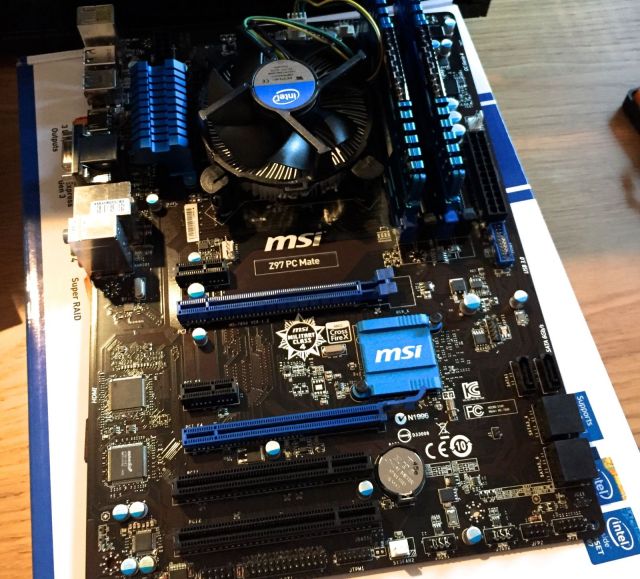
Pull the motherboard out of its packaging and place it on a steady surface. Now open up the shield over the CPU socket by using the metal lever that sits alongside it.
Open up your processor, ensuring you only touch its edges and not its bottom (where all its connectors can be found). There will be a gold arrow on one of its corners — ensure this lines up with the gold arrow on the CPU socket, and gently set the processor onto the socket.
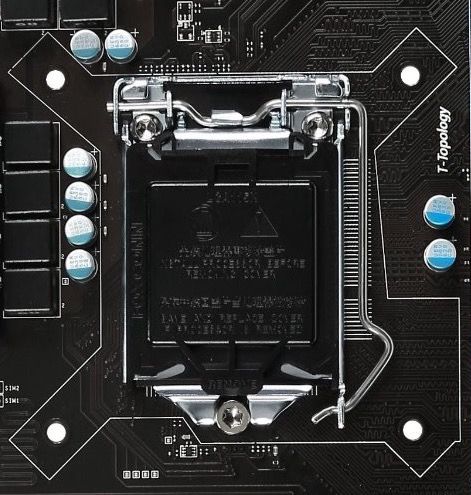
After ensuring it’s fitted properly, close the shield by pushing the lever down. You’ll need to push it firmly, but don’t worry — as long as you seated your CPU correctly you’re not going to break anything. Remove the plastic cover on top of the metal shield.
You can now install your CPU heatsink and fan. If you’re using the one that came with your CPU, it should have thermal paste pre-applied to its bottom. You don’t want to touch this. Just place the heatsink gently onto the CPU, ensuring the four clips that surround it line up with the holes on your motherboard.
Next, push those clips down until you hear them click to secure the whole thing to the board. Then plug the wire attached to the fan into one of the sockets labelled “CPU Fan.” On the PC Mate I used, there’s one directly above the CPU socket.
You’ve just installed your processor. Now it’s time to add the RAM, which is just as easy.

First, open up the memory slots you’re going to use. If you purchased the same motherboard as me, you’ll have two blue slots and two black ones. You’re only going to need two of them if you only have two RAM sticks, but ensure the two you use are the same color — don’t use one black and one blue, because they won’t work together as effectively.
On the sides of the memory slots, you’ll see two clips, which you’ll need to pull back. You can now open up your RAM sticks and insert them into the slots you’ve opened. Push them in firmly, and once they’re in place, the clips you opened should pop back into place by themselves.
With the CPU and RAM installed, it’s time to put the motherboard into your computer case.
Case
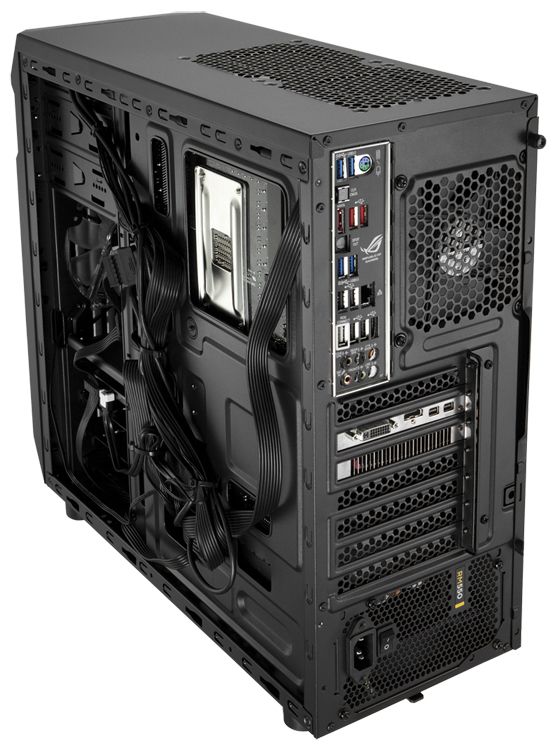
If you’re using the Corsair SPEC-01 case, you simply need to remove the four thumb screws in its back and slide off its side panels. You can then lay the case on its side to make it easier to get into. Don’t forget to feed your cables through the back of the case when installing your components, however, because this will make cable management much easier later on.
Inside the case, you’ll find its pre-installed fan and a bunch of wires for its front-facing ports. You don’t need to worry about these for now, so just move them out of the way so you have plenty of room to work.
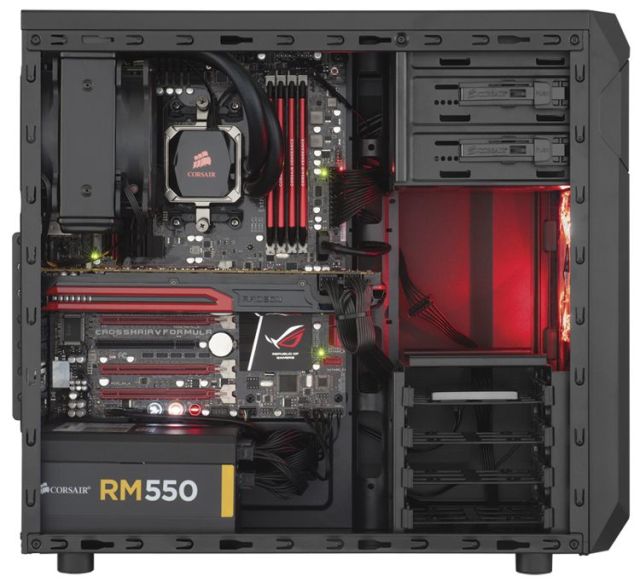
My case had motherboard standoffs pre-installed, but if yours doesn’t, you’ll need to put those in now, ensuring that they line up with the holes on your motherboard. The standoffs should have been included with your case, so if you can’t find them, check the packaging again.
With your motherboard, you should have received an I/O shield, which you’ll need to place into the large gap in the back of your computer case now. If you’re using the PC Mate motherboard I’ve chosen, ensure the round PS2 ports are at the top and the three holes for the audio jacks are at the bottom. Just push the shield firmly into the case, without bending it, to secure it in place.
With standoffs and I/O shield installed, gently place your motherboard into the case. Make sure that its screw holes line up with the standoffs, and that all of its ports line up with the I/O shield. It can be a little bit fiddly, but with patience you’ll get there — and once you do, you can screw the motherboard into place.
On the back of your case, toward the bottom, you’ll find a number of PCI slots for things like the graphics card, but they’ll be protected by removable metal shields. You may also find a bracket alongside those shields — I did on the SPEC-01 — that makes everything more secure. You’ll need to remove that bracket before moving on.
Graphics card
Now you can unwrap your graphics card and work out where it’s going to go on your motherboard (one of the PCI-e slots). You’ll need to remove one or two (depending on your card) of the PCI shields in the back of your case so the ports on your graphics card can stick out of it.
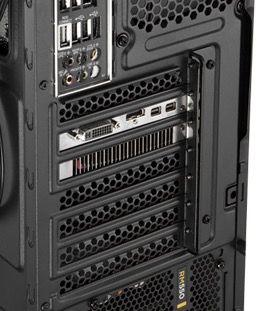
Once you’ve done that, you can gently push your graphics card into the PCI-e slot. Like the memory slots, this should have a clip on its side that you’ll need to pull back first, and once the graphics card is properly installed, the clip should pop back into place.
Next, use the screw(s) you removed from the back of the case to secure the graphics card in place. If you didn’t remove any screws (some PCI covers just pop out), you should find the screws alongside the other hardware that came with your case.
If your graphics card is like mine, it will have come with a driver-installation disk, a CrossFire cable, a DVI adapter and a 6-pin power cable. You’re going to need one of those power cables if you’re using the same power supply as me, so keep one handy.
Wi-Fi card
Now’s a good time to install the Wi-Fi card (if you bought one). The process is almost exactly the same as that for the graphics card, but instead of using a PCI-e slot, you’ll likely need a standard PCI slot instead.
If your Wi-Fi card came with some antennas, don’t install these until you’ve plugged the card into the motherboard and secured it to the back of the case.
Storage
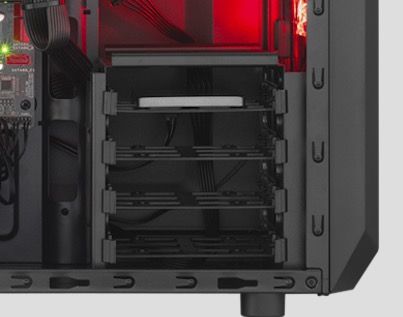
If you bought a 3.5-inch hard drive like me, you simply need to pull out one of the plastic tracks in the bottom of your case and place your hard drive inside it. You can screw it in if you want it to be super-secure, but the tray itself should prevent it from moving around.
If you bought a 2.5-inch SSD drive, you’ll need to screw your drive to the tray to keep it secure.
In the box your motherboard came in, you should find some SATA cables. Use one of these to connect your storage drive to one of the SATA ports on your motherboard. On the PC Mate, these are located in the bottom right corner, and only two of the six will be uncovered. Either of these is fine to use.
Optical drives
If you bought an optical drive for your machine, you can install this now. If you’re using the same case as me, you simply need to pop out one of the covers on its front, open the plastic bracket on the inside of the case, and then slide the drive into place before pushing the bracket back down. Like the HDD, the optical drive is connected to the motherboard using a SATA cable.
Power supply
I like to put the power supply in last because it means I get better access to the motherboard, but with some cases, it’s better to put the power supply in first, otherwise it can be tricky to install. With the SPEC-01, the PSU sits at the bottom, not the top, so it’s easy to slip in even after the motherboard is fitted.
Once your PSU is unboxed, seat it into the bottom of the case and then use the screws that came with it to secure it in place.
Wiring
Now it’s time to connect the power supply to all your components. I like to start by connecting the motherboard, which uses the large 20+4-pin lead. There will only be one socket that this can go into on your motherboard, so you can’t go wrong. It will likely be stiff, however, so push it firmly until it clicks into place.
You will have another power connector on your board, which will either use four or eight pins. Find the right cable from your power supply, and plug it in.
You can now plug the short, thin connectors into your hard disk, SSD and optical drives. They’ll only go in one way, so you can’t get it wrong.
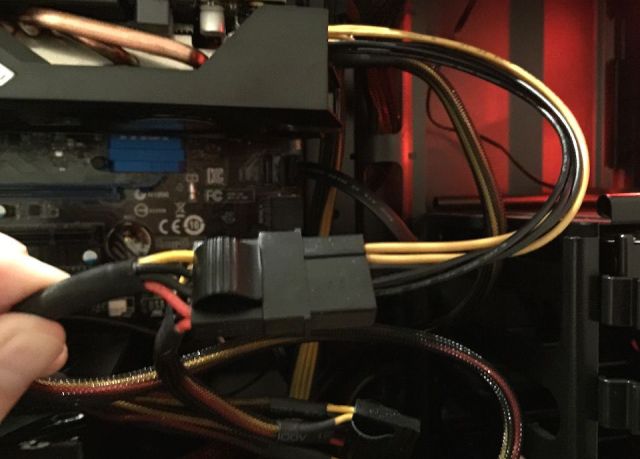
If your graphics card is like mine, it will have two 6-pin connectors that both require power. My power supply only has one 6-pin cable, however, so I used the adapter that came with the card to turn one of the 4-pin molex connectors into a second 6-pin connector.
For some reason, my graphics card was picky about which slots these connectors went into. I had to plug the original 6-pin connector into the port closest to the motherboard, and then the adapted connector into the port closest to the open side of the case. If I plugged them in the other way around, my monitor would go to sleep and the card simply wouldn’t work properly.
With all your components connected to the power supply, you can connect the ports and buttons on the front of your case to the motherboard. This is the tricky bit, and you’ll need to consult your motherboard manual to ensure you plug everything in the right way.
Start with the USB connector, because that one’s easy — it just plugs into one of the USB connectors on the motherboard, which should be surrounded by a plastic bracket. Thanks to this bracket, it clips into place and you can’t insert it the wrong way around.
You can then plug the smaller bundle of cables for the power and reset buttons, LED lights and fans into the correct connectors on your board. Some of these can be plugged in the wrong way, which is why you’ll need to consult your motherboard manual.
Don’t be worried, though. If you’re patient and careful, you shouldn’t have any problems. And if you do get anything wrong, it simply won’t work, so you just need to swap the wires around. You won’t break anything.
If you’ve installed additional fans, you’ll need to connect these now, too.
Testing
Before you close up your case, it’s a good idea to check that everything works. Plug your computer in, flick the switch on its power supply and connect your monitor, then hit the power button on its front. You’ll know straight away whether you’ve wired the power button correctly, because nothing will happen if you haven’t.
If your computer powers on, make sure all the fans are spinning — not only those attached to the case, but those cooling the CPU and graphics card, too. If your graphics card is installed properly, you should see a message on your monitor asking for a boot disc.
Hit the restart button on your PC to check that that’s functioning correctly, then enter your system’s BIOS. In here, you should have a feature that identifies connected components — it’s called “Board Explorer” if you’re using the same motherboard as me.
Use this to check that your motherboard recognizes all the parts you’ve installed correctly. Not only should it be able to tell you what graphics card, CPU and RAM you’re using, but it should also be able to tell you what’s plugged into your SATA ports, PCI slots, power ports and fan connectors.
Once you’re happy that all of your components are installed correctly and recognized by your machine, you can turn it back off.
Cable management
Now it’s time to tidy up any cables left hanging around. Your computer needs to stay cool, and a big bunch of wires tangled up inside it can restrict airflow.
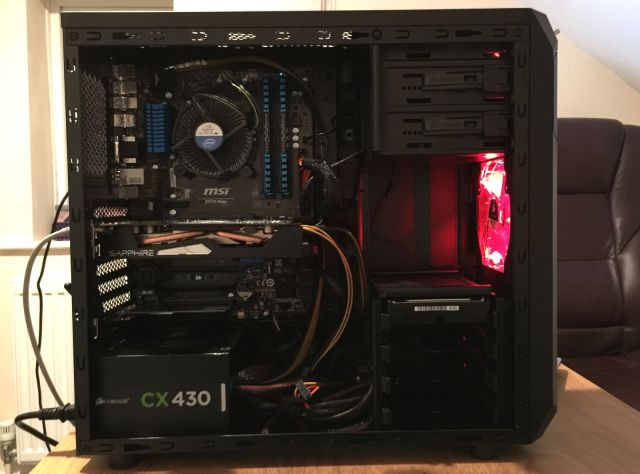
Use the cable ties included with your case and other components to strap cables together and keep them out of the way. Any unused cables from your power supply can simply be pushed down into the bottom of the case where they won’t be in the way.
Once everything’s tidy, slide the sides back onto your case and screw them in place.
You’ve just completed your Hackintosh build
Your Hackintosh is now built. Congratulations. You can now plug in your monitor, keyboard and mouse, and any other peripherals you wish to connect.
In the final installment of this series, we’ll tackle the software setup process, including installation of Windows and OS X.


