Up next in 10


A tutorial on how to build and publish a basic website in iWeb.
Show More Show Less View Video Transcript
0:06
hey everyone today I'm going to be
0:07
showing you how you can build your very
0:09
own website using Apple's application
0:11
called iweb which comes in the iif suite
0:14
and is bundled on all new Macs so to
0:17
find iweb all you're going to have to do
0:18
is open a new finder window and navigate
0:21
into your applications folder and find
0:24
iweb and open that up just double click
0:28
it and I along
0:33
launch once it launches you're going to
0:36
find this large window here and from
0:38
here you can do a variety of different
0:41
things so what we're going to do is
0:42
we're going to create a new website so
0:44
all you have to do is go up to the file
0:46
menu and click new
0:48
site this list will drop down and you'll
0:51
have a lot of different options as far
0:53
as different themes you want so for this
0:56
one we're just going to choose a modern
0:58
theme here and click cck on the welcome
1:00
page cuz that's the kind of page we'll
1:02
want to start with then you'll just
1:04
click choose and it's going to create a
1:06
new site for you and this is the
1:08
template site it gives you so this while
1:11
this picture is nice you probably don't
1:13
want it for your picture on your own
1:15
website so you can drag pretty much any
1:17
image in that you might have in a folder
1:19
or on your desktop all you have to do is
1:21
drag it and drop it right on top of the
1:23
picture and it'll replace so for an
1:25
example here I just have my desktop
1:27
wallpaper and I can drag it in and and
1:30
instantly that is a replaced the
1:34
previous picture that was there and then
1:36
I can use this slider here to decide
1:38
which part of the image I would like to
1:39
show now I can also edit the titles on
1:42
here all I have to do is click on the
1:44
title and then click again and it'll
1:46
highlight the text in it and I can start
1:48
typing so I can
1:50
type welcome and maybe I just want to
1:53
leave it at that little exclamation
1:55
point so you can do that and then the
1:58
same thing for these big larger text
2:00
boxes I can just click on them once to
2:02
select them and then click on them again
2:04
to highlight it and then replace the
2:07
text with what I
2:10
want so right there welcome now I can
2:13
also add another text box by going into
2:15
my two our at the bottom here and
2:17
clicking text box and you'll see a new
2:19
text box pop up in the middle of the
2:21
screen I can type in there whatever I
2:23
want to type and then I can also move
2:26
that text box wherever I would like to
2:29
on the screen
2:30
I can add a shape by clicking on the
2:32
shapes bar at the bottom and you'll see
2:34
all these different shapes I can add I
2:36
can add a triangle here and I can move
2:38
that around and I can even resize it by
2:41
dragging one of these handles on the
2:43
corner here and making it bigger or
2:45
smaller so that's kind of neat and let's
2:48
say I want to add a secondary page to my
2:50
website all I have to do is go to my
2:54
bottom toolbar here and click add page
2:57
and this next bar will come down or this
3:00
uh menu and you can choose another type
3:02
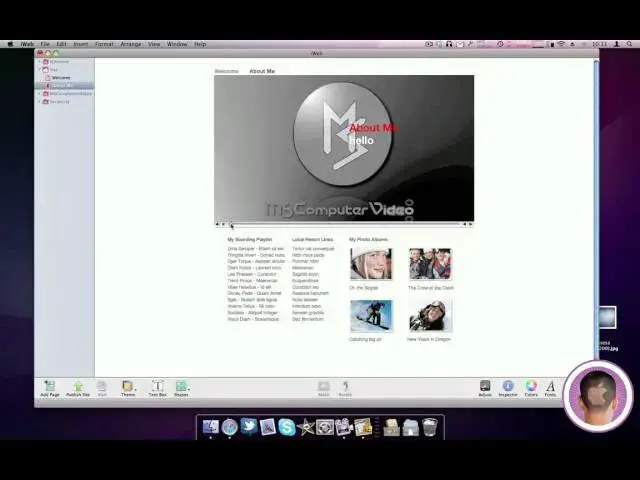
of page so I'll choose about me and then
3:05
click choose and instantly I'll have
3:08
another page so of course once again I
3:11
can replace the images on here with
3:13
whatever I want and I can replace the
3:15
selected text with whatever I want want
3:18
to
3:19
say so let's say I have a great video I
3:22
want to put on my website I can also do
3:25
that too by using the same drag and drop
3:28
method I did with photos so I have to do
3:30
is drag in a video and drop it wherever
3:33
I want it to go in this case in place of
3:34
the picture and right here it'll give me
3:37
a warning if the file is very big in
3:40
this case it says it's 187 megabytes
3:43
which is quite large and it might cause
3:44
long download times so I can click okay
3:47
and right in this place where the
3:50
picture was or wherever you choose to
3:51
put it is your video and you can play
3:55
any video on in there so let's say a
3:56
home movie or or something like that you
3:59
can put in
4:00
there and you can see at the top here
4:03
every time you add a new page it puts a
4:05
link to that page up here so I can click
4:07
on about me when I'm on my website and
4:09
I'll instantly go to that page so you
4:11
don't have to worry about linking pages
4:13
together or anything like that it does
4:15
it all for you so once you have your
4:17
page organized exactly the way you'd
4:19
like it with text boxes and images and
4:22
videos and things like that and you want
4:25
to publish your site you have a couple
4:26
different publishing options all you
4:28
have to do is click on the name of your
4:30
site up here in this case it's just name
4:32
site and you have your publishing
4:34
options so I can rename my site here and
4:36
I'll call it uh my great
4:40
site and you can put a contact email in
4:43
and if you have a mobile me account you
4:45
can publish your site right to your
4:46
mobile me account which is pretty nice
4:48
and if you don't have a mobile me
4:50
account you can publish it to an FTP
4:52
server or a local folder right on your
4:54
hard drive and with mobile me you can
4:56
also make your publish site private if
4:59
you don't want other people to be able
5:00
to view it so once you're once you feel
5:03
that you're ready to publish your site
5:06
all you need to do is go and select your
5:09
type and I'll choose local folder for
5:10
this
5:12
one and I'm just going to choose my
5:14
location in this case my
5:16
desktop click choose and it's going to
5:19
put it there you can put in a website
5:21
URL name and I'll just leave that blank
5:23
for now and then down in the bottom
5:26
toolbar here you're just going to click
5:29
publish
5:30
and it's going to give you a warning
5:31
that you're making sure that you own all
5:33
the files and copyrights of everything
5:37
that you have on your website you can
5:38
click continue and it's just going to
5:41
create your site and it'll take some
5:43
time depending on the length of your
5:45
site how much is in it and how detailed
5:48
it
5:49
is so once it's done publishing it'll
5:52
say your site has been published and I
5:53
can click okay or I can visit my site
5:56
right now so I'm just going to choose
5:58
visit site now and it's just a folder on
6:00
my desktop but it'll still visit it and
6:02
it'll show me exactly how the site is so
6:06
it opens up Safari and I can use my site
6:08
just like I would in real life so here's
6:11
my welcome page that I set up before and
6:13
then I can click on about me here and
6:16
it'll load the about me page that I had
6:19
set up
6:20
before so here's the about me page and I
6:23
have my video and my pictures and
6:25
everything else you know that I would
6:27
like to have on it so that's pretty much
6:30
the basics of creating a a website in
6:33
iweb and it's pretty easy there's not a
6:35
lot required to it to make a nice really
6:37
professional and great looking site that
6:40
um you know your friends family can
6:43
enjoy stuff like that so I hope you
6:46
found this tutorial useful and thank you
6:48
for watching
#Skins, Themes & Wallpapers
#Other
#Computer Education
#Video Sharing