Up next in 10


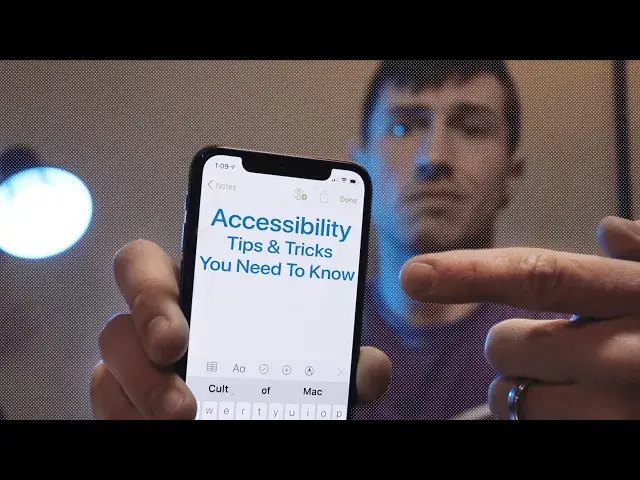
Some of the best tips and tricks for the iPhone and iPad are buried and hidden away in the accessibility menu... until now! Here's the seven best accessibility tricks on iOS that everyone should know!
iOS Settings:
- Reachability (Settings - General - Accessibility - Reachability)
- Magnifier (Settings - General - Accessibility - Magnifier)
- Type to Siri (Settings - General - Accessibility - Siri - Type to Siri)
- LED Flash for Alerts (Settings - General - Accessibility - LED Flash for Alerts)
- Dark Mode (Settings - General - Accessibility - Display Accommodations - Invert Colors)
- Super low-light mode (Settings - General - Accessibility - Display Accommodations - Reduce White Point)
- "Fake" Home Button (Settings - General - Accessibility - Assistive Touch)
Follow Ian on Twitter: @IanFuchs
More awesome tips and trips, Apple news, rumors, and excellent deals: http://www.cultofmac.com
Follow us!
Twitter: https://twitter.com/cultofmac
Facebook: https://www.facebook.com/cultofmac
Instagram: https://instagram.com/cultofmac/
Show More Show Less View Video Transcript
0:00
��
0:05
Apple's iOS devices are some of the most accessible portable devices you can get on the market
0:10
Now, some of those accessibility features are designed for visual impairments or hearing impairments
0:15
or mobility impairments, but some of them just about anybody can take advantage of
0:19
I'm Ian for Cult of Mac, and these are seven accessibility tricks that anybody can use
0:24
♪ ��
0:33
When Apple launched the iPhone 6 and 6 Plus, they added a feature called Reachability
0:38
The idea of the feature was to make it so you could reach the top edges of the screen
0:42
without needing to shift your hands around to get to those difficult-to-reach corners
0:47
The feature's available on iPhone 6 devices or newer and can be activated with a single toggle
0:53
Once activated, simply tap your thumb on the Touch ID ring or swipe down on the Home indicator
0:59
on the iPhone X-style devices, and the top edge of the screen will pull down
1:03
making it easier to reach things like search bars or buttons in the UI
1:08
Most notably for me, it makes it easy to get to Notification Center or Control Center
1:13
without having to stretch your thumb to get to that topmost corner or the top edge of the device
1:17
You can simply swipe down on the Home indicator or double-tap that ring, and the screen will pull down
1:22
and then any swipe above the top edge of the screen is treated as a swipe at the top of the screen
1:31
The second accessibility trick is available on iPhone or iPad, and it's as simple as the name sounds
1:37
The magnifier allows you to use your device's camera as a magnifying glass
1:42
This means that once enabled, you can triple-tap the Home button or the Side button
1:46
depending on your device, and activate the magnifier feature. Then you hold your device over the small text
1:53
or small object you're trying to look at and zoom in on, and it acts like a magnifying glass
1:57
From there, you can actually capture a freeze frame to allow you to avoid shaky hands
2:02
or you can zoom in and out. You can even set and adjust certain color and contrast profiles to make it easier
2:08
to read very fine text or get a feel for what it is exactly that you're looking at
2:17
The third trick on the list is one that can help you avoid those awkward situations
2:21
where you're out in public somewhere, and you don't want to be seen as the crazy person
2:26
talking into their phone or their iPad. With Type to Siri, which again is a very simple one to enable
2:31
you can type your Siri commands instead of speaking them out loud
2:36
The way the feature works is pretty simple. Press the Side button or the Home button
2:41
and Siri will prompt you to type your command. This is especially convenient
2:46
if you have a hard time having Siri understand what you're saying or you have a bit of an accent
2:50
You can make sure that Siri gets the exact command you want by typing it in
2:55
No issues with comprehension or misunderstandings in voice recognition. Best of all, you can still use the Hey Siri feature
3:03
to speak your commands to Siri so you get the best of both worlds
3:13
If you're the type of person that's constantly missing notifications or missing phone calls
3:18
the LED Flash for Alert might be the perfect setting for you. When Apple introduced the iPhone 4
3:23
they added a flash for the camera, and at the same time, they added the accessibility feature
3:28
to allow you to use that LED light as a notification light
3:33
This means that every time you receive a phone call or a text message, the camera flash will actually blink at the same time
3:39
Now there are some caveats to it. There's no granularity, like saying only this kind of notification
3:44
gets the flash and this one doesn't, so it's an all or nothing, but it can be extremely convenient
3:48
if you're expecting an important phone call or you work in a situation
3:52
where hearing or feeling the vibration in your phone might be a challenge
4:00
iOS devices aren't necessarily the most pleasant thing to use in a dark room
4:04
basically since iOS 7 came out. The very white interfaces can be extremely bright
4:11
even when the phone is at the dimmest setting. One way to get around this
4:15
is to enable the smart invert colors feature. The idea here is pretty simple
4:21
Anything that's not an image or an app icon gets the colors inverted
4:26
which means that things that are white become black. For the most part
4:30
it is kind of a halfway workaround to getting a dark mode feel on your iOS device
4:36
Obviously, my hope is that at some point in the future, Apple adds an actual dark mode to iOS
4:41
much like they did to macOS Mojave in this past year, but until then, smart invert colors is a great way
4:48
to get a kind of fake dark mode effect without too much complication
4:53
Best of all, you can set smart invert colors to use that same triple click feature
4:58
and then switch it on and off based on your needs, which means it's really fast and really easy
5:03
to get smart invert colors on and off depending on the situation you're in
5:07
Playing off the idea of using your device in a dark room
5:14
the reduce white point setting is actually a great way to get a extreme low light mode
5:21
Basically, the way the feature works is when enabled, everything that's white or everything that's bright
5:25
is dimmed a little bit. This means that you can pull the brightness all the way down
5:30
and then once this is enabled, go even dimmer. This is perfect in a ton of situations
5:35
and my personal most used accessibility feature on any of my devices
5:39
You do get a slider which allows you to control just how much you want to reduce that brightness
5:44
I set it somewhere in the 80 to 85% range, which makes it perfect if I'm going to use my iPad
5:49
for some reading in bed or checking up on the news or anything like that
5:53
that I can get a very, very, very dim screen while still being able to read text or see images
5:59
without disrupting someone else in the room or waking the entire neighborhood
6:04
or staring into the sun, as it sometimes feels when you're using an iPad
6:13
The final trick on the list is something you may have seen other people using
6:17
especially if they have a cracked screen or a broken home button on their device
6:22
and that's AssistiveTouch. The way it works is pretty simple. With it enabled, you get a small little widget
6:28
on the screen that acts like a home button of sorts. You can set a couple of features on it
6:33
the first of which that I would do is a single tap, making it replicate a home button press
6:39
and a double tap replicating pulling up multitasking. This makes the AssistiveTouch icon
6:45
work just like a virtual home button. The third setting, which is long press
6:49
or long hold on the button, I set to the flyout menu. From the flyout menu, you can get all kinds of features
6:54
like volume up and volume down, lock the screen, take a screenshot
6:59
This is really convenient, especially if you've switched to an iPhone 10
7:04
and you really miss that home button feel. This is a great way to do it through software
7:07
My suggestion, put it in the bottom at the center, and then once it's there, tap it like a home button
7:12
double tap it to get to multitasking, or press and hold to get those extra features
7:16
Much like the other features, you can enable and disable AssistiveTouch with a triple click of the side button or the home button
7:23
And best of all, it's easy to move out of your way, so if it ever feels like it's getting in the way
7:28
if you don't want to disable it entirely or switch it on and off all the time
7:31
you can grab it, move it to other parts of the screen, and then move it back to wherever your normal spot is
7:37
whenever you need to. So that's it, seven accessibility features that you or someone you know
7:42
could definitely take advantage of. If you found this helpful or know of any other accessibility tricks
7:47
feel free to let me know in the comments down below. Give the video a thumbs up if you found something useful in it
7:52
or share it with a friend or a loved one if you think there's something in there for them
7:57
I'm Ian for Cult of Mac, and I'll catch you in the next one. ��
#Computers & Electronics
#Consumer Electronics
#Assistive Technology