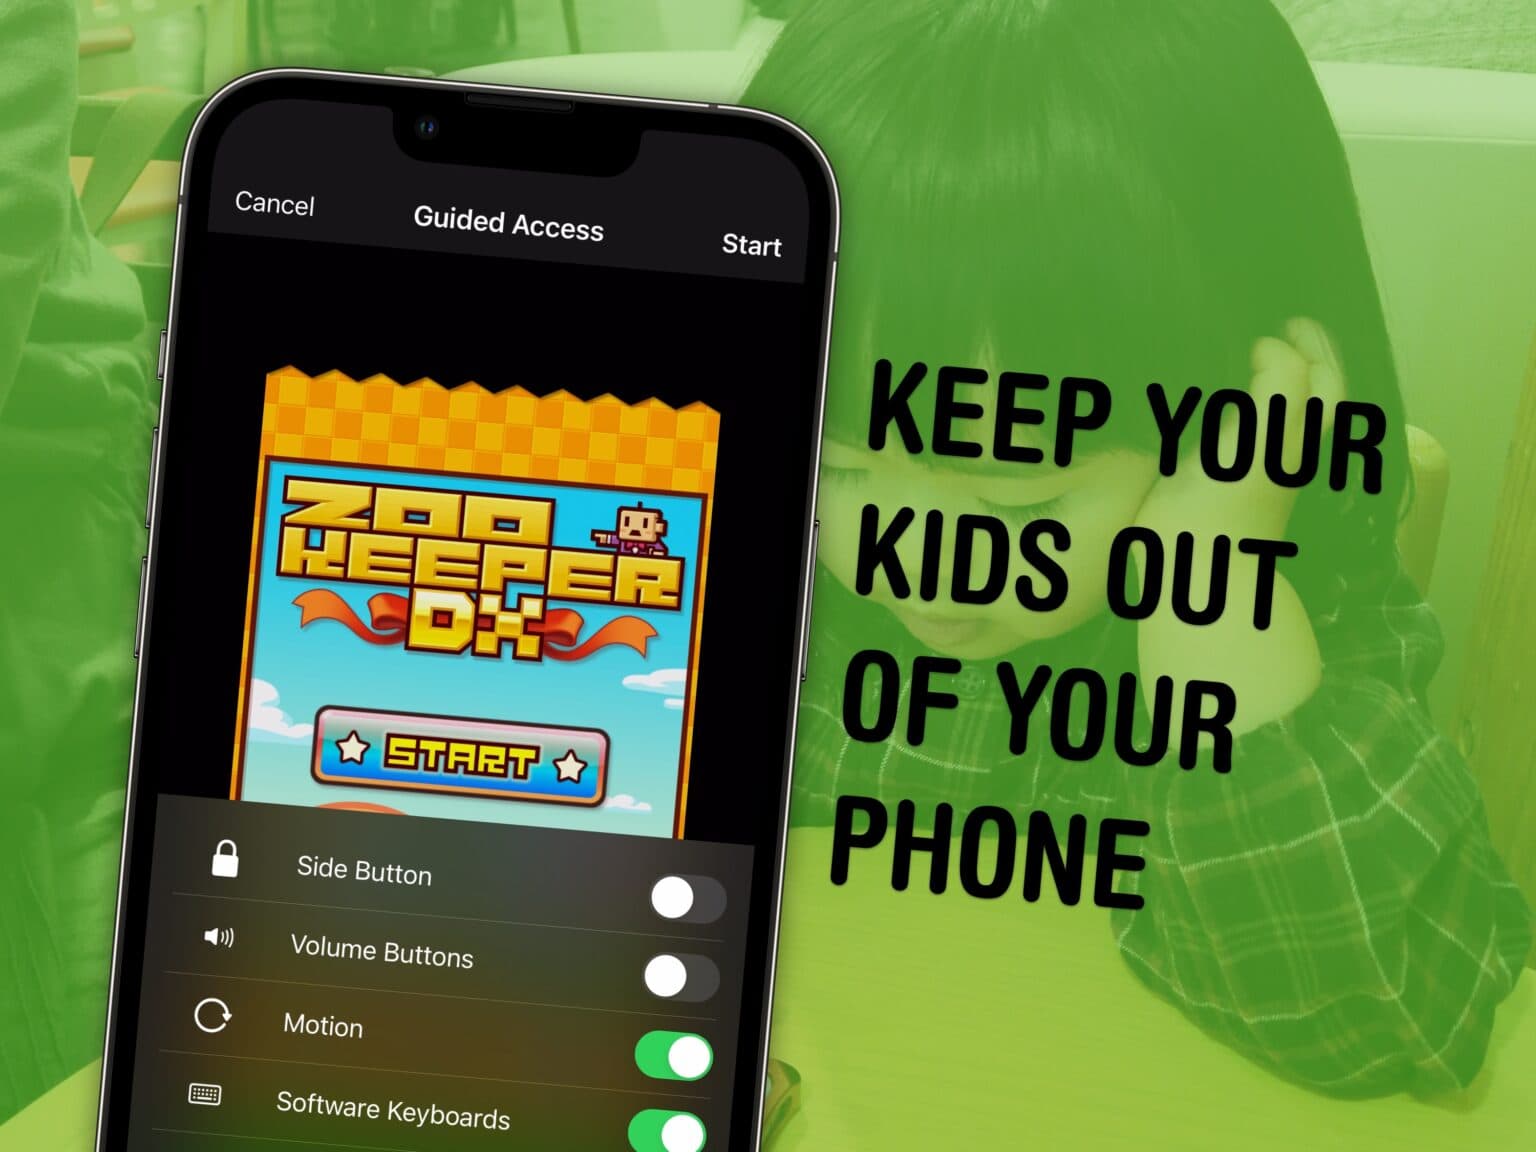
You can use a feature called Guided Access to lock down your iPhone to a single app before you hand it to a kid or someone else. You might want to let your offspring play a game, or pass your phone around for controlling music, or hand it off to show someone a video … but you probably don’t want them going rogue and reading your texts or calling your mom.
In Accessibility settings, you can enable Guided Access to limit your iPhone to a single app before you hand it off. It’s a kind of quick and dirty “guest mode.”
This will help you keep your phone — and your privacy — safe. You can even disable features like the volume buttons and set up time limits.
How to use Guided Access to lock your iPhone
Apple originally came up with Guided Access as an Accessibility feature that limits your device to a single app and lets you control which features are available. But it can come in handy when you need to lock down your iPhone in one app if you need to hand it to someone else.
It’s one of several accessibility settings that can be useful for everyday tasks. For instance, you can have your phone read any text out loud to you, control your Apple Watch with the same hand it’s being worn on, manage everything on your iPad from a keyboard and much more.
Many of these features offer use cases outside their intended purposes. I have no problem seeing my display clearly, but as a graphic designer, sometimes I magnify the screen to check for pixel-perfect alignment.
You’ll find Guided Access in your iPhone’s Accessibility settings
Screenshot: D. Griffin Jones/Cult of Mac
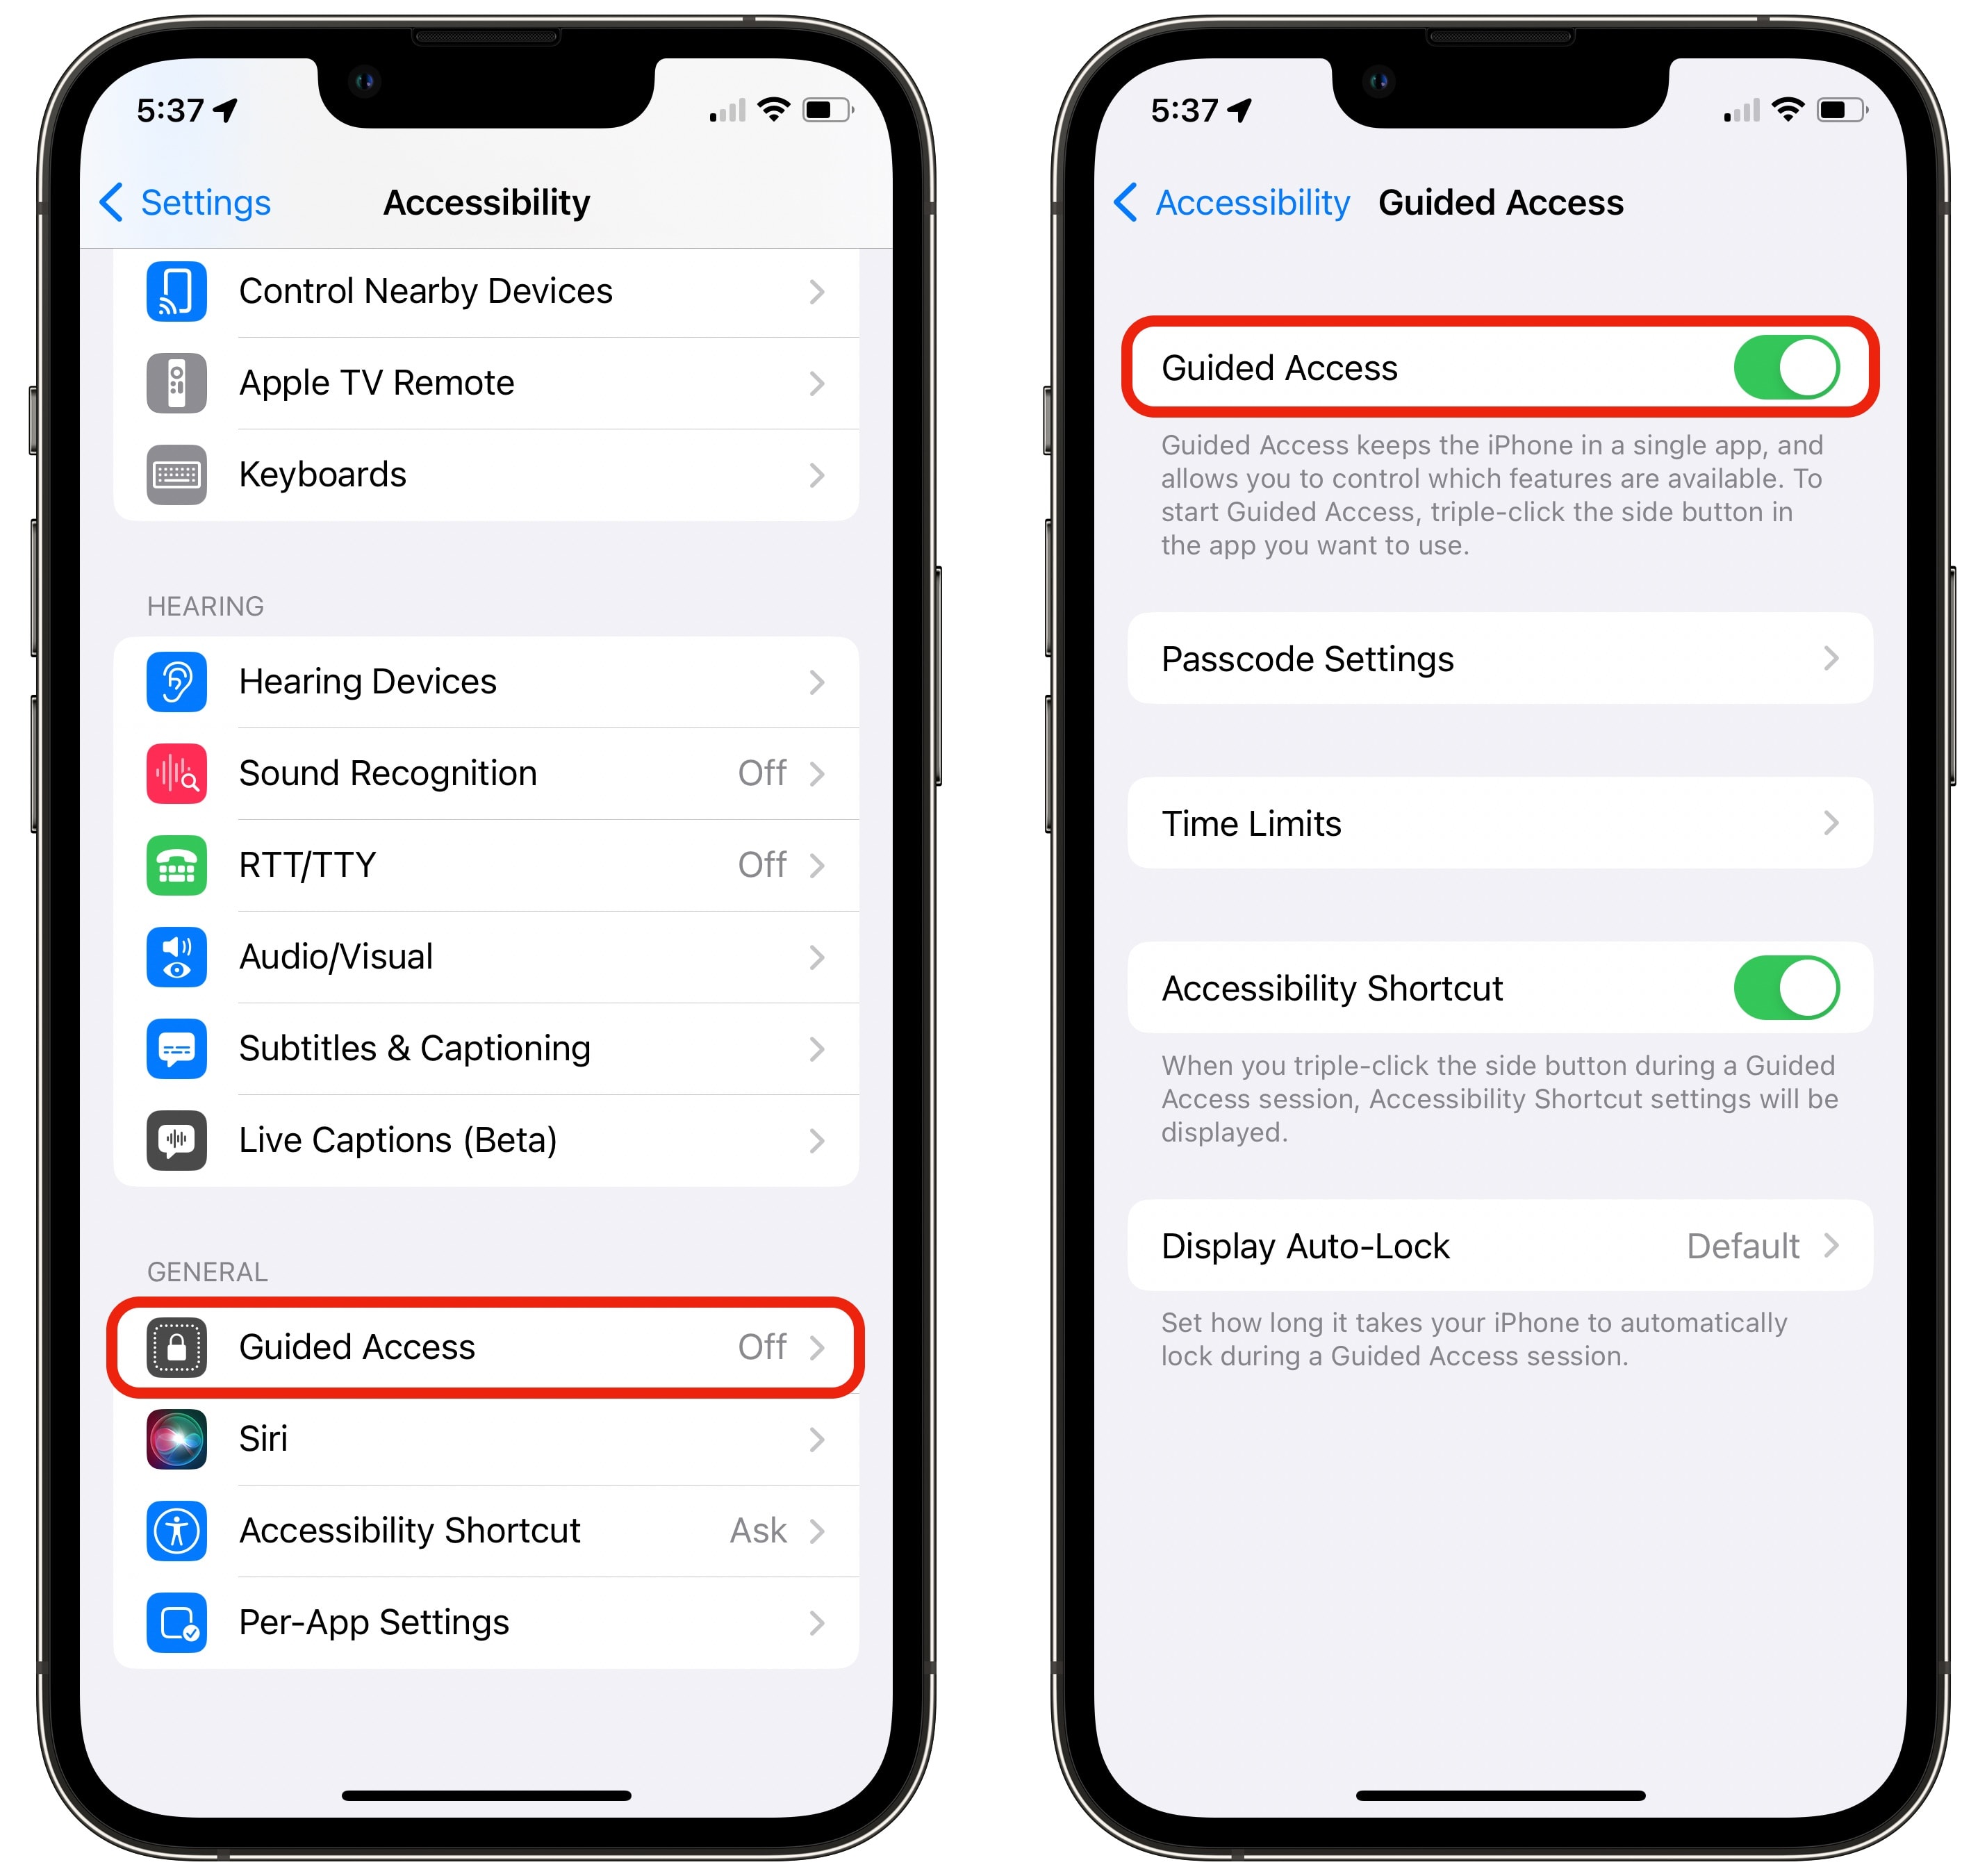
To make your iPhone safe to hand off to others, go to Settings > Accessibility > Guided Access (at the bottom). Turn on Guided Access to get started. You can’t actually enable Guided Access from inside Guided Access settings, though. You’ll need to switch to another app to try it out.
Screenshot: D. Griffin Jones/Cult of Mac
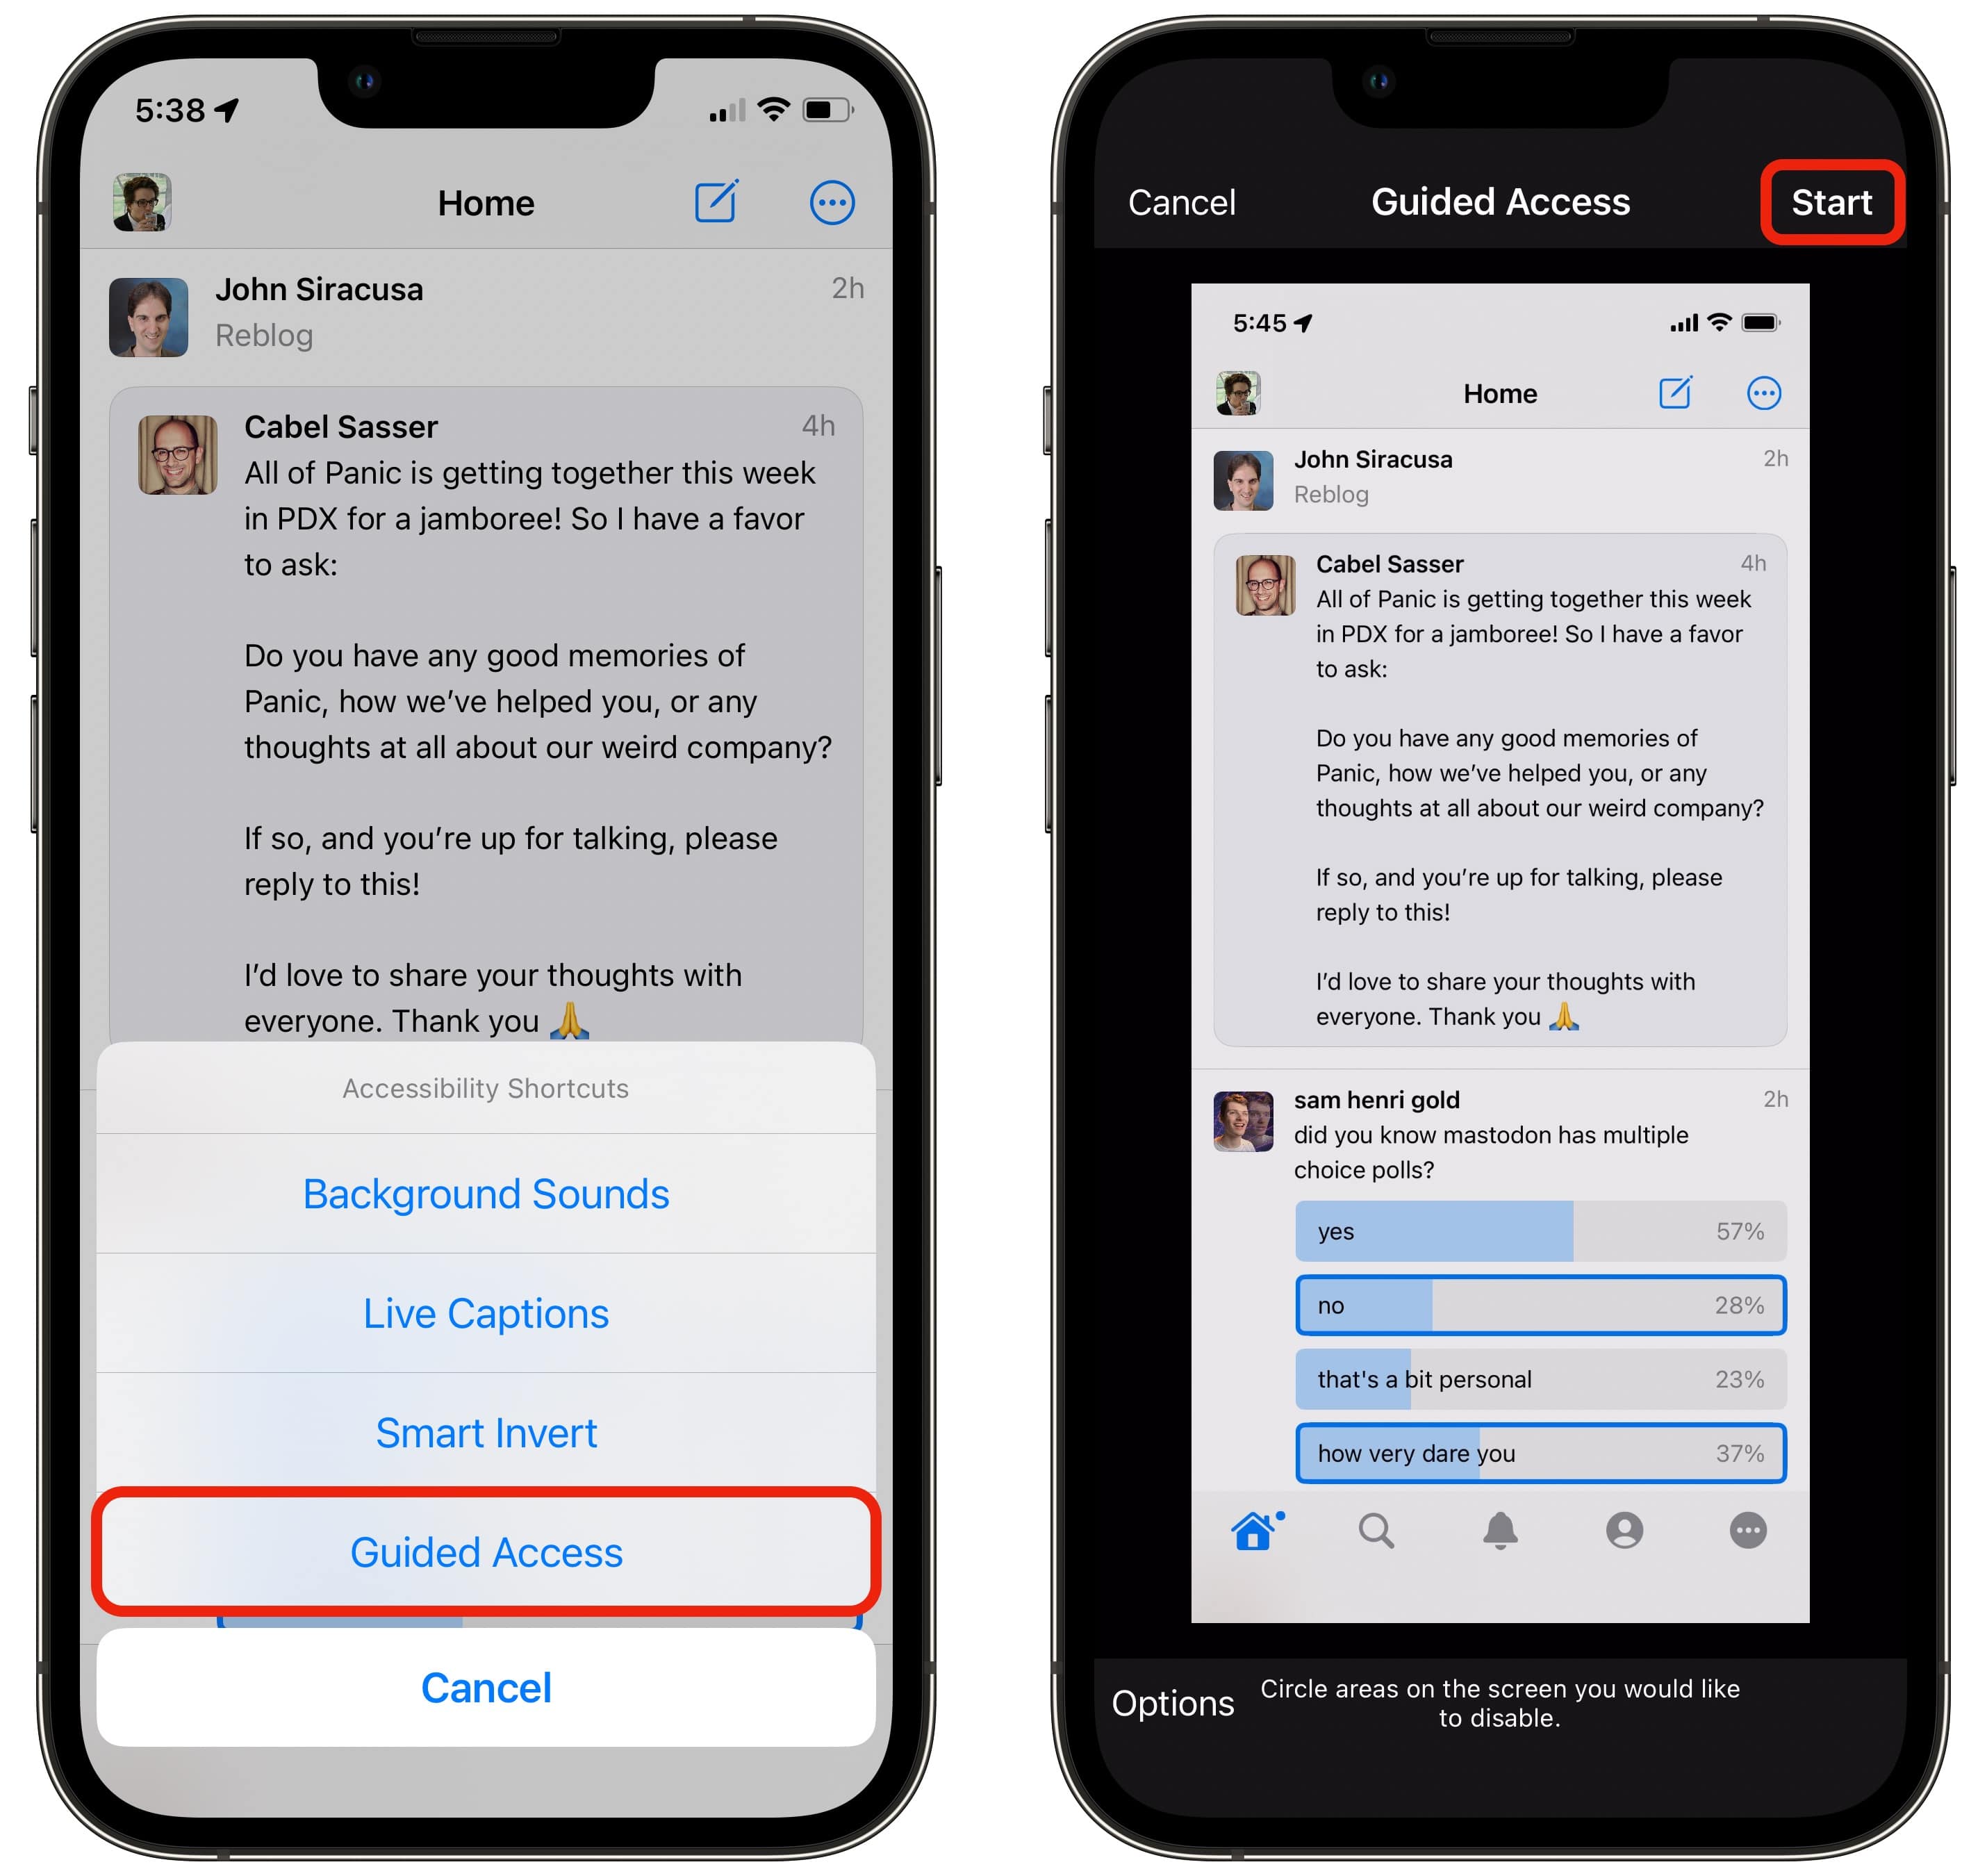
Enabling Guided Access is a little clunky. You must triple-tap your iPhone’s side button (if you have multiple Accessibility features enabled, you may need to select Guided Access from a pop-up menu). Then, you need to enter in a passcode twice and tap Start.
You also can enable Guided Access from the Accessibility button in Control Center. If you don’t see the accessibility icon here, you can enable it in Settings > Control Center and tapping + Accessibility Shortcuts.
After you hit Start, your phone is locked wherever you are. The Home bar at the bottom of the screen disappears. You won’t be able to swipe up to switch apps (or click the Home button on older iPhones).
Set which functions are available
Screenshot: D. Griffin Jones/Cult of Mac
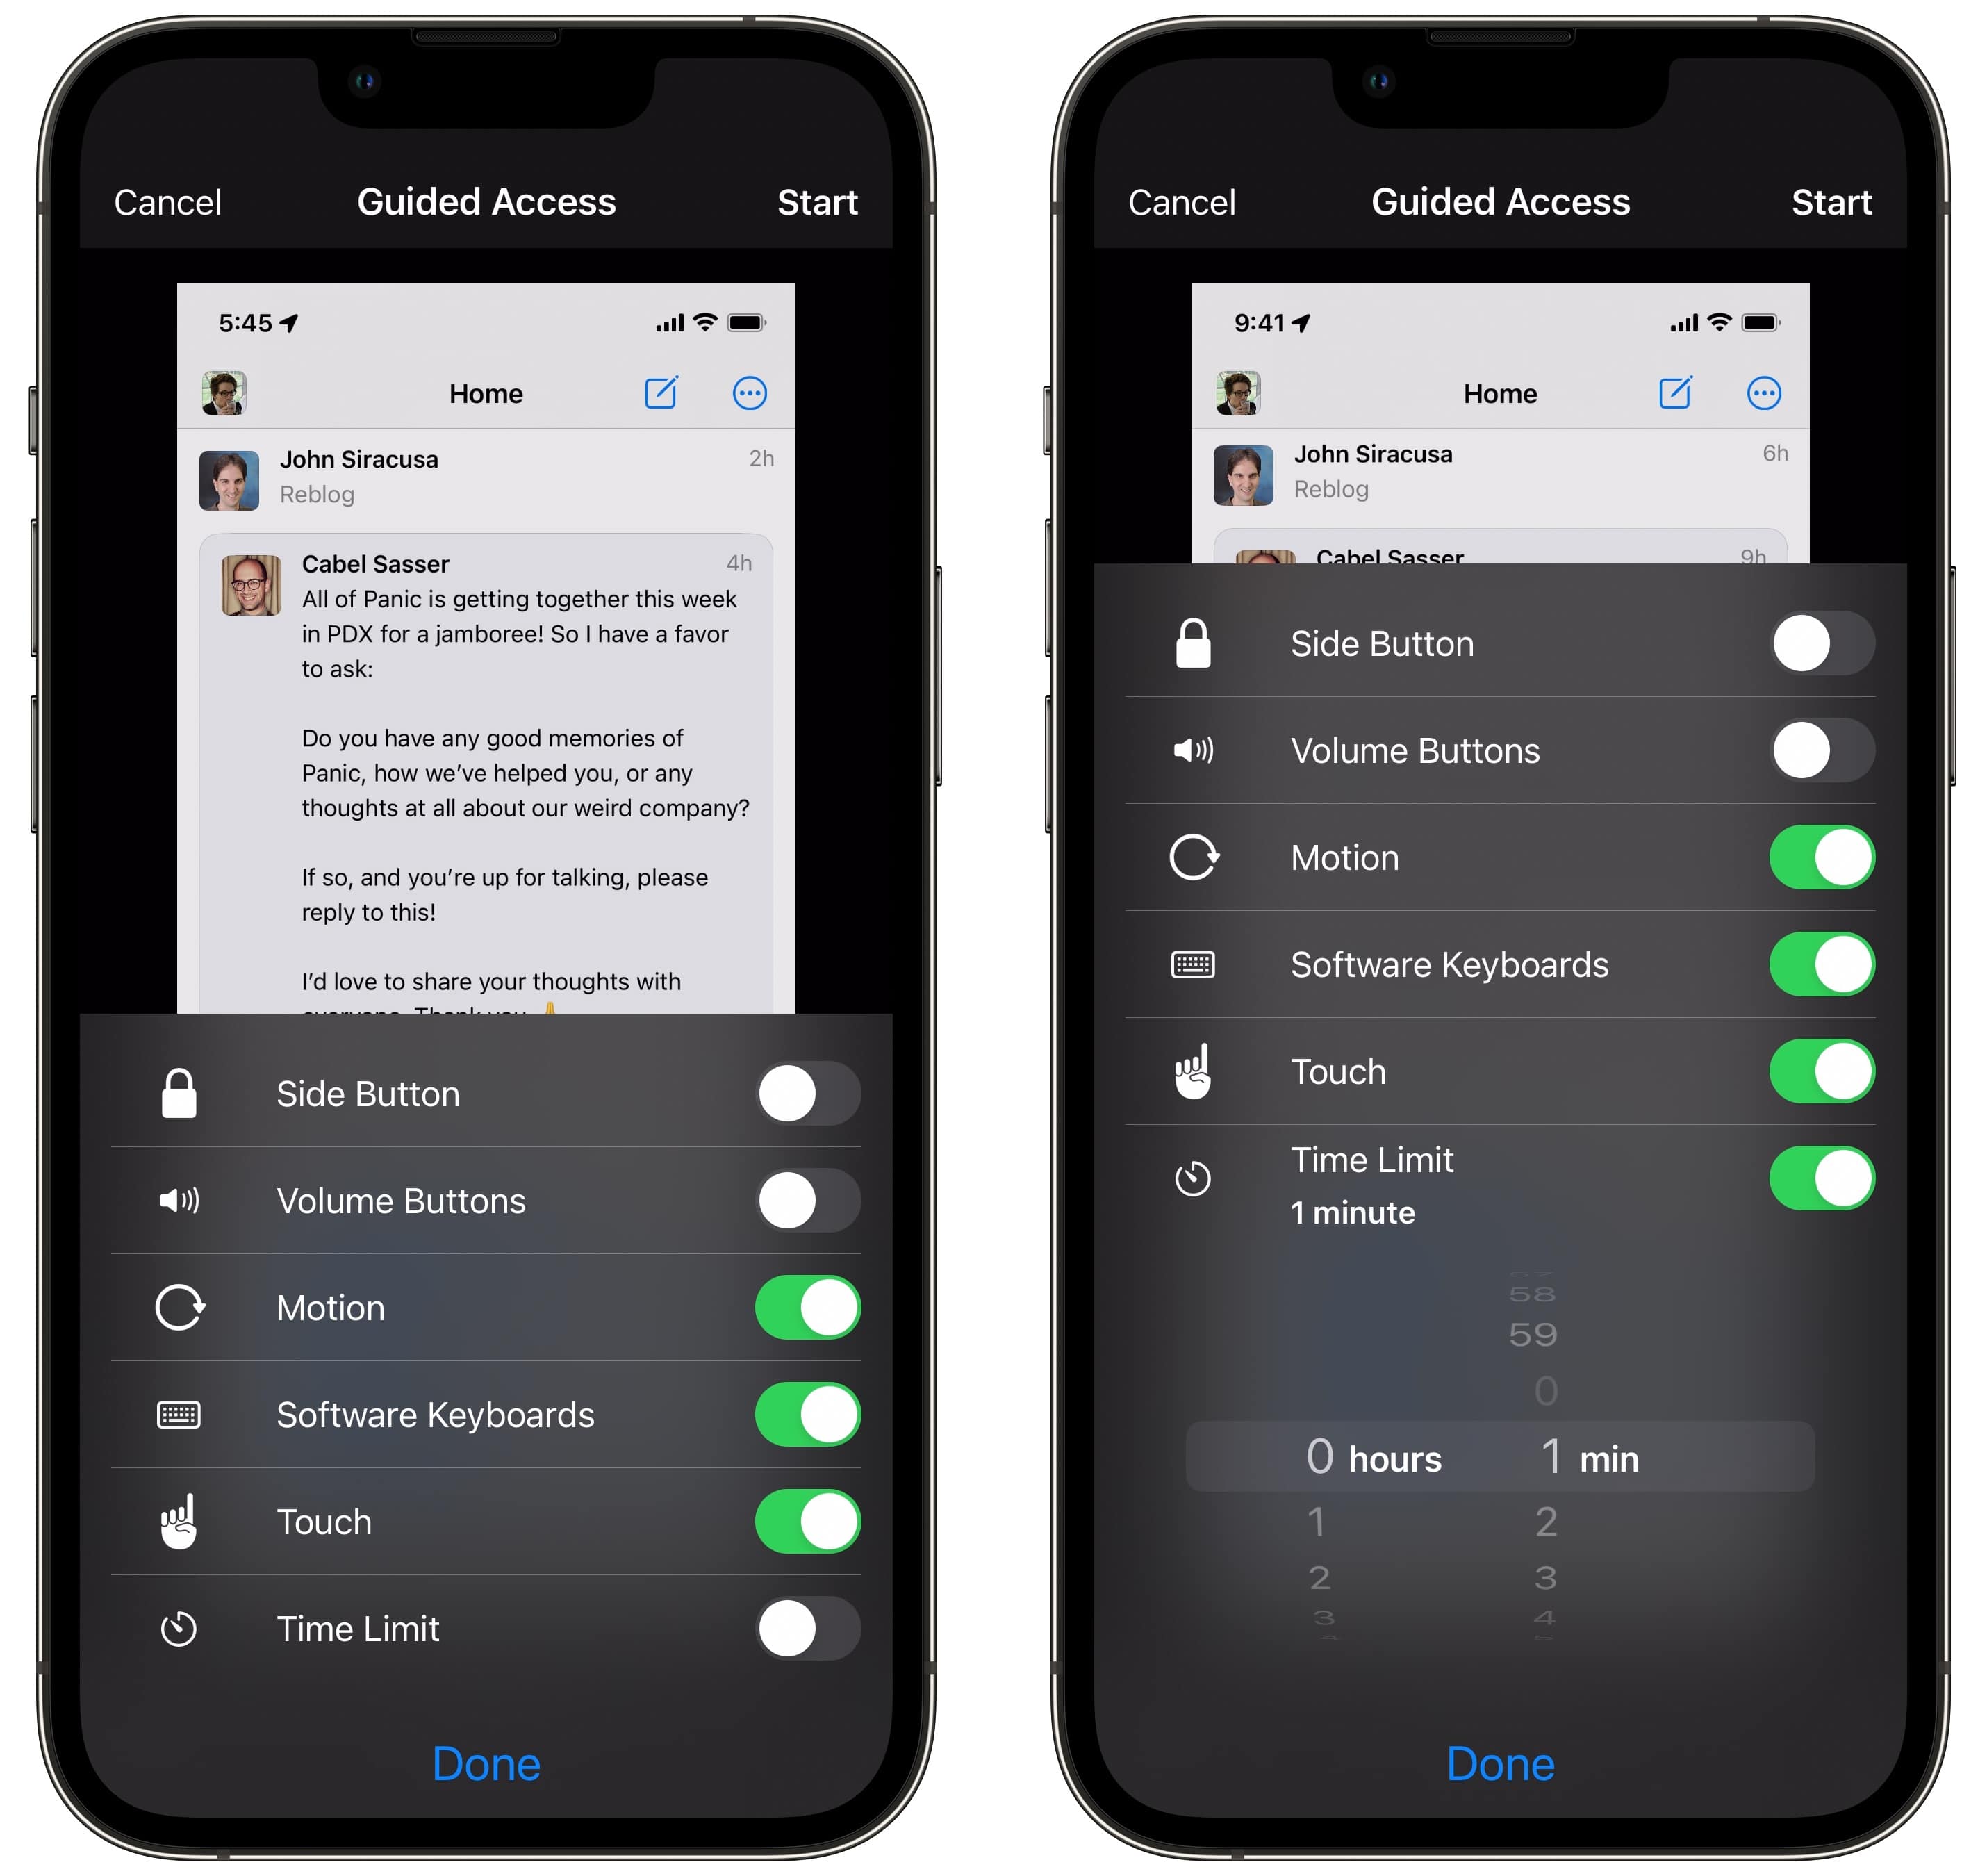
Apple also offers several ways you can customize Guided Access. Before you hit Start, you can tap Options in the bottom-left of the screen. Then you can turn on and off a few additional functions.
- Disable Side Button to prevent the phone from being turned off — and to keep Siri from being activated.
- Enable Volume Buttons to allow the user to change the volume.
- Turn off Motion to disable screen rotation.
- Switch off Software Keyboards to prevent the user from typing.
- Turn off Touch and the user can’t swipe on the screen at all, only look.
- Enable Time Limit to lock the screen after a certain amount of time passes. This proves handy if you use Guided Access to let kids play games on your iPhone and want to set limits. (You also can use the timer to force them to take equal turns.)
Block parts of the screen
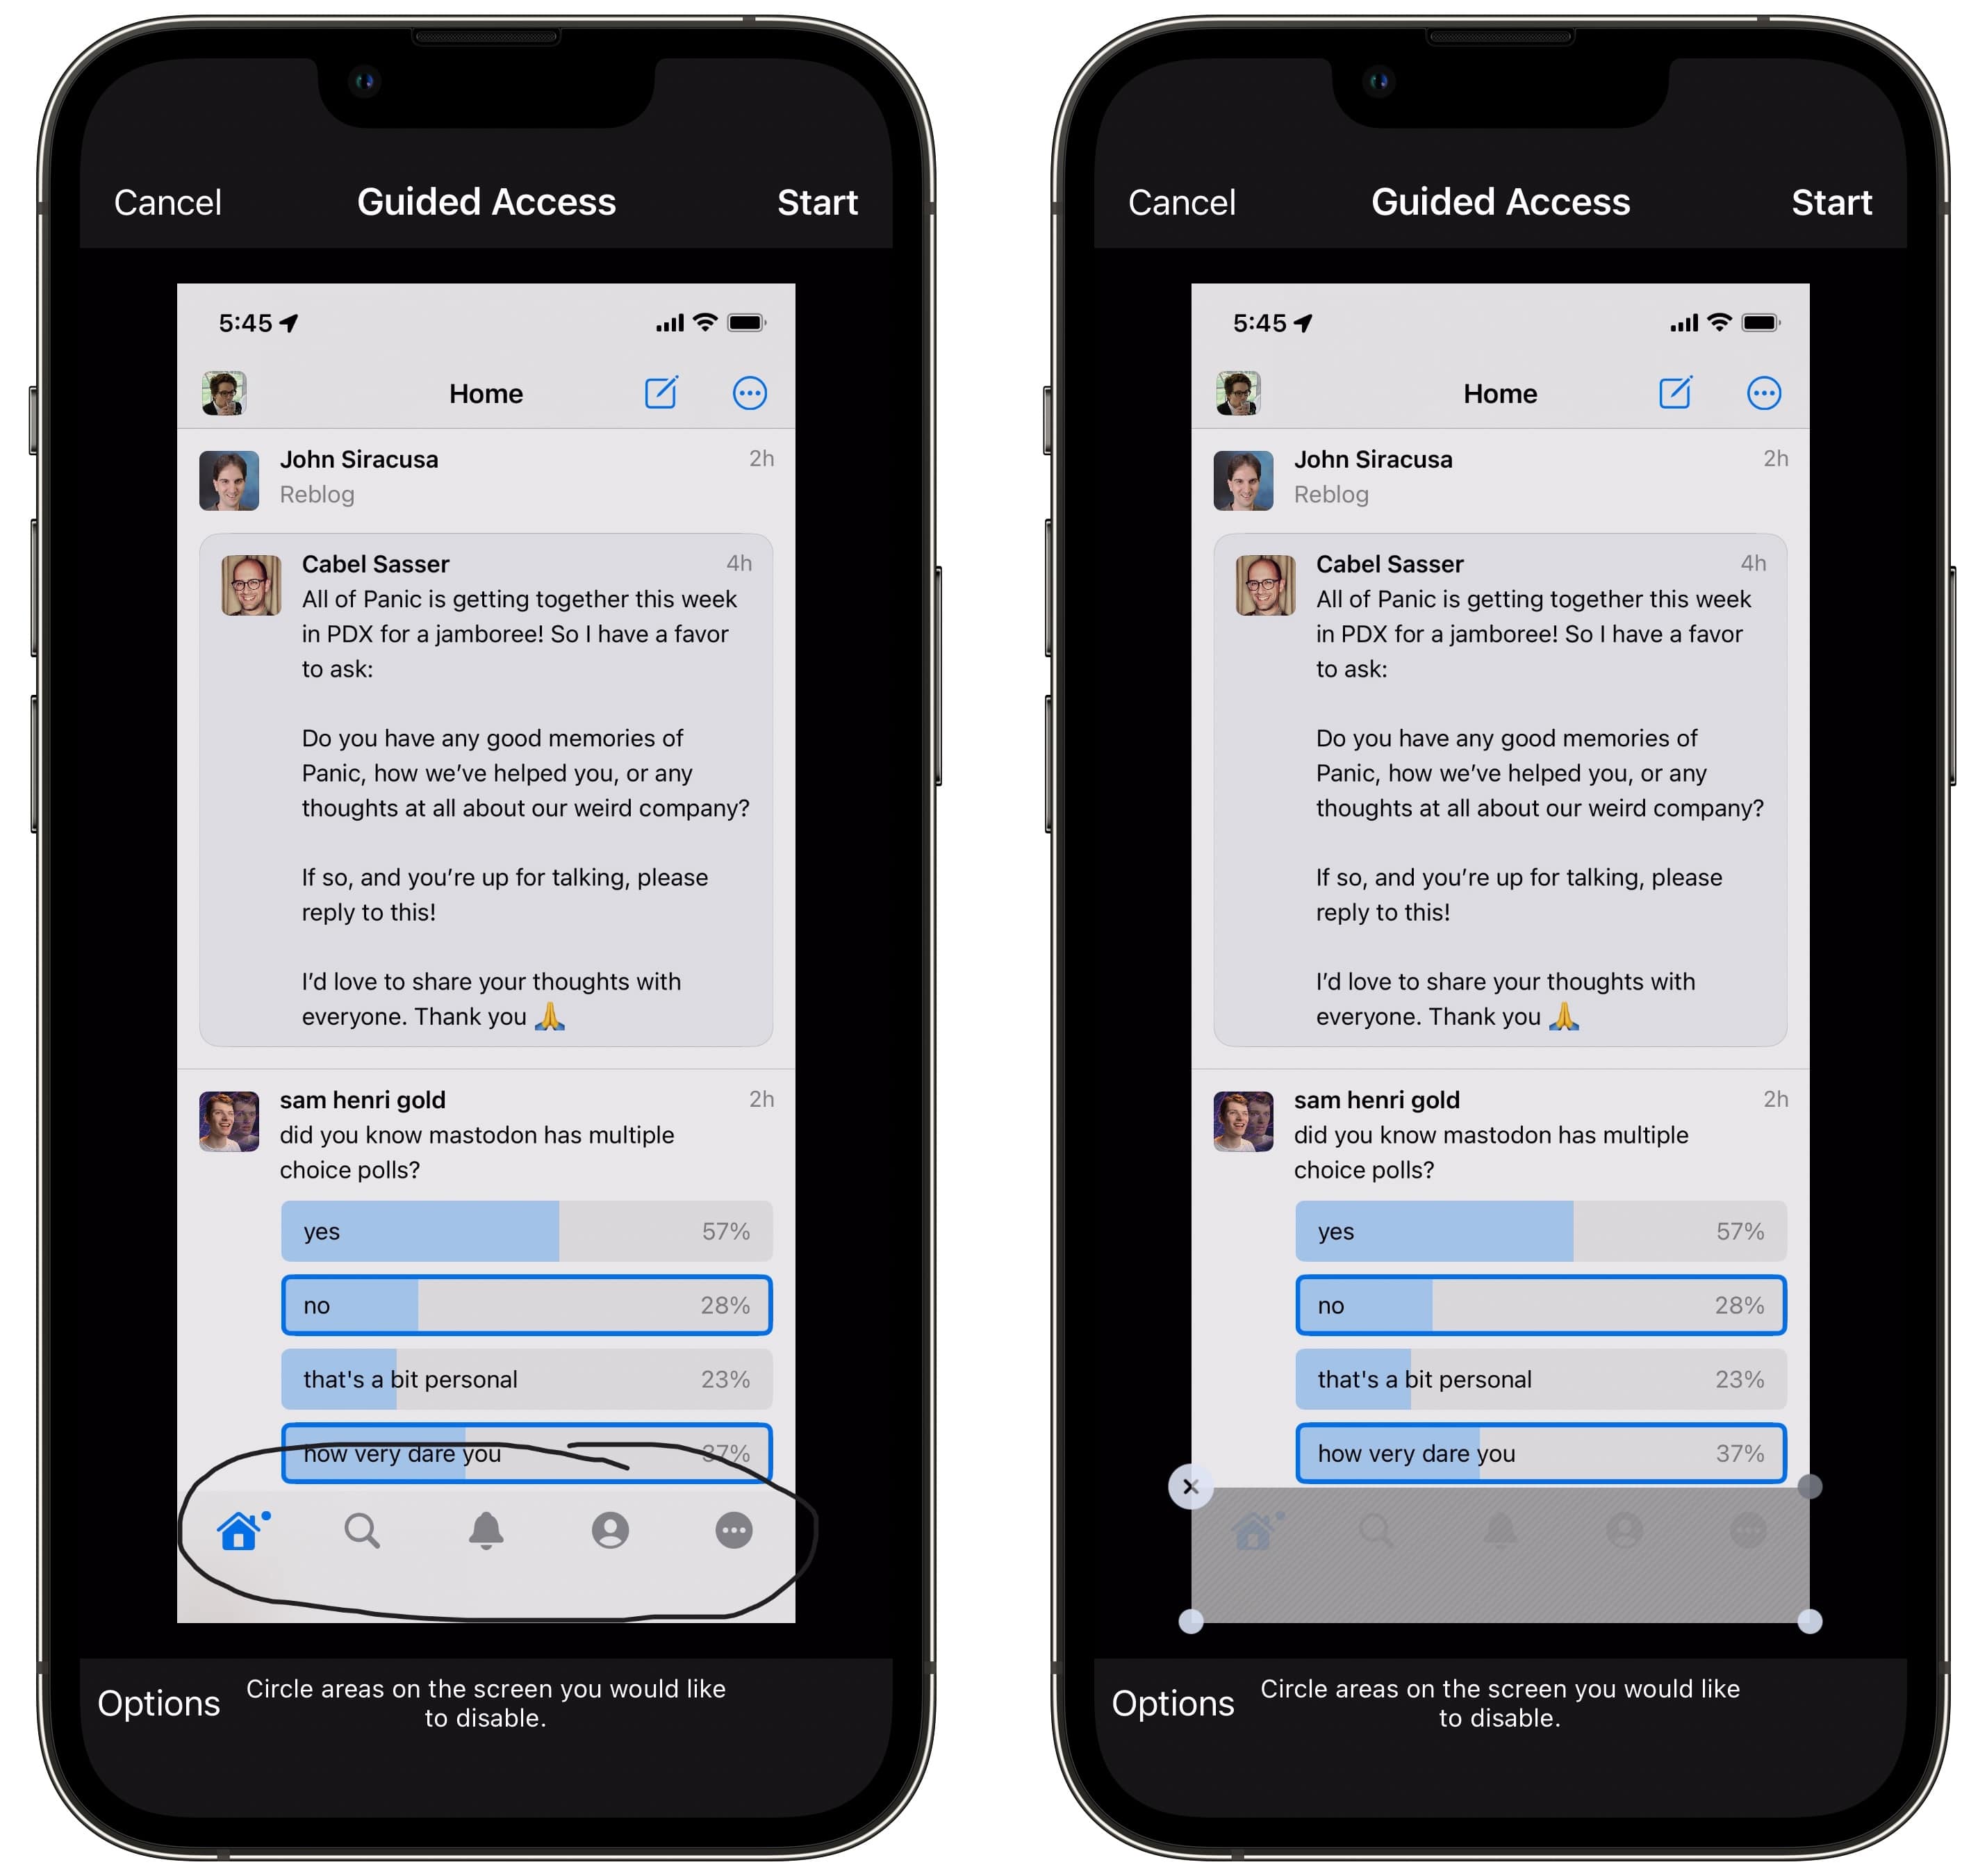
This may be handy if you want to lock someone to a particular view inside an app — maybe you want the designated car DJ to look up music, but you don’t want them browsing your library or private playlists. Or maybe you’re showing someone an album of pictures, but you don’t want them perusing your Photos library.
Screenshot: D. Griffin Jones/Cult of Mac
To restrict what the user can see, just draw a circle around the parts of the screen you want blocked off, like the bottom tab bar or the back button in the title bar. A light gray square will appear. You can adjust its size and position by moving it around or grabbing the handles in the corner.
When you start Guided Access, those parts of the screen will still be visually grayed out, so it will be clear to the other person that you’ve blocked off certain features. It’s not exactly discreet.
Screenshot: D. Griffin Jones/Cult of Mac
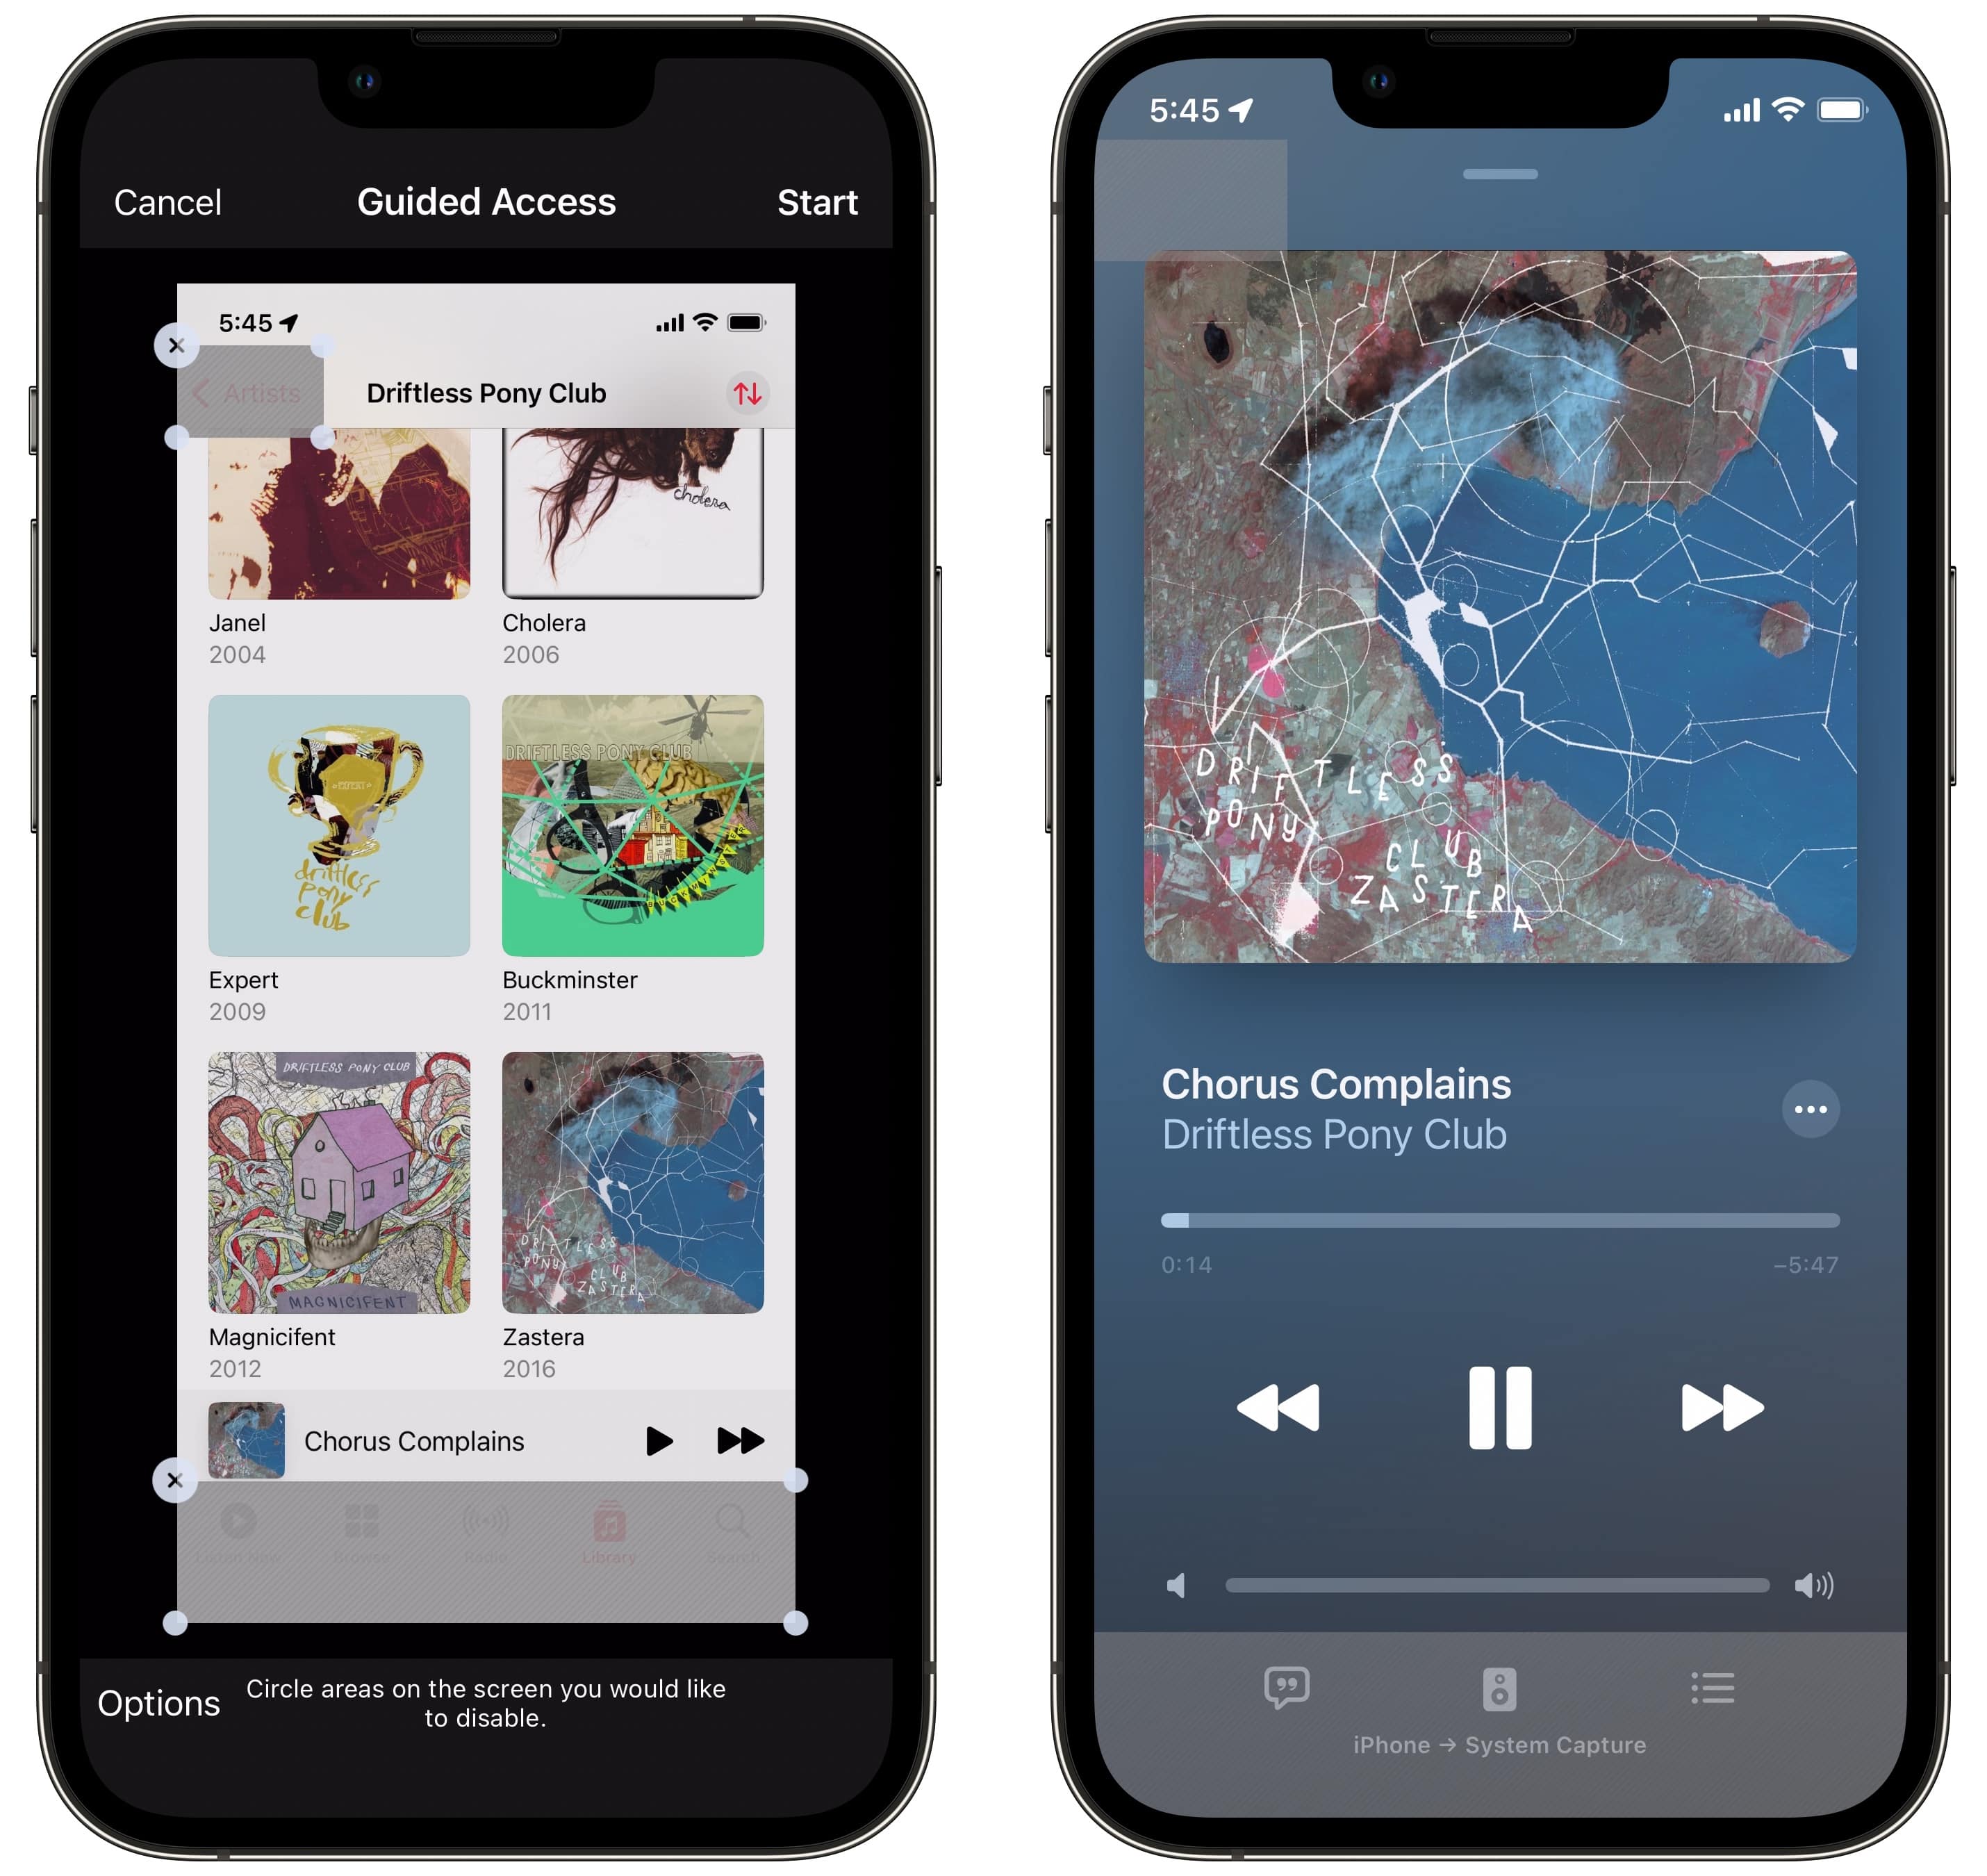
Another downside is that Guided Access is not smart about what’s being blocked. In the above screenshot, you may think that I’ve successfully hijacked the party into playing music exclusively by Driftless Pony Club, but that won’t really work.
While the Back button is blocked off, you can still swipe from the left edge to get to the rest of my library. And while the tab bar at the bottom is blocked off, you’re also blocked from tapping the Lyrics button.
How to turn off Guided Access
To turn off Guided Access, triple-click the iPhone’s Side button (or Home button). You can either enter your Guided Access passcode (which may be different from your standard passcode) or double-click again to use Face ID (or Touch ID).
Then tap End in the top-left of the screen to turn off Guided Access. This is also where you can edit the blocked sections of the screen.
Fine-tune Guided Access with additional settings
Screenshot: D. Griffin Jones/Cult of Mac
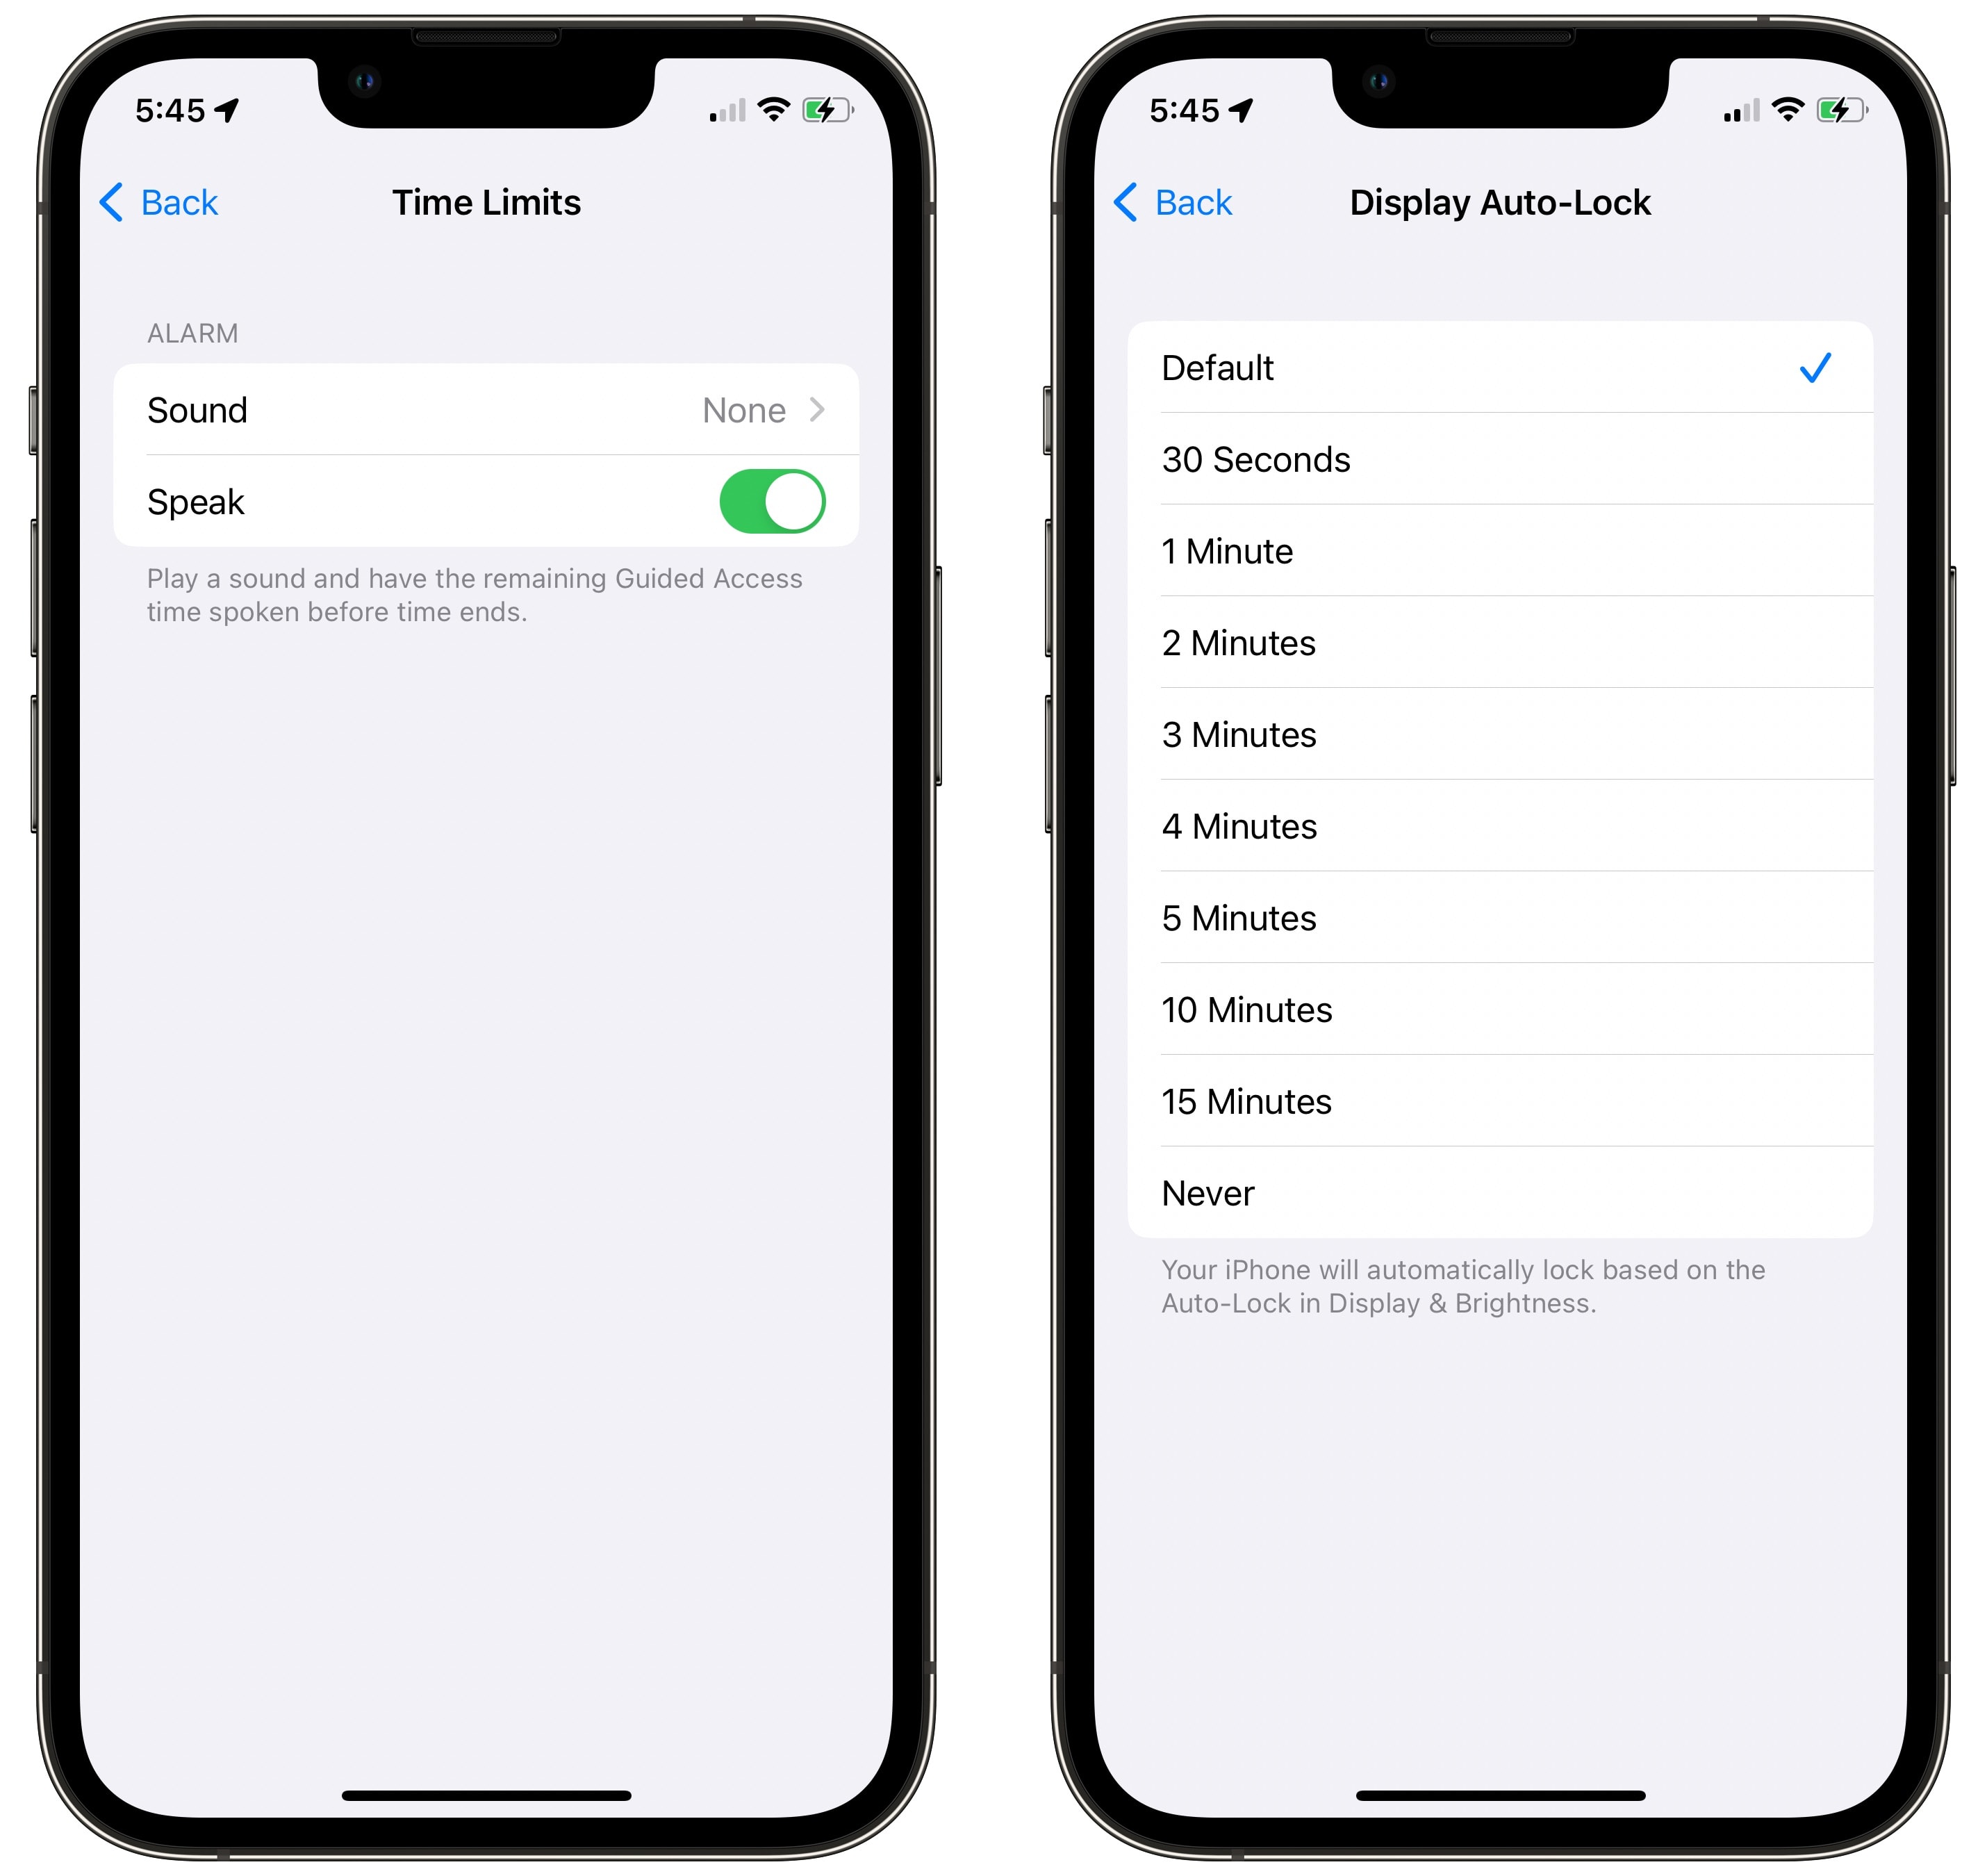
Additional Guided Access settings offer even more ways to fine-tune the feature. To do so, go back to Settings > Accessibility > Guided Access and look at your options.
For example, under Display Auto-Lock, you can set a different amount of time before the screen shuts off. This is handy if you’re passing your phone around to control music or as an Apple TV remote — you don’t need to unlock your phone again if it isn’t touched for a few minutes.
Under Passcode Settings, you can disable whether Face ID (or Touch ID) can be used to disable Guided Access. I know a few family members who look similar enough to each other to occasionally fool Face ID on each other’s devices — though screening for similar-looking fingerprints is a little more challenging.
Time Limits will sound a warning if your time limit is approaching. Pick an alert sound or enable Speak for your phone to announce it.
