HomePod 2 and (surprise!) HomePod mini both include temperature and humidity sensors. These can be used by Apple’s Home app to control HomeKit accessories. Or just tell you how hot or cold it is in your living room.
Here’s how to use the sensors in Apple’s large and small smart speakers.
Secret sensor in HomePod mini just activated
One of the new features of HomePod 2 is a temperature and humidity sensor, something the original did not offer.
And while we’ve known for years that HomePod mini had the same sensor, it hasn’t been activated. That changed with the release of iOS 16.3 and an equivalent software update for the smart speaker.
So the sensors in both the big and little HomePod are active, as long as you’re running at least iOS 16.3, iPadOS 16.3 and/or macOS 13.2. Plus, the HomePod itself must be updated. Read the Cult of Mac guide on how to update the smart speaker.
How to check temperature and humidity with HomePod

Photo: Ed Hardy/Cult of Mac
When you want to know either the temperature or humidity level of the room the HomePod is in, open the Home app on your Apple device, like your iPhone.
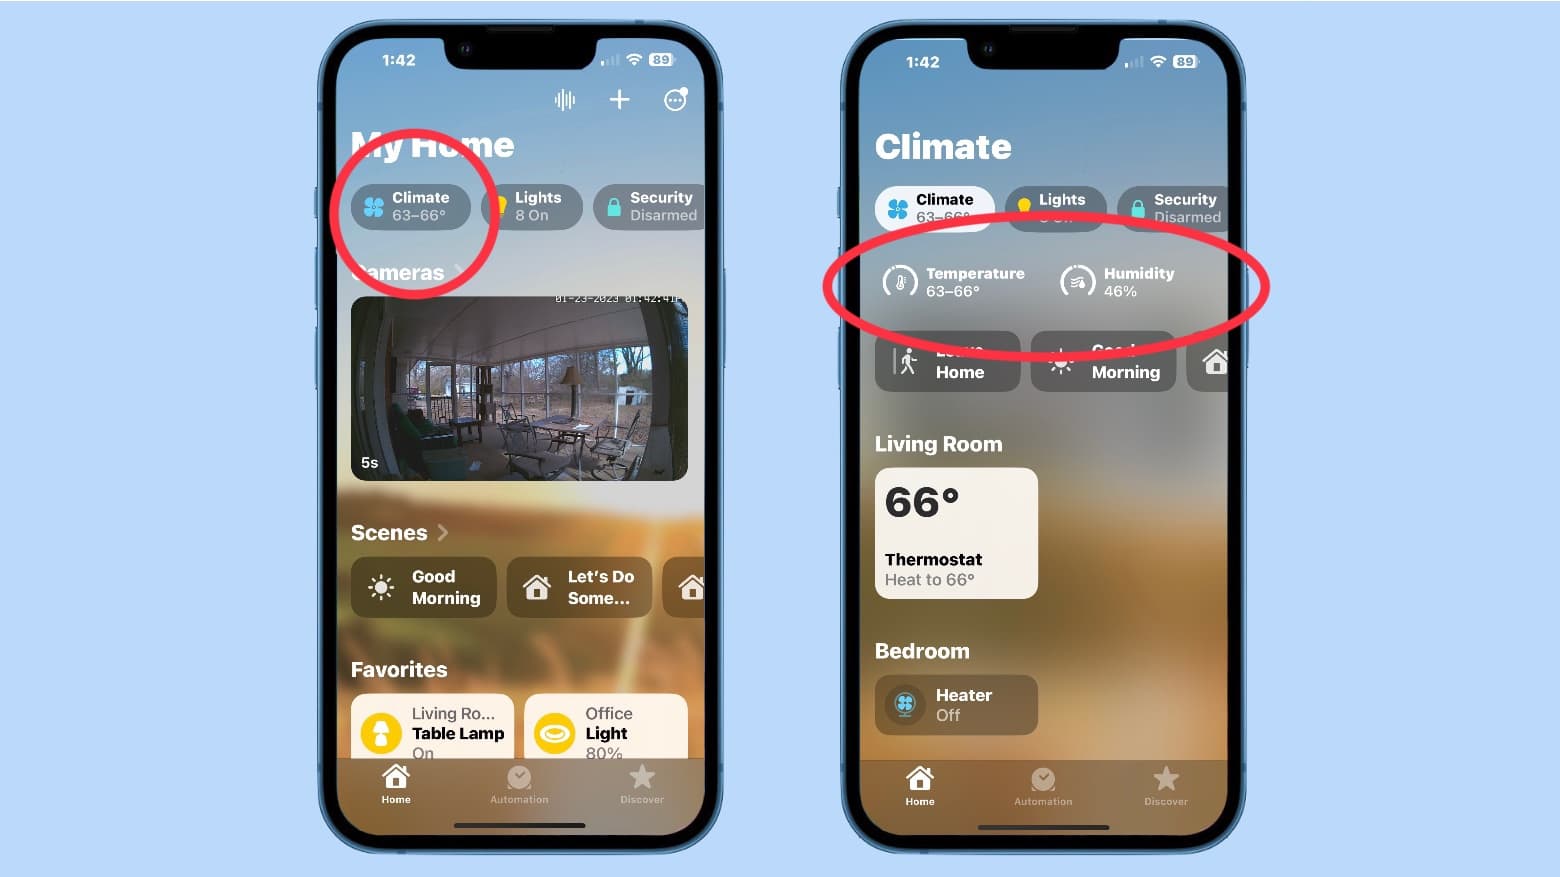
Press the Home button in the lower left to get back to the Home screen. Once there, look for the Climate button (shown above, at left). Tap on it.
Near the top of the resulting page you’ll see separate buttons for Temperature and Humidity (shown above, at right). Tap on them for more information. Expect the temperature to be a range, not an exact figure.
Create automations with the Home app

Scrfeenshots: Ed Hardy/Cult of Mac
The new HomePod sensors can be used for more than simply finding out conditions near the smart speaker. The information can be used in Automations. For example, during the winter you can cool your house down to 50 degrees at night but heat your bedroom with a space heater that automatically cuts on when the temperature in the room drops below 68 degrees.
Creating an Automation is easy, as long as the device you want to control supports HomeKit, or is plugged into a HomeKit compatible smart plug.
- Start by opening Apple’s Home app, then tapping the Automation icon at the bottom of the screen.
- Once on the Automations page, hit the plus sign in the upper right corner of the screen to create a new Automation.
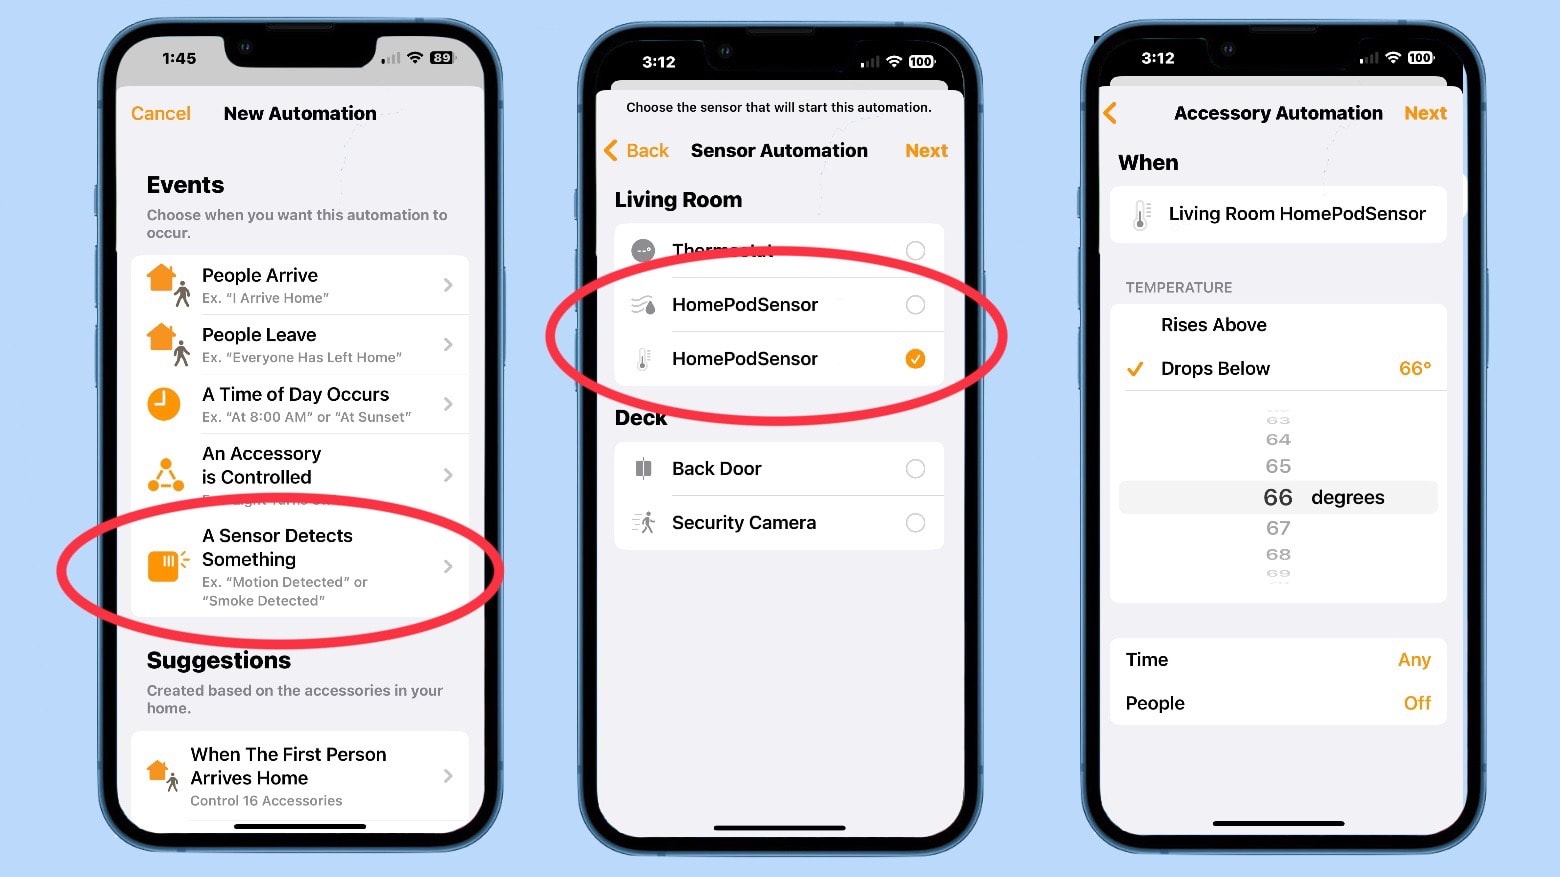
- On the pop-up window, select Add Automation. On the resulting New Automation page (shown above at left), tap on A Sensor Detects Something.
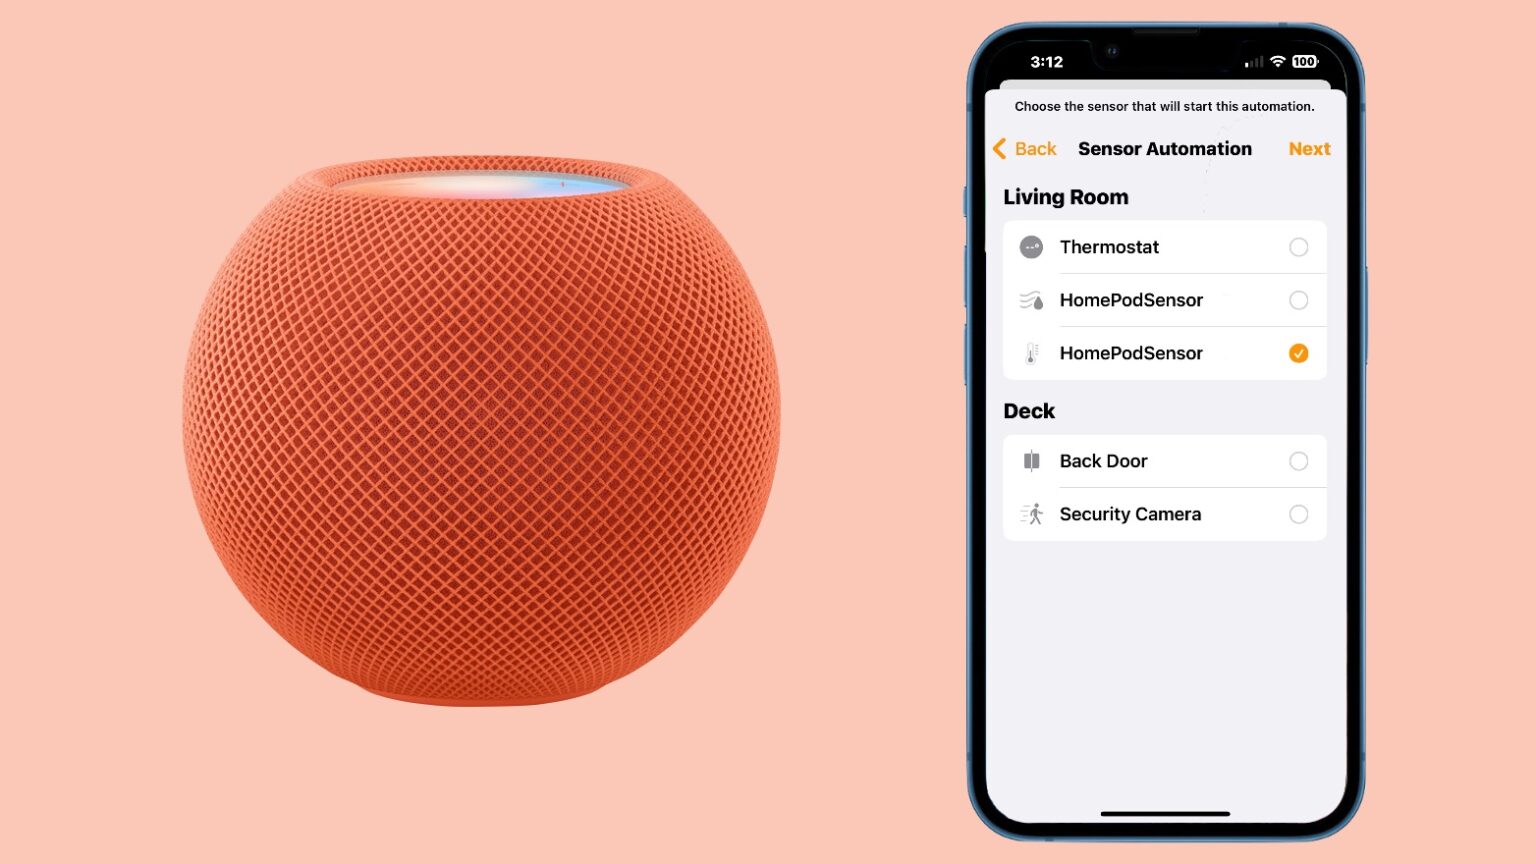
- The following is the Sensor Automation page (shown above at center) that lists the available sensors. You’ll notice that two new ones have been added, both labeled HomePodSensor. One has a thermometer next to it, while the other shows a humidity icon.
- For this example, tap on the checkbox to the right of the thermometer one, then hit Next in the upper righthand corner.
- On the Accessory Automation Page (shown above at right), you’ll be given the option to activate HomeKit accessories when the temperature rises above or below a specified point. Choose your options then hit Next.
- The next page allows you to choose the accessories that will activate when the temperature reaches the point you’ve specified. This can be a specific one, or you can create a scene with a collection of them. In our example, you’d choose the Bedroom Heater. Then tap Next.
- On the final screen, you see a summary of the Automation you just created, and are given the option to turn the HomeKit accessory on or off when the specified temperature is reached. Make your choices then hit Done.
There are other uses for the new sensors in HomePod, of course. One possibility is controlling humidity in a basement. Simple dehumidifiers often don’t let users specify exact humidity levels when they cut on or off, but a HomePod and HomeKit plug can be used for this job.


