A good way to separate your data is to partition your Mac hard drive. A partition splits your storage into two spaces, like putting a trunk divider in your car. The most common use case is to install a second operating system on the same computer. In college, I had a separate partition so I could boot into Ubuntu, and a third partition with Windows. With today’s Macs running Apple silicon, there’s no easy way to natively install Windows or Linux… yet.
But you’re probably here so you can install the beta version of macOS 13. The developer beta is anticipated for release the first week of June at WWDC22, Apple’s annual developer conference. The smart way to install it — especially with the developer betas, which can be notoriously rocky — is to use a separate partition.
The Mac comes with a very handy tool to partition your hard drive for free. Read on to partition your hard drive with Disk Utility.
How to partition your Mac hard drive
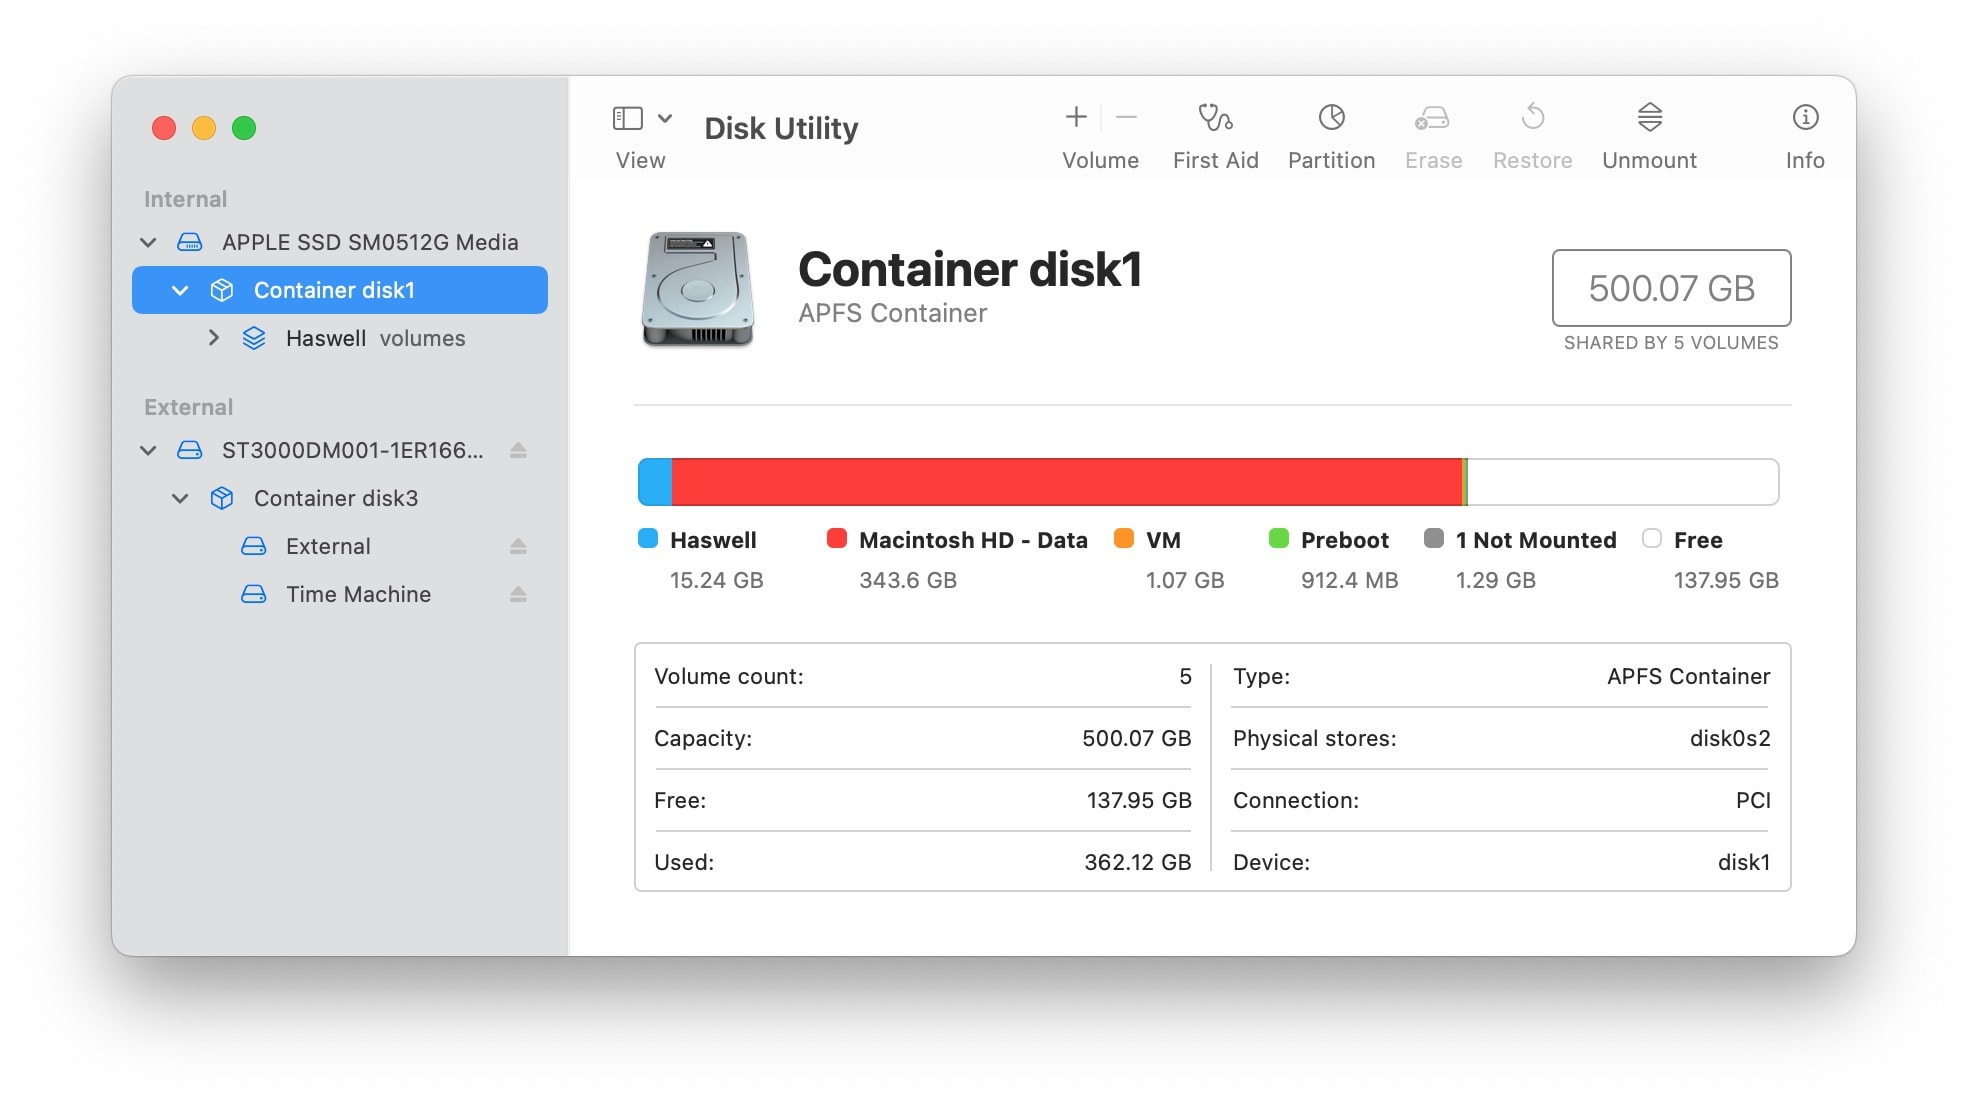
First, open Disk Utility. Search for it using Spotlight (⌘ Space) or find it in Applications > Utilities.

Screenshot: D. Griffin Jones/Cult of Mac
On the left, you’ll see a sidebar with internal storage and external storage (any hard drives or flash drives plugged in).
Click the arrow (❯) next to the top item listed under Internal (mine is titled APPLE SSD, yours may vary). Select Container disk1.

Screenshot: D. Griffin Jones/Cult of Mac
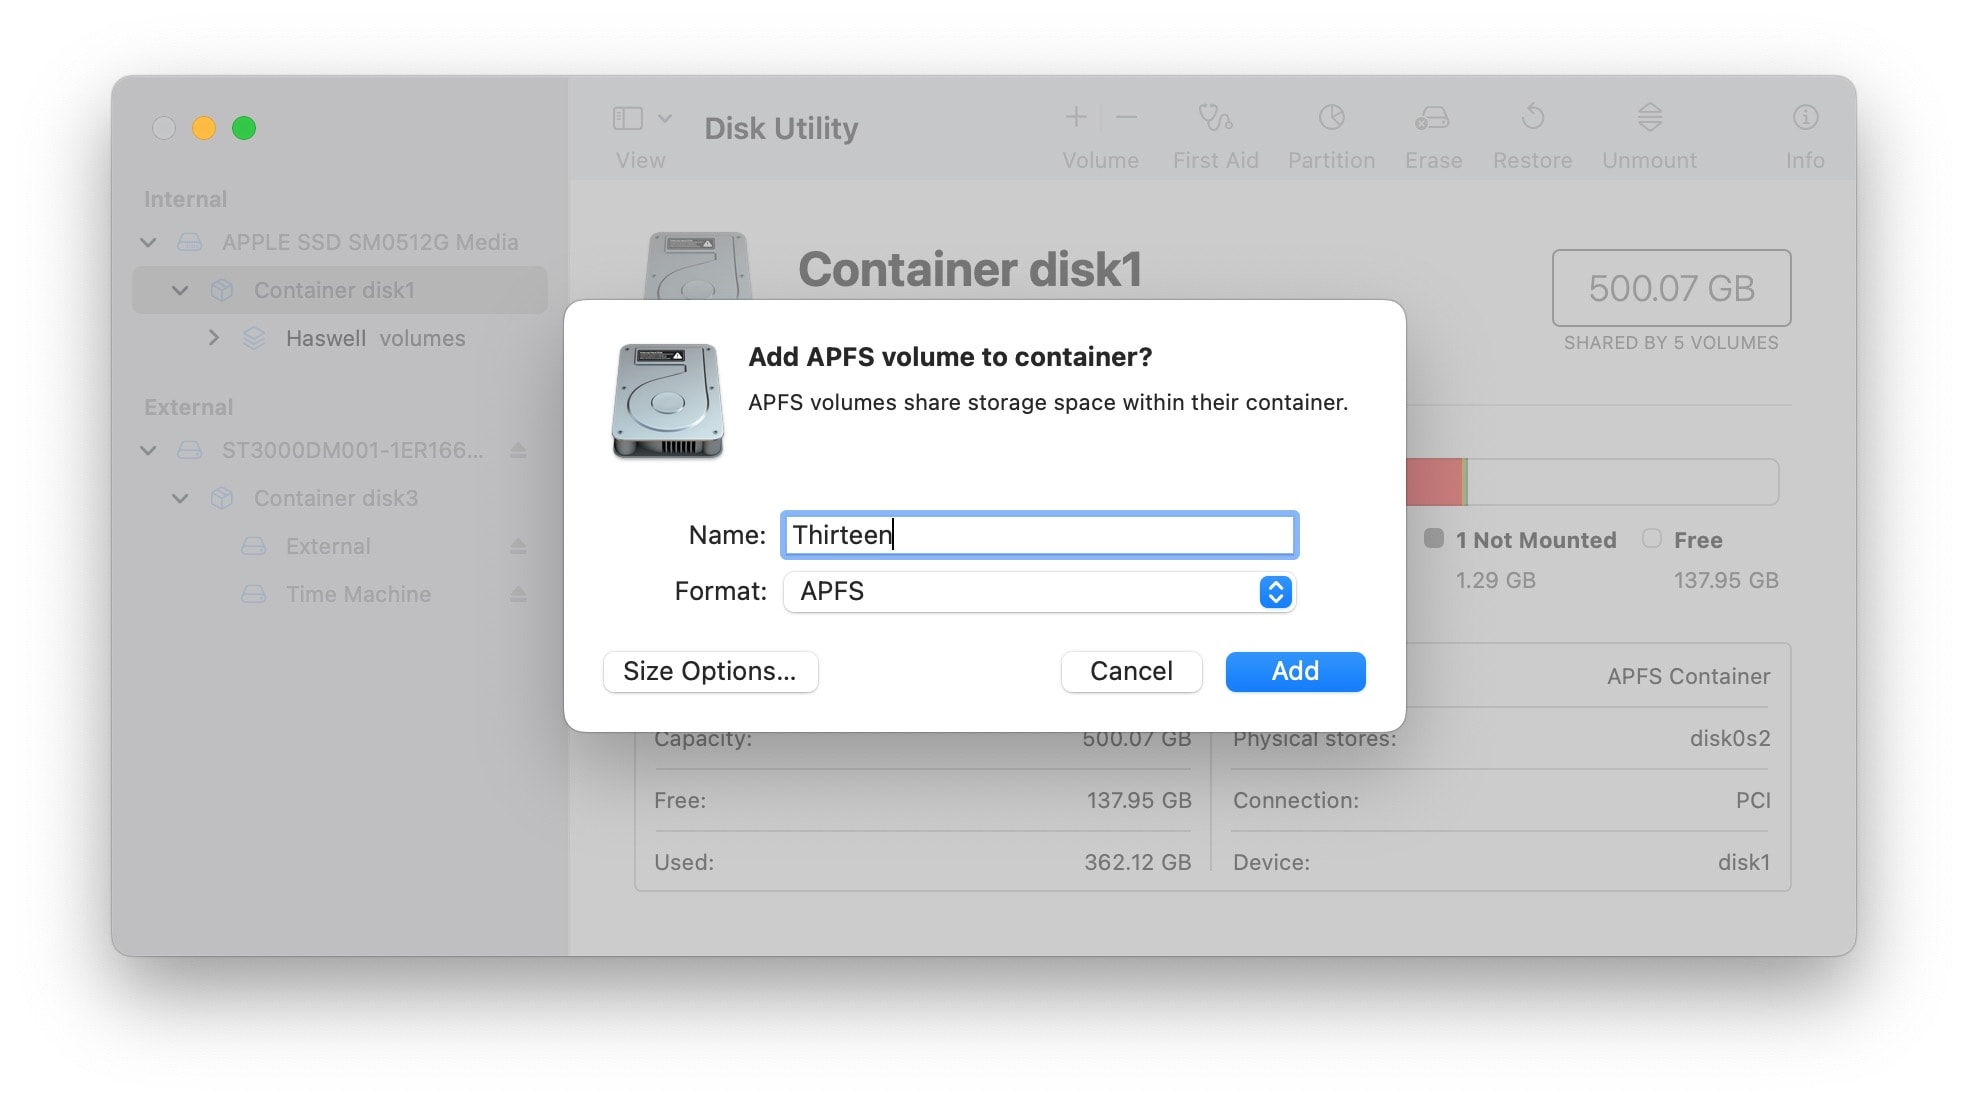
On the toolbar, click the + Volume button. This will add another partition, but it will share space with your main hard drive.
Enter a name. I’m writing this article in May, so I don’t know what the next version of macOS will be called; I named the partition Thirteen. (You can change the name at any time.)
With the default settings, you can just click Add and be done.
You don’t need to change the format. Leave it selected as APFS. The Apple File System (APFS) is what modern macOS is designed for. Unless you have a specific reason to choose Mac OS Extended or ExFAT for compatibility reasons, leave it as APFS.
You also don’t need to manually specify how much space to give to the new partition. Macs, unlike PCs, use a special file system that shares space between partitions on the same hard drive, dynamically allocating space as it’s used.

Screenshot: D. Griffin Jones/Cult of Mac
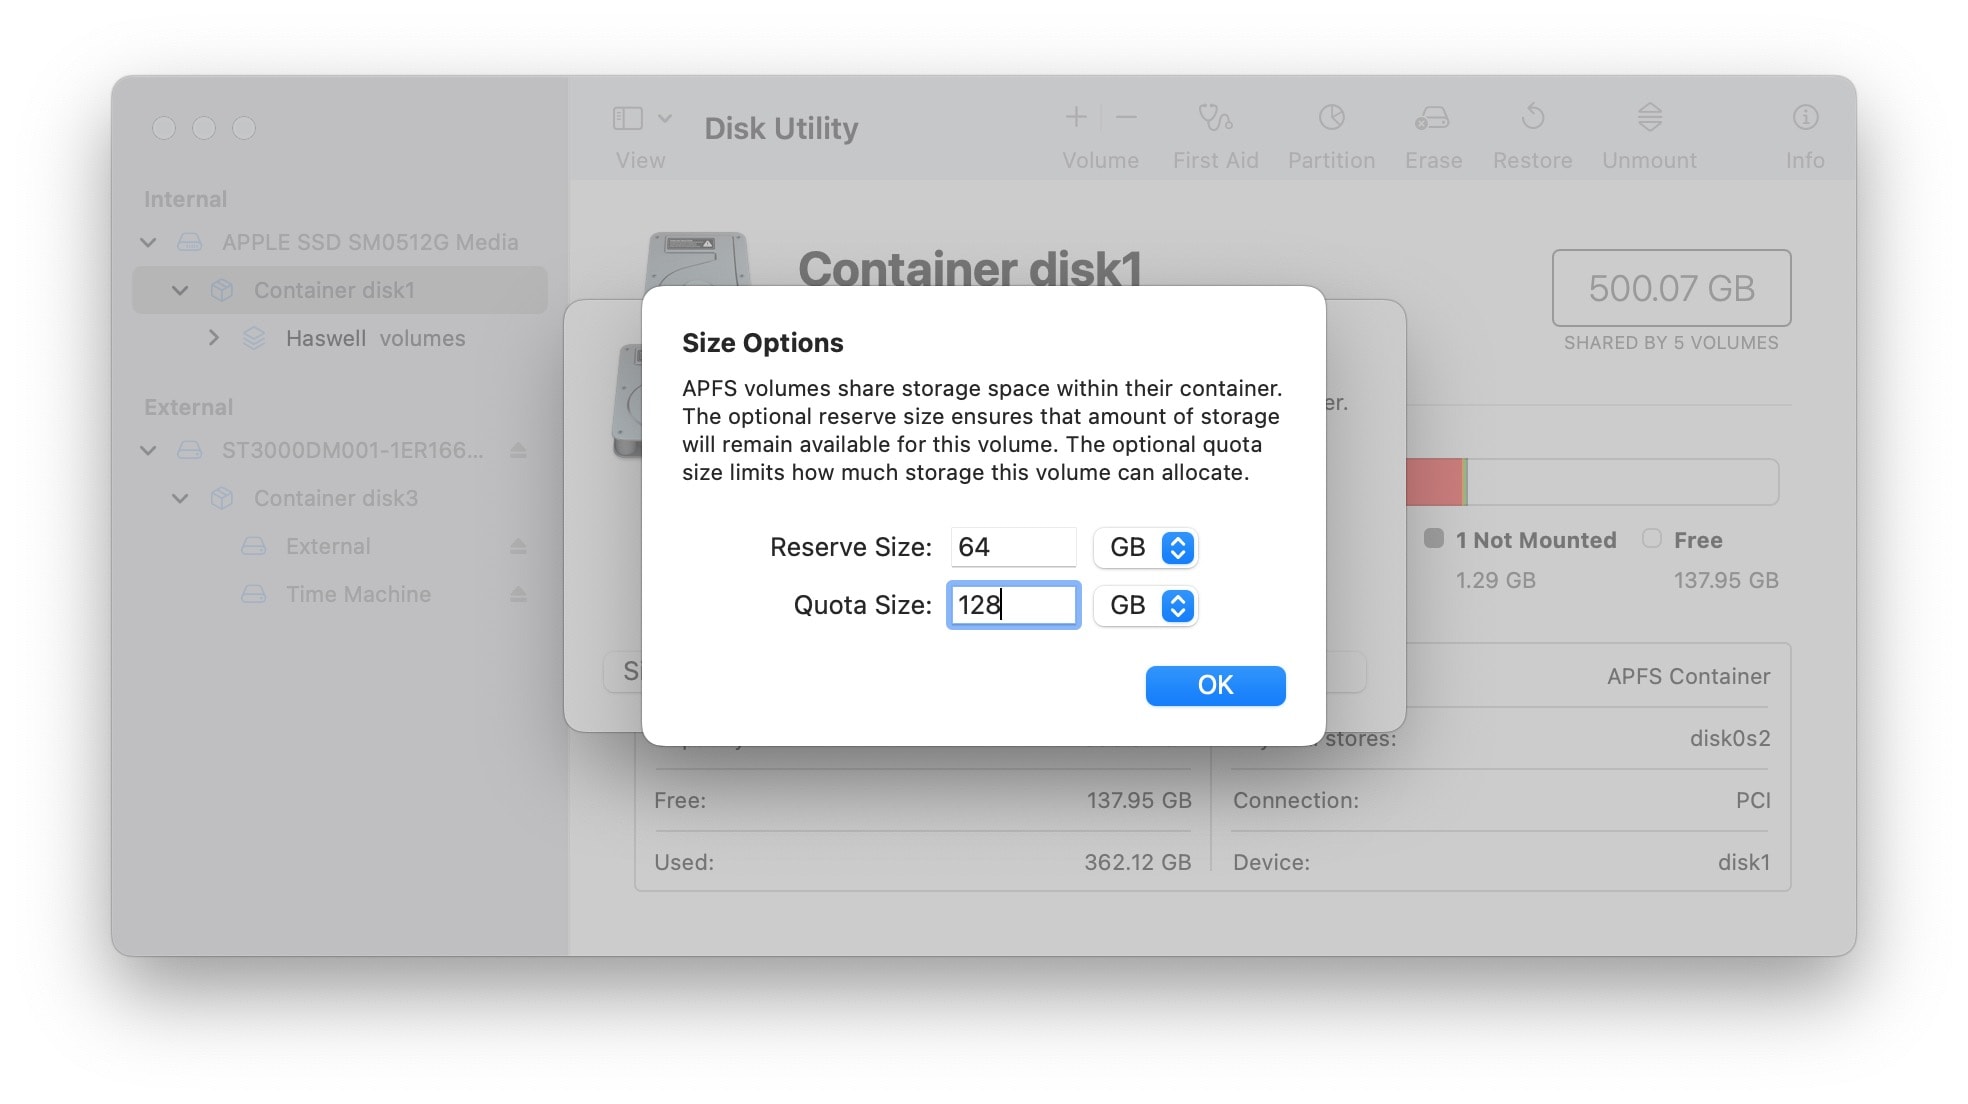
Click Size Options… if you want to set a minimum or a maximum size.
Reserve Size is the minimum, Quota Size is the maximum. If you’re installing macOS on this partition, you will need at least 64 GB — especially if you are using the beta for development. I would limit the available space to 128 GB unless you have a 1 TB hard drive or greater. Click OK to confirm and Add to create the partition.
And that’s it! Partitioning a hard drive is notoriously easy thanks to the Apple File System. And if it looks like your hard drive is close to full, check out our guide on how to clear up storage space.


