If you’ve ever tried saving Nintendo Switch screenshots to your iPhone or iPad, you’ll know it’s a less than seamless experience. It seems Nintendo didn’t put a great deal of thought into designing its rather primitive transfer tool.
Fortunately, someone else did. Developer Filip Němeček has built an app called SwitchBuddy that makes fetching your Switch screenshots on iPhone and iPad faster, easier, and much more enjoyable. Here’s how to use it.
Save Nintendo Switch screenshots to iPhone and iPad
Nintendo own transfer tool requires you to scan a QR code on your Switch, connect to your console as if it’s a Wi-Fi network, then open and save each of your screenshots individually. Sadly, many of these steps are necessary.
There is no other way to connect to your Switch from iPhone and iPad, so as much as we would love an alternative to that, it won’t happen until (if) Nintendo streamlines the process. But there is a better way to save your images.
SwitchBuddy provides a simpler interface that allows you to save all your images to your Camera Roll in just one tap. This significantly speeds up the process when you’re transferring multiple screenshots in one go.
How to use SwitchBuddy on iPhone and iPad
To use SwitchBuddy, first download it from the App Store. It’s completely free, though you can use in-app purchases to send Němeček a tip if you like. Next, follow these steps:
- On your Switch, open the Album to view your screenshots.
- Highlight a screenshot you want to share, then press the A button.
- Select Send to Smartphone or Send to Smart Device.
- Choose whether you wish to send just this image or multiple images. If you choose to send more than one, select all the other images you wish to share, then select Send.
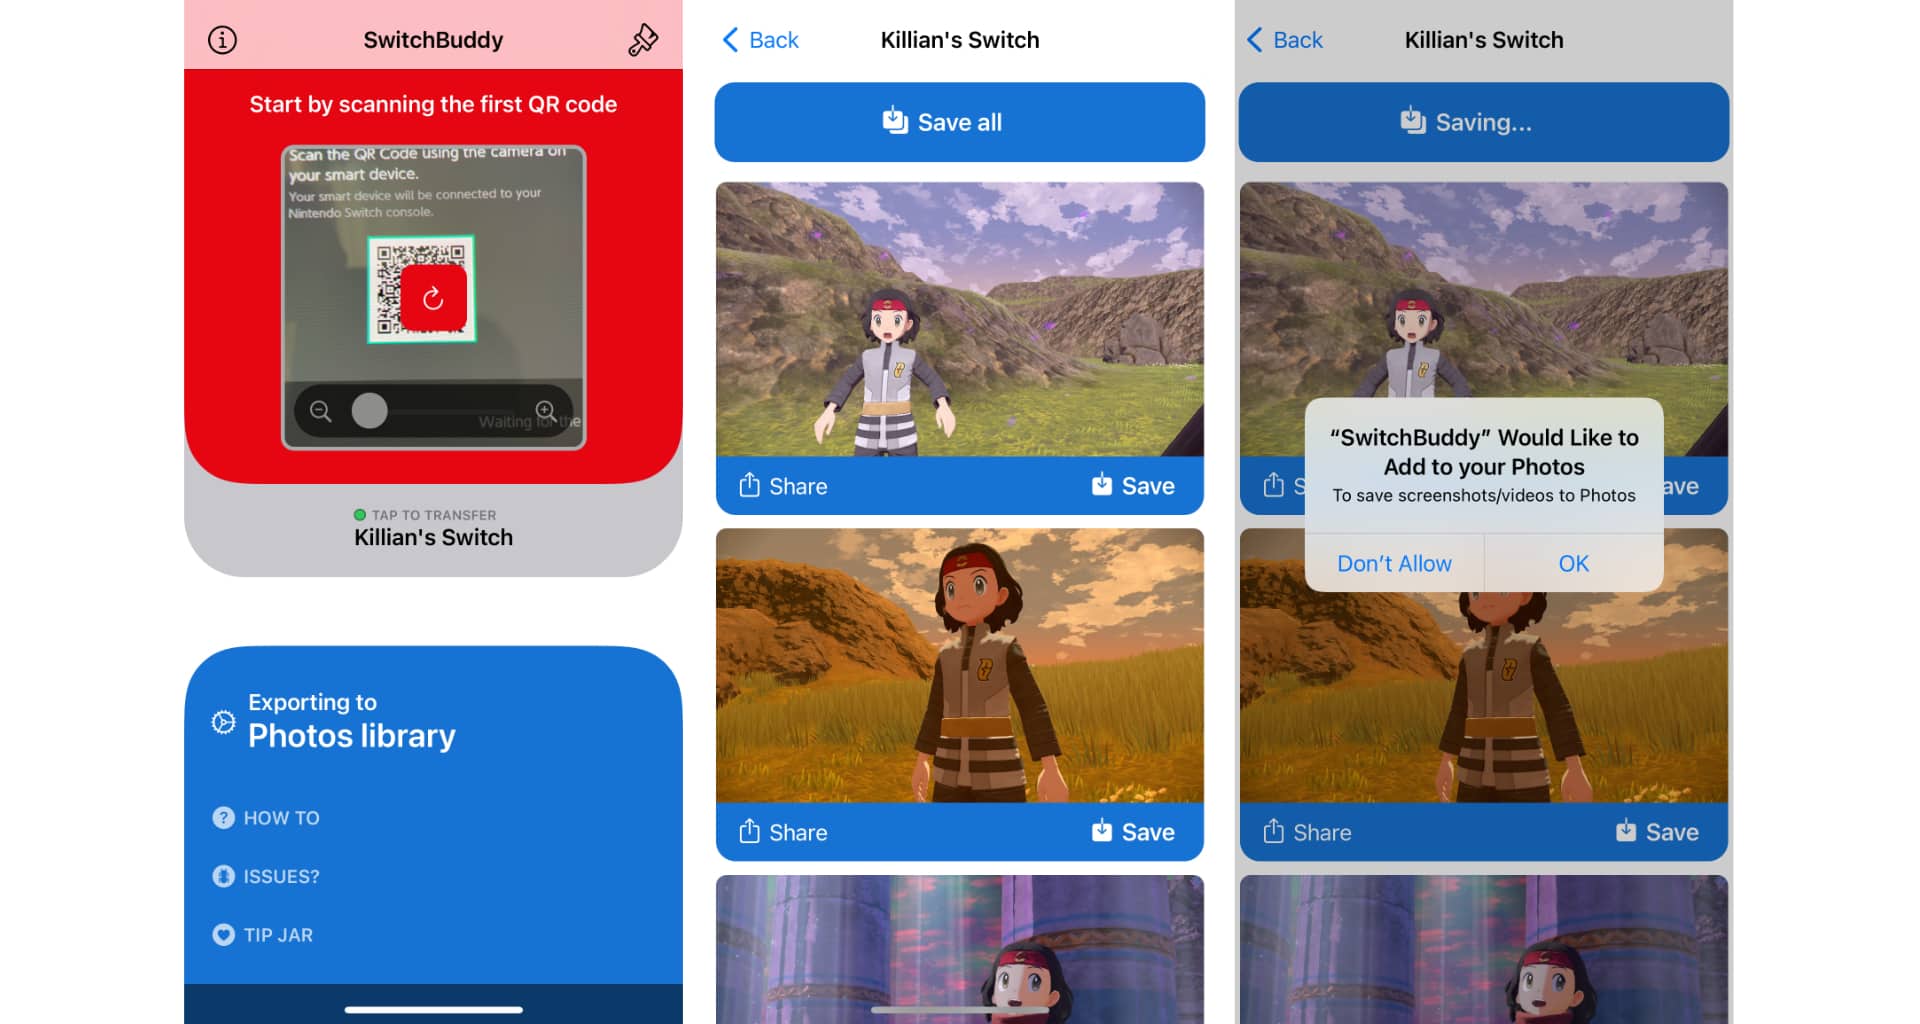
- Open the SwitchBuddy app and use it to scan the QR code that appears on your Nintendo Switch.
- Once both devices are connected, tap the Tap to Transfer button.
- SwitchBuddy will display all the screenshots you’ve chosen to transfer. Tap Save All to download them all at once, or use the Save buttons beneath each image to download them individually.

Screenshots: Killian Bell/Cult of Mac
Your Switch screenshots will now appear in your Camera Roll inside the Photos app. Alternatively, you can save them to a folder in iCloud Drive, or within the SwitchBuddy app.
Save Switch screenshots to iCloud Drive
To do this, follow steps 1-5 above, then do this:
- At the bottom of the screen in the SwitchBuddy app, tap Exporting to Photos library.
- Now select iCloud Drive or SwitchBuddy, depending on where you want your screenshots to end up.
If you’re also looking to backup the save data on your Switch, perhaps to transfer it to another console, we also have a guide on how to do that.
Via: NintendoLife


