One of iOS 12’s big changes is Notifications Center. It gets the seriously great Do Not Disturb at Bedtime feature, and it also now groups notifications, stacking them per-app in order to reduce clutter and increase clarity on the lock screen and elsewhere.
Notification grouping is totally automatic, but there are new settings that let you customize it if the auto options don’t suit you. Let’s take a look.
Notification groups in iOS 12

Photo: Apple
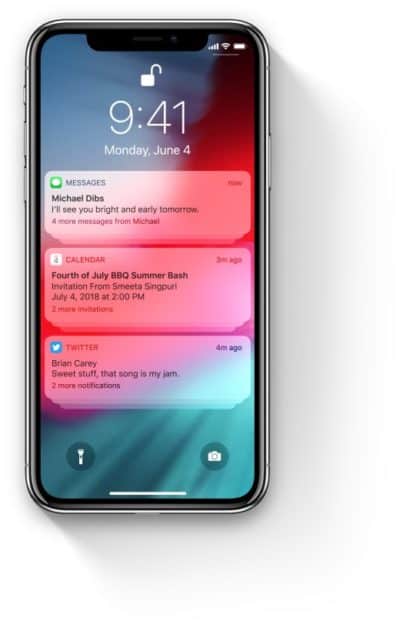
Notification grouping is simple. Instead of incoming alerts being displayed one above the other, in a long list of rectangles, iOS 12 stacks notifications per app. That means that all your iMessage notifications sit on top of each other, like a stack of cards. To expand a stack, you just tap it, right there in the Notification Center, or on the lock screen, and the cards separate themselves out.
It sounds simple, and it is, but it also makes a big improvement to notifications. You can just pick up your iPhone and glance at the screen, and get a quick overview of what’s new. Previously, if you had only a few recent messages, they pushed all other notifications down the screen. You might lose that one important email amidst a flurry of yet more baby photos from your brother. Now, no matter how many messages you are bombarded with, you’ll see one entry per app.
However, that’s not the whole story. Sometimes, iOS 12 will actually display notifications from the same app in the old manner, in separate panels. This is decided automatically, and I haven’t yet worked out the criteria for the choice. It seems that when iMessages are first received, for example, they are displayed separately, for a while at least, before being grouped. This usually works very well — you can glance to see all your brand-new messages, but if don’t care to, then they will be stacked into a group.
Smart grouping
Also, individual conversations are separated out. You could have two stacks for Messages, for example, both gathering messages from different conversations.
But what if you have a WhatsApp group that often goes nuts with back-and-forth messages? Maybe you never want to see all the individual message in that thread. That’s when you tell iOS 12 how to handle things.
Once you have expanded a stack, a little Show Less button appears. Tap it to collapse the stack again.
How to control grouped notifications in iOS 12

Photo: Cult of Mac
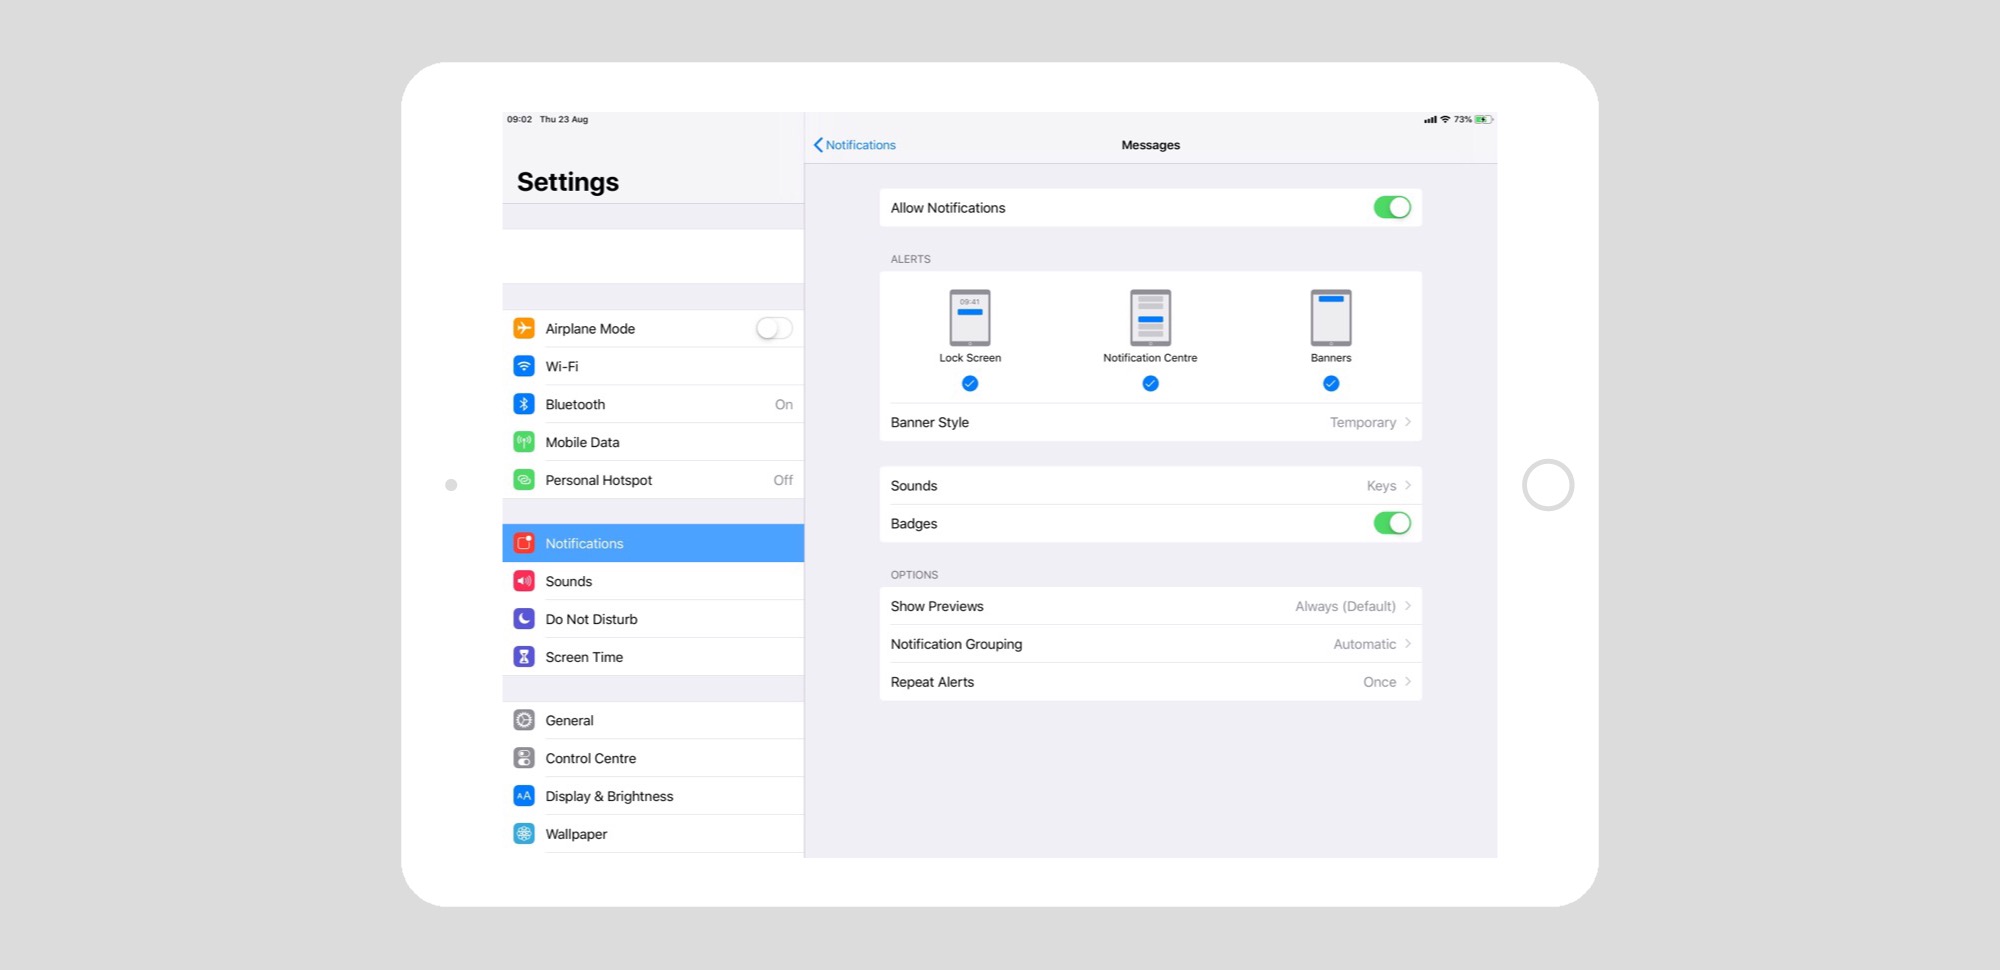
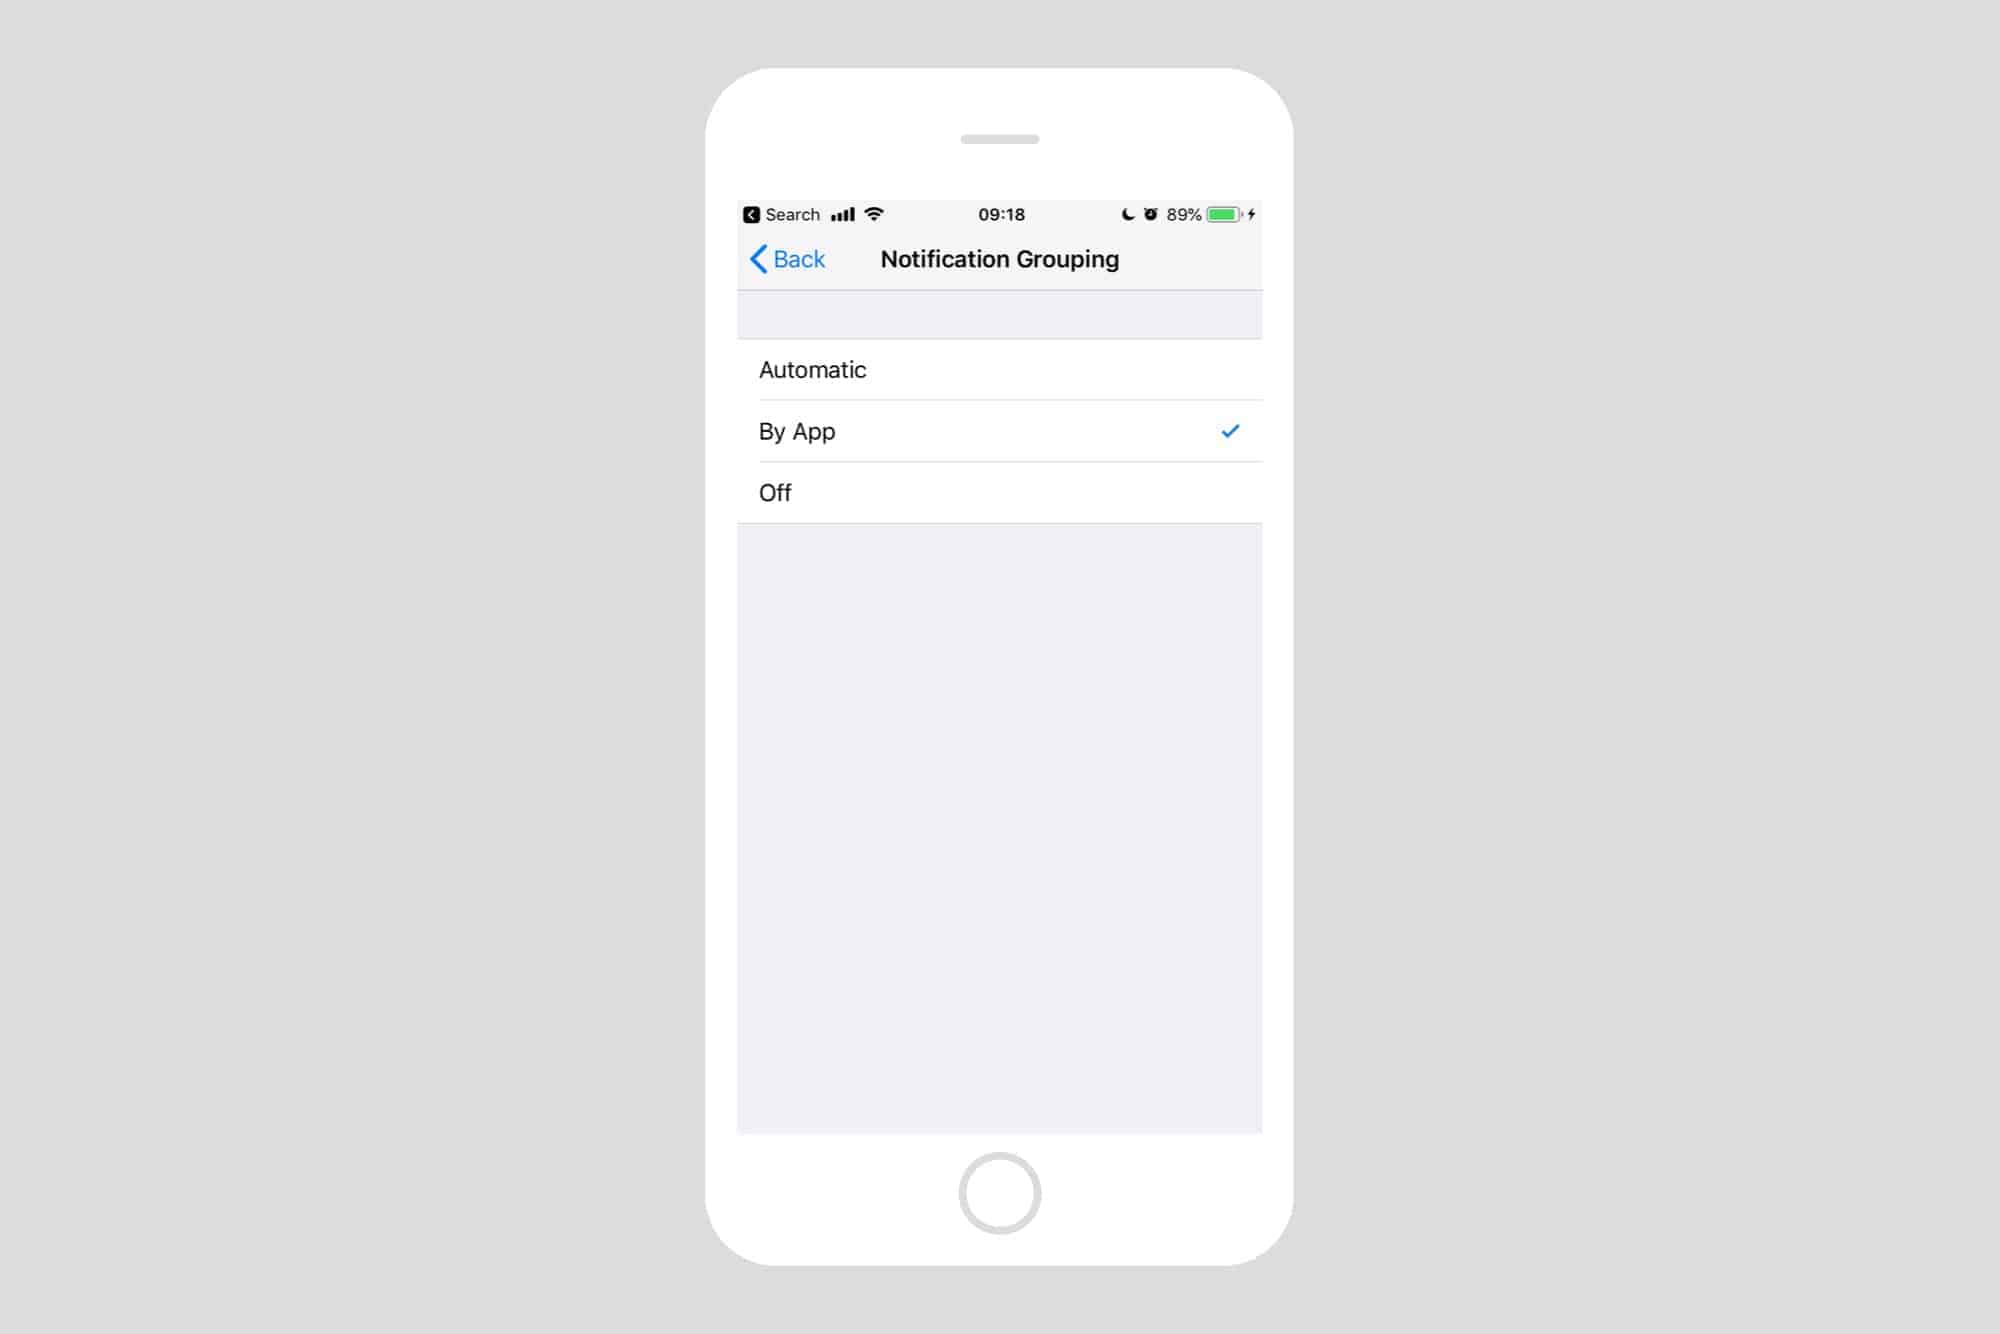
In iOS 12, group notifications settings can be set individually for each app. Go to Settings > Notifications, and scroll down to the app you want to control. In my example I use the Messages app, but this works for every app that provides alerts on your device. Tap the app you want to customize, then, at the bottom of the resulting screen, tap Notification Grouping, under Options. You’ll be presented with three choices:

Photo: Cult of Mac
Automatic, By App, and Off. The default is Automatic, as seen above. By App forces notifications from a single app to always be grouped, even if iOS would usually separate out different threads within that app.
And Off switches off grouping for that app altogether. That is, its alerts will never be grouped. They’ll act just like in iOS 11 and previous.
Bonus tip — change notification settings right from the lock screen

Photo: Cult of Mac
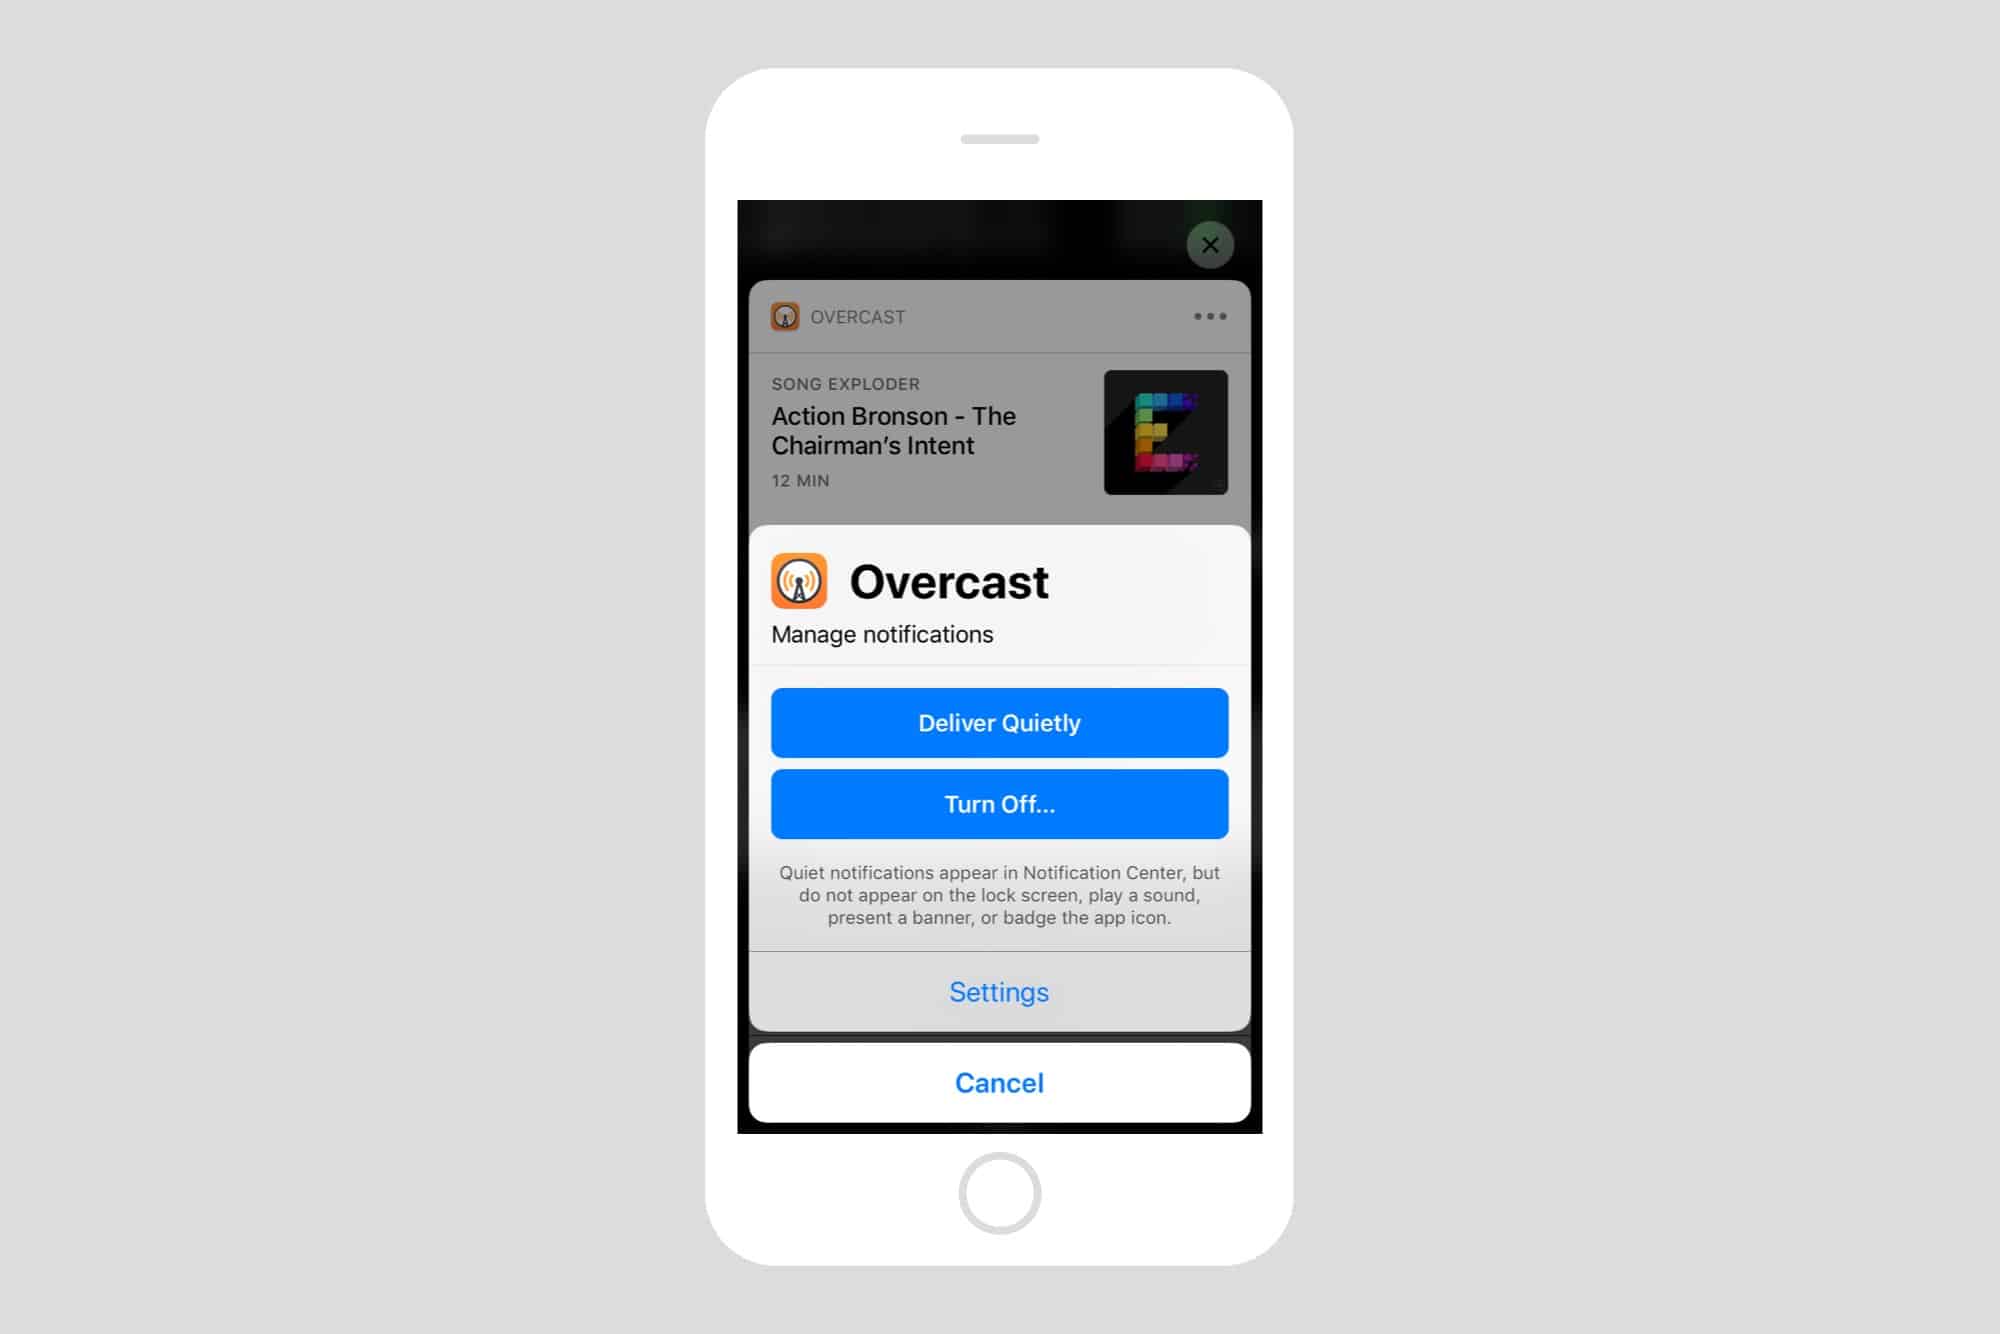
Finally, you don’t have to dig into the Settings app to do this. Also new in iOS 12 is Instant Tuning. Next time you get an alert, long press (or 3D Touch) on the notification, and you’ll be able to change the notification settings right there. You can turn them off, or opt to have them “deliver quietly” (go straight to Notification Center, bypassing the lock screen). You can also tap a button to go straight o the notification settings for that app. We have a great tutorial on using Instant Tuning in iOS 12.
iOS 12 has really streamlined notifications. It’s a lot easier to finesse them so you only see exactly what you want, and you can do it as the annoying alerts come in, instead of diving into the Settings app, which plenty of people never want to do. It’s just one of may nice tweaks in iOS 12 that make using an iPhone a much more pleasant experience.


