Instagram power users are all about the filters, typically choosing a few favorites that they use more often than others.
Instead of swiping back and forth along the filters row, why not reorder them to put the ones you use most often up front? Better yet, how about deleting the ones you don’t use ever to streamline your entire filter experience?
Here’s how.
Launch Instagram and set up a photo or video as you typically do. Tap Next to get to the filter screen.

Photo: Rob LeFebvre/Cult of Mac
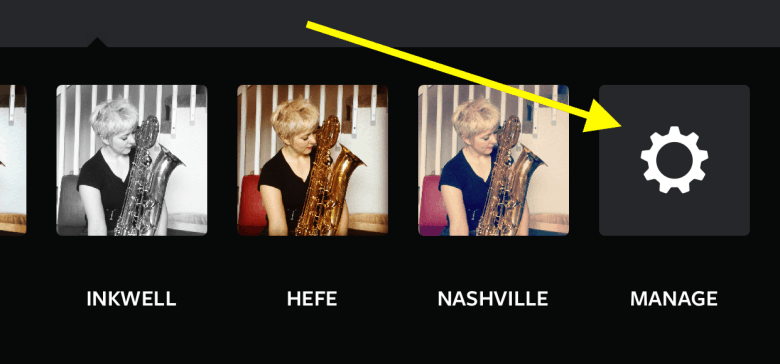
Next, swipe all the way to the right of the filters on the bottom until you see a gear icon: Manage. Tap there, and you’ll see the Manage Filters screen.

Photo: Rob LeFebvre/Cult of Mac
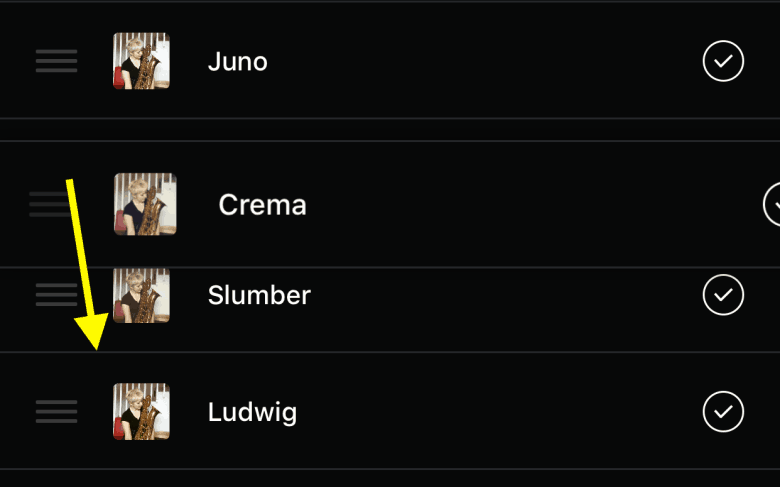
To reorder them, tap and hold just to the left of any filter where you see the three horizontal lines. Drag the filter to any position you want. I dragged the ones I use most often to the start of the list.

Photo: Rob LeFebvre/Cult of Mac
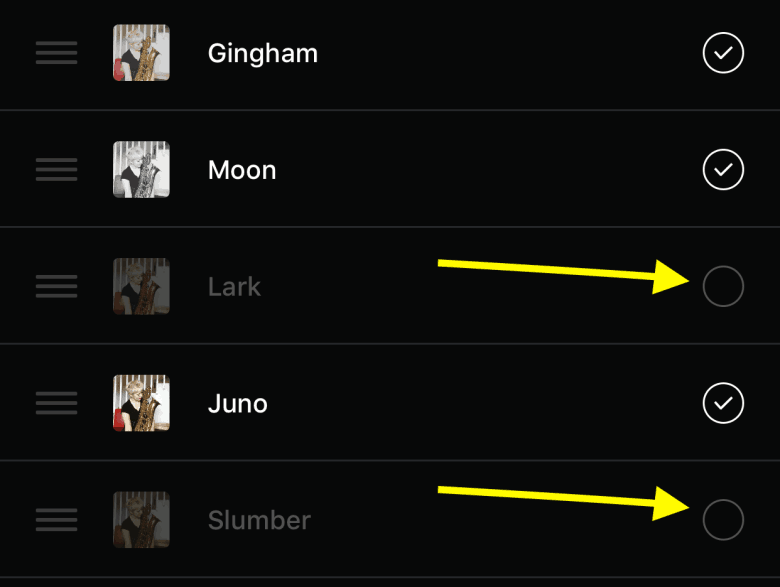
If you want to just completely hide some filters, tap on the little checkmark to the right of the filter name in the Manage Filters screen. This will make it so you don’t see unchecked filters in your main list.
As an added bonus, there are quite a few filters already disabled near the bottom of the list; you might like enabling some of these to make your photos a bit more unique.
Now you can work smarter, not harder, when you’re posting all those Instagram pics to your feed.
Via: Instagram


