I can’t tell you how much I love Adobe’s Lightroom Mobile. But like an insatiable lover, I want more. Specifically, I want to add my own presets. LR Mobile ships with a selection of the desktop app’s image presets built in, but unlike the desktop version, you can’t save your own settings as a preset, nor can you add any made by third parties. Or can you?
In this tutorial, we’ll see how to add any preset to Lightroom Mobile, using any and all of the image-editing tools available in the Mac version and making them available on iOS.
What are presets?
In Lightroom, you can save any group of settings as a preset. That’s all a preset is. If you come up with a particularly good look on one photo, just save it as a preset and all the current settings will be remembered for future use. You can tweak what actually gets saved – keeping the B&W mix, but ignoring the crop you made, for example – and then apply it with a single click.
The problem is, you can’t send any of these presets to the iPad version of Lightroom. Not officially, anyway.
The trick
Because Lightroom Mobile uses the exact same RAW rendering engine as the desktop version of the software – that is, it uses the same image processor on iOS as on the Mac – you can actually view presets on iOS that have been created on the Mac. And LR Mobile also has a button that applies all the edits from your previous photo to the current one. It’s meant to let you quickly apply the same settings to a bunch of pictures, one after the other, but we’re going to hack it for our own uses.
Can you see where we’re doing here?
We’re going to make a synced album in Lightroom, and apply a bunch of presets to the photos inside it. Then on the iPad (or iPhone) we can select one of these images, then switch to a new photo and use the “Previous” button to apply the new settings.
Voilà (or as they say in internet forums, “viola”). Custom presets on LR Mobile.

The setup
We’re going to create a bunch of Virtual Copies of the same photo and put them in a new collection, which I’m calling presets. Virtual copies are copies that take up no extra space on disk. Because Lightroom edits are saved as sets of instructions (essentially a text file) and then applied to photos on the fly by the Mac or iOS device, you can create many versions of the same photo, all with different edits, just by storing the instructions for each one and applying them to the single original photo file.
So, pick an image with a range of colors and shapes, so you can easily see the effects of different kinds of filters, and make a bunch of Virtual Copies. The quickest way to do this is to make a new collection, add a photo to it and then hit ⌘-’ a few times to make the virtual copies, right there inside the new collection.
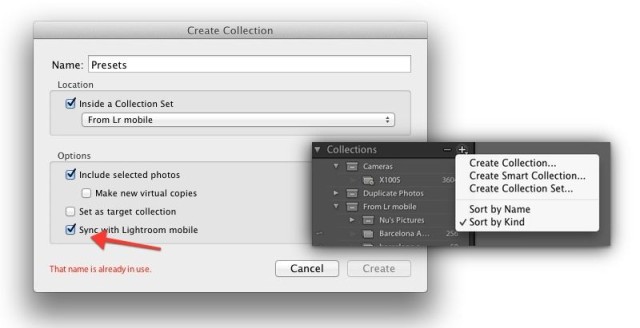
When you create the collection, make sure to check the box to sync it with Lightroom Mobile. Then, we can start adding presets.
This part is easy. Just click on one of your virtual copies and then – in the Develop Module – click on your preset of choice. That’s it. You can make as many as you like, but it might get confusing if they’re visually similar. Unfortunately there’s no way to label the photos to make them easier to tell apart on iOS – neither the caption nor the title is displayed in iOS.
You could use real, separate copies of each photo and change the actual file names, but that takes up extra space. It might be worth it, though, as the synced files are tiny.
Applying the presets
Next up, switch to your iPad (or iPhone) and fire up Lightroom. Wait a second for the new Collection to sync over, then go pick your preset. To use it, open the image as if to view or edit it. This sets it as your “Previous” image for the next step.
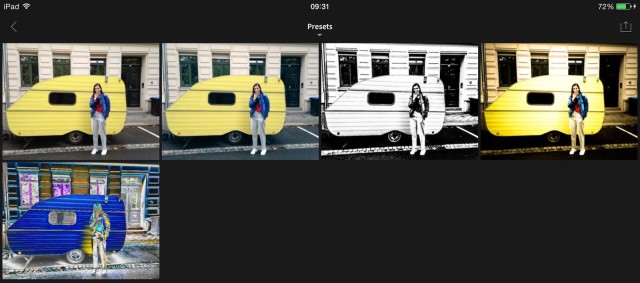
Then navigate to the photo to which you want to apply your preset. It’s important that you don’t open any other photos along the way, or these will become the new “Previous” image. When you find it, open it up, wait a second for the full-res version to load and then tap the third of the four icons along the bottom of the edit screen. This is where you usually add special effects, but it is actually just using Lightroom presets to do its work. Tap the button marked “Previous,” and then choose “Everything from previous photo.”
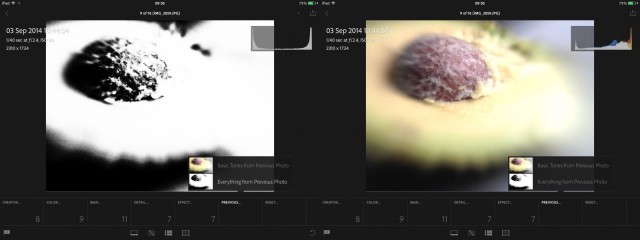
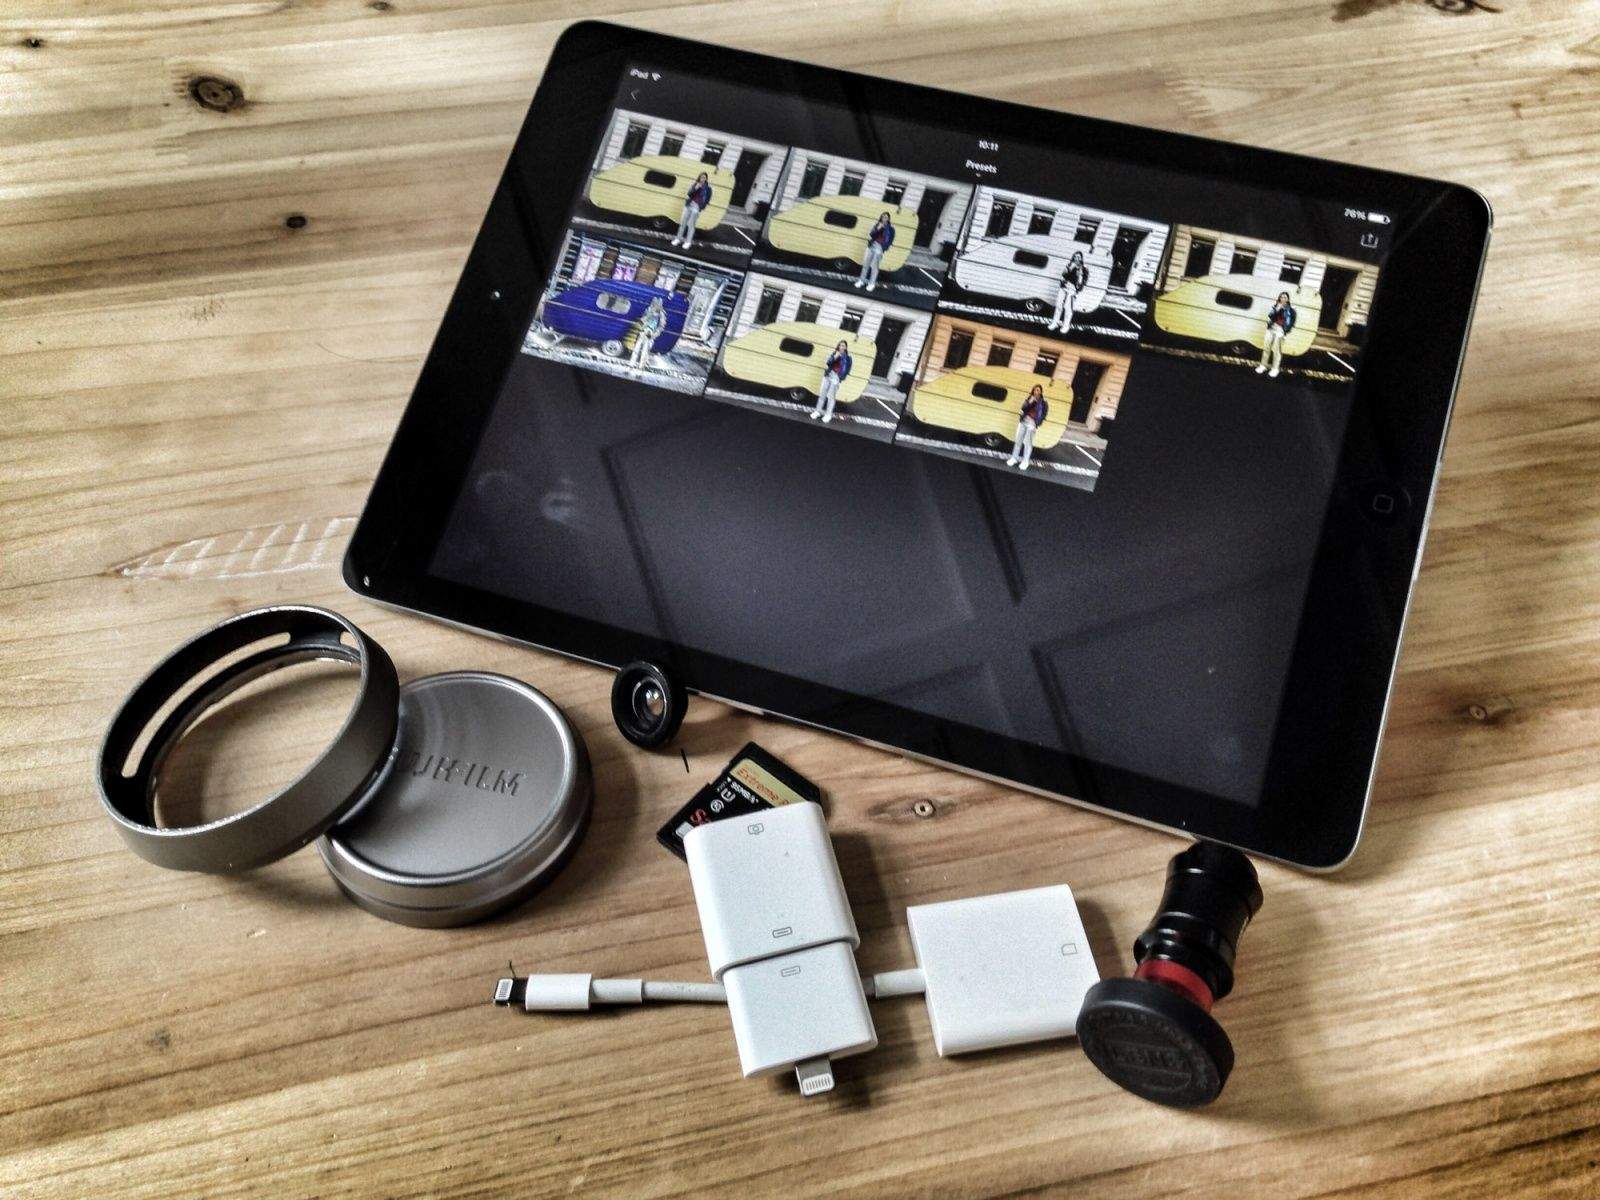
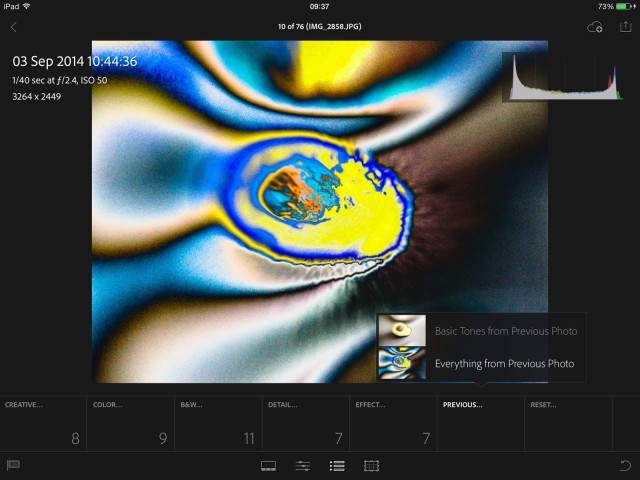
You’ll see a thumbnail preview of the result right there, and when you apply it, the whole preset is applied. Neat huh? It even works with crazy presets. Look:
Conclusion
It’s a workaround, and it’s a bit clunky, but this method is useful and serves as a reminder that Lightroom on iOS really does use the same engine as on the Mac, just in an iOS-friendly wrapper.
Here’s one final tip: You don’t need to save your Mac edit settings as presets to get them to work. You can just work straight on the pictures in your Presets folder and the result is the same. For instance, I just added a 1980s-style tobacco-grad filter to one of my images on the Mac and it can be used on the iPad right away.
