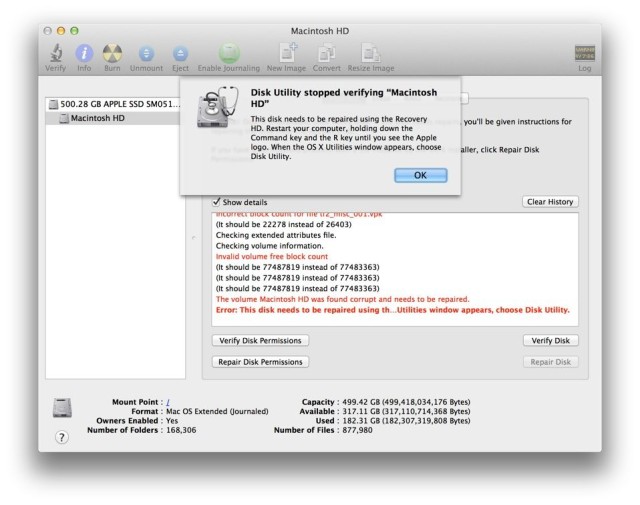
OS X offers a very nice graphical user interface to verify and repair your hard drive, located in the Utilities folder. It’s called Disk Utility, and you can use it as the first line of defense when weird disk-related things happen to your Mac’s hard drive.
If, however, you want to dig in a bit deeper, or you’re already running Terminal a lot and don’t want to launch a separate app, you can use the following commands to both verify (check for problems) and repair any problems that you might find when verifying.
Launch Terminal from your Dock, Utilities folder, or via an app launcher like Alfred. Once launched, type or paste in the following command.
diskutil verifyVolume [drive name]
So, for your main hard drive, you could type or paste in something like:
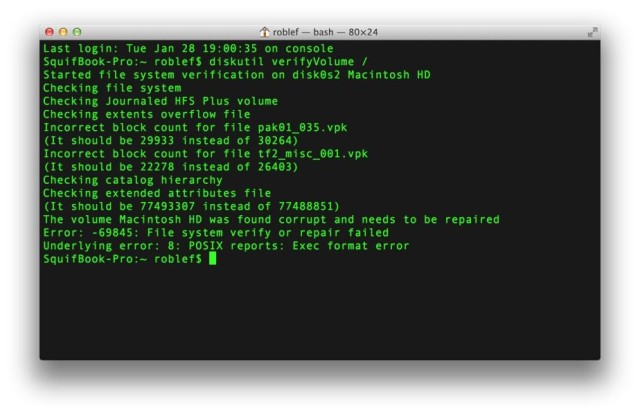
diskutil verifyVolume /
Or, if you have an external drive attached, you can type or paste in the following:
diskutil verifyvolume /Volumes/[drive name]/
So for an external drive named “BackupStuff” you would enter:
diskutil verifyvolume /Volumes/BackupStuff/
If you see no messages, then you can assume that diskutil hasn’t found any errors, and you can move on. If, however, you get an error like “The volume Macintosh HD was found corrupt and needs to be repaired,” then you can repair the drive using diskutil as well.
To repair the drive, you can issue the following command into Terminal:
diskutil repairvolume /
Or, for that external drive as above:
diskutil repairvolume /Volumes/BackupStuff/
Now, you may get an error (like I did) when you try to repair your hard drive, like “Live file system repair is not supported (-69673).” What I found (by running the GUI version of Disk Utility) was that I needed to run Disk Utility while in Recovery mode, so my Mac could unmount my drive to make the necessary fixes.
If you get the same error, you’ll need to restart your Mac while holding down the Command-R key combination to set your Mac into recovery mode. Once it relaunches, choose Disk Utility and verify and repair from there.
Via: OS X Daily
![How To Repair & Verify Your Hard Drive From The Command Line [OS X Tips] verify volume](https://www.cultofmac.com/wp-content/uploads/2014/02/verify-volume.jpg)


